
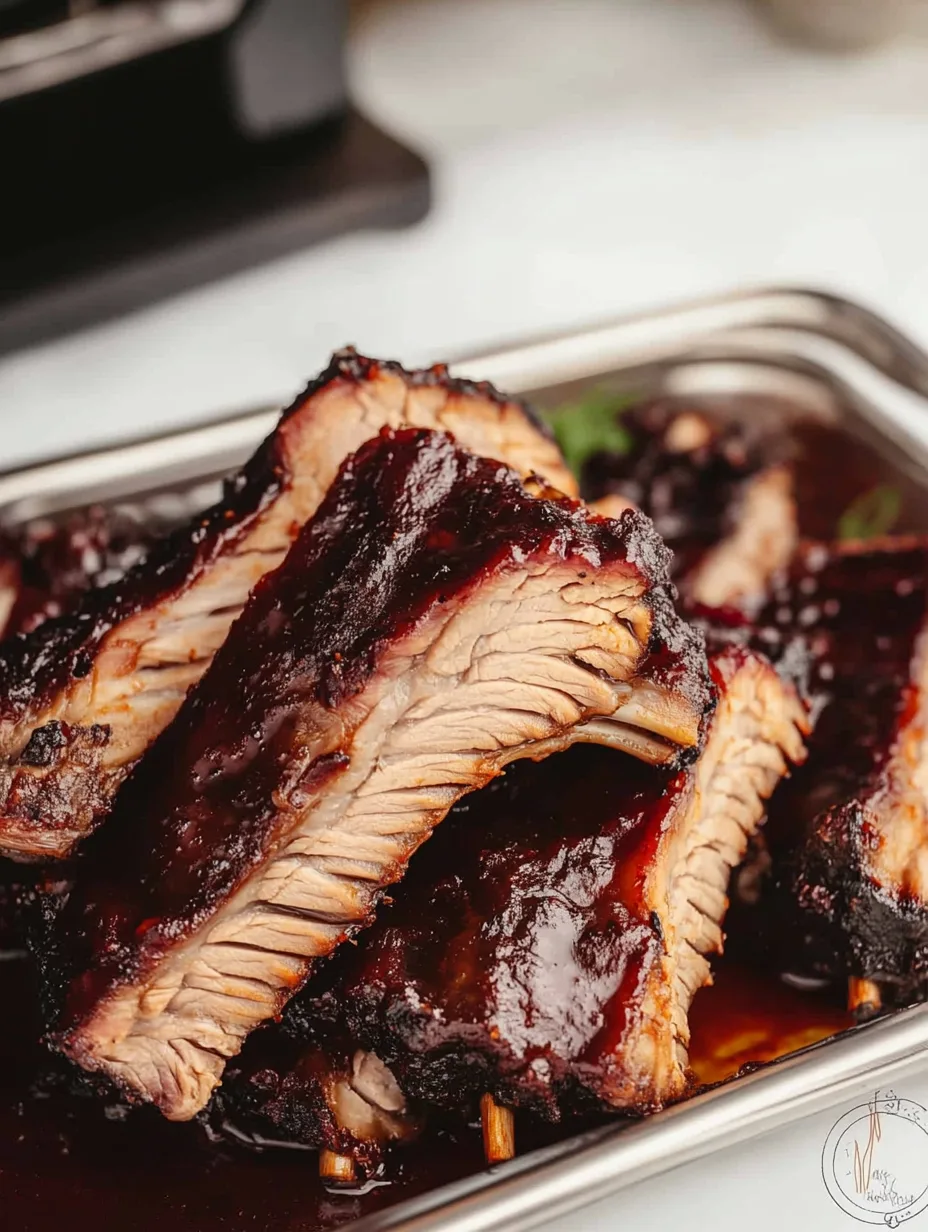
The Best Dry Rub for Ribs is a culinary secret that transforms ordinary ribs into a flavor-packed meal. A well-crafted dry rub enhances the natural sweetness of the meat while adding layers of complexity that keep everyone coming back for more. If you love barbecued ribs, you’re in for a treat! This rub will invigorate your grilling sessions and elevate your backyard cookouts to a whole new level. With just a few simple ingredients, you can create a mouthwatering experience that’s both delicious and memorable.
Creating the best dry rub is all about balance. You want a mix that’s spicy, sweet, and aromatic, all while giving your ribs a beautiful crust when cooked. Whether you’re using a smoker, grill, or oven, this incredible dry rub will work its magic and leave your guests raving about your cooking skills. In this guide, you’ll learn why this recipe stands out, how to make it step-by-step, and tips for serving your perfectly seasoned ribs.
The flavor profile of your dry rub will reflect your personal taste preferences. Do you like it smokey, spicy, or sweet? With this ultimate blend of spices, you have the freedom to adjust and create something uniquely yours. Get ready to take your rib game to the next level!
Why You’ll Love This Recipe
The Best Dry Rub for Ribs offers an array of benefits that will make your grilling experience exceptional. Here are some reasons why this recipe stands out:
1. Simple Ingredients – Most of the ingredients are pantry staples, so you won’t have to make a special trip to the store.
2. Flexibility – The recipe can be easily modified to suit individual tastes, allowing you to adjust the heat or sweetness.
3. Enhances Flavor – It boosts the natural flavors of the ribs, creating a perfect balance that’s hard to resist.
4. Versatile Use – This dry rub isn’t limited to ribs; you can use it for chicken, pork, or beef as well!
5. Easy to Make – The straightforward preparation means you can whip it up in minutes, even on a busy day.
6. Grill Master Approved – Impress your friends and family with ribs that taste like they came straight from a barbecue joint!
Given its ease of use and flavor-enhancing qualities, it’s no wonder that this dry rub has become a favorite among barbecuing enthusiasts. It’s sure to become your go-to recipe for all things ribs!
Preparation and Cooking Time
Creating The Best Dry Rub for Ribs is quick and uncomplicated. Here’s how the time breaks down:
– Preparation Time: 10 minutes
– Cooking Time: This will depend on how you choose to cook the ribs, but generally, it’s about 3-4 hours for low-and-slow cooking.
You can make the dry rub ahead of time, making it even easier to use when you’re ready to grill!
Ingredients
– ¼ cup brown sugar
– 2 tablespoons paprika
– 2 tablespoons kosher salt
– 1 tablespoon black pepper
– 1 tablespoon chili powder
– 1 tablespoon garlic powder
– 1 tablespoon onion powder
– 1 teaspoon cayenne pepper (adjust for spice level)
– 1 teaspoon mustard powder
– 1 teaspoon dried thyme
Step-by-Step Instructions
Creating The Best Dry Rub for Ribs is a breeze with this simple process:
1. Combine Ingredients: In a medium bowl, add all the dry ingredients: brown sugar, paprika, kosher salt, black pepper, chili powder, garlic powder, onion powder, cayenne pepper, mustard powder, and dried thyme.
2. Mix Well: Use a whisk or fork to thoroughly mix the spices until well combined. Ensure there are no lumps, especially from the brown sugar.
3. Taste and Adjust: Taste a small amount to see if it suits your preference. Add more cayenne for heat or brown sugar for sweetness if desired.
4. Store Properly: Transfer the dry rub to an airtight container. Store it in a cool, dark place if you’re not using it immediately. It can last for several months.
5. Prep the Ribs: Before applying the rub, make sure your ribs are dry. Pat them down with a paper towel to remove excess moisture.
6. Apply the Rub: Generously coat both sides of the ribs with the dry rub. Ensure a nice, even layer for maximum flavor.
7. Rest the Ribs: Let the seasoned ribs rest at room temperature for at least 30 minutes before cooking. This allows the flavors to penetrate the meat better.
Following these steps will ensure that you have a deliciously flavorful dry rub ready to enhance your ribs!
How to Serve
Serving ribs seasoned with The Best Dry Rub is an experience in itself. Here are a few tips on how to serve:
1. Presentation: Cut the ribs into individual sections or serve them whole for a rustic look. A platter with fresh parsley garnishes adds an elegant touch.
2. Accompaniments: Pair with classic sides like coleslaw, cornbread, or baked beans to balance the flavors.
3. Sauces: While the dry rub packs plenty of flavor, offering a side of barbecue sauce allows guests to customize their experience. Choose a tangy or sweet sauce to complement the spices.
4. Side Dishes: Think about serving with mac and cheese or grilled vegetables, enhancing the opportunity for diverse tastes at your gathering.
5. Beverage Pairing: An ice-cold beer or a fruity soda perfectly complements the smoky, sweet flavor of the ribs, enhancing the overall meal experience.
With these serving suggestions, your delicious dry-rubbed ribs are sure to be the highlight of any cookout. Everyone will be asking for seconds!
In conclusion, The Best Dry Rub for Ribs creates a deliciously irresistible dish that captures the essence of barbecuing. With its amazing balance of flavors and easy preparation, this recipe will elevate your rib cooking to incredible heights. Whether you’re a seasoned pitmaster or a curious beginner, you’ll find this rub to be an essential part of your grilling repertoire. Happy cooking!
Additional Tips
– Use Quality Ingredients: For the best flavor, make sure to use high-quality spices and fresh ingredients for the dry rub.
– Let the Ribs Rest: Allow the ribs to rest after cooking for at least 10 minutes. This redistributes the juices, ensuring moist and tender meat.
– Experiment with Cooking Methods: Try using a smoker for a deeper flavor or a grill for a nice char.
– Don’t Rush the Cooking: Low and slow is the name of the game. Patience will give you the most tender ribs.
– Keep It Simple: Don’t overcomplicate the preparation; let the dry rub shine without too many additional ingredients or spices.
Recipe Variation
Feel free to modify the dry rub recipe to suit your taste preferences. Here are a few ideas:
1. Sweet and Spicy: Add more cayenne pepper for heat or a bit of cinnamon for sweetness.
2. Herbs and Spices: Incorporate dried rosemary or oregano for a more herbal flavor profile.
3. Smoky Flavor: Use smoked paprika instead of regular paprika to elevate the smokiness of the ribs.
4. Citrus Kick: Add a teaspoon of lemon zest to the rub for a refreshing citrus flavor.
Freezing and Storage
– Storage: Store leftover dry rub in an airtight container in a cool, dark place. It can last for up to six months without losing flavor.
– Freezing: You can freeze the dry rub in small, labeled plastic bags. This makes it easy to access without waste. Just ensure it’s well-sealed to avoid freezer burn.
Special Equipment
You won’t need much, but having the right tools can make the process smoother. Here are some essentials:
– Mixing bowls for combining the dry rub ingredients.
– Whisk or fork to mix thoroughly.
– Measuring spoons and cups to ensure accurate proportions.
– An airtight container for proper storage of the dry rub.
– A grill, smoker, or oven for cooking the ribs.
Frequently Asked Questions
How long should I let the ribs marinate with the dry rub?
For the best flavor, let the ribs marinate with the dry rub for at least 30 minutes. However, if you have time, letting them sit overnight in the fridge will enhance the taste even further.
Can I use this dry rub for other meats?
Absolutely! This dry rub can be used on chicken, pork, or beef. Feel free to adjust the spice levels based on the meat you choose.
What if I don’t have all the ingredients for the dry rub?
You can substitute various spices based on what you have. For example, if you lack paprika, smoked paprika or even chili powder can work. Just keep the balance in mind.
Is it necessary to cook ribs low and slow?
While it’s not strictly necessary, cooking ribs low and slow will yield the most tender and flavorful result. If you’re short on time, you can increase the heat but monitor closely to avoid drying them out.
What should I do if my ribs turn out tough?
If your ribs are tough, it might be due to not cooking them long enough. Incorporate a longer cooking time, and consider wrapping them in foil during the last part of cooking to help tenderize the meat.
Conclusion
The Best Dry Rub for Ribs is a game-changer for your barbecuing adventures. Not only is it easy to make, but it also enhances the natural flavor of the ribs, creating a mouthwatering meal that will delight family and friends. Whether you’re grilling in your backyard, smoking over low heat, or baking in the oven, this dry rub will consistently deliver impressive results. With a few simple ingredients and actionable tips, you’ll find yourself becoming the rib master you always aspired to be. Enjoy the delicious journey of flavor exploration along the way!
The Best Dry Rub for Ribs: An Incredible Ultimate Recipe
- Total Time: 27 minute
Ingredients
– ¼ cup brown sugar
– 2 tablespoons paprika
– 2 tablespoons kosher salt
– 1 tablespoon black pepper
– 1 tablespoon chili powder
– 1 tablespoon garlic powder
– 1 tablespoon onion powder
– 1 teaspoon cayenne pepper (adjust for spice level)
– 1 teaspoon mustard powder
– 1 teaspoon dried thyme
Instructions
Creating The Best Dry Rub for Ribs is a breeze with this simple process:
1. Combine Ingredients: In a medium bowl, add all the dry ingredients: brown sugar, paprika, kosher salt, black pepper, chili powder, garlic powder, onion powder, cayenne pepper, mustard powder, and dried thyme.
2. Mix Well: Use a whisk or fork to thoroughly mix the spices until well combined. Ensure there are no lumps, especially from the brown sugar.
3. Taste and Adjust: Taste a small amount to see if it suits your preference. Add more cayenne for heat or brown sugar for sweetness if desired.
4. Store Properly: Transfer the dry rub to an airtight container. Store it in a cool, dark place if you’re not using it immediately. It can last for several months.
5. Prep the Ribs: Before applying the rub, make sure your ribs are dry. Pat them down with a paper towel to remove excess moisture.
6. Apply the Rub: Generously coat both sides of the ribs with the dry rub. Ensure a nice, even layer for maximum flavor.
7. Rest the Ribs: Let the seasoned ribs rest at room temperature for at least 30 minutes before cooking. This allows the flavors to penetrate the meat better.
Following these steps will ensure that you have a deliciously flavorful dry rub ready to enhance your ribs!
- Prep Time: 15 minutes
- Cook Time: 3-4 hours
Nutrition
- Serving Size: 4-6 servings
- Calories: 200 kcal (per serving, depending on rib type)
- Fat: 8g
- Protein: 22g