
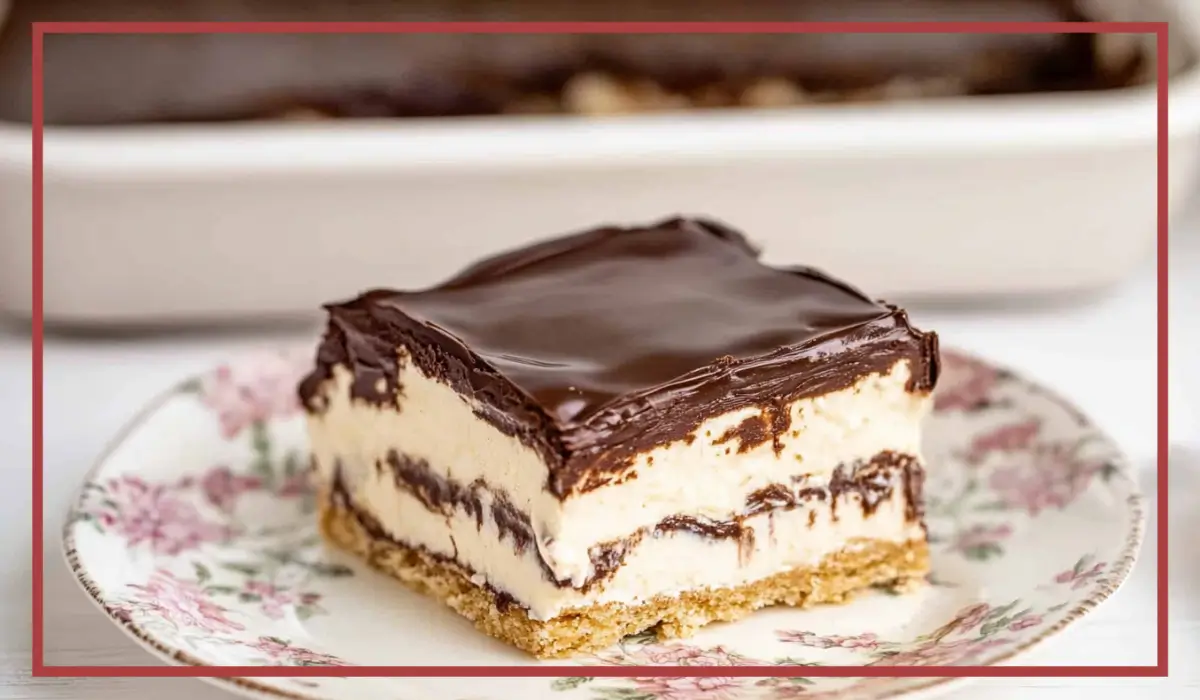
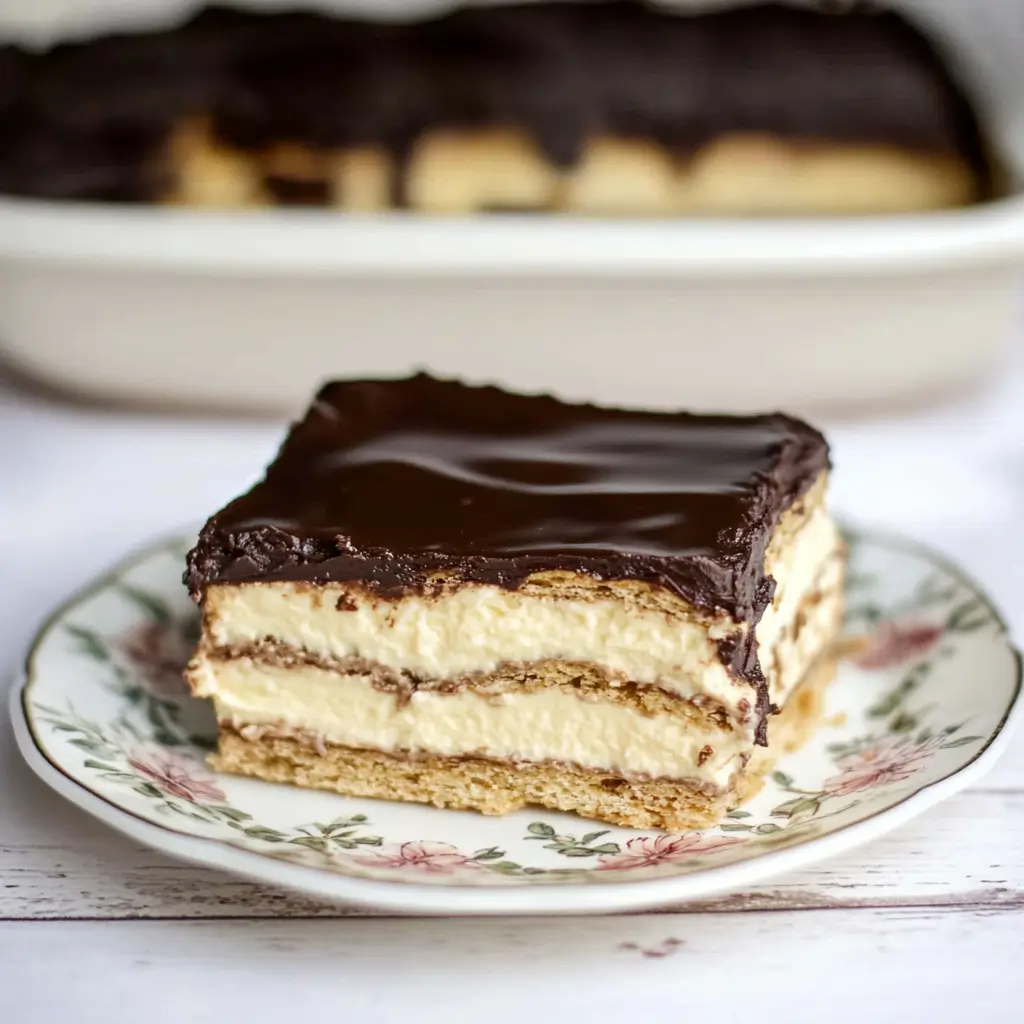
There’s something magical about a no-bake dessert that hits all the right notes—easy to make, irresistibly delicious, and perfect for just about any occasion. This no-bake chocolate éclair cake is one of those sweet recipes that has quickly become a go-to in our kitchen, especially when I want to whip up something impressive without turning on the oven. It’s layered with graham crackers, silky vanilla pudding mixed with whipped topping, and finished off with a rich layer of chocolate frosting. The texture? Think soft, fluffy, and melt-in-your-mouth with just the right touch of chocolatey goodness.
I first came across this recipe at a family gathering. It was sitting there on the potluck table looking all unassuming, but after one bite, I was hooked. I had to track down the person who made it and begged them for the recipe. When I realized how easy it was, I couldn’t believe I hadn’t been making it all my life. Now, it’s become our family’s little secret weapon dessert. We bring it to holidays, birthdays, and even just regular weekends when we need a treat. And let me tell you, it never lasts more than a day in the fridge.
What makes this éclair cake truly special is how it combines simple pantry ingredients to create something that tastes like you spent hours in the kitchen. It’s got that perfect mix of nostalgia and indulgence that reminds you of something your grandmother might’ve made, but with a shortcut twist that fits right into modern life. Whether you’re new to the kitchen or a seasoned home baker looking for something fun and easy, this dessert checks every box. And the best part? It tastes even better the next day—if you can wait that long.
Why You’ll Love This No-Bake Chocolate Éclair Cake Recipe
There are so many reasons this chocolate éclair cake deserves a permanent spot in your dessert rotation. First of all, it’s absolutely foolproof. If you can stir, layer, and chill, you can make this cake. There’s no baking, no complicated steps, and no special tools required. It’s one of those recipes that’s perfect for beginners but still impressive enough for dinner parties or special occasions.
One of the best things about this dessert is its flavor and texture. The graham crackers absorb just the right amount of moisture from the pudding mixture, softening into cake-like layers that slice beautifully. The pudding, made from instant vanilla mix and milk, is light and creamy, while the whipped topping adds that signature fluffy finish. Topping it all off is a luscious layer of chocolate frosting that firms up in the fridge to create the perfect contrast to the soft layers underneath.
You’ll also love how versatile this recipe is. You can play around with different pudding flavors like French vanilla or even banana, or switch out the chocolate frosting for a homemade ganache if you’re feeling fancy. It’s easy to adapt based on what you have in your kitchen. And because it’s served cold, it’s especially refreshing during the warmer months.
Another great reason to love this recipe? It’s a hit with everyone—kids, teens, adults, even picky eaters. It’s simple but indulgent, and people are always amazed when they find out it didn’t require any baking. If you’re hosting a crowd, this is the kind of dessert that disappears fast, so you might want to make two.
And lastly, cleanup is a breeze. Since you’re not using a bunch of bowls or baking dishes, there’s less to wash up afterward, which is always a win in my book. So whether you’re prepping for a potluck, celebrating a birthday, or just craving something sweet after dinner, this éclair cake is here to make your life a whole lot more delicious.
Health Benefits of this No-Bake Chocolate Éclair Cake
While this No-Bake Chocolate Éclair Cake recipe is definitely more of an indulgence than a health food, there are still a few silver linings when it comes to nutritional benefits, especially if you’re mindful about portion sizes and ingredient swaps. Let’s break it down.
First off, this dessert is made with milk, which adds a boost of calcium, protein, and vitamin D to each serving. Calcium is important for strong bones and teeth, and vitamin D helps the body absorb that calcium more effectively. Using whole milk also adds richness and creaminess without needing to add extra fats or oils.
The pudding itself, especially when made with instant mix, is a lower-fat alternative to custard or traditional pastry cream. If you want to make this dessert a little lighter, you can always opt for skim milk or a plant-based milk alternative like almond or oat milk, though that may slightly change the texture. Using a sugar-free pudding mix is another option if you’re watching your sugar intake.
The whipped topping (like Cool Whip) is also lighter in calories compared to real whipped cream, and it gives the filling a fluffy, airy texture that keeps the cake from feeling too heavy. If you prefer, there are also light or fat-free versions available that still work beautifully in this recipe.
Now let’s talk chocolate. While the chocolate frosting is a sweet treat, cocoa itself is rich in antioxidants, particularly flavonoids, which may help reduce inflammation and support heart health. Opting for a dark chocolate-based frosting or making your own ganache from high-quality dark chocolate could slightly boost the nutritional profile.
Finally, because this dessert is so satisfying, a small square can go a long way in satisfying your sweet tooth. It’s easy to slice into portion-controlled servings, which helps you enjoy the flavors without going overboard.
In moderation, this no-bake éclair cake can absolutely fit into a balanced lifestyle. And if you’re serving it at a gathering, chances are you’ll be sharing the indulgence with loved ones—which is good for your soul, too.
Preparation Time, Servings, and Nutritional Information
When you’re short on time but still want to impress, this no-bake éclair cake is the answer. With only about 15 to 20 minutes of hands-on prep and no oven time, it’s one of the easiest desserts you’ll ever make.
Total Time:
Prep Time: 20 minutes
Chill Time: At least 6 hours (preferably overnight)
Total Time: 6 hours 20 minutes
Servings:
This recipe makes approximately 12 servings. You can slice it smaller for a party or larger for a more indulgent dessert experience.
Nutritional Information (Per Serving):
Calories: 320
Protein: 4g
Carbohydrates: 40g
Sugar: 26g
Fat: 16g
Saturated Fat: 7g
Fiber: 1g
Calcium: 100mg
Sodium: 280mg
These numbers are approximate and can vary slightly based on the brand of ingredients used and serving size. If you’re looking to reduce sugar or fat, consider using sugar-free pudding, light whipped topping, or a lighter chocolate topping.
Ingredients List of this No-Bake Chocolate Éclair Cake
Here’s everything you’ll need to bring this creamy, dreamy dessert to life. Each ingredient plays a key role in achieving the perfect texture and flavor.
Vanilla Instant Pudding Mix (6.8 oz):
This is the base of your creamy filling. French vanilla works beautifully if you want a slightly richer flavor. Make sure it’s the instant kind—not the cook-and-serve version.
Milk (3 cups):
Whole milk is ideal for creaminess and body. You can substitute with 2% or even a plant-based milk, but the texture may be slightly thinner.
Whipped Topping (8 oz):
Cool Whip is classic here. It gives the pudding mixture its fluffy, mousse-like texture. Make sure it’s thawed before you use it so it folds in easily. There are also light or dairy-free versions if needed.
Graham Crackers (16 oz):
These are your “cake” layers. They soften overnight in the fridge and turn into something magical. Regular honey grahams are perfect, but you can also experiment with cinnamon grahams for a little twist.
Chocolate Frosting (16 oz):
This is your top layer and the “icing on the cake,” literally. You can use store-bought chocolate frosting or make a homemade ganache using chocolate chips and heavy cream. Microwave the frosting slightly to make it easier to spread.
Each ingredient is easy to find and budget-friendly, making this dessert perfect for last-minute plans or regular rotation in your weekly meal plan.
Step-By-Step Cooking Instructions
Now let’s dive into the fun part—making the no-bake chocolate éclair cake. These steps are incredibly simple, and I promise you’ll feel like a total dessert genius by the end. Just follow each one carefully, and you’ll end up with a creamy, cake-like treat that tastes like you spent hours in the kitchen. Spoiler alert: you didn’t.
Step 1: Prepare Your Pudding Filling
Start by grabbing a large mixing bowl. Pour in the pudding mix—vanilla or French vanilla, depending on your preference—and add the cold milk.
Use a whisk or an electric hand mixer to blend the two together. Whisk continuously for about 2 to 3 minutes, or until the mixture is thickened and smooth. You’ll notice it starts setting up a bit as it sits, which is exactly what you want.
Once the pudding mixture is ready, gently fold in the thawed whipped topping using a spatula. Don’t stir it aggressively—just gently fold until everything is well combined and no streaks remain. The mixture should be smooth, light, and airy.
Step 2: Prepare Your Dish
Take out a standard 9×13-inch baking dish. This will be your cake mold, and it’s the perfect size for creating three distinct layers.
Make sure it’s clean and dry, and you don’t need to grease it—another reason this recipe is such a breeze.
Step 3: Create the First Graham Cracker Layer
Begin by placing a single layer of graham crackers along the bottom of your baking dish. You may need to break some crackers to get them to fit perfectly.
It’s okay if there are small gaps, but try to cover the entire bottom surface. This layer forms the “crust” or base of your cake.
Step 4: Add Half the Pudding Mixture
Spoon half of your creamy pudding and whipped topping mixture onto the graham crackers.
Using a spatula, spread it out evenly across the entire surface. Make sure to get into the corners and smooth it out for an even layer.
Don’t worry if it looks a little thick—that’s exactly how it should be.
Step 5: Add Another Layer of Graham Crackers
Just like before, place another full layer of graham crackers over the pudding layer.
Try to offset the placement slightly from the first layer if possible, almost like laying bricks. This helps create a more stable structure and a better texture when slicing.
Step 6: Add the Remaining Pudding Mixture
Now, spread the second half of the pudding mixture evenly over the second layer of graham crackers.
Smooth it out as evenly as you can, taking care to make the top layer nice and flat. This helps your final frosting layer go on like a dream.
Step 7: Top with Final Graham Cracker Layer
Lay down your final layer of graham crackers. Again, break pieces as needed to fit every nook and cranny.
This will be the top layer of your éclair cake, so try to make it look neat—it’s the one that will peek out if your frosting doesn’t go right to the edges.
Step 8: Prepare the Frosting Layer
If you’re using store-bought chocolate frosting, remove the lid and foil seal, then microwave it (uncovered) for about 25 to 30 seconds.
This softens it just enough so it’s easy to pour and spread. Stir the frosting until it’s smooth and glossy.
Carefully pour the frosting over the final layer of graham crackers. Use a spatula or offset knife to spread it out evenly, going all the way to the edges.
Make sure it’s smooth and covers the entire top. The warmth of the frosting will make it spread easily, but it will firm up beautifully in the fridge.
Step 9: Chill and Set
Once everything is layered and frosted, cover the baking dish with plastic wrap or foil. Make sure it’s sealed well to prevent any fridge odors from sneaking in.
Refrigerate the cake for at least 6 hours, but overnight is best. This allows the graham crackers to absorb moisture from the pudding and soften into cake-like layers.
The longer it chills, the more cohesive and sliceable it becomes.
Step 10: Slice and Serve
When you’re ready to serve, remove the cake from the fridge and uncover it.
Use a sharp knife to slice into squares. You’ll notice how cleanly the layers hold together thanks to the overnight chilling.
Plate your squares and serve chilled for the best flavor and texture.
Optional Variations to Try
- Use chocolate graham crackers for a double chocolate version
- Swap in banana or butterscotch pudding for a fun twist
- Add a drizzle of caramel sauce on top before serving
- Layer in sliced bananas or strawberries for a fruity version
- Use homemade ganache instead of store-bought frosting for a richer finish
This basic recipe is the perfect canvas for creativity. Once you’ve mastered the classic version, feel free to make it your own.
How to Serve this No-Bake Chocolate Éclair Cake
Serving this no-bake chocolate éclair cake is as easy as enjoying it, and there are so many ways to dress it up depending on the occasion.
For a simple presentation, just slice it into squares and serve it chilled directly from the dish. The chilled layers stay firm and neat, making it perfect for slicing cleanly with a sharp knife.
If you’re hosting a gathering or special event, you can dress it up a bit. Add a light dusting of cocoa powder or powdered sugar over the chocolate frosting just before serving. This gives it a bakery-style finish without any extra effort.
For a pop of color and flavor, garnish each slice with a few fresh berries like raspberries or sliced strawberries. Their tartness pairs beautifully with the creamy sweetness of the cake.
You can also serve it with a dollop of extra whipped topping on the side, or drizzle a bit of chocolate or caramel sauce over each plate for a restaurant-style dessert.
If you want to make this more interactive for a party, consider turning it into mini servings by layering the ingredients in small mason jars or dessert cups. It’s the same delicious dessert in individual portions—and people love that!
Another idea is to serve it alongside a scoop of vanilla or chocolate ice cream. The cold, creamy layers of the cake are incredibly satisfying with the contrasting texture of ice cream.
No matter how you choose to serve it, this éclair cake always looks (and tastes) impressive without being fussy.
Pairing Suggestions
Desserts this rich and satisfying deserve thoughtful pairings that enhance the experience, and whether you’re serving this cake after a big dinner or as the star of the show at a party, there are plenty of ways to complement it.
Beverage Pairings:
A warm drink goes beautifully with this chilled dessert. Serve it with a freshly brewed cup of coffee or a creamy latte—the slight bitterness of the coffee balances out the sweet, creamy layers of the cake. If you’re serving it in the evening, consider offering decaf or a flavored coffee like vanilla or hazelnut.
Hot chocolate is another lovely option, especially if you’re serving this cake during colder months. Make a rich, thick version with a sprinkle of cinnamon or a splash of vanilla for a truly decadent pairing.
Tea lovers will enjoy this cake with a cup of black tea like Earl Grey or English Breakfast. Herbal teas, especially mint or chamomile, offer a lighter contrast that cleanses the palate.
If you’re serving children, a glass of cold milk or a vanilla milkshake makes an ideal pairing. It’s simple, classic, and universally loved.
Side Pairings:
As for food pairings, you don’t need much because this dessert is a star on its own. But if you’re putting together a full dessert spread, consider including a few lighter options like fruit salad, fresh berries, or lemon bars for contrast.
Savory finger foods can also be a good balance, especially at events. A cheese platter or light canapés served before dessert can help keep the flavors varied and interesting.
Because this dessert is sweet and creamy, pairing it with something crunchy or slightly salty can make for a more satisfying dessert plate. Try a few salted nuts, chocolate-covered pretzels, or biscotti on the side for texture and variety.
And if you’re planning this as part of a larger celebration meal, pair it with a main course that’s light and fresh—something like grilled chicken with a salad or a baked fish dish with vegetables. That way, the dessert doesn’t feel too heavy after an already rich meal.
Storage, Freezing & Reheating Instructions
One of the best things about this no-bake chocolate éclair cake—aside from how delicious it is—is how beautifully it stores and how well it holds up in the fridge and freezer. In fact, this dessert almost tastes better after it’s had time to rest, letting the layers soften and the flavors meld together. Whether you’re prepping ahead for a party or saving leftovers for later, here’s exactly how to store, freeze, and enjoy it again without compromising its perfect texture.
Refrigerator Storage:
Once you’ve assembled and chilled your éclair cake, keep it in the refrigerator covered tightly with plastic wrap or aluminum foil. It’s best stored in the same 9×13-inch dish you made it in—no need to transfer to another container. The cake will stay fresh and delicious for up to 4 days in the fridge. In fact, you may find the texture gets even better after the first day as the graham crackers continue to soften into that luscious, cake-like consistency.
Freezer Storage:
If you’re planning to store it for longer or prep it well in advance, freezing is absolutely an option. The key is to make sure the éclair cake is well-covered and protected from freezer burn.
To freeze the whole cake: After assembling and chilling it for at least 6 hours, wrap the entire baking dish tightly in several layers of plastic wrap followed by a layer of aluminum foil. Label it with the date and store it in the freezer for up to 1 month. While it may technically keep longer, the texture is best if enjoyed within that window.
To freeze individual slices: If you prefer to portion it out, slice the chilled éclair cake into squares and place the pieces on a baking sheet lined with parchment paper. Freeze until firm (about 1–2 hours), then transfer the frozen squares to a freezer-safe bag or container. This way, you can thaw just one or two pieces at a time without defrosting the whole cake.
How to Thaw and Reheat:
Now, this is a dessert that doesn’t require any reheating—it’s meant to be served chilled. If you’ve frozen the cake, simply transfer it from the freezer to the fridge and let it thaw overnight. For individual portions, thaw at room temperature for 20–30 minutes or in the fridge for a couple of hours.
Avoid microwaving the cake to thaw it quickly, as this could cause the pudding to break down and the frosting to melt unevenly. Slow, cold thawing is the way to go here to maintain that perfect creamy texture and soft, cake-like bite.
Quick Storage Tips:
- Store in the original dish with a tight cover to keep moisture in and fridge odors out.
- For best results, serve within 2–3 days of making it.
- If making ahead for a party, you can fully assemble it up to 2 days in advance and keep it chilled until ready to serve.
This dessert was practically made for make-ahead convenience, so don’t be afraid to prep early. Just keep it cold, and you’re guaranteed a crowd-pleasing treat every time.
Common Mistakes to Avoid
Even though this éclair cake is wonderfully easy to make, there are a few common pitfalls that can affect the texture or flavor. Fortunately, they’re all easy to avoid once you know what to look for. Here are some of the most common mistakes and how to prevent them.
1. Not Letting It Chill Long Enough
This is probably the number one mistake when it comes to éclair cake. If you try to serve it too soon, the graham crackers won’t have time to soften properly, and you’ll end up with crunchy layers instead of soft, cake-like ones. For best results, chill for at least 6 hours—overnight is even better.
2. Using Cook-and-Serve Pudding Instead of Instant
The recipe calls for instant pudding mix, which thickens quickly and doesn’t require heat. If you accidentally grab the cook-and-serve variety, it won’t set the same way and could result in a runny filling. Always double-check the box to make sure it says “instant.”
3. Not Thawing the Whipped Topping
If your whipped topping is still frozen when you try to mix it into the pudding, you’ll end up with a lumpy filling that won’t spread evenly. Make sure to thaw it in the refrigerator for a few hours before using it for the best texture.
4. Spreading Cold Frosting Straight from the Container
Chocolate frosting is much easier to spread when it’s slightly warm. If you try to spread it straight from the fridge or container, it can pull up the top layer of graham crackers and make your dessert look messy. A quick microwave helps it go on smooth and even.
5. Overmixing the Pudding and Whipped Topping
You want your filling to be light and airy, not dense and deflated. Fold the whipped topping into the pudding gently until just combined. Overmixing can break down the fluffy texture and make the filling too loose.
6. Not Covering the Cake Tightly
Whether you’re storing it in the fridge or freezer, it’s important to keep the éclair cake well covered. Exposure to air can cause the top layer to dry out or absorb odors from the fridge. Use plastic wrap, foil, or a lid that seals completely.
7. Cutting Before It’s Fully Set
It can be tempting to dive in early, but slicing too soon will lead to messy squares that don’t hold their shape. Letting the cake chill fully ensures clean, bakery-style slices every time.
Avoiding these small mistakes makes a big difference. Follow the recipe carefully, and you’ll end up with a dessert that looks as good as it tastes—soft, creamy, and absolutely irresistible.
Pro Tips
Want to take your éclair cake to the next level? These pro tips will help you get the most out of this easy dessert and give you a few fun ways to elevate the flavor and presentation.
1. Use French Vanilla for a Richer Flavor
While classic vanilla pudding works just fine, using French vanilla adds a deeper, creamier note to the filling. It’s a small change that can make a big difference in taste.
2. Make Homemade Ganache for the Topping
If you want to level up the flavor, skip the store-bought frosting and make a simple chocolate ganache. Just heat 1 cup of heavy cream and pour it over 1½ cups of semi-sweet chocolate chips. Let sit for 1 minute, then stir until smooth. Spread over the cake for a more decadent finish.
3. Chill Your Mixing Bowl
To keep the filling nice and thick, you can chill your mixing bowl and whisk before combining the pudding and whipped topping. This helps everything set up quicker and prevents the filling from becoming runny.
4. Try Cinnamon or Chocolate Graham Crackers
Switching up the graham crackers adds a new twist to the flavor. Cinnamon grahams add a warm, spiced note, while chocolate grahams make the whole dessert even more indulgent.
5. Use a Hot Knife for Clean Slices
When serving, run your knife under hot water and wipe it dry before slicing the cake. This melts through the chocolate layer cleanly and helps each square look polished and picture-perfect.
6. Add Layers of Fresh Fruit
If you want to add a fruity twist, layer in sliced strawberries, bananas, or raspberries between the pudding layers. Not only does this add fresh flavor, but it also makes the cake look gorgeous when sliced.
7. Serve in Individual Cups for Parties
Turn this cake into a fun party treat by layering the ingredients in small clear cups or mason jars. It’s perfect for potlucks, picnics, or portion control when serving a crowd.
8. Don’t Rush the Chill Time
It can’t be said enough—this cake needs time to chill. Plan ahead and make it the night before to give it time to set perfectly. You’ll be rewarded with that signature soft texture and flavor that everyone loves.
With these tips, even a beginner can create a dessert that looks like it came from a professional kitchen. Simple ingredients, smart tricks, and a little patience are all it takes.
Frequently Asked Questions (FAQs)
Every great recipe comes with a few common questions, especially when it’s as popular and easy as this no-bake chocolate éclair cake. Whether you’re making it for the first time or just looking to perfect your process, here are the answers to the most frequently asked questions to help guide you through.
1. Can I make this éclair cake ahead of time?
Absolutely! In fact, this cake is even better when made ahead. Prepare the whole dessert and refrigerate it at least 6 hours in advance, though overnight is ideal. This gives the graham crackers time to soften and absorb the pudding, which creates the perfect cake-like texture. It’s a dream for entertaining or prepping before a busy day.
2. Can I use homemade whipped cream instead of whipped topping?
Yes, you can use homemade whipped cream, but it does change the texture slightly. Whipped topping (like Cool Whip) holds its shape longer and adds stability to the filling. If you’re going with homemade whipped cream, make sure it’s whipped to stiff peaks and gently fold it into the pudding to keep the mixture light and airy.
3. What kind of pudding should I use?
You should use instant pudding mix, not cook-and-serve. Vanilla or French vanilla are classic choices, but you can get creative with flavors like banana, cheesecake, or even white chocolate. Just be sure to use the correct amount to maintain the right consistency.
4. Can I freeze éclair cake?
Yes! This dessert freezes well. Freeze the assembled cake either whole or in individual slices. Wrap tightly in plastic wrap and aluminum foil to avoid freezer burn. When ready to enjoy, thaw overnight in the refrigerator for the best texture.
5. Can I make it gluten-free?
Definitely. Simply use gluten-free graham crackers, which are widely available in most grocery stores. All other ingredients in this recipe are generally gluten-free, but always check labels to be safe, especially with pudding and whipped toppings.
6. What’s the best way to slice it cleanly?
Use a sharp knife dipped in hot water, then dried, to slice cleanly through the chilled cake. Wipe the knife between cuts for smooth, neat servings. The chilled layers will hold together beautifully if you’ve let the dessert rest long enough.
7. Can I add fruit to this recipe?
Yes! Sliced strawberries, bananas, or raspberries make great additions. Just layer them between the pudding and graham crackers. This adds freshness and a bit of tartness that balances the sweetness of the chocolate frosting.
8. What kind of frosting works best?
Store-bought chocolate frosting is the easiest option. Choose one that’s creamy and rich—milk chocolate or dark chocolate both work well. If you want to make your own topping, a simple ganache of chocolate and cream is a delicious upgrade.
9. Can I use low-fat or sugar-free ingredients?
Yes, you can make a lighter version of this cake. Use sugar-free instant pudding, low-fat milk, and light whipped topping. You can also find reduced-sugar chocolate frosting or make your own using dark chocolate and coconut milk for a healthier spin.
10. Will the graham crackers stay crunchy?
No, and that’s a good thing. The magic of this recipe is that the graham crackers soften in the fridge, turning into a texture that mimics cake. If your crackers are still crunchy, it means the dessert hasn’t chilled long enough.
These FAQs cover the most common questions, but don’t be afraid to experiment and make the dessert your own. The flexibility and simplicity are part of what makes it so beloved.
Conclusion & Call to Action
If you’ve been searching for the perfect no-bake dessert that checks all the boxes—easy, creamy, crowd-pleasing, and irresistibly delicious—then this no-bake chocolate éclair cake is about to become your new favorite recipe. With just a handful of pantry staples and a few simple steps, you can whip up a dessert that tastes like it came straight from a bakery window, no oven required.
This recipe is proof that sometimes, the simplest things in life are the most satisfying. Between the soft, cake-like graham cracker layers, the rich and fluffy vanilla pudding filling, and the smooth chocolate topping, every bite is pure comfort and joy. It’s the kind of treat that brings back childhood memories while still feeling grown-up enough to serve at a dinner party.
One of the best parts about this dessert is how easy it is to customize. From switching up pudding flavors to adding fresh fruit or using homemade ganache, you can truly make it your own. And since it’s such a forgiving recipe, it’s a perfect place to start if you’re new to cooking or baking. You really can’t mess this one up, and that’s part of its charm.
So what are you waiting for? Head to your kitchen, gather your ingredients, and make this chocolate éclair cake today. Trust me, once you taste it, you’ll be hooked—and so will everyone else who gets a bite. Be sure to snap a photo before it disappears and tag me so I can see your amazing creations.
Have questions? Drop them in the comments. Tried the recipe? I’d love to hear how it turned out for you. Whether you’re making it for a holiday, a birthday, or just because you’re craving something sweet, this no-bake éclair cake is a guaranteed win. Happy no-baking, and enjoy every creamy, chocolatey bite!
Print
No-Bake Chocolate Éclair Cake – Easy, Creamy & Irresistible
- Total Time: 6 hours 20 minutes (includes chill time)
- Yield: 12 servings 1x
- Diet: Vegetarian
Description
This no-bake chocolate éclair cake is an easy, layered dessert made with vanilla pudding, whipped topping, graham crackers, and chocolate frosting. Perfect for parties, holidays, or weeknight treats—no oven needed!
Ingredients
-
6.8 oz vanilla instant pudding mix (or French vanilla)
-
3 cups whole milk
-
8 oz whipped topping (Cool Whip), thawed
-
16 oz graham crackers
-
16 oz chocolate frosting (store-bought or homemade ganache)
Instructions
-
Whisk pudding mix and milk in a large bowl until smooth.
-
Fold in thawed whipped topping.
-
In a 9×13 dish, add a single layer of graham crackers.
-
Spread half the pudding mixture over the crackers.
-
Add another layer of graham crackers.
-
Spread remaining pudding mixture, then top with final cracker layer.
-
Microwave frosting for 25–30 seconds, stir, and spread over the top.
-
Cover and refrigerate for at least 6 hours or overnight.
-
Slice and serve chilled.
Notes
-
Chill overnight for best results.
-
Use cinnamon or chocolate graham crackers for a twist.
-
For a homemade touch, top with ganache instead of frosting.
- Prep Time: 20 minutes
- Cook Time: 0 minutes
- Category: Dessert
- Method: No-Bake
- Cuisine: American