
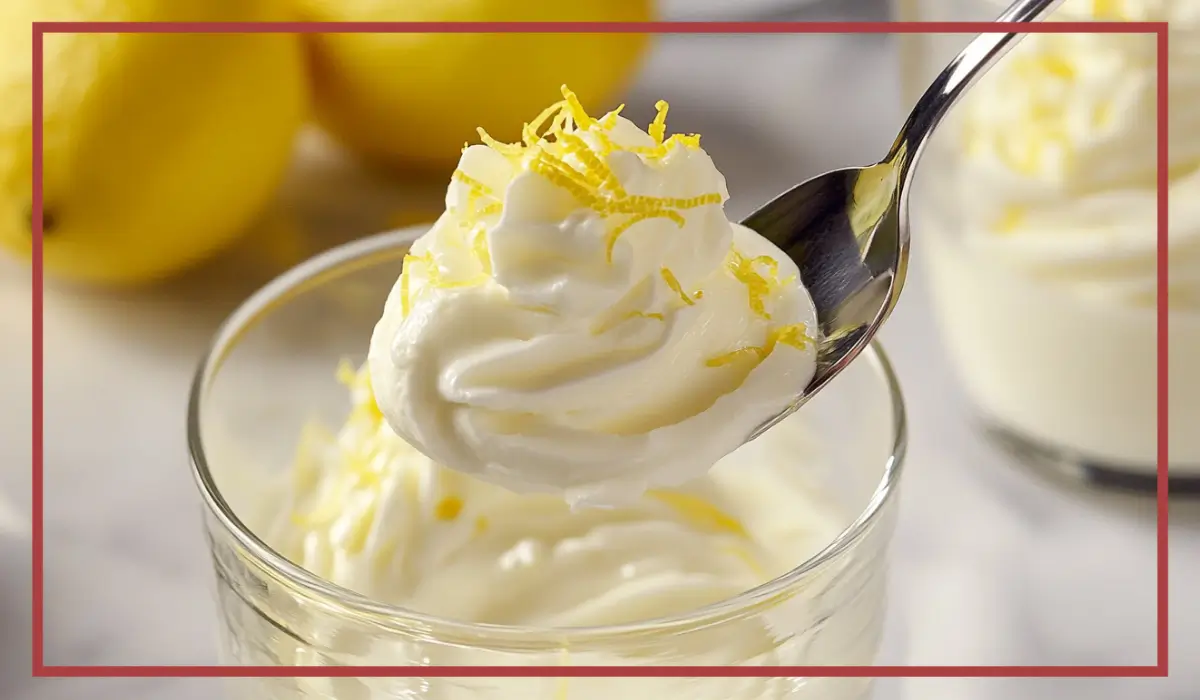
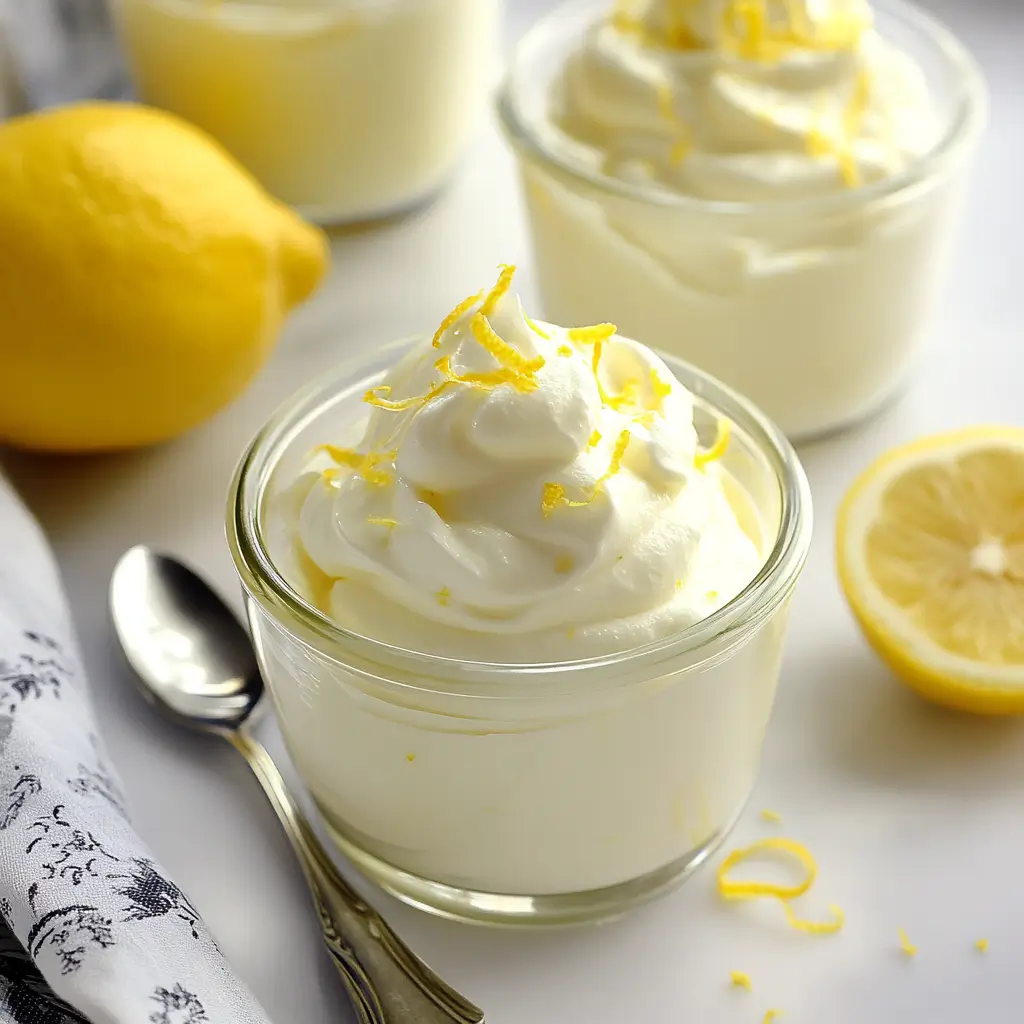
There’s something undeniably magical about a dessert that feels indulgent but is surprisingly easy to make. That’s exactly what this Lemon Mousse Dessert brings to the table. With only four ingredients and zero baking involved, it’s a no-fuss treat that delivers bright, citrusy flavor with a smooth, cloud-like texture. Whether you’re hosting a brunch, planning a picnic, or simply craving something sweet on a sunny afternoon, this mousse is a go-to recipe that checks all the boxes.
What makes this lemon mousse particularly special is the balance of flavors and textures. The whipped cream provides a luxurious base that’s rich without being heavy. Then there’s the lemon curd, which adds just the right amount of tartness, giving each spoonful a refreshing zing. A bit of lemon zest amplifies the citrus notes even more, while a touch of confectioner’s sugar ensures a silky smooth finish. It’s the kind of dessert that makes you close your eyes and smile with the very first bite.
Personally, this lemon mousse has become one of my favorite things to whip up when I need a quick dessert that still feels elegant. I discovered it on a hot summer afternoon when turning on the oven was absolutely out of the question. I had a jar of lemon curd sitting in the fridge, leftover from a baking project, and a carton of heavy cream on its last leg. A quick whip, a gentle fold, a little chill in the fridge, and suddenly, dessert was ready.
Since then, I’ve made it for everything from dinner parties to baby showers, and even as a midday treat just for myself. It always gets rave reviews, and the best part is, no one believes how easy it is to make. The simplicity of this recipe means you can always have a show-stopping dessert ready in almost no time. And once you make it, you’ll see why it has become such a beloved staple in my kitchen.
Why You’ll Love This Lemon Mousse Dessert Recipe
First and foremost, you’ll love this lemon mousse because it’s a no-bake dessert that requires minimal effort. In a world where so many desserts involve multiple steps, a hot oven, and a long wait time, this one is refreshingly straightforward. With only four ingredients, and a single mixing bowl, you can whip up something that tastes like it came from a high-end patisserie.
The texture is another reason to adore this recipe. It’s incredibly light and fluffy, almost like eating citrusy clouds. The whipped cream gives it that airiness we crave in a mousse, while the lemon curd adds body and a vibrant pop of flavor. The addition of lemon zest not only boosts the flavor but also adds a hint of natural aroma that makes each bite even more delightful.
Another reason you’ll fall in love with this recipe is how versatile it is. You can serve it in elegant glass cups for dinner parties, or in little mason jars for picnics and casual get-togethers. It’s also highly customizable—if you want to switch it up, try using lime or orange curd instead of lemon. You could even swirl in a bit of berry compote for added color and flavor.
Because this mousse is make-ahead friendly, it’s ideal for busy days when you still want to serve something homemade. You can prepare it the day before your event, let it chill overnight, and it will be perfectly set and delicious when it’s time to serve.
And let’s not forget that this is a family-friendly dessert. Kids love the creamy texture and bright taste, while adults appreciate the elegance and balance. Whether it’s for a weekday treat or a festive occasion, this mousse has universal appeal. Once you try it, it’s likely to become a repeat request from friends and family alike.
Health Benefits of this Lemon Mousse Dessert
While it’s true that Lemon Mousse Dessert isn’t exactly a “superfood,” it does have a few redeeming health qualities that make it a smart choice when you want to indulge without going overboard. Unlike many desserts that are packed with refined flours and heavy sugar content, this lemon mousse keeps things light and relatively simple.
To begin with, lemon is naturally rich in vitamin C, a powerful antioxidant that supports your immune system, skin health, and overall wellness. While the curd is sweetened, the zest and juice from real lemons bring in beneficial compounds like flavonoids and limonene, which have been studied for their anti-inflammatory and antioxidant properties.
Next, we have heavy cream, which, while rich, also provides a good source of fat-soluble vitamins like A, D, and E. These nutrients are essential for supporting eye health, bone strength, and a well-functioning immune system. When consumed in moderation, heavy cream can be part of a balanced diet.
The low sugar content of this recipe is another plus. By using only a small amount of confectioner’s sugar, the mousse avoids becoming cloyingly sweet. This allows the natural tang of the lemon to shine through, creating a more balanced and satisfying dessert that doesn’t spike your blood sugar levels as aggressively as other high-sugar treats might.
Also, because this mousse is gluten-free by nature, it’s a great option for people who have gluten sensitivities or celiac disease. You don’t have to substitute anything or use special products to enjoy it—just follow the recipe as-is.
Another underrated health benefit? Portion control. Since this mousse is so light and flavorful, a small serving feels totally satisfying. You can easily enjoy a half-cup portion and feel like you’ve had a complete dessert experience without going overboard on calories or fat.
Finally, because it’s a homemade dessert, you get full control over the ingredients. You can choose an organic lemon curd, use grass-fed cream, and even adjust the sugar to your liking. That’s one of the hidden perks of cooking at home—you know exactly what’s going into your food, and you can feel good about serving it to the people you love.
Preparation Time, Servings, and Nutritional Information
When it comes to prep time, this Lemon Mousse Dessert recipe is an absolute win. From start to finish, you’ll only need about 10 minutes of active time. After that, the mousse chills in the fridge for a minimum of 1 hour, which gives it time to set and develop its fluffy, luxurious texture. So, while it’s not an instant dessert, it is one you can make ahead and forget until it’s time to serve.
This recipe makes 8 servings, with each portion being just the right size to satisfy your sweet tooth without leaving you feeling too full. If you’re hosting a gathering, you can easily double the recipe and prepare it in advance. It also scales down beautifully if you’re just making a treat for two.
Here’s the breakdown of the estimated nutritional information per serving:
- Calories: 290
- Total Fat: 25g
- Saturated Fat: 15g
- Cholesterol: 95mg
- Carbohydrates: 14g
- Sugars: 12g
- Protein: 2g
- Sodium: 35mg
These numbers are estimates and can vary depending on the specific brands of lemon curd or heavy cream you use. However, compared to many traditional desserts, this mousse is relatively low in carbs and sugar, making it a suitable choice for those who are watching their sugar intake.
Additionally, you can make adjustments to the ingredients if you need a lighter version. For example, you could use a mixture of whipped coconut cream in place of heavy cream for a dairy-free option. Or you could use a low-sugar or homemade lemon curd to reduce the overall sweetness. The recipe is flexible enough to adapt to your dietary needs without sacrificing flavor or texture.
Ingredients List of this Lemon Mousse Dessert
One of the best things about this easy Lemon Mousse Dessert is how short and sweet the ingredient list is. You’ll only need four main ingredients, and there’s a good chance you already have most of them in your kitchen. Each ingredient plays a specific role in creating the perfect mousse—light, creamy, and bursting with lemon flavor.
Let’s go over what you’ll need and why each component is important.
- 2 cups (454 g) heavy cream: This is the foundation of your mousse. When whipped, heavy cream becomes light and airy, providing that classic mousse texture. Make sure it’s cold, as chilled cream whips faster and holds its structure better.
- 2 tablespoons (14 g) confectioner’s sugar: Also known as powdered sugar, this ingredient dissolves quickly and helps sweeten the whipped cream without adding any graininess. It also gives the mousse a silky finish.
- Pinch of salt: Just a touch of salt enhances the sweetness and brightens the overall flavor. Don’t skip this—it makes a subtle but noticeable difference in the final result.
- 1 cup (320 g) lemon curd: This is where the flavor magic happens. Lemon curd adds richness, tanginess, and a beautifully smooth texture to the mousse. You can use store-bought lemon curd for convenience or make your own if you prefer a homemade touch.
- 1 tablespoon (6 g) lemon zest: Freshly grated lemon zest intensifies the citrus flavor and adds aromatic oils that you can’t get from juice or curd alone. It gives the mousse a bright, vibrant edge.
Optional garnishes (not included in the core ingredients, but highly recommended for presentation and added texture):
- A dollop of whipped cream
- Additional lemon zest for color and aroma
- Crumbled vanilla wafers or graham crackers for crunch
These ingredients come together effortlessly, but the end result is anything but ordinary. Each one has a role to play in achieving the perfect balance of texture and flavor. The best part? You don’t need any hard-to-find or expensive ingredients—just a few quality basics and a little bit of time.
Step-By-Step Cooking Instructions of this Lemon Mousse Dessert
Making this lemon mousse is as easy as it gets, especially when you follow these detailed, step-by-step instructions. With just a few basic tools and ingredients, you’ll be enjoying a chilled, creamy dessert that’s every bit as beautiful as it is delicious. Whether you’re a beginner in the kitchen or a seasoned home cook, this process is smooth and straightforward. Let’s dive into the steps and make this mousse magic happen.
Step 1: Chill Your Tools
Before you begin whipping the cream, take a moment to chill your mixing bowl and beaters in the fridge or freezer for about 10–15 minutes. Cold equipment helps the cream whip more efficiently and hold its structure better. This is especially helpful if your kitchen is warm or if you’re making this on a hot summer day.
Step 2: Measure and Prepare Your Ingredients
It’s always a good idea to have everything measured and ready to go before you start. This is known as mise en place in the culinary world, and it keeps your process organized and stress-free.
- Pour 2 cups of cold heavy cream into your chilled mixing bowl.
- Measure out 2 tablespoons of confectioner’s sugar.
- Add a pinch of salt.
- Have your lemon curd ready (either store-bought or homemade).
- Zest one large lemon to yield about 1 tablespoon of lemon zest.
Step 3: Whip the Cream
Now, using an electric mixer on medium speed, begin whipping the heavy cream with the confectioner’s sugar and the pinch of salt.
- Start slowly to prevent splattering.
- After about 1 minute, increase to medium speed and continue whipping until medium peaks form. This usually takes 2–3 minutes, depending on your mixer and the temperature of your cream.
What are medium peaks? These are peaks that form when you lift the beaters and they gently hold their shape, but the tips slightly fold over. You don’t want stiff peaks, which would make the mousse too firm.
If you’re using a hand whisk, it’ll take a bit longer and more effort, but it’s definitely doable. Just be patient and keep an eye on the texture as it thickens.
Step 4: Fold in the Lemon Curd
Once your cream is whipped, it’s time to incorporate the lemon flavor.
- Add 1 cup of lemon curd directly into the whipped cream.
- Sprinkle in the lemon zest.
Now, using a spatula, gently fold the lemon curd and zest into the whipped cream. Folding means you’re carefully mixing without deflating the air you just whipped in. Use a motion that cuts down through the center, sweeps around the side, and turns the mixture over itself.
Don’t rush this step. It may take a minute or two, but slow and gentle folding helps preserve that beautiful airy texture. Keep going until everything is evenly combined and the mixture is smooth and lemony throughout.
Step 5: Taste and Adjust (Optional)
At this stage, you can give your mousse a quick taste.
- Want more tartness? Add a touch more lemon zest.
- Prefer it a little sweeter? You can sift in a bit more confectioner’s sugar and fold again.
This is your chance to make it perfect for your palate, so don’t be afraid to tweak it slightly if needed.
Step 6: Portion the Mousse
Once the mixture is fully combined and smooth, it’s time to portion it into individual servings.
- Use a spoon or a small ladle to scoop the mousse into 8 small dessert glasses or ramekins.
- Each serving should be about ½ heaping cup. You can also pipe it in for a more elegant presentation, especially if you’re serving guests.
If you don’t have dessert glasses, small mason jars, teacups, or even wine glasses work beautifully. The key is to keep the portions small but satisfying.
Step 7: Chill the Mousse
Place the filled glasses in the refrigerator to chill for at least 1 hour. This step is crucial, as it allows the mousse to firm up and develop that luscious, silky texture.
You can chill it for up to 24 hours, making this an ideal make-ahead dessert. The longer it chills (within reason), the more the flavors meld and intensify.
Step 8: Garnish Before Serving
Just before serving, you can dress up your lemon mousse with a few simple garnishes to add texture and visual appeal.
Here are a few easy garnish ideas:
- A dollop of whipped cream for an extra creamy finish.
- A sprinkle of lemon zest to enhance the citrus aroma.
- Crushed vanilla wafers or graham crackers for crunch.
- Fresh mint leaves for a pop of green.
- Fresh berries, like raspberries or blueberries, for color and contrast.
These toppings not only make your mousse look extra special but also add complementary textures and flavors that elevate the whole experience.
Step 9: Serve and Enjoy
Now comes the best part—serving your beautifully chilled lemon mousse. It should be light, creamy, and just firm enough to hold its shape on a spoon. Each bite should melt in your mouth, leaving behind the perfect balance of sweet and tart.
This dessert is at its best when served cold, so keep it in the fridge until you’re ready to enjoy. If you’re hosting guests, serve with small dessert spoons and watch the delight on their faces as they dive in.
And that’s it—your easy lemon mousse is ready to shine. Simple, stunning, and absolutely delicious, this dessert is proof that elegance doesn’t have to be complicated.
How to Serve this Lemon Mousse Dessert
Serving lemon mousse can be just as fun as making it. Its elegant yet playful presentation makes it the perfect centerpiece for any dessert table. Since it’s already portioned into individual servings, all you need to do is decide on the best way to present it and what to serve alongside.
For a classic and elegant approach, serve the mousse in stemmed dessert glasses, garnished with a twist of lemon zest and a sprig of mint. This setup is perfect for dinner parties or more formal gatherings where presentation matters. The height of the glass allows you to show off the beautiful, fluffy texture, and the garnishes add color and sophistication.
If you’re aiming for something more casual and cozy, opt for mason jars or small glass bowls. These are great for picnics, brunches, or family-style meals where the focus is on comfort and simplicity. Top with crushed vanilla wafers or a few fresh berries for a more rustic look.
When serving to kids or for an outdoor event, you can even use clear plastic cups for easy cleanup. Add a cookie or biscuit on the side and you’ve got a fun, handheld dessert that’s easy to enjoy anywhere.
Here are a few serving ideas to make the experience even more delightful:
- Top with a drizzle of berry sauce for a tangy contrast.
- Add a shortbread cookie or sugar wafer on the side for dipping.
- Serve with a fruit salad for a refreshing pairing.
- Sprinkle toasted coconut on top for a tropical twist.
The beauty of lemon mousse lies in its adaptability. No matter how you choose to serve it, the result is always a creamy, dreamy treat that brings smiles with every spoonful.
Pairing Suggestions
When it comes to pairing this lemon mousse with other flavors or dishes, the key is to complement its bright citrusy profile with either contrasting textures or mild, mellow notes that allow the lemon to shine.
Let’s start with beverage pairings. Since this mousse is sweet and tangy, it pairs wonderfully with herbal teas, such as chamomile, mint, or lavender. These teas have gentle flavors that enhance the lemon without overwhelming it. A lightly brewed green tea can also add a refreshing balance. If you prefer a chilled drink, go for sparkling lemonade or a citrus-infused iced tea for a cohesive flavor experience.
For those who enjoy coffee with dessert, a mild roast coffee or an espresso macchiato works well. The slight bitterness of the coffee complements the sweetness of the mousse, creating a well-rounded contrast.
Looking at food pairings, consider serving this mousse alongside other light desserts, such as almond biscotti, coconut macaroons, or meringue cookies. These add texture and variety to the dessert course without clashing with the lemon flavor.
Here are a few more pairing ideas to inspire you:
- Fresh fruit platter: Strawberries, blueberries, and kiwi pair beautifully with lemon and add natural sweetness.
- Mini pavlovas: Serve the mousse inside crisp mini pavlova shells for an elegant twist.
- Shortbread cookies: Their buttery texture and mild sweetness are the perfect contrast to the mousse’s tartness.
- Toasted pound cake slices: Layer the mousse on top for a lemon shortcake-inspired treat.
Whether you’re planning a full dessert spread or just adding a touch of something extra, these pairings will elevate your lemon mousse into a standout experience.
Storage, Freezing & Reheating Instructions of this Lemon Mousse Dessert
One of the great things about this Easy Lemon Mousse is how well it stores. Because it’s a chilled dessert with a stable whipped cream base, it holds up beautifully in the refrigerator and even in the freezer with the right precautions. This makes it not only delicious and easy to prepare but also extremely practical when planning ahead.
Storing in the Refrigerator
If you’re planning to serve the mousse within a few days, the refrigerator is the best place to store it.
- Store in individual portions: Cover each glass or container with plastic wrap or a lid to prevent the mousse from absorbing odors from the fridge.
- Keep chilled for up to 3 days: After this, the mousse may begin to lose its airy texture as the whipped cream can deflate slightly or begin to separate.
- Avoid frequent opening: Try not to open and reseal the containers too often, as this can introduce moisture or air that may affect the texture.
Freezing for Longer Storage
Yes, you can freeze lemon mousse, which is especially useful if you want to prep this dessert far in advance.
- Use airtight, freezer-safe containers: Small glass jars or sturdy plastic containers work best. Avoid freezing in thin plastic or flimsy cups, which may crack under cold temperatures.
- Leave room at the top: Since the mousse may expand slightly as it freezes, don’t fill containers all the way to the brim.
- Freeze for up to 1 month: After that, the texture may begin to degrade, although the flavor will still be pleasant.
Thawing and Serving from Frozen
When you’re ready to enjoy the mousse:
- Thaw in the refrigerator: Remove the frozen mousse from the freezer and place it in the fridge for about 3–4 hours or overnight. This allows it to return to a creamy, spoonable texture without turning watery.
- Avoid microwaving: Reheating the mousse in the microwave is not recommended, as the whipped cream base can melt or curdle.
You’ll find that mousse that’s been frozen and properly thawed is still delicious, although slightly denser in texture. It’s perfect if you want to make a large batch ahead of time for events or parties.
Quick Tips for Storage Success
- Label and date: Especially important if you’re freezing, so you can keep track of freshness.
- Garnish after storing: Add whipped cream, zest, or toppings only after thawing or removing from the fridge, to keep everything crisp and fresh.
- Use clean spoons: When serving, always use clean utensils to avoid introducing bacteria that can shorten the mousse’s shelf life.
Properly stored, your lemon mousse will retain its flavor and texture beautifully, giving you the flexibility to enjoy this delightful dessert any time you want.
Common Mistakes to Avoid
Even though this recipe is beginner-friendly, a few small missteps can affect the final result. Understanding these common mistakes ahead of time will help you get that perfect, fluffy lemon mousse on your very first try.
Over-whipping the Cream
This is probably the most common error when making any mousse that starts with whipped cream. Whipping the cream past medium peaks can lead to stiff, grainy cream or even turn it into butter if you go too far.
- Fix: Stop whipping once medium peaks form. You should see soft ridges that slightly bend at the tips when you lift the whisk.
Skipping the Chill Time
It might be tempting to dig into the mousse right after making it, but the chilling step is crucial for the mousse to set and achieve the right texture.
- Fix: Always chill for at least an hour, though longer is even better. Overnight chilling allows the flavors to meld and gives the mousse a perfect, silky consistency.
Not Folding Gently
Folding the lemon curd into the whipped cream too quickly or aggressively can deflate the air you just whipped in, resulting in a dense mousse.
- Fix: Use a light hand and a spatula. Think slow, sweeping motions to preserve that airy volume.
Using Warm Ingredients
Heavy cream that isn’t cold enough won’t whip properly, and warm lemon curd can make the whipped cream collapse.
- Fix: Make sure all your ingredients—especially the cream—are cold. Chill your bowl and beaters too for best results.
Storing Uncovered
If you leave the mousse uncovered in the fridge, it may pick up odors from other foods or form a skin on top.
- Fix: Always cover with plastic wrap or lids. Press plastic wrap gently against the surface of the mousse to prevent skin formation if storing for longer than a day.
Choosing a Too-Tart Lemon Curd
Some lemon curds are extremely tart or overly sweet. The flavor of your curd will be front and center, so if it’s off-balance, the whole mousse will taste that way.
- Fix: Taste your lemon curd before using. If it’s too tart, you can blend in a little extra sugar before folding it into the whipped cream.
Avoiding these small pitfalls will give you that picture-perfect lemon mousse every time, with no surprises and lots of compliments from your lucky taste-testers.
Pro Tips of this Lemon Mousse Dessert
Sometimes it’s the little details that elevate a simple recipe into something truly memorable. Here are some tried-and-true professional tips to help you perfect your lemon mousse and make it restaurant-worthy, right in your own kitchen.
1. Use Cold Cream and Equipment
Temperature matters more than you might think. Whipping cream is all about creating and stabilizing air bubbles, and colder temperatures help those bubbles form and stay in place.
- Pro tip: Pop your mixing bowl and beaters into the freezer for 10–15 minutes before whipping. Cold tools make a big difference, especially in warm kitchens.
2. Choose High-Quality Lemon Curd
Since lemon curd is the main flavor in this mousse, using a high-quality brand (or making your own) will really enhance the final taste.
- Pro tip: Look for curds that list lemon juice and egg yolks high in the ingredients list. They tend to have better flavor and texture than those loaded with corn syrup.
3. Don’t Skip the Zest
The lemon zest might seem like a small addition, but it packs a punch. It brings essential oils from the lemon peel into the mousse, adding complexity and depth.
- Pro tip: Zest the lemon just before folding it in to keep the oils fresh and aromatic. Avoid the bitter white pith underneath.
4. Use a Gentle Folding Motion
To keep your mousse fluffy, folding is your best friend. The goal is to combine ingredients without knocking out the air.
- Pro tip: Rotate your bowl with one hand while you fold with the other for consistent mixing. Always scrape down the sides and bottom to ensure an even blend.
5. Add Texture with Garnishes
A soft dessert like mousse benefits from a little crunch or contrast. Think about topping it with something crisp or chewy.
- Pro tip: Crushed vanilla wafers, slivered almonds, or toasted coconut flakes add a lovely textural contrast that elevates the dish visually and flavor-wise.
6. Serve It Beautifully
People eat with their eyes first. Presenting your mousse in clear glasses or jars lets the beautiful texture and color shine through.
- Pro tip: Layer the mousse with fruit compote or curd in between for a parfait-style presentation.
7. Adjust Sweetness to Taste
Everyone has a different preference for sweet vs. tart. Start with the suggested amount of sugar, then adjust based on your lemon curd and personal taste.
- Pro tip: Add a touch more sugar if using a particularly tart curd, or balance with a swirl of honey.
Following these pro tips will help you not only create a perfect lemon mousse but also customize it to your own preferences and style. With just a little extra care and creativity, you’ll take this dessert from simple to sensational.
Frequently Asked Questions (FAQs)
Even with a simple recipe like this Easy Lemon Mousse, a few questions tend to pop up—especially if you’re trying it for the first time or planning to make it ahead. Here’s a helpful FAQ section to clear up any doubts and ensure your mousse turns out perfect every time.
Can I use store-bought lemon curd?
Absolutely. In fact, using high-quality store-bought lemon curd is one of the reasons this recipe is so fast and easy. Just make sure to choose a brand with good flavor and no artificial aftertaste. If you prefer more control over the sweetness or tartness, you can always make your own lemon curd from scratch. Homemade lemon curd also tends to be silkier and can have a more vibrant citrus flavor.
Can I use low-fat or dairy-free alternatives instead of heavy cream?
Heavy cream is essential to getting that rich, fluffy texture we love in mousse. That said, there are dairy-free options that can work well, especially if you’re catering to dietary restrictions. Full-fat coconut cream is a popular substitute and whips up beautifully when chilled. Just be aware that it will slightly alter the flavor of the dessert, adding a subtle tropical note.
Low-fat cream or light alternatives usually don’t whip well and won’t hold their structure, so they’re not ideal for this recipe.
What if my whipped cream won’t thicken?
This usually happens if your cream wasn’t cold enough or if you’re using a product that’s not high enough in fat. Make sure you’re using heavy cream with at least 36% milk fat, and that it’s thoroughly chilled before whipping. Chilling your bowl and beaters can also help whip cream more effectively.
If you’ve over-whipped your cream and it starts to look grainy, try gently folding in a few tablespoons of unwhipped cream to smooth it out again.
Can I make this recipe ahead of time?
Yes, this mousse is an excellent make-ahead dessert. In fact, it needs at least 1 hour in the fridge to set, but it actually gets better with more chilling time. You can prepare it up to 24 hours in advance without any problem. Just wait to garnish until just before serving to keep toppings fresh and crisp.
Can I freeze this lemon mousse?
Yes, this mousse freezes surprisingly well. Just be sure to store it in airtight containers and thaw it slowly in the fridge when you’re ready to serve. The texture may be slightly denser after freezing, but the flavor remains bright and delicious.
How long does it last in the fridge?
The mousse will stay fresh for up to 3 days in the refrigerator, as long as it’s stored in an airtight container. After that, it may start to lose its airy texture or develop a slightly weepy consistency as the whipped cream begins to break down.
Can I add other flavors or mix-ins?
Definitely. This recipe is a fantastic base for creative flavor combinations. Here are a few fun ideas:
- Swirl in berry compote for a fruitier variation.
- Add crushed graham crackers between mousse layers for a lemon pie-inspired dessert.
- Mix in vanilla bean paste for a touch of warmth and visual appeal.
Just be careful not to add anything too heavy or watery, as it may weigh down the mousse.
What type of container should I serve it in?
You can serve the mousse in anything from elegant glass cups to simple ramekins or even small mason jars. Clear containers are especially pretty, allowing the pale yellow color of the mousse to shine through. If you’re hosting a large group, clear disposable cups also work and make cleanup easy.
What’s the difference between lemon mousse and lemon pudding?
While they may look similar, mousse and pudding have very different textures and ingredients. Mousse is light, airy, and whipped, usually with a base of whipped cream or egg whites. Pudding is denser, thickened with starch (like cornstarch) and cooked. Mousse is generally no-cook (as in this recipe), while pudding requires stovetop preparation.
Can I double this recipe?
Yes! This recipe doubles (or even triples) very easily. Just make sure you have a large enough mixing bowl and work in batches if needed when whipping the cream. Also be sure to have enough containers ready for portioning. It’s a great choice for parties or when you need an impressive dessert for a crowd.
Whether you’re a seasoned cook or just getting started, having answers to these common questions can help you feel confident and set you up for success. If you ever feel unsure about a step, just come back to this guide for reassurance and practical tips.
Conclusion & Call to Action
This Easy Lemon Mousse is proof that you don’t need an elaborate list of ingredients or hours in the kitchen to create something truly special. With just four ingredients and a handful of simple steps, you can make a dessert that’s light as air, bursting with citrus flavor, and guaranteed to impress anyone lucky enough to get a spoonful.
What makes this recipe so memorable isn’t just the taste—though the balance of sweet and tart is a winner every time—but also the simplicity. It’s the kind of dessert that invites you to slow down and savor, one spoonful at a time. It fits seamlessly into any occasion, whether you’re hosting an elegant dinner party, surprising your family with a weeknight treat, or simply indulging in a quiet moment for yourself.
If you’re new to making mousse, don’t worry. This is one of the most approachable desserts you can try, and the payoff is huge. There’s no baking, no complicated techniques, and no stress. Just a few ingredients, a little patience while it chills, and a lot of joy once you dig in.
Now that you’ve got the full guide, it’s your turn. Head to the kitchen, grab your lemon curd and heavy cream, and whip up a batch of this delicious lemon mousse. Then come back and tell me how it went! I’d love to hear what you thought, any variations you tried, and what your guests had to say. Did you garnish it with crushed cookies? Add a berry compote? Maybe even sneak in a second serving?
If you enjoyed this recipe, don’t forget to bookmark it or share it with a friend who loves citrus desserts. And if you take photos of your finished dish, I’d absolutely love to see them. Tag me on social media so I can celebrate your mousse-making victory with you.
Let this be the dessert you return to time and time again—when you need something fast, elegant, and delicious. Because at the end of the day, the best recipes are the ones that bring people together, make you smile, and turn everyday moments into something a little more special.
Happy whipping—and enjoy every spoonful!
Print
Lemon Mousse Dessert Recipe – Quick, Fluffy, No Bake Treat
- Total Time: 1 hour 10 minutes (including chill time)
- Yield: 8 servings 1x
- Diet: Vegetarian
Description
This easy lemon mousse is a light, no-bake dessert made with just 4 ingredients. It’s creamy, fluffy, and perfectly tart—ideal for warm-weather treats or elegant gatherings.
Ingredients
-
2 cups (454 g) heavy cream
-
2 tablespoons (14 g) confectioner’s sugar
-
Pinch of salt
-
1 cup (320 g) lemon curd (store-bought or homemade)
-
1 tablespoon (6 g) lemon zest (about 1 large lemon)
Instructions
-
Chill mixing bowl and beaters for 10–15 minutes.
-
In the bowl, whip heavy cream, sugar, and salt until medium peaks form (about 2–3 minutes).
-
Gently fold in lemon curd and lemon zest until fully combined.
-
Divide into 8 dessert glasses (½ cup per serving).
-
Refrigerate at least 1 hour before serving.
-
Garnish with whipped cream, lemon zest, or crumbled wafers as desired.
Notes
-
Use cold cream and chilled tools for best results.
-
Store in the fridge for up to 3 days.
-
Optional garnishes enhance texture and presentation.
-
For a dairy-free version, use whipped coconut cream.
- Prep Time: 10 minutes
- Cook Time: 0 minutes
- Category: Dessert
- Method: No-Bake
- Cuisine: American