
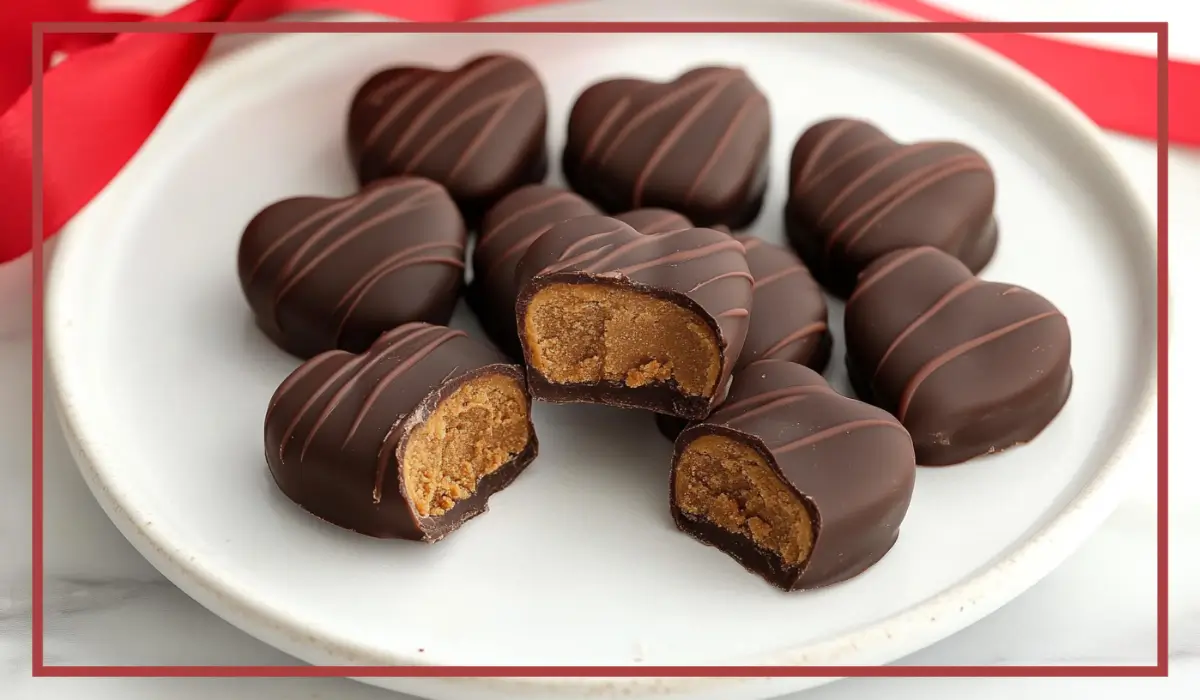
When it comes to homemade desserts, nothing beats the combination of creamy peanut butter and rich chocolate. These Homemade Peanut Butter Hearts are everything you want in a no-bake treat—sweet, indulgent, and incredibly easy to make. Think of them as the perfect homemade version of Reese’s peanut butter cups, but in adorable heart shapes. Whether you’re prepping for Valentine’s Day, surprising a loved one, or simply treating yourself, these peanut butter hearts are bound to win over any crowd.
What makes this recipe extra special is how customizable it is. You can drizzle them with extra chocolate, sprinkle them with crushed nuts, or even top them with a touch of sea salt for that irresistible sweet-and-salty vibe. Plus, because this is a no-bake recipe, you don’t need to worry about turning on the oven—just a little bit of time, a handful of ingredients, and a heart-shaped cookie cutter are all you need to make magic happen.
I remember the first time I made these. It was a snowy February afternoon, and I wanted to create something festive for a Valentine’s Day get-together. These little hearts were a hit, and I’ve been making them ever since. The best part? My kids love helping cut out the hearts, which makes this recipe not only delicious but also a fun activity to share with the family.
Why You’ll Love This Recipe
There are so many reasons why these peanut butter hearts are going to become one of your go-to desserts. First of all, they’re incredibly easy to make. With just a few steps and no oven required, even novice bakers can whip these up without breaking a sweat. The hardest part is waiting for the chocolate to set!
Next, they’re absolutely packed with flavor. The creamy peanut butter filling is rich, smooth, and perfectly sweetened with powdered sugar, while the chocolate coating adds that classic indulgent touch. If you love chocolate and peanut butter together, these will be your new obsession.
Another bonus is how versatile this recipe is. You can adjust the size of the hearts to suit the occasion—tiny ones for party favors, larger ones for individual gifts—or even switch up the toppings to make each batch unique. Plus, they store beautifully, so you can make them ahead of time and still impress your guests.
Finally, these treats are kid-friendly in every sense of the word. They’re fun to make, loved by kids and adults alike, and perfect for sharing. Whether you’re making them for a special event or just as a little pick-me-up, these peanut butter hearts are guaranteed to bring smiles all around.
Preparation Time and Servings
Total Time: 1 hour (including chilling time)
Servings: Makes approximately 15–20 hearts, depending on the size of your cookie cutter.
Nutritional Information (per heart):
Calories: 180
Protein: 4g
Carbohydrates: 16g
Fat: 11g
Ingredients of the Homemade Peanut Butter Hearts
Here’s what you’ll need to make these heavenly peanut butter hearts:
For the Filling:
- 1 cup creamy peanut butter (not natural peanut butter, as it’s too runny)
- ¼ cup unsalted butter, softened
- 1 teaspoon vanilla extract
- 1½ cups powdered sugar
For the Coating:
- 12 oz semi-sweet chocolate chips (or use milk or dark chocolate, depending on your preference)
That’s it! Just five ingredients, all of which you probably already have in your kitchen, and you’re ready to get started.
Step-by-Step Instructions
1. Prepare the Peanut Butter Mixture
Start by combining the peanut butter and softened butter in a microwave-safe bowl. Microwave the mixture for about 1 minute, stirring halfway through, until it’s smooth and well-blended. Then, stir in the vanilla extract for a hint of warmth and flavor.
Next, gradually mix in the powdered sugar. You’ll want to do this in batches to avoid making a mess. As you mix, the peanut butter mixture will start to thicken and take on a dough-like consistency. If it feels too sticky, you can add an extra tablespoon or two of powdered sugar until it’s easy to handle.
2. Shape the Hearts
Lay a sheet of parchment paper on your countertop or a large baking sheet. Transfer the peanut butter mixture onto the parchment and roll it out to about ½ inch thickness. If the dough feels too soft to roll, you can refrigerate it for 10–15 minutes to firm it up slightly.
Once the dough is rolled out, place it in the freezer for about 30 minutes. This step is crucial—it makes the dough firm enough to cut into clean heart shapes without sticking to the cookie cutter.
When the dough is chilled, use a heart-shaped cookie cutter to cut out as many hearts as possible. Re-roll the scraps and repeat the process until all the dough is used up. Place the hearts on a parchment-lined tray and keep them in the refrigerator while you prepare the chocolate.
3. Melt the Chocolate
Place the chocolate chips in a microwave-safe bowl and microwave in 30-second intervals, stirring after each interval, until the chocolate is completely melted and smooth. Be careful not to overheat the chocolate, as it can seize and become grainy.
4. Dip the Hearts
Now comes the fun part—dipping the hearts! Using a fork, carefully lower each heart into the melted chocolate, making sure it’s fully coated. Lift the heart out of the chocolate and gently tap the fork on the edge of the bowl to let the excess chocolate drip off.
Transfer the coated hearts back onto the parchment paper. If you’re feeling fancy, you can drizzle extra melted chocolate over the tops for a decorative touch. You can also add sprinkles, crushed nuts, or a pinch of flaky sea salt at this stage for a bit of flair.
5. Set and Serve
Let the chocolate-covered hearts set at room temperature for about 10 minutes, then transfer them to the refrigerator to fully harden, about 10–15 minutes more. Once the chocolate is firm, your peanut butter hearts are ready to serve!
Store them in an airtight container at room temperature for up to a week, or in the refrigerator if you prefer them chilled.

How to Serve this Homemade Peanut Butter Hearts
There are so many ways to enjoy these peanut butter hearts:
- Gift them in decorative boxes or bags for a thoughtful homemade present.
- Serve them on a dessert platter at parties or gatherings.
- Pair them with a glass of milk for a cozy, indulgent snack.
- Use them to top ice cream for an extra-special sundae.
Tips for Success
- Chill the Dough: Freezing the dough before cutting ensures clean, crisp heart shapes.
- Work Quickly: When dipping the hearts, try to work quickly to prevent them from softening too much in the warm chocolate.
- Choose the Right Chocolate: High-quality chocolate makes a big difference in flavor, so opt for a brand you love.
- Add Decorations Early: If you’re adding toppings like sprinkles or nuts, do so immediately after dipping, before the chocolate hardens.
- Store Properly: Keep the hearts in an airtight container to prevent the chocolate from absorbing any odors from the fridge.
Recipe Variations
These peanut butter hearts are incredibly versatile, so feel free to get creative:
- Gluten-Free: Use certified gluten-free powdered sugar and check that your chocolate chips are gluten-free.
- Vegan Option: Swap out the butter for a plant-based alternative and use dairy-free chocolate chips.
- Extra Crunch: Stir in some crushed pretzels or rice cereal into the peanut butter mixture for added texture.
- Different Shapes: While hearts are perfect for Valentine’s Day, you can use other cookie cutters for different occasions—stars, circles, or even holiday-themed shapes.
Storing and Freezing
If you have leftovers (unlikely, but it could happen!), these peanut butter hearts store beautifully. Keep them in an airtight container at room temperature for up to 5 days, or refrigerate for up to 2 weeks. For longer storage, freeze the hearts in a single layer on a baking sheet until solid, then transfer them to a freezer-safe container. They’ll keep for up to 3 months—just thaw them in the fridge before serving.
Special Equipment
You don’t need much to make these treats, but a few tools will make the process even smoother:
- Heart-Shaped Cookie Cutter: For that classic look.
- Parchment Paper: Prevents sticking and makes cleanup a breeze.
- Microwave-Safe Bowl: Essential for melting the chocolate.
Conclusion
There you have it—a sweet, easy-to-make recipe that’s guaranteed to impress. These Homemade Peanut Butter Hearts are perfect for any occasion, from Valentine’s Day to a simple treat-yourself moment. I hope you give them a try, and when you do, I’d love to hear how they turn out! Feel free to leave a comment or tag me on social media with your creations. Happy cooking!
Print
Homemade Peanut Butter Hearts: A Sweet and Simple Treat
- Total Time: 1 hour
- Yield: 15–20 hearts 1x
- Diet: Vegetarian
Description
These Homemade Peanut Butter Hearts are a delightful no-bake dessert, blending creamy peanut butter with rich chocolate. Perfect for holidays, gifting, or just because, this easy recipe will satisfy your sweet tooth and make any occasion extra special.
Ingredients
- For the Filling:
- 1 cup creamy peanut butter
- ¼ cup unsalted butter
- 1 teaspoon vanilla extract
- 1½ cups powdered sugar
- For the Coating:
- 12 oz semi-sweet chocolate chips
Instructions
- Combine peanut butter and butter in a microwave-safe bowl. Heat for 1 minute and stir until smooth.
- Add vanilla extract and powdered sugar, mixing until the mixture forms a dough-like consistency.
- Roll the dough out to ½ inch thickness and freeze for 30 minutes.
- Use a heart-shaped cookie cutter to cut out hearts. Refrigerate while melting the chocolate.
- Melt chocolate chips in 30-second intervals in the microwave, stirring until smooth.
- Dip each heart into the melted chocolate, ensuring it’s fully coated.
- Let set on parchment paper and refrigerate for 10–15 minutes until the chocolate hardens.
Notes
- If the dough is sticky, add a little extra powdered sugar.
- Sprinkle with nuts or sea salt for added flavor before the chocolate sets.
- Freeze leftovers for up to 3 months.
- Prep Time: 30 minutes
- Cook Time: 30 minutes (chilling)
- Category: Dessert
- Method: No-bake
- Cuisine: American