
Deviled eggs are such a classic, crowd-pleasing appetizer. But have you ever thought about taking them up a notch and turning them into a vibrant, festive treat? That’s exactly what we’re doing with this Festive Colored Deviled Eggs recipe. This isn’t just your ordinary deviled egg recipe. It’s a show-stopping appetizer that will have everyone talking at your next gathering.
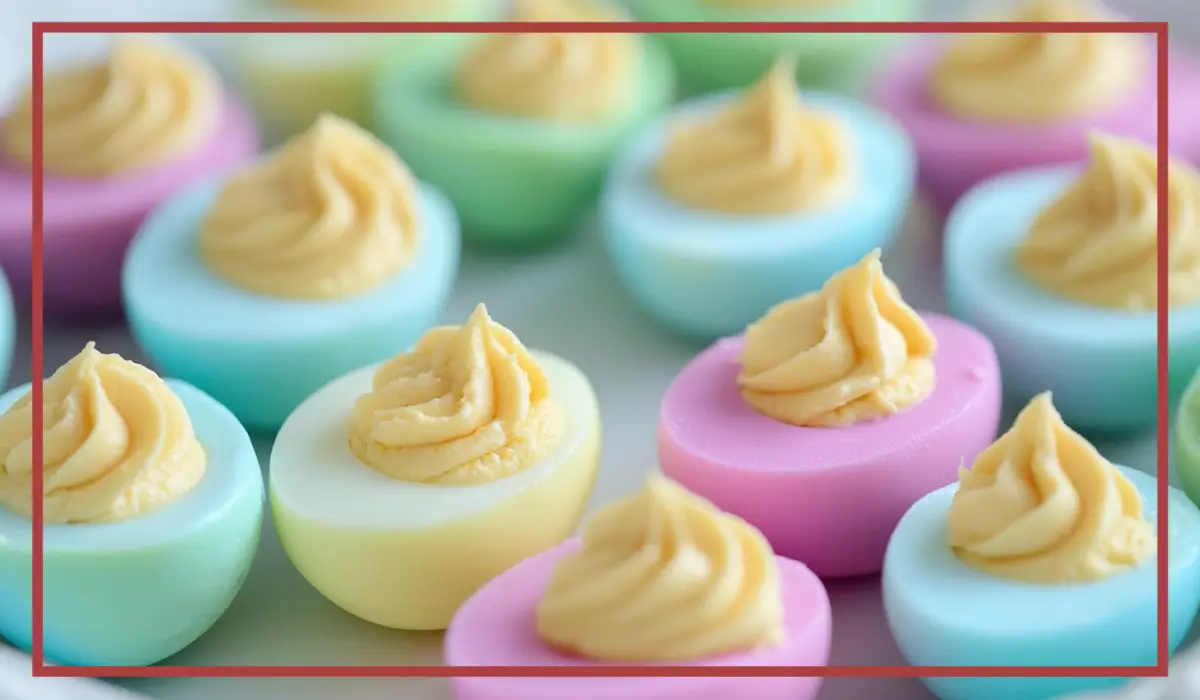
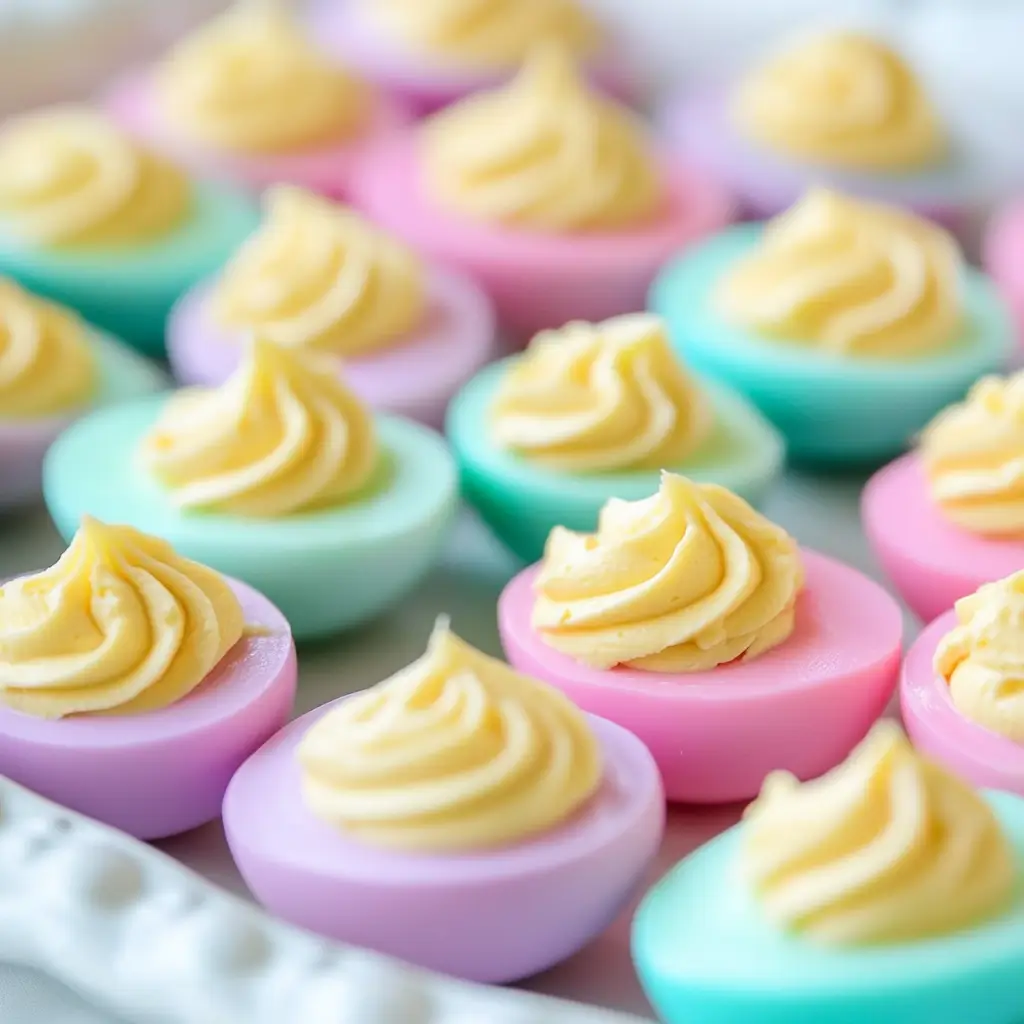
There’s something magical about taking a classic dish and adding a creative twist. And when that twist involves a burst of color, it’s even better. Whether you’re looking for something fun for Easter, Halloween, baby showers, or just a bright addition to your brunch spread, these colored deviled eggs will be a hit. Imagine a tray full of beautifully dyed pastel or bold-colored egg whites, filled with creamy, tangy, and perfectly seasoned yolk filling. It’s eye-catching and delicious—what more could you ask for?
I remember the first time I made these for a spring picnic. I was a bit skeptical about how the colors would turn out, but wow, did they steal the show. People couldn’t stop talking about how pretty they looked, and of course, how delicious they tasted. It’s like classic deviled eggs, but with a playful, artistic upgrade. And the best part? They’re incredibly easy to make. No fancy techniques or hard-to-find ingredients, just a little creativity and some simple kitchen staples.
In this detailed guide, we’re going to walk through every step of the process, from boiling the eggs to creating the dreamy filling, and of course, dyeing the egg whites to perfection. Plus, I’ll share plenty of tips and tricks to help you nail this recipe on your first try. So, let’s get those eggs ready and dive right in!
Why You’ll Love This Recipe
There are so many reasons to love these Festive Colored Deviled Eggs, and I’m willing to bet you’ll be hooked from the first bite. Here’s why this recipe deserves a spot at your table:
It’s Visually Stunning
The colorful egg whites are absolutely gorgeous. Whether you choose pastel shades for a spring event or bold, vivid colors for a Halloween party, the results are always impressive. It’s the perfect way to add a splash of color to your appetizer spread.
Easy to Make
This recipe is super straightforward, with no complicated techniques or specialized equipment required. If you can boil eggs and mix a filling, you can make these with ease.
Perfect for Any Occasion
Because you can customize the colors, these deviled eggs can fit any theme or holiday. Easter, Fourth of July, Halloween, Christmas—you name it. They’re always a hit.
Delicious Flavor
It’s not just about the looks. The creamy, tangy filling made with mayonnaise, mustard, pickle juice, and chopped dill pickles is mouthwatering. It’s a classic flavor combo that never disappoints.
Kid-Friendly and Fun
This is a fantastic recipe to make with kids. They love helping out with the dyeing process and seeing how the eggs turn into beautiful, colorful pieces of art.
Customizable
You can tweak the filling to suit your taste preferences or dietary needs. Want a spicy kick? Add some hot sauce or chopped jalapeños. Looking for something a bit sweeter? A dash of relish works wonders.
Inexpensive Ingredients
You likely have most of these ingredients on hand already, making this an affordable and fun recipe to whip up whenever you’re in the mood for something special.
If you’re looking to impress guests with minimal effort, this recipe is the way to go. It’s quick, simple, and absolutely stunning. Now, let’s talk about why these deviled eggs aren’t just pretty but also packed with some surprising health benefits.
Health Benefits
Eggs are not only delicious but also packed with essential nutrients. When you make deviled eggs, you’re essentially taking a nutritious base and adding some flavorful touches. Let’s break down why these colorful deviled eggs can actually be a nutritious addition to your table.
High-Quality Protein
Eggs are an excellent source of high-quality protein, containing all nine essential amino acids. One large egg has about 6 grams of protein, which helps keep you full and satisfied for longer.
Rich in Vitamins and Minerals
Eggs are nutrient-dense, providing a variety of essential vitamins and minerals, including Vitamin D, Vitamin B12, Vitamin B6, Selenium, and Iron. Vitamin D is particularly important for bone health and immune function.
Healthy Fats
The mayonnaise used in the filling adds healthy fats to the dish. Opting for avocado or olive oil-based mayonnaise can boost the healthy fat content even more.
Choline for Brain Health
Eggs are one of the best sources of choline, a nutrient that plays a critical role in brain development, memory, and cognitive function. It’s especially important for pregnant women to ensure proper brain development in their babies.
Low in Carbohydrates
Deviled eggs are naturally low in carbs, making them a great option for those following low-carb or keto diets.
Good for Eye Health
The yolk of the egg contains lutein and zeaxanthin, antioxidants known to benefit eye health and reduce the risk of age-related macular degeneration.
Supports Muscle Repair
The protein content in eggs aids in muscle repair and growth, making these deviled eggs a great post-workout snack if you’re looking for something fun yet nutritious.
Customizable for Dietary Needs
By using low-fat mayonnaise or skipping the mayonnaise altogether and replacing it with Greek yogurt, you can lower the calorie and fat content without sacrificing flavor.
Antioxidant Boost
Adding dill pickles not only brings a lovely tangy flavor but also provides antioxidants. Dill itself has been linked to anti-inflammatory and antimicrobial properties.
So, while these deviled eggs are definitely a treat for the eyes and the taste buds, they’re also packed with goodness that your body will appreciate. That’s a win-win in my book.
Preparation Time, Servings, and Nutritional Information
One of the best things about this recipe is how quick and easy it is to prepare. Let’s go over the time breakdown, serving size, and nutritional facts.
Preparation Time
- Boiling and Preparing Eggs: 20 minutes
- Dyeing Egg Whites: 10 minutes (plus additional drying time if needed)
- Making the Filling and Assembling: 20 minutes
- Total Time: Approximately 50 minutes
Servings
This recipe makes 12 deviled eggs (24 halves), which is enough to serve 6 to 8 people as an appetizer. If you’re hosting a larger gathering, feel free to double or triple the recipe as needed.
Nutritional Information (Per Deviled Egg Half)
- Calories: Approximately 70
- Protein: 3 grams
- Fat: 6 grams
- Carbohydrates: Less than 1 gram
- Sodium: 120 mg
- Cholesterol: 95 mg
This nutritional profile will vary slightly depending on the type of mayonnaise used and the amount of salt added. It’s a relatively low-calorie appetizer, making it a guilt-free option to enjoy.
Now that we’ve covered the basics, let’s dive into the ingredients list and get these gorgeous deviled eggs started!
Ingredients List
To make these Festive Colored Deviled Eggs, you’ll need a few simple ingredients for both the filling and the egg dyeing process.
For the Deviled Egg Filling
- 12 Eggs (Hard-boiled and peeled) – The star of the show. Make sure they’re boiled perfectly for the best results.
- 1/2 cup Mayonnaise – Adds that rich, creamy texture we all love. Feel free to use a healthier version like avocado mayo if you prefer.
- 2 teaspoons Pickle Juice – This is the secret ingredient that adds a tangy kick to the filling.
- 2 teaspoons Mustard – A little mustard goes a long way to provide depth of flavor and a hint of sharpness.
- 4 tablespoons Finely Chopped Dill Pickles – Adds texture and a refreshing, briny flavor to the filling.
- Salt and Pepper, to taste – Essential for balancing the flavors. Adjust according to your preference.
For the Egg Dye
- 6 oz Water (per cup for each color) – You’ll need separate cups for each color you want to create.
- 1 teaspoon White Vinegar (per cup) – Helps the food coloring adhere better to the egg whites for a brighter, more vibrant color.
- Food Coloring (Regular or Gel) – Use any colors you like! Pastel shades for Easter, bold hues for Halloween, or even themed colors for special occasions.
Optional Garnishes
- Paprika – For a classic sprinkle on top.
- Chopped Fresh Herbs (like dill or parsley) – Adds a pop of green and freshness.
- Sliced Jalapeños or Pickles – If you want to add some heat or extra crunch.
These ingredients are all easy to find and probably already sitting in your kitchen. The beauty of this recipe is that you can adjust the filling ingredients to suit your taste. Want it creamier? Add more mayonnaise. Prefer it tangier? A little more pickle juice will do the trick.
Now that we’ve got everything ready, let’s dive into the step-by-step cooking instructions and start making these gorgeous deviled eggs!
Step-By-Step Cooking Instructions
Step 1: Prepare the Eggs
- Boil the Eggs:
- Place your 12 eggs in a large saucepan and cover them with cold water.
- Bring the water to a boil over medium-high heat. Once it reaches a rolling boil, turn off the heat, cover the pan with a lid, and let the eggs sit for 12 minutes. This method ensures perfectly cooked eggs every time.
- Cool the Eggs:
- After 12 minutes, carefully drain the hot water and immediately transfer the eggs to a bowl of ice water.
- Let them sit in the ice water for at least 5 minutes. This cooling process makes peeling the eggs much easier.
- Peel the Eggs:
- Gently tap each egg on a hard surface to crack the shell.
- Roll it between your hands to loosen the shell, then carefully peel away the shell.
- Rinse each egg under cold water to remove any small bits of shell that might still be clinging.
Step 2: Dye the Egg Whites
- Cut the Eggs in Half:
- Once the eggs are peeled, slice each egg in half lengthwise using a sharp knife.
- Carefully scoop out the yolks and place them in a medium-sized mixing bowl. Set the egg whites aside on a plate or tray.
- Prepare the Dye Cups:
- For each color, grab a small cup or bowl.
- Add 6 oz of water and 1 teaspoon of white vinegar to each cup.
- Add your desired food coloring (a few drops if using liquid food coloring or a small amount of gel food coloring) and mix well.
- Dye the Egg Whites:
- Gently place the egg whites into the dye cups, making sure they are fully submerged.
- Let them soak for at least 10 minutes or until they reach your desired shade. The longer they soak, the deeper the color will be.
- Carefully remove the egg whites from the dye using a spoon or slotted spoon and place them on paper towels to dry.
- Allow the egg whites to dry completely before proceeding to the next step.
Step 3: Make the Filling
- Mash the Egg Yolks:
- Using a fork or potato masher, mash the egg yolks in the mixing bowl until they are finely crumbled.
- Add the Filling Ingredients:
- To the yolks, add 1/2 cup mayonnaise, 2 teaspoons pickle juice, 2 teaspoons mustard, and 4 tablespoons finely chopped dill pickles.
- Mix everything together until it’s smooth and creamy.
- Season to Taste:
- Add salt and pepper to taste, and give the mixture another good stir.
- If you like your filling extra creamy, feel free to add a bit more mayonnaise. If you prefer more tang, add a touch more pickle juice or mustard.
Step 4: Assemble the Deviled Eggs
- Prepare a Piping Bag:
- Transfer the filling mixture to a zip-top bag.
- Cut off a small corner of the bag to create a makeshift piping bag. This makes filling the egg whites easier and neater.
- Pipe the Filling:
- Carefully pipe the yolk mixture into the dyed egg white halves, filling each one generously.
- Add Garnishes (Optional):
- Sprinkle with paprika for a classic touch.
- Add a sprinkle of chopped fresh herbs like dill or parsley for extra flavor and color.
- For those who like it spicy, top with a slice of jalapeño or extra dill pickles.
Step 5: Chill and Serve
- Refrigerate:
- Place the finished deviled eggs in the refrigerator for at least 30 minutes to allow the flavors to meld together and to keep them chilled until ready to serve.
- Serve:
- Arrange your beautifully colored deviled eggs on a platter and watch them disappear in no time.
And that’s it! You’ve just made a batch of Festive Colored Deviled Eggs that are sure to impress everyone who lays eyes on them. But we’re not done yet. Let’s talk about how to serve these beauties to really make them shine.
How to Serve
Serving these Festive Colored Deviled Eggs is all about presentation. After all, you’ve gone through the effort of making them look beautiful, so let’s show them off the right way.
Serving Suggestions
- Platter Presentation:
- Arrange the dyed and filled deviled eggs on a large serving platter.
- To make the colors pop, try using a plain white platter or a wooden serving board.
- Garnish for Extra Appeal:
- Sprinkle a light dusting of paprika over each egg for that classic touch.
- Add some fresh herbs like dill or parsley for a vibrant green contrast against the colored eggs.
- Want to impress even more? Add thinly sliced radishes, cherry tomatoes, or microgreens for a touch of elegance.
- Themed Arrangements:
- For Easter, arrange pastel-colored eggs in a circular pattern with a small vase of flowers in the center.
- For Halloween, use deep, bold colors like purple, black, and orange, and place the eggs on a dark-colored tray.
- For a baby shower, opt for soft pinks and blues, especially if it’s a gender-reveal theme.
- Serving Temperature:
- Always serve deviled eggs chilled. They’re at their best when slightly cold, allowing the creamy filling to maintain its smooth texture.
- Buffet-Friendly Option:
- If you’re serving these at a large gathering, consider placing them on a chilled serving tray or over a layer of crushed ice to keep them cool throughout the event.
These serving ideas will make your deviled eggs stand out even more and have everyone reaching for seconds. Now, let’s talk about what pairs well with these colorful appetizers.
Pairing Suggestions
Your Festive Colored Deviled Eggs are already bursting with flavor, but pairing them with complementary dishes can elevate your appetizer spread even more. Here’s what works best:
Side Dishes
- Fresh Veggie Platter:
- Serve alongside fresh, crunchy veggies like carrots, celery, bell peppers, and cucumbers. Their natural crispness and lightness pair perfectly with the creamy richness of the deviled eggs.
- Simple Arugula Salad:
- A peppery arugula salad with a lemon vinaigrette can cut through the richness of the filling and provide a refreshing contrast.
- Roasted Vegetables:
- If you’re serving these deviled eggs as part of a brunch or lunch spread, roasted asparagus, broccoli, or Brussels sprouts make excellent companions.
Bread and Crackers
- Toasted Bread Slices:
- Serve with slices of crusty baguette or buttery crostini for guests to enjoy a bite of egg with a crunchy element.
- Crackers:
- A selection of buttery or whole-grain crackers can be a great addition, especially if you’re serving these eggs as finger food.
Drinks to Pair
- Sparkling Water or Lemonade:
- The light, refreshing nature of sparkling water or lemonade complements the creamy, tangy filling of the eggs without overwhelming the palate.
- Iced Tea:
- Whether sweetened or unsweetened, iced tea provides a cooling, soothing counterbalance to the richness of the eggs.
- Fruit-Infused Water:
- Keep things fresh and hydrating with a pitcher of water infused with mint, lemon, or berries.
These pairing ideas will enhance the experience and leave everyone talking about how incredible those deviled eggs tasted. But what if you have leftovers? Let’s make sure you know how to store, freeze, and reheat them properly.
Storage, Freezing & Reheating Instructions
Proper storage is essential to ensure your Festive Colored Deviled Eggs stay fresh and delicious. Here’s how to do it right:
Storing Deviled Eggs in the Refrigerator
- Storage Method:
- Place the finished deviled eggs in an airtight container.
- For best results, use a container with a flat bottom so the eggs can sit without being squished. You can also use a deviled egg tray with a fitted lid if you have one.
- Refrigeration Time:
- Store deviled eggs in the refrigerator for up to 3 days.
- After that, the quality and texture will start to deteriorate, especially the filling.
- Important Note:
- Never leave deviled eggs at room temperature for more than 2 hours. If you’re serving them at an outdoor event or buffet, consider placing the platter over a bowl of ice to keep them cool.
Freezing Deviled Eggs
Technically, you can freeze deviled eggs, but it’s not recommended because the texture can change dramatically. However, if you must freeze them, here’s how:
- Freezing Only the Filling:
- If you plan to freeze, remove the yolk mixture and place it in a freezer-safe container.
- Store for up to 1 month.
- Thaw in the refrigerator and stir well before using.
- Why Not Freeze the Egg Whites?
- Egg whites tend to become rubbery and watery after being frozen and thawed.
- It’s best to make fresh boiled eggs and simply reuse your pre-frozen filling if needed.
Reheating Deviled Eggs
Deviled eggs are meant to be served cold, so you don’t need to reheat them. However, if you’re making the filling ahead of time:
- Thawing and Assembling:
- If you’ve frozen the filling, let it thaw in the refrigerator overnight.
- Once thawed, stir it well before piping it into fresh egg whites.
Proper storage and handling are key to keeping these deviled eggs tasting amazing even if you need to prepare them ahead of time. But before you jump into making them, let’s go over some common mistakes people often make and how to avoid them.
Common Mistakes to Avoid
Even though these Festive Colored Deviled Eggs are easy to make, there are some common mistakes that can affect the final result. Here’s how to avoid them:
1. Overcooking the Eggs
Overcooked eggs will result in a dry, crumbly yolk with a greenish-gray ring around it. Not only does this affect the appearance, but it also alters the taste and texture.
How to Avoid: Follow the boiling method provided above: boil, cover, and let sit for 12 minutes before transferring to an ice bath. This method ensures perfectly cooked eggs every time.
2. Not Cooling the Eggs Properly
Skipping the ice bath or not cooling the eggs thoroughly can make peeling a nightmare. You’ll end up with ugly, broken egg whites, which won’t dye evenly.
How to Avoid: Immediately transfer the boiled eggs to an ice water bath and let them sit for at least 5 minutes before peeling.
3. Using Watery Mayonnaise or Overly Watery Ingredients
If your mayonnaise or pickle juice has too much water content, it can make your filling runny and difficult to pipe.
How to Avoid: Use high-quality mayonnaise and be careful when adding pickle juice—start with less and add more as needed to achieve your desired consistency.
4. Not Drying Egg Whites Before Dyeing
If the egg whites are still wet when you place them in the dye, the color may not adhere properly or might turn out blotchy.
How to Avoid: Pat the egg whites dry with paper towels before submerging them in the dye.
5. Adding Too Much Food Coloring
Too much food coloring can result in overpowering or unpleasant shades. It can also leave a slight aftertaste.
How to Avoid: Start with a few drops and gradually add more if needed. Gel food coloring is more concentrated, so a little goes a long way.
6. Not Seasoning the Filling Properly
The filling is the star of the show. If you don’t season it properly, the flavor will fall flat.
How to Avoid: Taste the filling before piping it into the egg whites. Adjust the salt, pepper, pickle juice, or mustard to your liking.
7. Making the Eggs Too Far Ahead
Deviled eggs are best when served fresh. Preparing them too far in advance can result in a less-than-desirable texture and flavor.
How to Avoid: Assemble the deviled eggs no more than 1 day in advance. Store them in an airtight container in the fridge.
By avoiding these mistakes, you’ll end up with perfectly cooked, beautifully dyed, and incredibly delicious deviled eggs every single time.
Pro Tips
Now that you know what to avoid, here are some pro tips to help you make your Festive Colored Deviled Eggs even better:
1. Use Older Eggs for Easy Peeling
If you have the choice, use eggs that are a few days old. Fresh eggs are notoriously hard to peel, while slightly older eggs peel much more easily.
2. Invest in a Piping Bag
While a zip-top bag works just fine, using an actual piping bag with a decorative tip will give your deviled eggs a more polished, professional look.
3. Adjust Color Intensity with Time
If you want deeper, more vibrant colors, leave the egg whites in the dye for a longer period. For pastel shades, a shorter soak will do the trick.
4. Experiment with Fillings
Want to switch things up? Try adding avocado for a creamy, healthy twist. Or, for a spicy kick, add a dash of hot sauce, chopped jalapeños, or smoked paprika.
5. Keep the Yolks Creamy
For an extra creamy filling, you can use a hand mixer instead of a fork when mashing the yolks. This will result in a smoother texture.
6. Prevent Fillings From Drying Out
If you’re preparing the filling in advance, cover it with plastic wrap pressed directly against the surface. This will prevent it from drying out and forming an unappetizing crust.
7. Make a Test Batch
If you’re making these deviled eggs for a special occasion, consider doing a small test batch to perfect your colors and flavors. This will save you from any unexpected mishaps on the big day.
8. Try Natural Dyes
If you prefer to avoid artificial food coloring, you can try natural alternatives like beet juice (pink), turmeric (yellow), spinach juice (green), or red cabbage (blue-purple).
These tips will help ensure your deviled eggs not only look amazing but taste incredible too. Now, let’s tackle some frequently asked questions to clear up any potential concerns before you start making this recipe.
Frequently Asked Questions (FAQs)
Q1: Can I Make These Deviled Eggs Ahead of Time?
Yes! You can prepare the filling up to 2 days in advance. Store it in an airtight container in the refrigerator. Assembling the deviled eggs is best done the day you plan to serve them.
Q2: How Can I Make Them Spicier?
If you love a little heat, try adding a pinch of cayenne pepper, some finely chopped jalapeños, or a few dashes of hot sauce to the filling mixture.
Q3: Can I Use Gel Food Coloring Instead of Liquid Food Coloring?
Absolutely! Gel food coloring works even better since it provides more intense and vibrant colors with just a small amount.
Q4: What If My Filling Is Too Runny?
If the filling turns out too runny, try adding more egg yolk or a bit more mayonnaise to thicken it. Also, make sure to measure the pickle juice carefully.
Q5: Can I Use Greek Yogurt Instead of Mayonnaise?
Yes, you can! Greek yogurt makes a great healthier alternative. It will give the filling a slightly tangy flavor and a smooth, creamy texture.
Q6: How Do I Prevent the Egg Whites from Tearing While Peeling?
Make sure the eggs are fully cooled in an ice bath before peeling. Rolling the egg gently on a hard surface to crack the shell evenly can also help.
Q7: How Long Can Deviled Eggs Sit Out at Room Temperature?
Deviled eggs should not sit out for more than 2 hours. If serving outdoors or at a buffet, place the tray over ice to keep them cool.
Q8: Can I Freeze the Assembled Deviled Eggs?
It’s not recommended to freeze the assembled eggs. However, you can freeze the filling separately and thaw it when needed.
Q9: How Can I Make This Recipe More Colorful?
Feel free to use as many different colors of food dye as you like! You can even use two-toned dyeing techniques by partially submerging the egg whites in one color and then flipping them over to dye the other side in a different color.
Q10: What Can I Do With Leftover Filling?
Use it as a spread on toast, crackers, or even as a filling for sandwiches. It’s creamy, flavorful, and too good to waste.
With these FAQs answered, you’re fully equipped to make the most beautiful and delicious Festive Colored Deviled Eggs ever.
Conclusion & Call to Action
Making these Festive Colored Deviled Eggs is more than just preparing a delicious appetizer; it’s about creating something fun, eye-catching, and incredibly satisfying to eat. Whether you’re serving them at a holiday brunch, a birthday party, a family picnic, or just because you feel like making something special, these deviled eggs are sure to leave a lasting impression.
The beauty of this recipe lies in its simplicity. You don’t need any special culinary skills or expensive ingredients. Just some good old hard-boiled eggs, a bit of creativity, and a dash of enthusiasm. From the creamy, tangy filling to the vibrant, beautifully dyed egg whites, every bite is pure joy. And the best part? They’re fully customizable to suit any occasion or flavor preference.
By now, you’ve got all the tips, tricks, and pro advice you need to make this recipe a success. Whether you’re experimenting with bold, rich colors for Halloween or opting for soft pastels for Easter, these deviled eggs will turn out beautifully every single time.
So, what are you waiting for? Head to the kitchen, grab those eggs, and get creative! And once you’ve made them, I’d love to see your colorful creations. Feel free to leave a comment below sharing how your deviled eggs turned out. Better yet, snap a photo and tag me on social media—I love seeing your delicious masterpieces!
And if you have any questions or run into any issues along the way, drop a comment, and I’ll be more than happy to help you out.
Happy cooking, and enjoy every delicious, colorful bite of your Festive Colored Deviled Eggs!
Print
Festive Colored Deviled Eggs Recipe – Vibrant & Easy Appetizer
- Total Time: 50 minutes
- Yield: 12 Deviled Eggs (24 halves) 1x
- Diet: Vegetarian
Description
These Festive Colored Deviled Eggs are a fun and vibrant twist on the classic appetizer. Perfect for Easter, Halloween, baby showers, and themed parties, they combine creamy, tangy, and rich flavors with a colorful presentation that’s sure to impress everyone at the table.
Ingredients
For the Deviled Egg Filling:
-
12 Eggs (hard-boiled and peeled)
-
1/2 cup Mayonnaise
-
2 tsp Pickle Juice
-
2 tsp Mustard
-
4 tbsp Finely Chopped Dill Pickles
-
Salt and Pepper, to taste
For the Egg Dye:
-
6 oz Water (per cup for each color)
-
1 tsp White Vinegar (per cup)
-
Food Coloring (regular or gel)
Instructions
-
Prepare the Eggs:
-
Boil eggs, cool them in an ice bath, peel, and cut in half lengthwise. Remove yolks.
-
-
Make the Filling:
-
Mix yolks with mayonnaise, pickle juice, mustard, and chopped pickles. Season with salt and pepper.
-
-
Dye the Egg Whites:
-
Prepare dye cups with water, vinegar, and food coloring.
-
Soak egg whites for at least 10 minutes, then dry completely.
-
-
Assemble:
-
Pipe the filling into the dyed egg whites.
-
-
Chill & Serve:
-
Refrigerate for at least 30 minutes before serving.
-
Notes
-
Use gel food coloring for more vibrant colors.
-
Store in the fridge for up to 3 days.
-
Customize filling with hot sauce, avocado, or smoked paprika for added flavor.
- Prep Time: 30 minutes
- Cook Time: 20 minutes
- Category: Appetizer
- Method: Boiling, Mixing, Dyeing
- Cuisine: American