

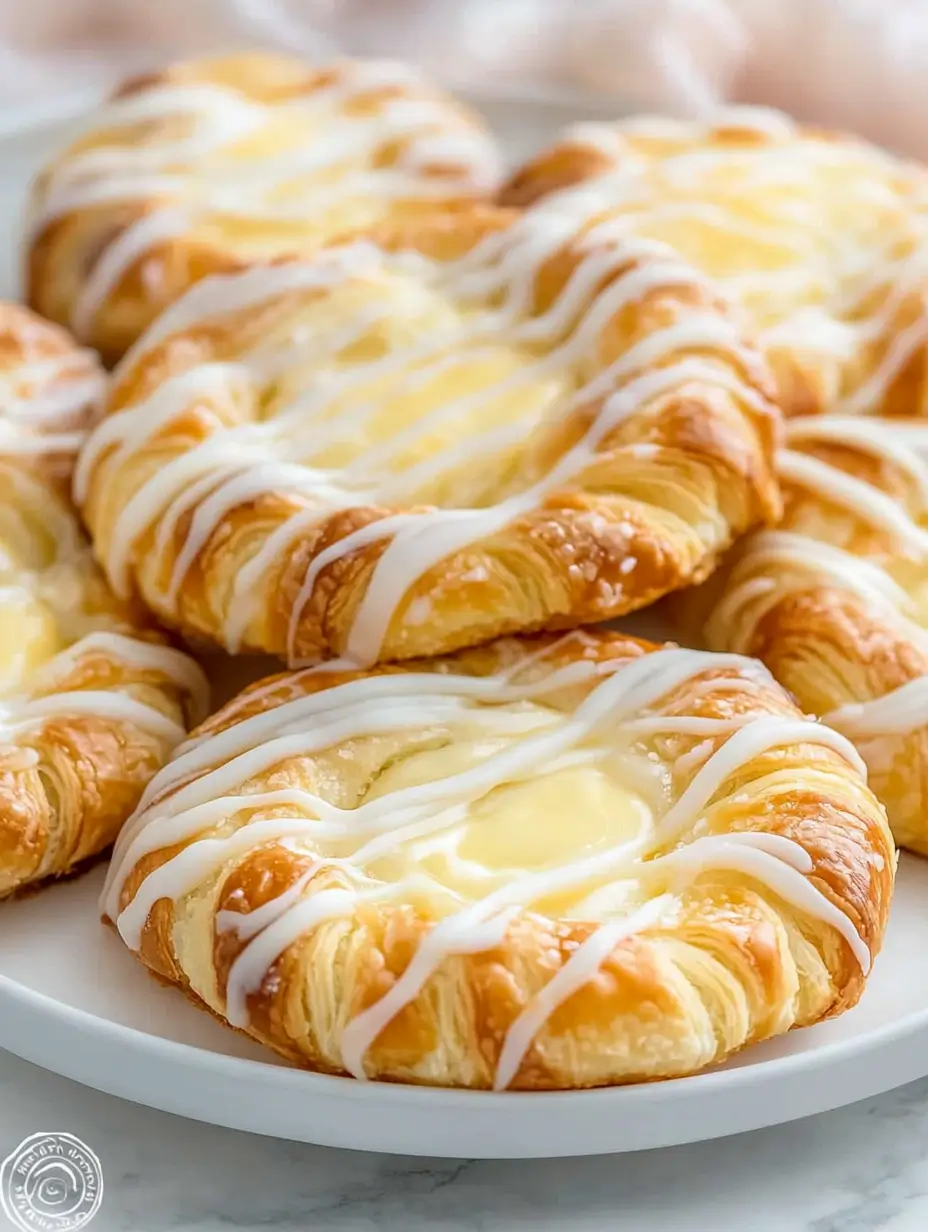
There is something undeniably comforting about biting into a warm, freshly baked cheese Danish. The crisp, buttery layers of puff pastry paired with the sweet, creamy filling create the perfect balance of textures and flavors. Whether you have enjoyed these pastries from a bakery or store-bought versions, nothing compares to the taste of a homemade cheese Danish, fresh out of the oven.
This recipe is not only delicious but also incredibly easy to make. With the help of store-bought puff pastry, you can achieve bakery-quality results without the hassle of making dough from scratch. The cream cheese filling is rich, smooth, and slightly tangy, perfectly complementing the delicate flakiness of the pastry. To make it even better, a light drizzle of sweet glaze ties everything together beautifully.
The first time I made these Danishes at home, it was a chilly Sunday morning, and I was craving something warm and comforting with my coffee. I had some puff pastry in the freezer and cream cheese in the fridge, so I decided to experiment. From the moment they started baking, my kitchen was filled with the most amazing aroma—sweet, buttery, and absolutely irresistible. When they came out of the oven, golden and puffed, I knew I had found my new favorite breakfast treat. The first bite was everything I had hoped for: crispy on the outside, creamy on the inside, and just the right amount of sweetness. Since then, I have made them countless times, experimenting with different flavors and toppings.
If you love pastries but want an easy, foolproof recipe that delivers impressive results, this cheese Danish recipe is for you. Whether you are making them for a special breakfast, a weekend brunch, or simply treating yourself, these pastries will quickly become a favorite. Let’s dive into why you are going to love them.
Why You’ll Love This Recipe
There are so many reasons to love this homemade cheese Danish recipe, but here are the top ones:
- Quick and easy: Thanks to store-bought puff pastry, you can have fresh, homemade pastries in under 30 minutes. No complicated dough-making process required.
- Minimal ingredients: You only need a handful of basic ingredients, most of which you likely already have in your kitchen.
- Flaky, buttery perfection: Puff pastry bakes up beautifully golden and crispy, giving you that bakery-style quality without the effort.
- Sweet and creamy filling: The cream cheese filling is rich, smooth, and lightly sweetened, creating the perfect contrast to the crisp, buttery pastry.
- Customizable: You can easily add fruit, jam, nuts, or even a sprinkle of cinnamon to make these Danishes uniquely yours.
- Make-ahead friendly: These pastries can be prepared in advance and baked fresh when needed.
Another reason this recipe stands out is how impressive it looks with very little effort. If you have ever been intimidated by the idea of making homemade pastries, this recipe will change your mind. Even if you are a beginner in the kitchen, you can pull off these cheese Danishes with ease.
Health Benefits
While cheese Danishes are certainly a treat, they do offer some surprising health benefits when enjoyed in moderation:
- Good source of protein and calcium: The cream cheese filling provides a good amount of protein and calcium, which help support strong bones and muscles.
- Quick energy boost: Puff pastry is made from carbohydrates, which provide a fast source of energy, making this a great breakfast option when paired with protein.
- Customizable for a healthier version: You can use reduced-fat cream cheese and less sugar to make a lighter version of this recipe. Adding fresh fruit like berries or apples also increases the fiber and vitamin content.
- Homemade is better than store-bought: By making these Danishes at home, you can control the ingredients and avoid unnecessary preservatives and artificial additives.
If you are looking for a healthier alternative, you can also experiment with whole wheat puff pastry or use natural sweeteners like honey or maple syrup instead of refined sugar.
Preparation Time, Servings, and Nutritional Information
- Prep time: 10 minutes
- Cook time: 15-18 minutes
- Total time: 25-30 minutes
- Servings: 4-6 Danishes
Estimated Nutrition Per Serving:
- Calories: 250-300
- Protein: 4g
- Fat: 18g
- Carbohydrates: 22g
- Sugar: 8g
These numbers will vary depending on the exact ingredients and toppings you use.
Ingredients List
For the Pastry:
- 1 sheet puff pastry, thawed
- 1 egg, beaten (for egg wash)
- 1 tablespoon water
For the Cream Cheese Filling:
- 8 ounces cream cheese, softened
- ¼ cup granulated sugar
- 1 teaspoon vanilla extract
- ½ teaspoon lemon zest (optional, but highly recommended)
he Glaze:
- ½ cup powdered sugar
- 1-2 tablespoons milk
Optional Toppings:
- Fresh berries (strawberries, blueberries, raspberries)
- Honey drizzle
- Sliced almonds
- Melted chocolate
Step-By-Step Cooking Instructions
1: Preheat the Oven
Preheat your oven to 375°F (190°C) and line a baking sheet with parchment paper. This will ensure your pastries do not stick and bake evenly.
2: Prepare the Cream Cheese Filling
In a medium mixing bowl, combine the softened cream cheese, granulated sugar, vanilla extract, and lemon zest. Beat with a hand mixer or whisk until smooth and creamy. Set aside.
3: Roll Out the Puff Pastry
Lightly flour your work surface and roll out the puff pastry sheet if needed. Cut it into 4-6 equal squares or circles, depending on your preference.
4: Score the Pastry
Using a sharp knife, lightly score a smaller border inside each pastry square (about ½ inch from the edge). Do not cut all the way through—this will help the edges puff up while keeping the center intact for the filling.
5: Add the Filling
Spoon about 1 tablespoon of the cream cheese mixture into the center of each pastry. Spread it slightly but keep it inside the scored border.
6: Apply the Egg Wash
In a small bowl, whisk together 1 beaten egg and 1 tablespoon of water. Brush this mixture around the edges of each pastry square. This will give the Danishes a golden, shiny finish.
7: Bake to Perfection
Place the pastries on the prepared baking sheet and bake for 15-18 minutes, or until golden brown and puffed.
8: Prepare the Glaze
While the Danishes are baking, mix powdered sugar and milk in a small bowl until smooth. Adjust the consistency by adding more milk if needed.
9: Drizzle the Glaze
Once the pastries are out of the oven and slightly cooled, drizzle the glaze over the top.
10: Add Toppings and Serve
Top with fresh berries, a dusting of powdered sugar, a drizzle of honey, or a sprinkle of nuts. Serve warm and enjoy.
How to Serve this Easy cheese Danish
Homemade cheese Danishes are incredibly versatile and can be served in a variety of ways. Whether you are making them for breakfast, brunch, or an afternoon treat, here are some delicious serving ideas:
- Classic breakfast treat: Enjoy your cheese Danish warm with a cup of freshly brewed coffee or tea. The combination of buttery pastry and creamy filling pairs beautifully with a hot beverage.
- Brunch centerpiece: Serve alongside scrambled eggs, crispy turkey bacon, and fresh fruit for a well-rounded brunch spread. Arrange the Danishes on a large platter and dust them with powdered sugar for an elegant touch.
- With fresh fruit: Add a handful of fresh berries like raspberries, strawberries, or blueberries on the side to balance the sweetness with a refreshing, tart contrast.
- With a drizzle of honey or maple syrup: For extra indulgence, drizzle a little honey or pure maple syrup over the top just before serving. This adds a natural sweetness and enhances the overall flavor.
- With yogurt or whipped cream: If you want to make the Danishes even more decadent, serve them with a dollop of whipped cream or a side of Greek yogurt for a creamy contrast.
- For dessert: These Danishes make an excellent dessert, especially when paired with vanilla ice cream or a drizzle of melted chocolate.
For the best experience, serve them warm and fresh out of the oven. If you need to store them for later, a quick reheat in the oven will bring back the crispy, flaky texture.
Pairing Suggestions of this Easy cheese Danish
Pairing your cheese Danishes with the right drink or side dish can elevate the experience even more. Here are some excellent pairing ideas:
Beverage Pairings
- Coffee: A freshly brewed cup of coffee, whether black or with milk, enhances the buttery richness of the Danish. A latte or cappuccino works particularly well.
- Tea: Try a mild black tea, Earl Grey, or a chai latte for a warm, comforting combination. Herbal teas like chamomile or vanilla rooibos also complement the pastry beautifully.
- Fresh juice: Orange juice or apple cider adds a refreshing contrast to the richness of the Danish.
- Milk: A cold glass of milk pairs wonderfully with the sweet and creamy filling, making it a great choice for kids.
Side Dish Pairings
- Scrambled eggs or omelets: A protein-rich side like eggs balances the sweetness of the Danish and creates a satisfying meal.
- Yogurt with granola: A bowl of Greek yogurt topped with granola and fruit complements the Danish with added texture and nutrition.
- Fruit salad: A fresh fruit salad with berries, mango, and kiwi provides a refreshing contrast to the richness of the pastry.
- Roasted nuts: A small handful of roasted almonds or walnuts on the side adds a crunchy, nutty element that pairs well with the creamy filling.
Whether you are serving these Danishes for breakfast, brunch, or as a dessert, the right pairing can make them even more enjoyable.
Storage, Freezing & Reheating Instructions of this Easy cheese Danish
If you have leftover cheese Danishes (which is rare because they disappear quickly!), proper storage will help maintain their freshness.
Storage
- Store leftover Danishes in an airtight container at room temperature for up to 2 days.
- If you need to keep them fresh longer, place them in the refrigerator for up to 4 days.
- To maintain the best texture, avoid stacking them directly on top of each other.
Freezing
- If you want to make these Danishes ahead of time, they freeze beautifully.
- Allow them to cool completely before placing them in a single layer on a baking sheet.
- Once frozen solid, transfer them to a freezer-safe container or zip-top bag and store for up to 2 months.
- For the best results, freeze them before adding the glaze and add it after reheating.
Reheating
- Oven: Preheat your oven to 350°F (175°C) and bake for 5-7 minutes, or until warm and crispy. This method helps restore the flaky texture.
- Toaster oven: Heat for 3-5 minutes at 350°F for a quick reheat.
- Microwave: If you are short on time, you can microwave them for 15-20 seconds, but the pastry may not be as crispy.
Reheating in the oven is the best method to ensure the Danishes retain their crispy, flaky texture.
Common Mistakes to Avoid in this Easy cheese Danish
Even though this recipe is simple, there are a few common mistakes that can affect the final result. Here’s what to watch out for:
1. Not Thawing the Puff Pastry Properly
Puff pastry needs to be thawed correctly to achieve the best texture. If it is too cold, it will crack when you unfold it. If it is too warm, it will become sticky and difficult to work with. For best results, thaw it in the refrigerator for a few hours or at room temperature for about 30 minutes.
2. Overloading the Filling
It can be tempting to add extra cream cheese filling, but too much can cause the pastry to become soggy or overflow during baking. Stick to about 1 tablespoon per Danish to keep everything balanced.
3. Skipping the Egg Wash
The egg wash gives the Danishes a beautiful golden-brown finish. Without it, the pastry can look dull and pale. Always brush the edges with an egg wash before baking.
4. Overbaking or Underbaking
If the Danishes are underbaked, the pastry will be doughy and not flaky. If they are overbaked, they can become too crispy and dry. Keep an eye on them and bake until they are golden brown and puffed.
5. Not Letting Them Cool Before Adding the Glaze
Adding the glaze while the Danishes are too hot will cause it to melt and run off. Let them cool for a few minutes before drizzling the glaze for the perfect consistency.
By avoiding these common mistakes, you will ensure that your Danishes turn out perfect every time.
Pro Tips for the Best Easy cheese Danish
To make this recipe even better, here are some expert tips:
1. Use High-Quality Puff Pastry
Not all puff pastries are created equal. If possible, use an all-butter puff pastry for the flakiest, most flavorful results.
2. Keep the Pastry Cold
For the best texture, keep your puff pastry cold until you are ready to use it. If it gets too warm while you are working with it, pop it back in the fridge for a few minutes.
3. Use a Sharp Knife to Score the Pastry
Scoring the pastry around the edges helps create a border so the center stays flat while baking. Use a sharp knife and be careful not to cut all the way through.
4. Experiment with Flavors
Try adding cinnamon, nutmeg, or almond extract to the filling for extra flavor. You can also mix in fruit preserves or chocolate chips for a twist.
5. Serve Fresh for the Best Texture
Cheese Danishes are best enjoyed warm and fresh. If making them ahead of time, reheat in the oven to restore their crispness before serving.
Frequently Asked Questions (FAQs)
1. Can I use crescent roll dough instead of puff pastry?
Yes! Crescent roll dough will give you a softer, bread-like Danish instead of a flaky one, but it will still taste delicious.
2. Can I make these Danishes ahead of time?
Yes, you can prepare them the night before and store them in the fridge until ready to bake. Alternatively, you can freeze them and bake fresh when needed.
3. Can I add fruit to the filling?
Absolutely! Try adding blueberries, raspberries, or a spoonful of fruit preserves on top of the cream cheese mixture before baking.
4. How do I prevent my Danishes from becoming soggy?
Avoid overloading with filling, bake at the right temperature, and ensure your oven is fully preheated before baking.
Conclusion & Call to Action
Now that you have everything you need to make these easy, bakery-style cheese Danishes at home, it’s time to give it a try! Whether you are making them for a cozy breakfast, a brunch gathering, or just because, these pastries are sure to impress.
I’d love to hear how your cheese Danishes turned out! Leave a comment below, share your experience, or tag me in your pictures on social media. Happy baking!
Print
Easy Cheese Danish Recipe – Flaky, Buttery, and Bakery-Style
- Total Time: 25-30 minutes
- Yield: 4-6 Danishes 1x
- Diet: Vegetarian
Description
This easy cheese Danish recipe features flaky puff pastry filled with a rich, creamy, lightly sweetened cream cheese filling. Ready in just 30 minutes, it’s perfect for breakfast, brunch, or an indulgent snack. Customize it with fruit, nuts, or a drizzle of glaze for a bakery-style treat at home!
Ingredients
For the Pastry:
- 1 sheet puff pastry, thawed
- 1 egg, beaten (for egg wash)
- 1 tablespoon water
For the Cream Cheese Filling:
- 8 ounces cream cheese, softened
- ¼ cup granulated sugar
- 1 teaspoon vanilla extract
- ½ teaspoon lemon zest (optional)
For the Glaze:
- ½ cup powdered sugar
- 1–2 tablespoons milk
Optional Toppings:
- Fresh berries
- Honey drizzle
- Sliced almonds
- Melted chocolate
Instructions
- Preheat oven to 375°F (190°C) and line a baking sheet with parchment paper.
- Prepare filling: Mix cream cheese, sugar, vanilla, and lemon zest until smooth.
- Roll out puff pastry and cut into 4-6 squares or circles.
- Score a border around each pastry square and spoon the filling into the center.
- Brush edges with egg wash to create a golden finish.
- Bake for 15-18 minutes, or until puffed and golden brown.
- Prepare glaze by whisking powdered sugar and milk.
- Drizzle glaze over cooled Danishes and top with optional fruit or nuts.
- Serve warm and enjoy!
Notes
- Use cold puff pastry for the best flaky texture.
- Let the pastries cool slightly before glazing to prevent the glaze from melting too quickly.
- Add fruit preserves or chocolate chips for extra flavor.
- Prep Time: 10 minutes
- Cook Time: 15-18 minutes
- Category: Breakfast, Brunch, Dessert
- Method: Baking
- Cuisine: European, American