
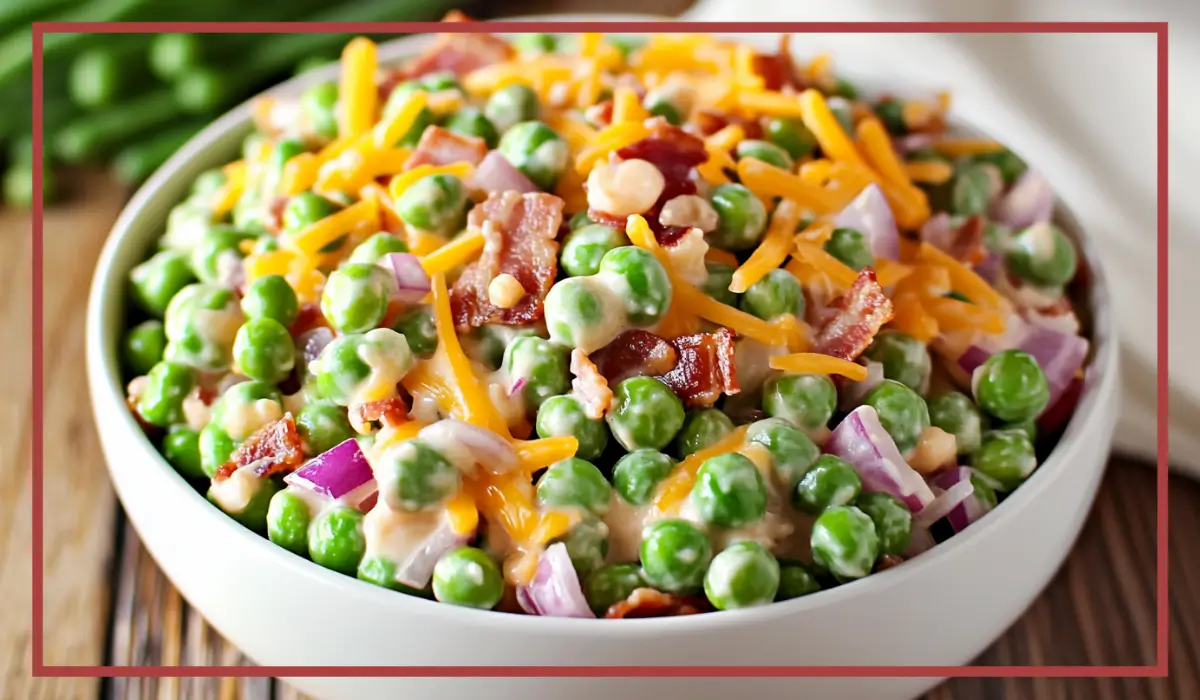
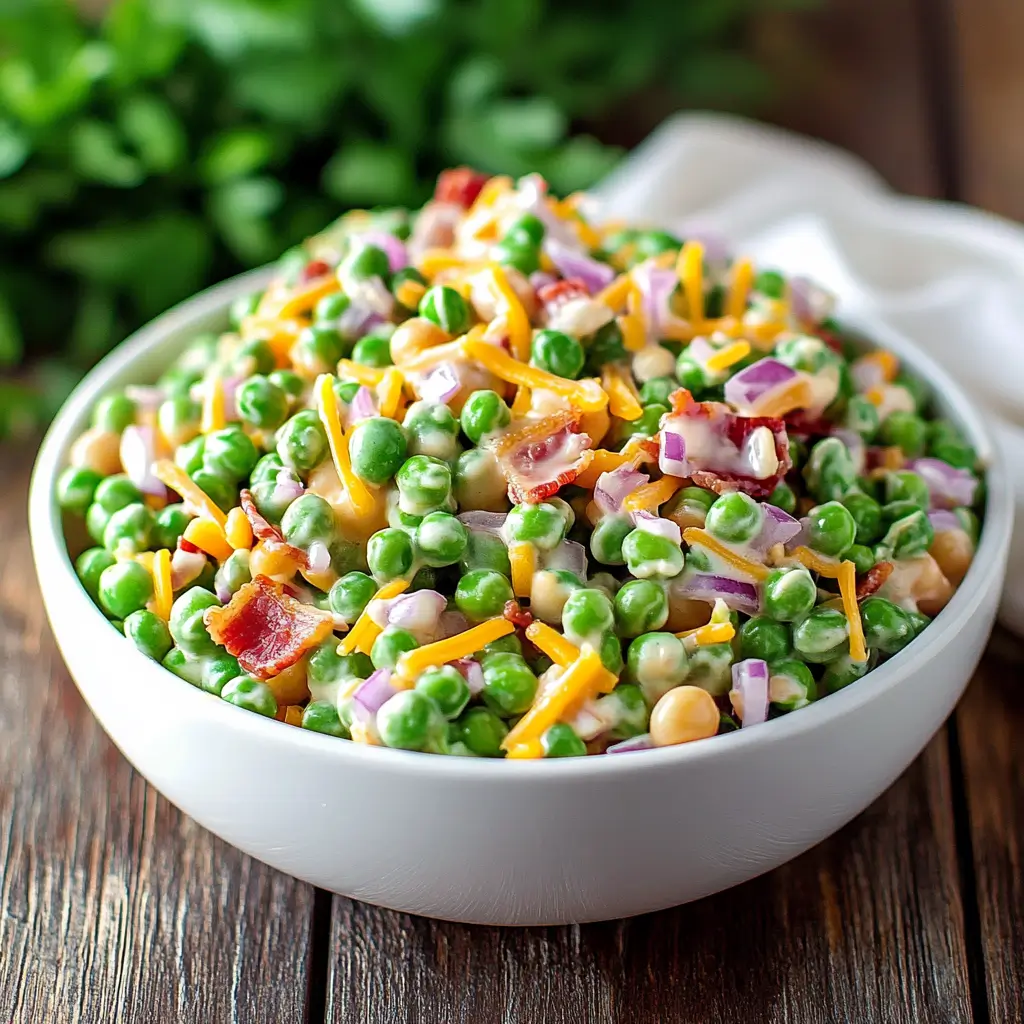
There’s just something so effortlessly nostalgic about a chilled bowl of creamy bacon pea salad. Whether it’s gracing the table at a summer BBQ, passed around at a holiday potluck, or packed into a weekday lunchbox, this humble dish has a way of bringing people together. It’s cool, crunchy, creamy, and loaded with flavor. And when you get that salty, smoky crunch from the bacon alongside the sweet pop of green peas and the richness of cheese—well, that’s comfort food magic.
This particular recipe is a personal favorite because it’s so easy to whip up but still feels like something special. No fancy ingredients or complicated techniques—just a handful of kitchen staples and about 15 minutes of prep. I originally made this salad on a whim during a family cookout when I needed a quick side dish, and it ended up being the most talked-about thing on the table. Everyone asked for the recipe, and since then, it’s become a must-make for almost every gathering.
What’s great about this salad is that it’s more than just a side—it’s a make-ahead marvel that actually gets better as it sits. A few hours (or even overnight) in the fridge allows all the flavors to meld together beautifully, making it the kind of dish you can prep in advance and forget about until serving time.
So, if you’re looking for something simple yet crowd-pleasing, creamy but crisp, and full of classic flavor, this creamy bacon pea salad deserves a permanent spot in your recipe rotation.
Why You’ll Love This Creamy bacon pea salad Recipe
It’s Ridiculously Easy to Make
If you’ve got a bag of frozen peas and a few pantry basics, you’re already halfway there. This recipe doesn’t require any cooking beyond crisping up the bacon, and even that can be done ahead of time. Simply thaw your peas, mix everything together, and chill. That’s it.
Perfect for Make-Ahead Meals and Gatherings
This is one of those magical recipes that actually tastes better the longer it sits. The flavors deepen, the dressing soaks in just enough, and everything comes together in the fridge like a perfect culinary harmony. That makes it ideal for potlucks, meal prep, or any time you want a stress-free side dish ready to go.
Flavor and Texture in Every Bite
Each spoonful delivers a contrast of textures and flavors that’s incredibly satisfying. You’ve got the soft, juicy peas. The crunch of bacon. The slight bite of red onion. The creamy smoothness of the dressing. And the cheese? It adds just the right amount of richness without being overpowering.
A Hit With Everyone
Even picky eaters tend to warm up to this salad. Kids love the sweetness of the peas and creamy dressing, while adults appreciate the savory touches of smoky bacon and sharp red onion. It’s also endlessly customizable, so you can tweak it to fit your taste.
Totally Customizable
You can change up the cheese, swap turkey bacon to make it lighter, add fresh herbs, or throw in some chopped hard-boiled eggs or celery for extra crunch. It’s a very forgiving recipe that invites creativity.
Health Benefits
A Surprising Dose of Nutrition
Despite its creamy nature and indulgent flavor, this salad actually contains several nutritious elements. Let’s start with the peas, which are the star of the show. Green peas are a great source of fiber, protein, and essential vitamins like vitamin K, vitamin C, and several B vitamins. They’re also rich in antioxidants and phytonutrients that support overall wellness.
Peas: A Plant-Based Protein Powerhouse
One cup of peas contains around 8 grams of protein, which makes them an excellent protein source for a side dish. That’s especially valuable if you’re trying to balance your meals with more plant-based options or looking for satisfying vegetarian alternatives (minus the bacon, of course).
Healthy Fats and Flavor from Real Ingredients
Instead of using processed dressings or overly sweet sauces, this salad gets its creaminess from real mayonnaise. When used in moderation, mayo provides healthy fats that help your body absorb the fat-soluble vitamins in the peas and other ingredients. You can also substitute with avocado mayo or Greek yogurt for a lighter twist.
Balanced Indulgence
Yes, there’s bacon and cheese—but in reasonable amounts that contribute bold flavor without overwhelming the dish nutritionally. The cheese brings calcium and a bit of extra protein, while the bacon, used sparingly, provides that craveable crunch and smoky taste.
Encourages Mindful Eating
Because it’s a chilled salad, you’re likely to eat it more slowly, giving your body time to register fullness. It’s also rich and satisfying, which can help reduce the urge to snack afterward. All in all, it’s a side dish that feels indulgent while still offering nutritional value.
Preparation Time, Servings, and Nutritional Information
Preparation Time
- Active Prep Time: 15 minutes
- Chill Time: Minimum 4 hours (overnight preferred for best flavor)
- Total Time: 4 hours and 15 minutes (mostly hands-off)
Servings
- Serves: 6 to 8 people as a side dish
- Serving Size: About ¾ cup per person
Nutritional Information (Per Serving)
- Calories: 280
- Protein: 7g
- Carbohydrates: 14g
- Fat: 22g
- Fiber: 4g
- Sugar: 5g
- Sodium: 480mg
These values can vary slightly depending on the type of mayonnaise and bacon used. For a lighter version, consider using low-fat mayo and turkey bacon.
Ingredients List
Main Ingredients
- 16 oz frozen peas, thawed and well-drained
These sweet little gems are the foundation of the dish. Be sure to thaw them fully and pat them dry to prevent a watery salad. - 6 strips of bacon, cooked and chopped
Opt for beef or turkey bacon if you’re keeping things halal or just want a leaner option. Cook until crispy for the best texture. - ½ cup shredded cheddar cheese
Sharp cheddar gives a bold, tangy contrast to the sweetness of the peas. It also adds depth and richness. - ½ cup shredded mozzarella cheese
For creaminess and a smooth melt-in-your-mouth texture, mozzarella is a perfect complement to the cheddar. - ½ cup red onion, finely diced
The slight sharpness and crunch of red onion adds a pop of flavor and visual color contrast. You can soak the onion in cold water for 10 minutes beforehand to mellow the bite if preferred. - 1 cup real mayonnaise
This brings everything together in a silky, luscious dressing. Use your favorite brand or try an avocado or olive oil–based mayo for a healthier option. - Salt and black pepper, to taste
A few dashes are all you need to bring out the natural flavors. Don’t overdo it—let the bacon and cheese shine.
Step-by-Step Cooking Instructions
Step 1: Prepare the Peas
Start by removing your frozen peas from the freezer and placing them in a colander. Rinse under cold water to speed up the thawing process. Once they’re no longer icy, allow them to sit for about 10–15 minutes to drain thoroughly. Then, pat them dry with paper towels to soak up any excess moisture. This step is crucial—excess water can make your salad soggy.
Step 2: Cook and Chop the Bacon
While the peas are draining, cook your bacon until it’s golden and crispy. You can do this in a skillet over medium heat, or bake it in the oven at 400°F for about 12–15 minutes. Once cooked, transfer the bacon to a paper towel–lined plate to remove excess grease. Let it cool slightly, then chop into small, bite-sized pieces.
Step 3: Dice the Red Onion
Finely dice half a cup of red onion. If you’re not a big fan of the strong onion flavor, you can soak the chopped onion in cold water for 5–10 minutes, then drain it. This mellows the sharpness while still keeping that wonderful crunch and color.
Step 4: Combine All Dry Ingredients
In a large mixing bowl, add the drained peas, chopped bacon, shredded cheddar cheese, shredded mozzarella, and diced red onion. Gently toss everything together so that the ingredients are evenly distributed throughout the bowl.
Step 5: Add the Mayonnaise
Spoon the mayonnaise into the bowl with the other ingredients. Start with ¾ cup and mix gently using a large spoon or spatula. If the salad looks a little dry, add the remaining ¼ cup of mayo. You want everything lightly but thoroughly coated, not drowning in dressing.
Step 6: Season to Taste
Sprinkle in salt and freshly cracked black pepper. Stir and taste. Adjust the seasoning if needed, but remember that the bacon and cheese already bring a good amount of saltiness to the dish.
Step 7: Chill for Best Flavor
Cover the bowl with plastic wrap or a tight-fitting lid and refrigerate the salad for at least 4 hours. This chilling time allows all the flavors to blend and the salad to firm up slightly. For best results, make it the night before serving.
Step 8: Stir and Serve
Right before serving, give the salad a quick stir to redistribute the dressing and ingredients. If it looks a little dry after chilling, you can stir in an extra spoonful of mayo to bring back that creamy texture.
Optional Add-ins
- Chopped hard-boiled eggs
- Diced pickles or relish for tang
- Fresh chopped parsley or dill for an herbal note
- Celery for extra crunch
- Crushed red pepper for a spicy twist
Stay tuned for the rest of the article including:
- How to Serve
- Pairing Suggestions
- Storage, Freezing & Reheating Instructions
- Common Mistakes to Avoid
- Pro Tips
- FAQs
- Conclusion & Call to Action
How to Serve this Creamy bacon pea salad
Make It the Star of Your Table
This creamy bacon pea salad may technically be a side dish, but it often steals the spotlight. It’s one of those dishes that guests always gravitate toward—often going back for seconds or even thirds. Because it’s served cold, it works beautifully for warm-weather events, but it’s also hearty enough to make an appearance at winter holiday tables.
Serve It Chilled, Always
The number one rule? Serve it cold. The creamy texture and crisp bite of the peas and onion are best experienced straight from the fridge. Not only is it refreshing, but it also enhances the flavors, making each spoonful feel vibrant and satisfying.
Suggested Serving Ideas
Here are some of the best ways to enjoy this salad:
- As a BBQ Side Dish: Pair it with grilled chicken, burgers, kebabs, or even halal hot dogs. The creamy texture contrasts beautifully with smoky, charred meats.
- At Potlucks or Picnics: Bring it in a chilled container and serve it alongside other picnic staples like potato salad, hummus, or sandwiches.
- In Lunchboxes or Meal Prep Containers: This salad keeps well in the fridge, making it a great cold side for lunch bowls, wraps, or sandwiches.
- As a Holiday Side Dish: Bright green peas add a lovely color contrast to a holiday spread, and the rich flavors hold up well next to roasted meats and baked dishes.
This salad truly shines in just about any setting. Its versatility is one of the many reasons it’s a must-have recipe in your back pocket.
Pairing Suggestions
Build the Perfect Plate
When it comes to pairing creamy bacon pea salad with other dishes, the options are nearly endless. Thanks to its balanced combination of sweet, salty, creamy, and crunchy, it plays well with both light and hearty main courses. Whether you’re hosting a casual cookout or a festive dinner party, here are some pairing ideas that’ll help you build the perfect meal.
Ideal Main Dishes
- Grilled Chicken or Turkey Breast
The smoky crispiness of the salad’s bacon pairs wonderfully with lightly seasoned grilled poultry. Add some garlic and lemon for brightness, and you’ve got a fresh, balanced combo. - Beef or Turkey Burgers
Serve this salad as a cold contrast to hot-off-the-grill burgers. You can even spoon it onto the bun as a creamy, flavorful topping. - BBQ Chicken Wings or Drumsticks
Sticky-sweet barbecue flavors are nicely offset by the creamy coolness of this salad. The sweetness in the peas echoes that of BBQ sauce, making them natural partners. - Stuffed Bell Peppers or Baked Ziti (Halal)
When you’re serving a heavier dish, this light but creamy side adds just enough richness without being overwhelming.
Side Dish Combinations
- Corn on the Cob
Serve with a little melted butter and lemon zest—simple, summery, and perfect alongside pea salad. - Roasted Potatoes or Wedges
The crispy, warm potatoes complement the chilled salad beautifully, offering contrasting temperatures and textures. - Flatbread or Pita Chips
Scoop up the salad like a dip for a fun and informal serving idea. This works especially well for parties or casual lunches.
Beverage Pairings
- Sparkling Water with Citrus
A simple, refreshing option that complements the salad’s richness. - Lemon Iced Tea or Minty Lime Cooler
These non-alcoholic drinks offer a balance of sweet and tart to cut through the creaminess. - Chilled Mango Lassi or Yogurt Drink
A creamy, slightly tangy drink that pairs surprisingly well with this type of salad, especially in summer.
These pairings ensure your creamy bacon pea salad always has delicious company on the plate.
Storage, Freezing & Reheating Instructions
Short-Term Storage
If you’re making the Creamy bacon pea salad ahead of time or storing leftovers, place the mixture in an airtight container and store it in the refrigerator. It will stay fresh for up to 3–4 days. Always give it a good stir before serving again to re-incorporate the dressing and maintain that creamy consistency.
Freezing Recommendations
Freezing is not recommended for this particular salad. The texture of thawed peas can become mushy, and the mayonnaise-based dressing may separate after freezing, resulting in a watery, unappetizing mixture.
Make-Ahead Tips
For meal prepping or event planning, you can prepare the entire salad up to 24 hours in advance. If you prefer, you can also prep individual components (cook the bacon, thaw and drain the peas, dice the onion) and combine everything closer to serving time.
To save space and keep things fresh, store the bacon separately and mix it in just before serving. This preserves its crispiness and prevents it from going soggy in the dressing.
Reincorporating the Dressing
When serving leftovers, the salad might appear slightly dry. Just add a tablespoon or two of mayonnaise and stir well to revive that fresh, creamy texture.
In summary:
- Refrigerator: Store up to 4 days
- Freezer: Not recommended
- Best served: Chilled, straight from the fridge
- Make ahead: Up to 1 day before serving
Common Mistakes to Avoid
Using Wet or Unthawed Peas
This is the most common pitfall. If you don’t drain and dry your peas thoroughly after thawing, your salad will turn watery, diluting the flavor and ruining the creamy texture.
Overmixing the Salad
It might be tempting to stir and stir, but overmixing can break down the peas and turn the salad into mush. Gently fold the ingredients just until they’re evenly combined.
Adding Hot Bacon
While it’s important that the bacon is freshly cooked, you should let it cool completely before mixing it into the salad. Hot bacon can melt the cheese and mayo, resulting in an oily dressing and a less appetizing texture.
Overseasoning
Bacon and cheese already bring a decent amount of saltiness. Taste before adding extra salt, and always season gradually to avoid going overboard.
Skipping Chill Time
This salad needs time in the fridge. Without it, the flavors won’t meld, and the dressing won’t set properly. For best results, allow at least 4 hours of chilling—or overnight if possible.
Pro Tips
Dry Your Peas Like a Pro
After thawing, don’t just rely on a colander. Lay the peas out on a clean kitchen towel or paper towels and gently pat them dry. This extra step makes a big difference in texture.
Crisp Up That Bacon
For extra crispy bacon, bake it on a wire rack over a baking sheet. This method allows fat to drain while cooking and results in perfectly crisp, evenly cooked strips—ideal for mixing into creamy dishes.
Let the Salad Rest
Even after refrigerating, let the salad rest at room temperature for 10–15 minutes before serving. This softens the dressing slightly and enhances flavor without compromising food safety.
Use Freshly Grated Cheese
Pre-shredded cheese often contains anti-caking agents that can make the salad grainy. Grate your cheddar and mozzarella yourself for the creamiest texture and richest taste.
Customize Your Texture
Like extra crunch? Toss in some sunflower seeds, chopped celery, or even diced bell pepper. Want a smoother bite? Skip the red onion or substitute with green onions for a milder flavor.
These tips help take your salad from good to great—ensuring flavor, texture, and presentation are on point every time.
Frequently Asked Questions (FAQs)
Can I use canned peas instead of frozen?
It’s best to use frozen peas for this recipe. Canned peas are much softer and often lack the fresh, sweet flavor and firm texture that frozen peas provide.
Is there a substitute for mayonnaise?
Yes! You can use plain Greek yogurt or an avocado-based mayo alternative. Both options give a creamy consistency with slightly different flavor profiles. Greek yogurt also adds a bit of tang and extra protein.
Can I make this salad vegetarian?
Absolutely. Just skip the bacon or use a plant-based bacon alternative. You could also add roasted nuts or seeds for extra flavor and crunch.
How long can it sit out at room temperature?
As a mayo-based salad, it should not sit out for more than 2 hours. If serving at an outdoor event, keep it in a cooler or serve it on a tray of ice to maintain a safe temperature.
Can I prep this salad in advance?
Yes, in fact, it’s even better when made ahead. Prepping it the night before allows the flavors to develop beautifully. Just remember to stir before serving.
How do I mellow out the onion flavor?
Soak the diced red onion in cold water for 5–10 minutes, then drain and pat dry. This removes some of the sharp bite while keeping the crunch and color.
Can I use a cheese other than cheddar and mozzarella?
Definitely. Feel free to experiment with shredded gouda, Monterey jack, or even a touch of crumbled feta for a saltier twist.
What’s the best way to transport this salad?
Use a sealed, airtight container, and keep it chilled in an insulated bag or cooler with ice packs. Stir before serving and check the temperature if it’s been in transit for a while.
Is this salad gluten-free?
Yes, this recipe is naturally gluten-free. Just double-check your bacon and mayo labels to ensure no added gluten ingredients are present.
How can I make this spicier?
Add a pinch of crushed red pepper flakes, diced jalapeños, or a splash of hot sauce to give the salad a gentle heat that balances out the sweetness of the peas.
Conclusion & Call to Action
Creamy bacon pea salad is the kind of dish that sneaks up on you—in the best way. It’s not flashy or trendy, but once you try it, you understand why it’s stood the test of time. It’s dependable, flavorful, and downright comforting. Plus, it’s just so easy to make, and it always gets people talking.
Whether you’re making it for a potluck, preparing it as part of a weeknight dinner, or just looking to revive a classic from your childhood, this recipe delivers. It’s rich but refreshing, simple but satisfying, and flexible enough to make your own.
I hope this recipe finds its way into your regular rotation just like it did in mine. It’s the kind of no-fuss, full-flavor dish that feels like a warm hug from your favorite aunt. So go ahead—grab those peas from the freezer, crisp up some bacon, and mix up a big bowl of creamy goodness.
And when you do? I’d love to see how it turns out. Snap a photo and tag me on social media, or leave a comment letting me know your favorite variation. Your twist might just become my new go-to version.
Until next time—happy cooking, and enjoy every creamy, crunchy bite.
Print
Creamy Bacon Pea Salad Recipe: The Best Make-Ahead Side Dish
- Total Time: 25 minutes + chill time
- Yield: 6-8 servings 1x
- Diet: Halal
Description
A cold, creamy, and crunchy classic side dish made with sweet peas, crispy bacon, shredded cheese, and tangy mayo dressing. Easy to make and perfect for BBQs, picnics, and potlucks.
Ingredients
-
16 oz frozen peas, thawed and drained
-
6 strips bacon (beef or turkey), cooked and chopped
-
½ cup shredded cheddar cheese
-
½ cup shredded mozzarella cheese
-
½ cup red onion, diced
-
1 cup real mayonnaise
-
Salt and black pepper, to taste
Instructions
-
Thaw peas and pat dry.
-
Cook bacon until crispy; let cool and chop.
-
In a large bowl, combine peas, bacon, cheeses, and onion.
-
Add mayonnaise and mix gently until coated.
-
Season with salt and pepper to taste.
-
Chill for at least 4 hours or overnight.
-
Stir before serving.
Notes
-
For a lighter version, substitute mayo with Greek yogurt or avocado mayo.
-
Add sunflower seeds, celery, or hard-boiled eggs for extra texture.
-
Store in fridge up to 4 days. Do not freeze.
- Prep Time: 15 minutes
- Cook Time: 10 minutes
- Category: Side Dish
- Method: No-cook (except bacon)
- Cuisine: American