
Cookie Thanksgiving Dessert Board is the perfect way to celebrate this festive season with style. By combining a variety of cookie styles, flavors, and textures, you can create an impressive dessert spread that everyone will love. It’s not just about the cookies; it’s about the joy of sharing, sampling, and indulging in delicious treats. This dessert board embodies the spirit of Thanksgiving, where friends and family gather around to appreciate the art of good food.
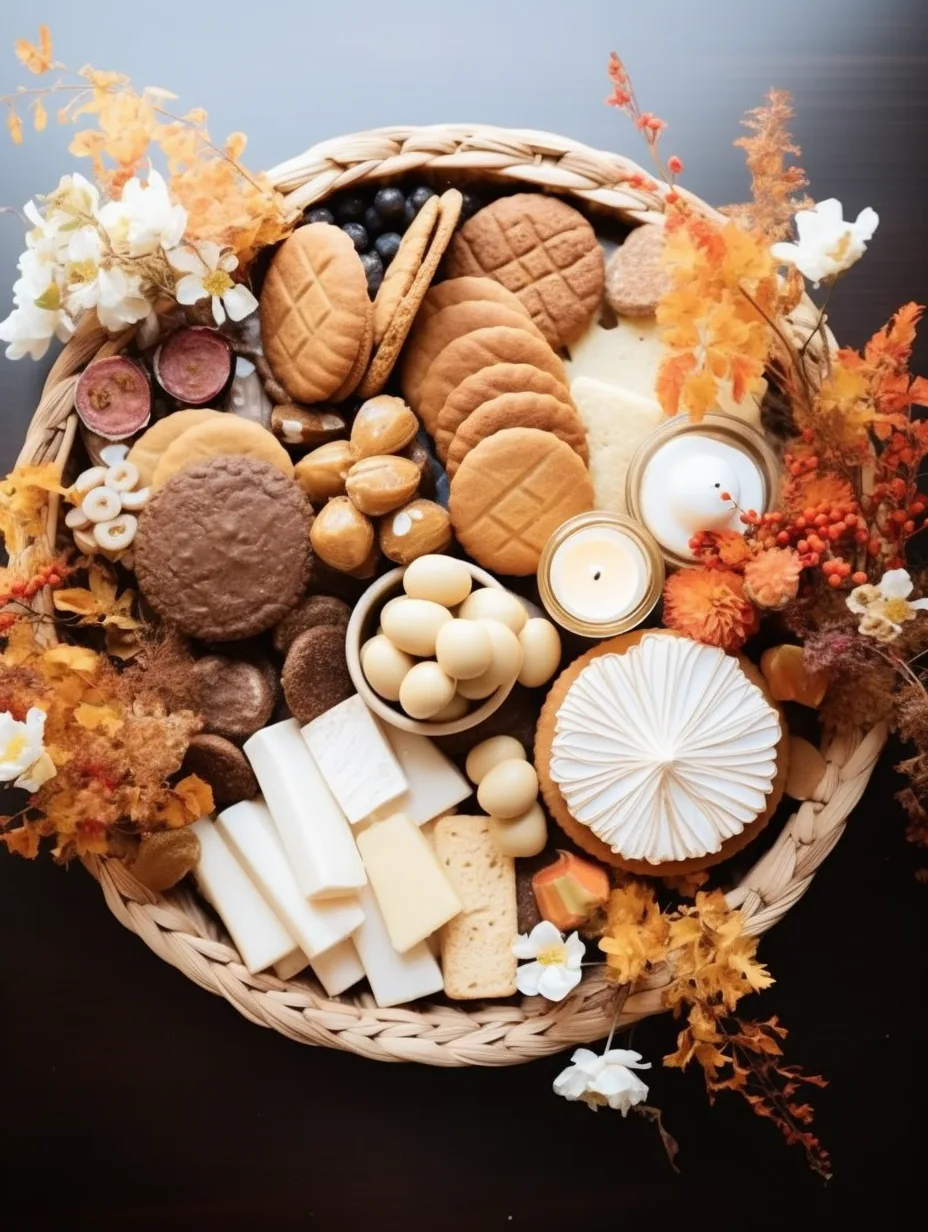
Imagine a lavish display filled with cookies ranging from classic chocolate chip to seasonal flavors like pumpkin spice. Each cookie adds a delightful touch, creating an amazing visual appeal that captures the essence of Thanksgiving. The Cookie Thanksgiving Dessert Board isn’t merely a feast for the palate but also for the eyes. It invites guests to dig in and share memories while slowing down to appreciate the moment.
In this guide, we will explore why this dessert board is a must-have for your Thanksgiving celebration, how to prepare it effectively, and some enticing serving suggestions. With a blend of simple ingredients and straightforward steps, even novice bakers can create this delightful dessert board. Let’s dive into the specifics and discover why a Cookie Thanksgiving Dessert Board will be the highlight of your Thanksgiving gathering!
Why You’ll Love This Recipe
Creating a Cookie Thanksgiving Dessert Board has several compelling reasons. Here are some aspects that make it a delightful addition to your holiday festivities:
1. Versatility: You can customize the board based on your favorite cookie recipes and dietary preferences.
2. Varied Flavors: There’s a cookie for everyone! From classic flavors to creative twists, the choices are endless.
3. Easy to Assemble: The process is simple. Just bake or buy your cookie selections and arrange them beautifully.
4. Visual Appeal: A well-presented dessert board becomes a centerpiece that attracts attention.
5. Interactive Dessert: Guests enjoy the experience of selecting their favorites, creating a fun and festive atmosphere.
6. Leftover Friendliness: Cookies keep well, allowing you to enjoy leftovers long after the celebration has concluded.
With these factors in mind, it’s easy to see that a Cookie Thanksgiving Dessert Board not only satisfies sweet cravings but also enhances the overall holiday experience.
Preparation and Cooking Time
Creating your Cookie Thanksgiving Dessert Board requires some time, but it’s generally uncomplicated. Here’s a breakdown of what to expect in terms of preparation and cooking time:
– Preparation Time: 30-60 minutes (including baking)
– Cooking Time: 20-30 minutes (depending on cookie varieties)
– Cooling Time: 15-20 minutes
Overall, you can expect to spend about 1.5 to 2 hours assembling this delightful board, depending on how many different types of cookies you wish to include.
Ingredients
– 2 cups all-purpose flour
– 1 cup granulated sugar
– 1 cup brown sugar
– 1 cup unsalted butter, softened
– 1 large egg
– 1 teaspoon vanilla extract
– 1 teaspoon baking soda
– ½ teaspoon salt
– 1 cup chocolate chips
– 1 cup chopped nuts (walnuts or pecans)
– 1 cup oatmeal
– 1 cup pumpkin puree (for pumpkin spice cookies)
– 2 teaspoons pumpkin pie spice (if making seasonal cookies)
– Colored sprinkles and edible decorations (optional)
– Assorted fruits (like grapes and apple slices) for garnish
Step-by-Step Instructions
Preparing a Cookie Thanksgiving Dessert Board is straightforward. Follow these steps for a delightful outcome:
1. Preheat Your Oven: Set your oven to 350°F (175°C) to prepare for cookie baking.
2. Combine Dry Ingredients: In a bowl, whisk together the flour, baking soda, and salt.
3. Cream Butter and Sugars: In a separate large bowl, beat the softened butter, granulated sugar, and brown sugar until creamy.
4. Add Egg and Vanilla: Incorporate the egg and vanilla extract into the butter mixture until well blended.
5. Mix Dry Ingredients: Gradually add the dry ingredients into the wet mixture, stirring until just combined.
6. Stir in Mix-ins: Fold in chocolate chips, nuts, and oatmeal as desired, mixing until evenly distributed.
7. Shape Cookies: Use a tablespoon or cookie scoop to drop cookie dough onto ungreased baking sheets, spacing them apart.
8. Bake Cookies: Place the cookies in the preheated oven and bake for about 10-12 minutes or until the edges are lightly golden.
9. Cool Cookies: After baking, allow cookies to cool on the baking sheet for a few minutes before transferring them to wire racks to cool completely.
10. Decorate as Needed: Consider drizzling some cookies with melted chocolate or adding sprinkles for a festive touch.
11. Arrange on Board: Once the cookies are cooled, arrange them artfully on a large wooden board or platter. Use other ingredients like fruits or edible decorations to fill gaps and enhance visual appeal.
12. Add the Finishing Touches: Personalize your dessert board with additional elements—consider adding sliced fruits, chocolates, or themed decorations to amplify the thanksgiving spirit.
These steps will help you create a stunning Cookie Thanksgiving Dessert Board that will impress your guests.
How to Serve
Serving a Cookie Thanksgiving Dessert Board can be as delightful as preparing it. Here are some tips to ensure that your presentation is as impressive as the cookies themselves:
1. Presentation Style: Use a large wooden cutting board or a beautiful platter to arrange your cookies. Consider a tiered stand for added height and dimensionality.
2. Color Coordination: Arrange cookies by color or type for a cohesive visual impact.
3. Accompaniments: Pair with a rich dipping sauce like melted chocolate, caramel, or a flavored icing to elevate the enjoyment.
4. Seasonal Decor: Include pumpkins, autumn leaves, or festive candles as a centerpiece on the board to embrace the Thanksgiving theme.
5. Serving Utensils: Provide small tongs or wooden picks for easy serving, encouraging guests to help themselves and taste a variety of cookies.
6. Informal Approach: Let guests take their time. The Cookie Thanksgiving Dessert Board encourages interaction and conversation.
With these serving suggestions, your Cookie Thanksgiving Dessert Board will not only be a feast for the eyes but also a delightful experience for all your guests!
Additional Tips
– Mix Different Textures: Combine soft cookies with crunchy ones to enhance the variety on your Cookie Thanksgiving Dessert Board.
– Create Miniature Cookies: Consider making smaller versions of each type to allow guests to sample more flavors.
– Consider Allergies: Be aware of your guests’ dietary restrictions and include at least one gluten-free or nut-free option to ensure everyone can enjoy the board.
– Utilize Seasonal Ingredients: Incorporate fall flavors, such as cinnamon or nutmeg, to align your dessert with Thanksgiving vibes.
– Engage with Guests: Encourage conversation by sharing cookie stories or memories as everyone enjoys the board.
Recipe Variation
Feel free to get creative! Here are a few interesting variations to consider:
1. Decorative Cookies: Use royal icing for decorating cookies to match the Thanksgiving theme or add cute designs.
2. Peppermint Cookies: Include peppermint-flavored cookies for a fresh twist that’s particularly delightful if transitioning into the winter holiday season.
3. Savory Cookie Options: Try adding a few savory cookies, like herb-infused shortbread, to balance the sweetness.
4. Gluten-Free Choices: Substitute the all-purpose flour with a gluten-free blend for gluten-sensitive guests.
5. Different Mix-Ins: Swap out chocolate chips and nuts for dried fruits like cranberries or apricots for a festive touch.
Freezing and Storage
– Storage: Keep your cookies in an airtight container at room temperature for up to one week. If you want to maintain the freshest flavors, consider refrigerating them.
– Freezing: Baked cookies can be frozen for up to three months. Ensure they are well-wrapped or placed in airtight containers. Allow them to thaw at room temperature before serving. The dough can also be frozen if you prefer to bake cookies fresh later.
Special Equipment
While you can make this dessert board with basic kitchen tools, a few items can help streamline the process:
– Mixing Bowls: Having multiple bowls allows for efficient mixing of different cookie doughs.
– Baking Sheets: Use several sheets to bake multiple batches of cookies at once.
– Silicone Baking Mats: These can prevent cookies from sticking and aid in easy removal.
– Cookie Scoops: These tools ensure uniform-sized cookies for even baking.
– Decorating Tools: If you’re using icing, have piping bags and tips ready for a professional-looking finish.
Frequently Asked Questions
Can I make the cookies in advance?
Yes, you can bake cookies a few days before your event. Store them in air-tight containers to keep them fresh.
What types of cookies work best for a dessert board?
A mix of cookies with different textures and flavors works best. Popular choices include chocolate chip, oatmeal raisin, sugar cookies, and seasonal flavors like pumpkin spice.
How can I transport the dessert board?
To transport your dessert board, consider assembling it at your destination or keeping cookies in containers and arranging them on-site to prevent them from moving around.
What should I do if my cookies become hard?
If your cookies are a bit hard, you can revive their softness by placing a piece of bread in the container with them. It will help retain moisture.
Can I use store-bought cookies?
Absolutely! If time is limited, store-bought cookies can be creatively arranged on your dessert board along with homemade cookies for variety.
Conclusion
The Cookie Thanksgiving Dessert Board is not only a charming way to celebrate the season, but it’s also a versatile option that caters to a variety of tastes. With a mix of flavors, textures, and festive decorations, this board will be a delightful centerpiece at your Thanksgiving gathering. Remember to personalize it and let your creativity shine through. Your guests will love diving into each homemade or carefully selected cookie, making this a memorable addition to your holiday traditions.
Cookie Thanksgiving Dessert Board: An Amazing Ultimate Guide
- Total Time: 23 minute
Ingredients
– 2 cups all-purpose flour
– 1 cup granulated sugar
– 1 cup brown sugar
– 1 cup unsalted butter, softened
– 1 large egg
– 1 teaspoon vanilla extract
– 1 teaspoon baking soda
– ½ teaspoon salt
– 1 cup chocolate chips
– 1 cup chopped nuts (walnuts or pecans)
– 1 cup oatmeal
– 1 cup pumpkin puree (for pumpkin spice cookies)
– 2 teaspoons pumpkin pie spice (if making seasonal cookies)
– Colored sprinkles and edible decorations (optional)
– Assorted fruits (like grapes and apple slices) for garnish
Instructions
Preparing a Cookie Thanksgiving Dessert Board is straightforward. Follow these steps for a delightful outcome:
1. Preheat Your Oven: Set your oven to 350°F (175°C) to prepare for cookie baking.
2. Combine Dry Ingredients: In a bowl, whisk together the flour, baking soda, and salt.
3. Cream Butter and Sugars: In a separate large bowl, beat the softened butter, granulated sugar, and brown sugar until creamy.
4. Add Egg and Vanilla: Incorporate the egg and vanilla extract into the butter mixture until well blended.
5. Mix Dry Ingredients: Gradually add the dry ingredients into the wet mixture, stirring until just combined.
6. Stir in Mix-ins: Fold in chocolate chips, nuts, and oatmeal as desired, mixing until evenly distributed.
7. Shape Cookies: Use a tablespoon or cookie scoop to drop cookie dough onto ungreased baking sheets, spacing them apart.
8. Bake Cookies: Place the cookies in the preheated oven and bake for about 10-12 minutes or until the edges are lightly golden.
9. Cool Cookies: After baking, allow cookies to cool on the baking sheet for a few minutes before transferring them to wire racks to cool completely.
10. Decorate as Needed: Consider drizzling some cookies with melted chocolate or adding sprinkles for a festive touch.
11. Arrange on Board: Once the cookies are cooled, arrange them artfully on a large wooden board or platter. Use other ingredients like fruits or edible decorations to fill gaps and enhance visual appeal.
12. Add the Finishing Touches: Personalize your dessert board with additional elements—consider adding sliced fruits, chocolates, or themed decorations to amplify the thanksgiving spirit.
These steps will help you create a stunning Cookie Thanksgiving Dessert Board that will impress your guests.
- Prep Time: 15 minutes
- Cook Time: 20-30 minutes
Nutrition
- Serving Size: Serves 8-10
- Calories: Varies by cookie type
- Fat: Varies by cookie type
- Protein: Varies by cookie type