
There’s something downright magical about sliders. They’re fun to eat, easy to share, and somehow always disappear within minutes—especially when they’re oozing with cheese, loaded with crispy chicken, and baked to golden perfection on a bed of soft, sweet Hawaiian rolls. These Cheesy Chicken Parmesan Sliders are the kind of meal that brings people together around the table, whether it’s a game day gathering, a casual family dinner, or a weekend potluck with friends.
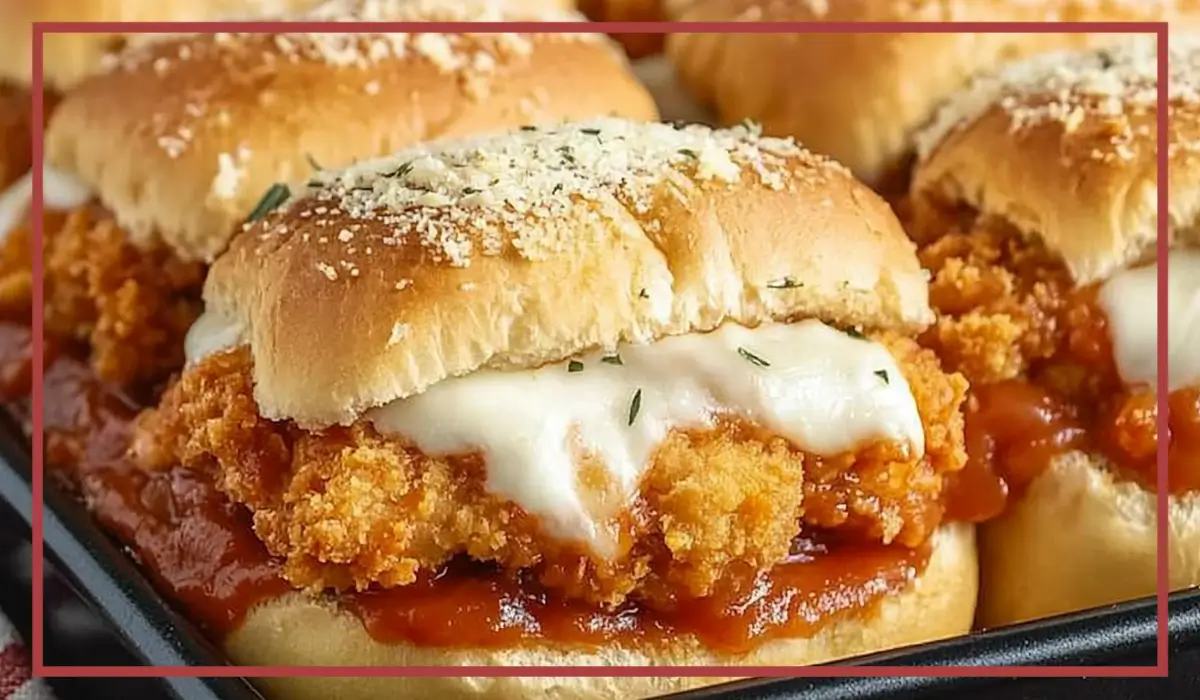
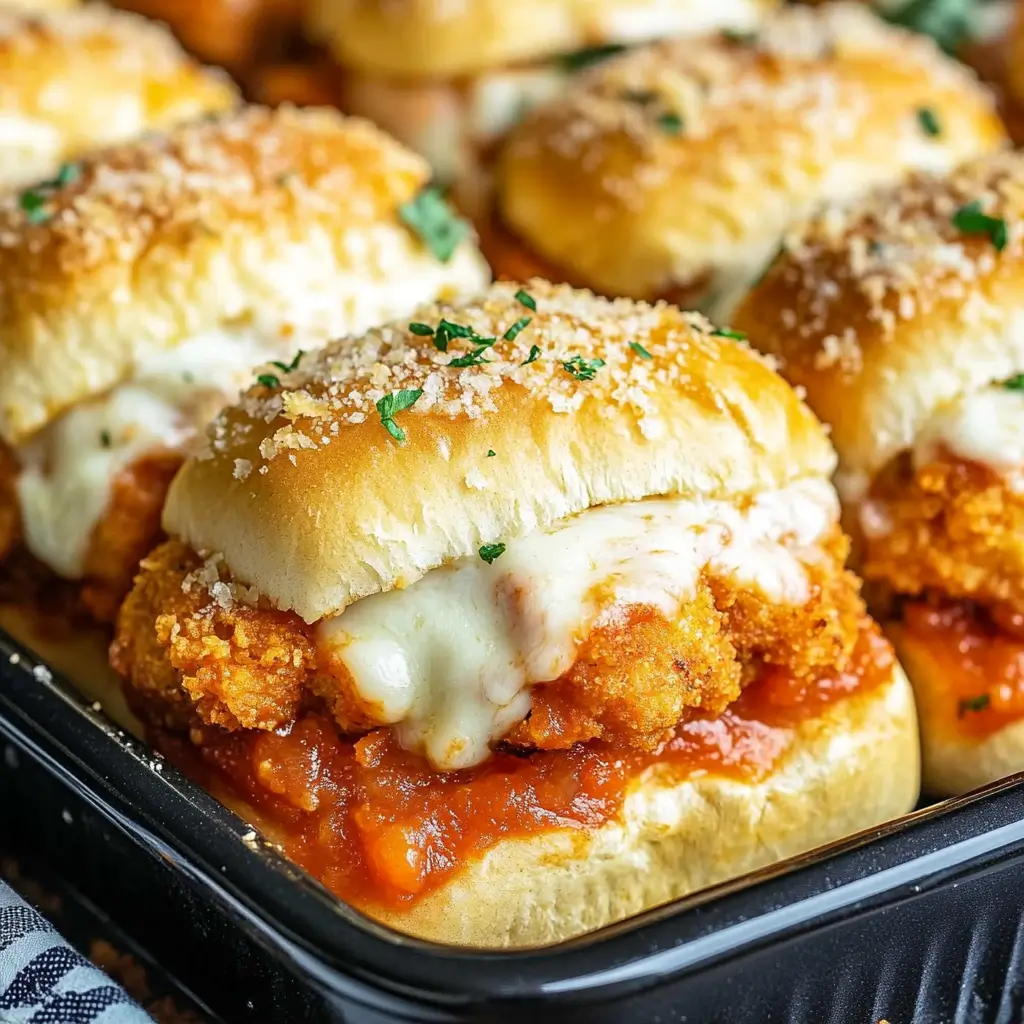
Now, let’s talk about what makes these sliders so irresistible. You start with a base of soft, slightly sweet Hawaiian rolls, which are the perfect size and texture for holding everything together. Then, you add a golden-brown breaded chicken tender—either store-bought for convenience or homemade if you’ve got the time and energy. Next comes a spoonful of rich, garlicky pasta sauce—think marinara or Rao’s if you’re going for bold flavor. And of course, you can’t forget the cheese. A gooey combination of mozzarella and Parmesan melts over everything, creating that dreamy cheese pull with every bite.
To take things one step further, the whole pan gets brushed with a garlicky butter glaze and baked until the tops are toasted and the insides are hot and melty. It’s one of those dishes that feels indulgent but is shockingly easy to throw together—especially when time is tight and your people are hungry.
Personally, this recipe has become one of my go-tos for casual entertaining or even weeknight comfort food. The first time I made it, I wasn’t expecting anything fancy—just something quick and filling. But as soon as those buttery rolls came out of the oven and I saw that bubbling cheese, I knew we had a new family favorite. Now, anytime we need a crowd-pleasing dish that doesn’t require hours in the kitchen, these sliders are at the top of the list.
Why You’ll Love This Cheesy Chicken Sliders Recipe
There are so many reasons why these Chicken Parmesan Sliders deserve a spot in your regular meal rotation. First and foremost, they’re incredibly easy to make. You don’t need to be a gourmet chef or spend hours prepping ingredients to pull this dish off. With just a few basic components and minimal prep, you can have these ready for the oven in under 15 minutes.
Another reason to love them is how family-friendly they are. Whether you’re feeding picky eaters, hungry teens, or friends who just dropped by unexpectedly, these sliders are sure to satisfy. They’re perfectly portioned, super satisfying, and—thanks to the gooey cheese and savory sauce—packed with flavor that everyone enjoys.
And let’s talk about the flavor. These sliders hit all the right notes: crispy chicken, savory marinara, creamy melted cheese, and the slightly sweet, pillowy bread. The garlic butter topping adds a rich, herby finish that takes things over the top. Every bite is warm, cheesy, and just a little bit crunchy on the edges—pure comfort food bliss.
They’re also endlessly versatile. Want to make them spicier? Add a pinch of crushed red pepper flakes. Need a vegetarian version? Use breaded eggplant slices instead of chicken. Hosting a party? Double the batch and keep them warm in the oven—your guests will thank you.
Lastly, cleanup is minimal. Since everything comes together in one baking dish, there aren’t a bunch of pots and pans to scrub afterward. So you get all the joy of a comforting, satisfying meal without the mess.
Health Benefits of these Cheesy Chicken Sliders
While sliders might not seem like the healthiest option at first glance, these Chicken Parmesan Sliders actually strike a nice balance between indulgent and nutritious—especially when you make a few simple adjustments and use quality ingredients.
To begin with, using fully cooked breaded chicken tenders gives you a great source of protein. Chicken breast is lean, packed with essential amino acids, and helps keep you full longer. If you opt for oven-baked tenders instead of fried ones, you cut down significantly on saturated fats and calories without sacrificing texture or flavor.
Then there’s the marinara sauce. A good-quality tomato sauce like Rao’s is rich in lycopene, a powerful antioxidant that’s been linked to heart health and cancer prevention. Tomatoes also provide a nice boost of vitamin C and potassium, both of which support immune function and overall wellness.
Cheese sometimes gets a bad rap, but it’s also a valuable source of calcium, protein, and vitamin B12. By using shredded mozzarella and Parmesan in moderation, you add flavor and creaminess without going overboard on fat or calories. And because cheese is so flavorful, a little goes a long way.
The garlic butter topping, though indulgent, also offers benefits—especially if you use real garlic or high-quality garlic powder. Garlic is known for its antibacterial and anti-inflammatory properties, and it’s been used for centuries to support cardiovascular health.
If you’re looking to lighten things up even more, you can use whole grain rolls instead of Hawaiian rolls or swap the butter for olive oil. You can also bulk up the nutritional content by serving the sliders with a fresh side salad or roasted veggies, making this meal a balanced and nourishing option for the whole family.
Preparation Time, Servings, and Nutritional Information
One of the best things about these Chicken Parmesan Sliders is how quickly they come together. Whether you’re preparing a quick family dinner or hosting a casual get-together, you’ll appreciate how little time is needed from start to finish.
Total Preparation Time:
- Prep time: 15 minutes
- Cook time: 20 minutes
- Total time: 35 minutes
Servings:
This recipe makes 12 sliders, which is perfect for serving 4 to 6 people as a main dish or more if you’re offering it as an appetizer or part of a spread.
Nutritional Information (per slider, estimated):
- Calories: 290
- Protein: 16g
- Carbohydrates: 22g
- Fat: 14g
- Fiber: 1g
- Sugar: 4g
- Calcium: 150mg
- Iron: 1.2mg
Of course, nutritional values can vary depending on the exact ingredients and brands used. If you’re aiming for a lighter meal, consider swapping in low-fat cheese, using grilled chicken tenders, or serving the sliders with a side salad instead of chips or fries.
Ingredients List of these Cheesy Chicken Sliders
Let’s take a closer look at what you’ll need to make these mouthwatering Chicken Parmesan Sliders. Each ingredient plays a key role in building the layers of flavor and texture that make this dish so satisfying.
12 slider rolls
Hawaiian sweet rolls are ideal because of their soft, slightly sweet texture, which complements the savory filling beautifully. If you prefer something less sweet, feel free to use any soft dinner rolls or slider buns.
1 lb fully cooked breaded chicken tenders
These are the heart of the dish. You can use frozen store-bought tenders or make your own at home. Just make sure they’re cooked through and crispy before assembling the sliders.
2 cups pasta sauce
A good marinara sauce is key here. Look for one with rich tomato flavor and a hint of garlic and herbs. Rao’s is a top choice because of its balanced seasoning and high-quality ingredients.
2 cups shredded mozzarella cheese
Mozzarella adds that classic stretchy, melty goodness. It’s mild, creamy, and pairs perfectly with the marinara and chicken.
½ cup shredded Parmesan cheese
Parmesan brings a nutty, salty punch that contrasts nicely with the mozzarella. Together, they create the perfect cheesy topping.
3 tablespoons butter, melted
Butter makes everything better, especially when brushed over the tops of the rolls before baking. It gives the sliders a golden, toasty finish.
1 teaspoon garlic powder
This adds a savory depth to the butter topping. If you love garlic, feel free to increase the amount slightly.
1 teaspoon Italian seasoning
A blend of dried basil, oregano, thyme, and rosemary adds herby goodness to the garlic butter and ties all the Italian-inspired flavors together.
Optional Add-ins:
- Crushed red pepper flakes for a touch of heat
- Fresh basil for garnish
- Extra Parmesan sprinkled on top before baking
With these simple ingredients, you’re well on your way to creating something that’s comforting, flavorful, and surprisingly easy to make.
Step-by-Step Cooking Instructions
Now that you’ve gathered all your ingredients, it’s time to get into the heart of the recipe. These step-by-step instructions will walk you through every part of the process so you can create perfectly golden, cheesy, crispy Chicken Parmesan Sliders. Even if this is your first time making sliders, don’t worry—every step is designed to be easy and foolproof. Let’s dive in.
Step 1: Preheat Your Oven
The very first thing you want to do is preheat your oven to 350°F (175°C). This ensures that it’s fully heated by the time your sliders are assembled and ready to bake. A preheated oven guarantees even cooking, which is essential for that perfectly melted cheese and golden, crispy tops.
Step 2: Prepare Your Baking Dish
Next, grab a 9×13-inch baking dish or a rimmed sheet pan. Lightly grease the bottom with nonstick spray, butter, or a thin layer of oil to prevent sticking. This step may seem minor, but it makes serving and cleanup much easier later on.
Step 3: Slice the Rolls
Using a serrated knife, carefully slice the entire batch of Hawaiian rolls in half horizontally. Try to keep them connected if possible—it makes assembly a lot faster. Set the top half aside, and place the bottom half of the rolls in your prepared baking dish.
If your rolls aren’t pre-sliced or if they’re slightly uneven, take your time here. Even layers will help everything bake evenly and look great when served.
Step 4: Add the Chicken
Place one cooked breaded chicken tender on each roll. If your tenders are too long or thick, feel free to cut them down to size so they fit nicely. Each slider should have a tender that fits within the bun without too much overhang.
If you’re using homemade tenders, make sure they are fully cooked and nicely crisped before placing them in the rolls. This ensures that they’ll heat through evenly during baking without becoming soggy.
Step 5: Spoon on the Sauce
Using a spoon or small ladle, add a generous spoonful of marinara sauce over each piece of chicken. You want enough sauce to cover the chicken and provide moisture, but not so much that it makes the buns soggy. Aim for about 1½ to 2 tablespoons per slider.
Try to distribute the sauce evenly across all the sliders. If some look a little light, go back and add a bit more. The sauce is what brings the whole dish together and gives it that classic Chicken Parmesan flavor.
Step 6: Add the Cheese
In a bowl, combine your shredded mozzarella and Parmesan cheese. Stir them together so that the two cheeses are evenly mixed—this ensures that every bite has the perfect blend of melty and salty goodness.
Sprinkle the cheese mixture generously over the sauced chicken tenders. Be generous here! The cheese melts into all the nooks and crannies, binding everything together into a gooey, delicious mess. If you love extra cheese (who doesn’t?), go ahead and add a little more.
Step 7: Add the Top Buns
Once the cheese is in place, gently place the top half of the rolls over the sliders. Align them as best you can with the bottoms. Press down slightly so they nestle into the filling, but don’t squish them too hard—you want them fluffy and light after baking.
Step 8: Make the Garlic Butter Topping
In a small bowl, combine your melted butter with the garlic powder. Stir until the garlic powder is fully dissolved into the butter. Then, using a pastry brush or spoon, brush the garlic butter evenly over the tops of the slider buns.
After brushing, sprinkle the Italian seasoning over the buttered tops. This adds an herby aroma and gives the sliders that extra Italian flair. If you like, you can also add a pinch of salt or a bit more Parmesan on top for a final savory hit.
Step 9: Bake Covered
Cover the entire baking dish with aluminum foil. This step helps trap heat and steam so that the cheese melts evenly and the sliders stay soft on the inside. Bake in your preheated oven for 10 minutes.
Make sure the foil doesn’t touch the tops of the rolls, or they might stick. If your dish is a little shallow, consider using toothpicks to prop the foil up slightly.
Step 10: Uncover and Finish Baking
After 10 minutes, remove the foil and return the dish to the oven. Bake uncovered for another 10 minutes. During this time, the tops will turn golden and slightly crisp while the cheese finishes melting into the chicken and sauce.
Keep a close eye on the sliders during this step. If your oven runs hot, they might be done a minute or two early. If you want the tops extra crispy, you can broil them for an additional 1 to 2 minutes—but be sure to watch carefully to avoid burning.
Step 11: Let Them Rest
Once the sliders are baked to perfection, remove the dish from the oven and let them sit for about 5 minutes before serving. This short rest helps the cheese firm up slightly, making the sliders easier to slice and serve without everything sliding apart.
Step 12: Slice and Serve
Using a sharp knife, cut the sliders along the roll seams into individual portions. If you kept the rolls connected during assembly, this should be easy and clean. Serve them hot while the cheese is still stretchy and gooey.
They’re perfect just the way they are, but you can also add a sprinkle of fresh chopped basil or a drizzle of extra sauce on the side for dipping.
These steps bring together all the ingredients into a comforting, satisfying meal that feels like something you’d order at a favorite Italian deli, only it’s homemade, simple, and incredibly delicious.
How to Serve these Cheesy Chicken Sliders
Once your sliders are baked and cut into individual portions, it’s time to serve them up—and there are so many fun and creative ways to do it. Whether you’re setting up for a casual dinner or a party spread, these Chicken Parmesan Sliders are as versatile as they are delicious.
Serve them as a main dish for dinner alongside your favorite sides. A big green salad with a lemony vinaigrette or a bowl of roasted vegetables makes a fresh, colorful complement to the warm, cheesy sliders. You could also pair them with baked potato wedges or sweet potato fries for a more filling meal.
If you’re hosting a gathering, consider setting the sliders out on a large platter with toothpicks or small serving tongs so guests can grab them easily. Add a small bowl of warm marinara on the side for dipping, and maybe a sprinkle of chopped parsley or basil for a little garnish. They’re a total crowd-pleaser and look fantastic as part of a game-day or buffet-style spread.
You can even turn them into a fun lunchbox option for kids. Pack a slider or two in a thermos-style container to keep them warm, along with some fruit and carrot sticks for a balanced midday meal.
However you serve them, these sliders are guaranteed to be the star of the table.
Pairing Suggestions for these Cheesy Chicken Sliders
While these sliders are absolutely satisfying on their own, pairing them with the right sides and drinks can really elevate the meal and turn it into something special.
For a fresh contrast to the rich, cheesy filling, try serving your sliders with a crisp salad. A simple arugula salad with lemon vinaigrette or a classic Caesar salad brings brightness and balance to every bite. You can also go for a tomato and cucumber salad with fresh herbs, which ties in beautifully with the Italian flavors of the sliders.
For a cozier meal, roasted vegetables like zucchini, bell peppers, or Brussels sprouts make a hearty side dish. The caramelized edges of the veggies work so well with the buttery rolls and cheesy chicken.
Pasta lovers can enjoy the sliders alongside a small serving of spaghetti tossed with garlic and olive oil or a baked ziti for a double-carb comfort food night. It’s rich, indulgent, and perfect for when you want to treat yourself.
For drinks, sparkling water with lemon, sweet iced tea, or a citrusy soda makes a refreshing companion to the rich sliders. If you’re serving a halal-friendly crowd, skip the wine and opt for mocktails like a rosemary lemonade or a spiced pomegranate cooler.
For kids, serve the sliders with fruit slices and a side of veggie sticks with ranch or hummus—it’s a kid-friendly combo that feels like a fun restaurant meal.
No matter how you choose to pair them, these sliders play well with a wide range of sides and drinks.
Storage, Freezing & Reheating Instructions
One of the many reasons to fall in love with these Cheesy Chicken Parmesan Sliders is how well they store. Whether you’re making them ahead of time, saving leftovers, or prepping for a busy weeknight, this recipe holds up beautifully. With a few simple storage and reheating tips, you can enjoy these sliders fresh, frozen, or rewarmed without losing any of their deliciousness.
How to Store Leftovers
Once the sliders have cooled to room temperature, transfer any leftovers to an airtight container. If you prefer, you can leave them in the baking dish and cover tightly with foil or plastic wrap. Store them in the refrigerator for up to 3 days.
To keep the rolls from getting soggy, try placing a layer of parchment paper between the sliders before stacking them or storing them side by side. This helps preserve the structure of the buns while keeping the cheese and sauce intact.
How to Freeze for Later
These sliders are also freezer-friendly, which makes them a great option for meal prep. Here’s how to freeze them properly for the best texture and taste when reheated:
- Cool completely: Before freezing, make sure the sliders are fully cooled. This prevents condensation and ice crystals from forming, which can make the rolls soggy during reheating.
- Wrap individually or in batches: Wrap each slider tightly in plastic wrap or aluminum foil. For even more protection, place the wrapped sliders in a freezer-safe zip-top bag or airtight container.
- Label and freeze: Mark the bag or container with the date and a note about the contents. Sliders can be frozen for up to 2 months without compromising quality.
If you’re freezing a full batch at once, you can also freeze them in the original baking dish. Just wrap the entire dish with a layer of plastic wrap followed by a layer of aluminum foil for extra protection.
How to Reheat
There are a few methods for reheating, depending on how many sliders you’re warming up and how much time you have.
For individual sliders:
- Remove the plastic or foil and microwave on a microwave-safe plate for 45–60 seconds, or until heated through. If the slider seems dry, add a tiny splash of water and cover it loosely with a damp paper towel before microwaving.
For multiple sliders:
- Place the desired number of sliders in an oven-safe dish, cover with foil, and bake at 325°F (160°C) for 10–15 minutes. Remove the foil in the last 5 minutes to crisp up the tops.
From frozen:
- Reheat straight from the freezer in a 350°F (175°C) oven for 25–30 minutes, covered with foil for the first 20 minutes. For best results, let the sliders thaw overnight in the refrigerator before reheating.
Using these tips, you can enjoy the convenience of a homemade freezer meal that tastes just as good the second time around.
Common Mistakes to Avoid in these Cheesy Chicken Sliders
Even though this recipe is straightforward, there are a few common pitfalls to watch for. Avoiding these will help ensure that your sliders come out perfect every single time—crispy where they should be, melty in all the right places, and never soggy or bland.
Overloading with Sauce
It might be tempting to drown your chicken tenders in sauce, especially if you’re a marinara lover. However, too much sauce can soak into the rolls and make the sliders soggy. Stick to a light but generous spoonful on each piece of chicken—just enough to add flavor without overwhelming the bread.
Using Undercooked or Frozen Chicken
Since the baking time is relatively short, it’s essential that the chicken tenders you use are fully cooked before assembling the sliders. If you use raw or frozen chicken straight from the freezer, you risk uneven cooking and potential food safety issues. Always cook or reheat the chicken fully before placing it in the rolls.
Skipping the Garlic Butter
This step might seem optional, but it’s actually what takes these sliders from good to amazing. The garlic butter adds richness, aroma, and flavor to the top of each slider. Brushing it on ensures the tops brown evenly and develop a light crispness that balances the softness inside.
Not Letting the Sliders Rest
It’s tempting to dive right in as soon as they come out of the oven, but letting the sliders rest for just 5 minutes makes a big difference. It allows the cheese to set slightly and the flavors to meld, which makes slicing and serving cleaner and more enjoyable.
Using Low-Quality Rolls
The rolls are just as important as the filling. Choose soft, sturdy slider rolls—like Hawaiian rolls or similar sweet, fluffy options—that can hold up to the moisture and heat without falling apart. Avoid thin or overly airy rolls that won’t support the weight of the chicken and sauce.
By steering clear of these simple mistakes, you’ll be able to make the kind of sliders that everyone raves about and requests again and again.
Pro Tips of these Cheesy Chicken Sliders
Want to take your sliders from delicious to unforgettable? These pro tips will help you elevate this already amazing dish and make your cooking experience even smoother.
Toast the Bottoms of the Rolls
Before adding the chicken, place just the bottom halves of the rolls in the oven for 3 to 5 minutes to lightly toast them. This prevents them from absorbing too much moisture from the sauce and gives a firmer base that holds everything together.
Add a Cheese Barrier
For extra protection against sogginess and an even more decadent bite, sprinkle a little cheese directly on the bottom rolls before adding the chicken. This creates a gooey layer that also acts as a moisture shield.
Double the Garlic Butter
If you’re making this for a crowd or want an ultra-flavorful experience, consider doubling the garlic butter mixture and brushing a little on the bottoms of the rolls before baking as well. It infuses flavor from top to bottom.
Use Fresh Herbs for Garnish
Right before serving, sprinkle the finished sliders with fresh chopped parsley or basil. This adds a pop of color and a burst of freshness that contrasts beautifully with the rich filling.
Keep Them Warm for Parties
If you’re serving these at a party, keep them warm by placing the baking dish in an oven set to the “warm” setting or about 200°F (90°C). Cover loosely with foil to prevent drying out and serve with small plates and napkins for easy, mess-free snacking.
These tips help add flavor, improve texture, and ensure that your sliders are picture-perfect every time.
Frequently Asked Questions (FAQs)
Whether you’re making these Chicken Parmesan Sliders for the first time or you’ve already added them to your go-to recipe list, questions are bound to pop up. Below are some of the most common FAQs with practical, straightforward answers to help you cook with confidence.
Can I use grilled chicken instead of breaded chicken tenders?
Absolutely. While breaded chicken tenders give these sliders their classic crispy texture, grilled chicken works just as well—especially if you’re aiming for a slightly lighter version. Simply slice the grilled chicken into pieces that fit nicely into the slider rolls. The flavor will be slightly different, but still delicious and satisfying.
What’s the best way to make these Cheesy Chicken Sliders ahead of time?
These sliders are perfect for make-ahead meals. You can fully assemble the sliders—up to the point of adding the garlic butter—and then cover them with foil and refrigerate for up to 24 hours. When you’re ready to bake, remove them from the fridge, let them sit at room temperature for about 15–20 minutes, then brush with the garlic butter and bake as directed.
Can I use homemade marinara sauce?
Yes, and it’s a great idea if you have the time. A homemade sauce allows you to control the flavor and ingredients, which is ideal if you want a low-sodium or sugar-free option. Just make sure the sauce is thick enough to avoid soggy buns. If it’s too runny, simmer it a little longer to reduce the liquid.
What can I use instead of Hawaiian rolls?
If Hawaiian rolls aren’t available, any soft slider buns or dinner rolls will work. Look for rolls that are fluffy but still sturdy enough to hold the filling and sauce without falling apart. Potato rolls or brioche buns are great alternatives.
How do I keep the sliders from getting soggy?
There are a few ways to prevent soggy sliders. First, avoid using too much sauce. Second, toast the bottom halves of the rolls before assembling. Third, create a cheese barrier by sprinkling a little cheese on the rolls before adding the chicken. Lastly, bake uncovered for the last 10 minutes to let steam escape and crisp the tops.
Can I make this Cheesy Chicken Sliders recipe gluten-free?
Definitely. Just use gluten-free slider rolls and gluten-free breaded chicken tenders. Many stores carry these options in the freezer section. Make sure to double-check the labels on your marinara sauce and spices as well to ensure there’s no hidden gluten.
What’s the best cheese to use besides mozzarella?
While mozzarella is classic for that stretchy, gooey texture, you can absolutely mix things up. Provolone, fontina, or even a mild cheddar can be delicious substitutes or additions. Just keep in mind that some cheeses melt better than others, so experiment to find your favorite blend.
How can I make these Cheesy Chicken Sliders spicy?
For a little heat, add a pinch of crushed red pepper flakes to the marinara sauce or sprinkle some into the cheese mixture. You could also use spicy breaded chicken tenders or drizzle a little hot sauce on top before serving. A few jalapeño slices under the cheese layer can also add a fiery kick.
Can I freeze these Cheesy Chicken Sliders before baking?
It’s best to freeze these sliders after baking and cooling completely. Freezing them unbaked can lead to soggy rolls when thawed and baked later. However, if you do want to prep ahead, bake them first, let them cool, then wrap and freeze. Reheat in the oven as needed.
How do I keep the cheese from sticking to the foil?
Great question. If you’re worried about the cheese sticking to the foil during baking, simply spray the underside of the foil with a little nonstick cooking spray before covering the sliders. This will help prevent any mess and keep the cheese looking perfect when you pull off the foil.
These FAQs should give you all the clarity you need to make these Chicken Parmesan Sliders with confidence. If you ever find yourself wondering about a tweak or substitution, chances are you can make it work—and still end up with something absolutely delicious.
Conclusion & Call to Action
If there’s one thing I’ve learned from making these Chicken Parmesan Sliders time and time again, it’s this: comfort food doesn’t have to be complicated. With just a few simple ingredients, a little assembly, and a quick bake in the oven, you can create a dish that feels both homemade and indulgent, casual and celebratory.
These sliders are more than just a weeknight dinner option—they’re the kind of food that brings people together. Whether you’re serving them at a birthday party, a game night, or a quiet dinner with family, they’re always a hit. There’s something about that buttery garlic topping, the crispy chicken, and the gooey cheese all tucked into a soft roll that just makes people happy. And that’s what good food is all about.
I hope this recipe brings as much joy to your table as it has to mine. If you try these sliders, I’d love to hear how they turned out for you. Did you add your own twist? Did your family devour them in minutes like mine did? Leave a comment below and share your experience.
Better yet, snap a photo and tag me on social media so I can see your delicious creations. There’s nothing more fun than seeing these recipes come to life in your kitchens.
So go ahead, grab those rolls, preheat that oven, and get ready to serve up something warm, cheesy, and utterly irresistible. These Cheesy Chicken Parmesan Sliders are waiting to be the new favorite at your table.
Happy cooking!
Print
Cheesy Chicken Sliders: Easy, Gooey, Crowd-Pleasing Favorite
- Total Time: 35 minutes
- Yield: 12 sliders 1x
- Diet: Halal
Description
These easy Cheesy Chicken Parmesan Sliders are loaded with crispy chicken tenders, rich marinara, and melty cheese on sweet Hawaiian rolls. Brushed with garlic butter and baked to golden perfection, they’re a total crowd-pleaser and perfect for dinner, parties, or game day.
Ingredients
-
12 slider rolls (preferably Hawaiian sweet rolls)
-
1 lb fully cooked breaded chicken tenders
-
2 cups pasta sauce (marinara recommended)
-
2 cups shredded mozzarella cheese
-
½ cup shredded Parmesan cheese
-
3 tablespoons butter, melted
-
1 teaspoon garlic powder
-
1 teaspoon Italian seasoning
Instructions
-
Preheat oven to 350°F (175°C).
-
Slice slider rolls in half and place bottoms in a greased baking dish.
-
Place a chicken tender on each roll.
-
Spoon marinara sauce over each piece of chicken.
-
Mix mozzarella and Parmesan; sprinkle over the top.
-
Add top half of rolls.
-
Mix melted butter with garlic powder and brush on tops.
-
Sprinkle with Italian seasoning.
-
Cover with foil and bake for 10 minutes.
-
Remove foil and bake an additional 10 minutes, until tops are golden and cheese is melted.
-
Let rest for 5 minutes, slice, and serve hot.
Notes
-
Preheat oven to 350°F (175°C).
-
Slice slider rolls in half and place bottoms in a greased baking dish.
-
Place a chicken tender on each roll.
-
Spoon marinara sauce over each piece of chicken.
-
Mix mozzarella and Parmesan; sprinkle over the top.
-
Add top half of rolls.
-
Mix melted butter with garlic powder and brush on tops.
-
Sprinkle with Italian seasoning.
-
Cover with foil and bake for 10 minutes.
-
Remove foil and bake an additional 10 minutes, until tops are golden and cheese is melted.
-
Let rest for 5 minutes, slice, and serve hot.
- Prep Time: 15 minutes
- Cook Time: 20 minutes
- Category: Main Dish
- Method: Baking
- Cuisine: American