
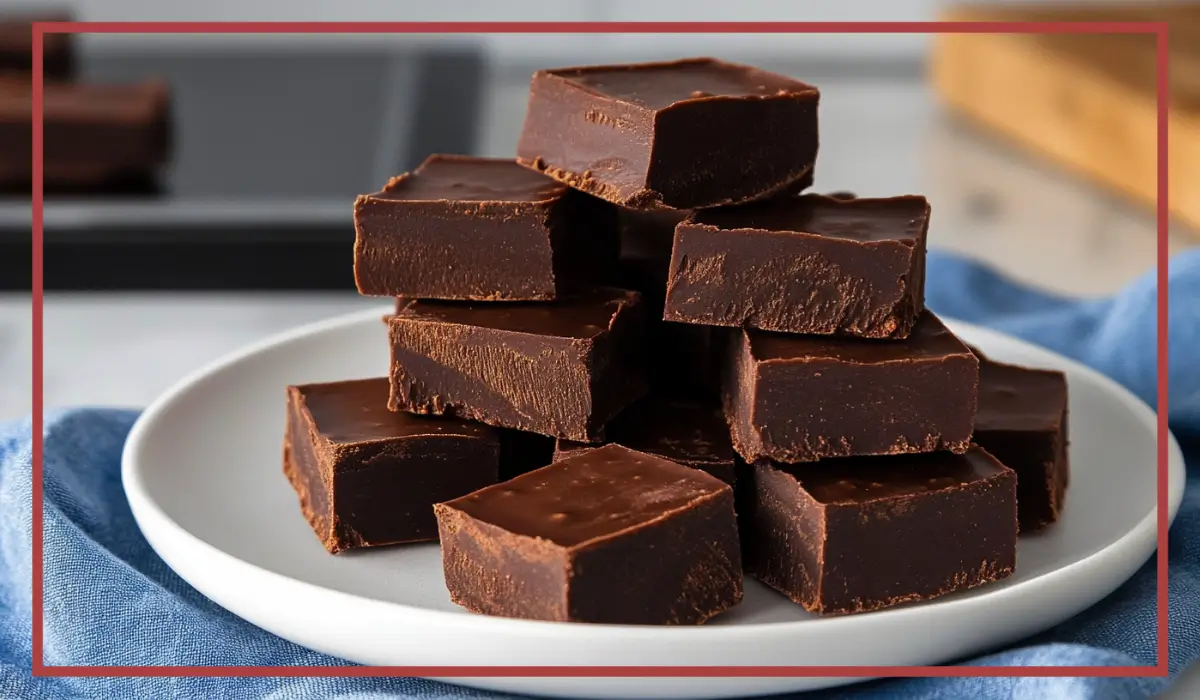
There’s something so comforting about a square of rich, velvety fudge. It’s one of those timeless treats that manages to feel nostalgic and indulgent all at once. Whether you associate it with childhood holidays, cozy kitchen memories, or that irresistible urge to grab just one more piece from the dessert tray, fudge holds a special place in so many hearts—and kitchens.
But let’s be honest: for a dessert that tastes like it came from a high-end confectionery, fudge can be surprisingly easy to make. That’s where this 3-ingredient chocolate fudge recipe comes in. It’s hands-down one of the simplest and most foolproof treats you’ll ever try. There’s no candy thermometer involved, no endless stirring, no worrying about sugar crystals forming or the dreaded grainy texture. Just melt, pour, chill, and cut.
This particular recipe is one that I’ve returned to countless times. It first came into my life on a snowy December evening when I needed a last-minute dessert for a holiday gathering. I didn’t have time to bake, and I was out of eggs—but I did have a can of sweetened condensed milk, a bag of chocolate chips, and some butter in the fridge. Out of sheer curiosity and desperation, I threw them together on the stove, hoping for something halfway decent. What I got was not only delicious—it was dangerously good. And now it’s a go-to whenever I need a quick, crowd-pleasing dessert.
What makes this fudge extra lovable is its versatility. You can stick to the basic three ingredients or jazz it up with nuts, sea salt, crushed cookies, or a swirl of peanut butter. It’s one of those recipes that feels infinitely customizable and effortlessly impressive at the same time.
So, if you’re looking for an easy win—whether you’re brand new to the kitchen or just need a low-stress dessert—you’re in for a real treat. This fudge is creamy, decadent, and absolutely satisfying. And the best part? You probably already have everything you need in your pantry.
Why You’ll Love This 3-ingredient chocolate fudge Recipe
Let’s be honest—there are a lot of dessert recipes out there. So what makes this one so special? To start with, it’s not just delicious, it’s doable. You don’t need baking experience or fancy equipment. Just a saucepan, a spatula, and a little patience while it chills in the fridge. That’s it.
One of the standout features of this recipe is its minimal ingredient list. With only three pantry staples—sweetened condensed milk, chocolate chips, and butter—you’re already halfway to dessert perfection. And if you’ve ever felt overwhelmed by the idea of making candy or tempering chocolate, you can breathe easy here. This fudge doesn’t require any of that. It’s almost impossible to mess up.
Then there’s the texture. The sweetened condensed milk gives the fudge a smooth, creamy consistency that practically melts in your mouth. Meanwhile, the chocolate chips provide richness and depth of flavor. Depending on the type of chocolate you choose (semi-sweet, dark, or milk), you can tailor the sweetness and intensity to your liking. The butter adds just enough silkiness to bring everything together.
It’s also incredibly family-friendly. Kids can easily help out with the mixing and pouring steps, making it a great weekend or holiday activity. Plus, it stores well, freezes beautifully, and makes the perfect homemade gift for neighbors, teachers, or friends. Wrap it up in a cute box with some parchment paper, and you’ve got a heartfelt treat that looks like it came straight from a bakery.
Lastly, let’s talk about that versatility again. You can stir in toasted nuts, sprinkle the top with flaky sea salt, swirl in caramel, or add a handful of mini marshmallows for a Rocky Road vibe. Each variation is like a new flavor adventure—and the base recipe is strong enough to handle them all.
So whether you’re making this for a party, a potluck, a holiday celebration, or just because you’ve got a serious chocolate craving, this fudge delivers. Every. Single. Time.
Health Benefits: A Smarter Sweet Treat (Within Reason!)
Okay, so we’re not going to pretend that fudge is a health food. But when it comes to indulgent treats, this one has a few redeeming qualities that are worth mentioning—especially if you’re someone who likes to keep an eye on what goes into your food.
First, let’s start with the sweetened condensed milk. While it does contribute sugar to the recipe, it’s also a source of calcium thanks to the milk content. It provides some protein, and because it’s already thick and rich, you don’t need to add additional sweeteners or binders to get that creamy texture. This keeps the ingredient list short and avoids the need for processed additives you might find in store-bought fudge.
Next up, the chocolate. Chocolate chips, especially if you go with semi-sweet or dark varieties, can actually bring some nutritional benefits to the table. Dark chocolate contains antioxidants known as flavonoids, which are linked to heart health. It also has small amounts of minerals like iron, magnesium, and potassium. The key is moderation—and choosing a high-quality chocolate chip can make a noticeable difference in both flavor and nutritional value.
Butter, although high in saturated fat, is used sparingly here—only two tablespoons for the entire batch. It helps give the fudge its luxurious mouthfeel, but in such a small amount, it’s not something that should raise concerns unless you’re on a strict low-fat diet.
And here’s the real bonus: since this recipe contains no eggs, flour, or artificial stabilizers, it’s naturally gluten-free. That means it’s a great option for those with gluten sensitivities or dietary restrictions. Plus, if you want to make it dairy-free, you can easily swap in dairy-free chocolate chips and coconut condensed milk, and use plant-based butter. It’s just that flexible.
So while this fudge is definitely a dessert, it’s one you can feel a bit better about enjoying in small squares. When homemade, you control the ingredients, avoid preservatives, and skip the extra mystery stuff often found in packaged sweets. And when you savor it slowly, piece by piece, it’s a dessert that’s deeply satisfying without needing to go overboard.
Preparation Time, Servings, and Nutritional Information
One of the best parts of this 3-ingredient chocolate fudge recipe—besides the taste—is how little time it takes. From start to finish, you’ll spend less than 10 minutes actively working, and the rest is simply chill time. That makes this a great make-ahead option for parties, holiday trays, or just keeping something sweet in the fridge.
Total Time Required:
- Preparation: 5–7 minutes
- Cooking/Melting: 3–5 minutes
- Chilling Time: Minimum 2 hours (can be left overnight)
Yield and Serving Size:
- Makes approximately 36 to 49 squares, depending on how small you cut them.
- Serving size: 1 piece (roughly 1–1.5 inches square)
Approximate Nutritional Information (Per Square):
- Calories: 120
- Fat: 7g
- Saturated Fat: 4.5g
- Carbohydrates: 14g
- Sugar: 12g
- Protein: 1g
- Fiber: 1g (if using dark chocolate)
These are general estimates and will vary slightly depending on the type of chocolate chips you use. Choosing dark chocolate can slightly reduce sugar and increase antioxidants and fiber, while using milk chocolate will give you a creamier, sweeter result with a slightly higher sugar content.
Either way, one small piece is usually enough to satisfy even the strongest chocolate craving. And because the recipe is so rich and flavorful, a little truly does go a long way.
Ingredients List of this 3-ingredient chocolate fudge
This recipe couldn’t be more straightforward—and yet, it produces some of the best fudge you’ll ever taste. Here’s everything you’ll need, along with a few helpful notes on each ingredient.
Main Ingredients:
- 1 (10 oz) can sweetened condensed milk: This acts as both the sweetener and the creamy base for the fudge. Make sure it’s sweetened, not evaporated milk—they’re not interchangeable. You can also use a dairy-free version if needed.
- 3 cups chocolate chips: You can use semi-sweet, dark chocolate, or milk chocolate chips. Semi-sweet offers the best balance between rich flavor and sweetness. Milk chocolate is sweeter and softer. Dark chocolate gives you a more intense cocoa flavor.
- 2 tablespoons butter: This gives the fudge a silky, smooth texture and helps it set beautifully. You can use unsalted or salted butter depending on your taste. A plant-based butter also works well for a dairy-free version.
Optional Add-ins and Toppings:
- Chopped nuts: Walnuts, pecans, or almonds add crunch and a nutty depth.
- Flaky sea salt: A light sprinkle on top balances the sweetness.
- Crushed cookies or graham crackers: Swirl them in before chilling.
- Mini marshmallows: For a fun Rocky Road twist.
- Peanut butter swirl: Drop spoonfuls and gently marble with a knife before chilling.
With just these three basic ingredients and endless optional twists, this fudge is a customizable treat that never gets boring.
Step-By-Step Cooking Instructions of this 3-ingredient chocolate fudge
Making fudge might sound like a daunting task if you’ve never tried it before, but this version is so beginner-friendly you’ll feel like a pro on your very first attempt. Just follow these simple steps and you’ll have a tray of creamy, dreamy chocolate fudge ready to enjoy in no time.
Step 1: Prepare Your Pan
Before you do anything else, prep your pan so that it’s ready to go once your mixture is melted. Line an 8×8-inch square baking pan with parchment paper or aluminum foil. If you’re using foil, lightly grease it with a bit of butter or nonstick spray to make removal easier. Be sure to leave a little overhang on two sides to act as “handles” for lifting the fudge out later.
This step might seem small, but it makes the biggest difference when it comes time to cut and serve your fudge. You’ll get clean edges, no sticking, and minimal mess.
Step 2: Melt the Ingredients
Grab a medium-sized saucepan and place it on your stovetop over low to medium heat. Low and slow is the name of the game here. You want everything to melt together smoothly without boiling or overheating.
Add the 2 tablespoons of butter first and let it begin to melt. Once the butter is almost completely melted, pour in the can of sweetened condensed milk, using a spatula to get every last drop out of the can. Then, add in the 3 cups of chocolate chips.
Now comes the stirring. Using a silicone spatula or wooden spoon, stir the mixture gently and continuously as the chocolate chips begin to melt. This is important—don’t walk away! Stirring constantly helps everything combine evenly and prevents the chocolate from burning.
You’ll see the chocolate chips start to break down and blend into the condensed milk and butter. After a few minutes, the mixture will transform into a smooth, glossy, thick chocolate base.
Important Tip: Keep the heat low. If you turn the heat too high or stop stirring, the chocolate may seize or burn, leading to a grainy texture. We want silky-smooth fudge, so gentle heat is your best friend here.
Step 3: Pour the Mixture into the Prepared Pan
Once your 3-ingredient chocolate fudge mixture is completely smooth and velvety, immediately pour it into your prepared baking pan. Use a spatula to spread it evenly into the corners and smooth out the top.
If you’re adding any toppings—like chopped nuts, sea salt, or cookie crumbles—now’s the time to sprinkle them over the surface. Lightly press them into the fudge so they stick.
Step 4: Let It Chill and Set
Cover the pan with plastic wrap or foil and place it in the refrigerator. Let it chill for at least 2 hours, or until the fudge is completely firm to the touch. If you have the time, letting it set overnight is even better. The flavors deepen, and the texture becomes perfectly sliceable.
You’ll know it’s ready when you can press a finger gently into the surface and it feels solid without being rock-hard.
Step 5: Cut Into Bite-Sized Squares
Once the fudge is fully set, lift it out of the pan using the parchment or foil handles and place it on a cutting board. Using a sharp knife, slice the fudge into small squares. Depending on your preference, you can make 36 to 49 pieces.
Pro Tip: For clean, neat cuts, run your knife under hot water and wipe it dry between slices. This helps glide through the fudge without dragging or crumbling the edges.
And that’s it—you’ve just made a batch of rich, chocolatey fudge that rivals anything you’d find in a bakery or candy shop.

How to Serve this 3-ingredient chocolate fudge
This 3-ingredient chocolate fudge is incredibly versatile, so you can serve it in a number of delicious ways depending on the occasion. Whether you’re prepping a dessert tray, gifting it to friends, or just sneaking a piece after dinner, here are a few great ideas for how to serve it.
Classic Dessert Platter: Arrange the fudge squares on a pretty serving tray or platter, possibly alongside other sweets like cookies, brownies, or fresh fruit. The contrast in textures and flavors makes for an eye-catching spread.
Holiday or Party Gift Boxes: Fudge is a fantastic edible gift. Wrap a few squares in parchment paper and place them in decorative tins or boxes. Add a little handwritten note or tag for a personal touch.
With Coffee or Tea: One or two pieces of fudge served alongside a hot beverage make a cozy and satisfying treat. It’s especially nice after dinner or during a relaxed weekend brunch.
Midday Snack: Keep a few pieces chilled in the fridge for a quick pick-me-up when those afternoon cravings hit. A small bite goes a long way.
Topped with Extras: Just before serving, consider adding a light sprinkle of powdered sugar, cocoa powder, or crushed peppermint for extra visual appeal and flavor.
As an Ice Cream Topping: Chop the fudge into even smaller pieces and sprinkle it over your favorite ice cream for an indulgent, chewy topping that melts just slightly on contact.
However you serve it, this fudge never fails to please. Its creamy texture, rich chocolate flavor, and just-sweet-enough profile make it a crowd favorite every time.
Pairing Suggestions for this 3-ingredient chocolate fudge
3-ingredient chocolate fudge pairs beautifully with all sorts of accompaniments, both sweet and savory. Here are a few pairing ideas that can elevate your fudge experience and make it feel like an all-out dessert event.
Hot Beverages:
- Coffee: A dark roast or espresso pairs perfectly with the richness of chocolate fudge. The bitterness of the coffee balances the sweetness.
- Black Tea or Chai: These strong teas complement the deep cocoa notes while adding a warm spice profile.
- Hot Chocolate: Yes, double chocolate is a thing—and it’s divine. Add a pinch of chili or cinnamon to your hot chocolate for an extra twist.
Cold Drinks:
- Milk (dairy or plant-based): The creaminess of milk tones down the richness of the fudge for a smooth bite-and-sip experience.
- Iced Coffee or Cold Brew: A refreshing contrast to the dense, chewy fudge.
- Sparkling Water: Helps cleanse the palate between bites and keeps the experience light.
Dessert Pairings:
- Cheesecake bites: Serve mini cheesecake squares and fudge together for a creamy, decadent dessert board.
- Fruit: Slices of apple, strawberries, or even a few orange wedges can brighten up the richness and offer a bit of natural sweetness.
- Salted nuts or pretzels: The salty crunch adds amazing contrast to the soft, sweet fudge.
Celebration-Worthy Pairings:
- Mocktails: A sparkling non-alcoholic drink with citrus and mint is a refreshing balance to fudge’s intensity.
- Halal sparkling cider: Sweet, bubbly, and perfect for festive moments without any alcohol.
These pairings transform a simple square of fudge into an elevated dessert experience, making it perfect for everything from casual evenings to celebratory events.
Storage, Freezing & Reheating Instructions of this 3-ingredient chocolate fudge
One of the greatest things about this 3-ingredient chocolate fudge—aside from the fact that it tastes amazing—is how well it stores. Whether you’re prepping ahead for a holiday, gifting it to friends, or just making a batch to enjoy throughout the week, this fudge is incredibly forgiving when it comes to storage.
How to Store Fudge
Once your fudge is set and sliced, place the squares in an airtight container. You can store them in a single layer, or if you need to stack them, separate each layer with a piece of parchment or wax paper to prevent sticking.
Keep the container in the refrigerator for the best texture and freshness. The cold helps the fudge stay firm and keeps it from getting too soft, especially if your kitchen runs warm.
Refrigerated shelf life: Up to 2 weeks
If you prefer softer fudge and live in a cooler climate, it can also be stored at room temperature in a cool, dry place for up to 1 week. Just make sure it’s in an airtight container away from sunlight or heat.
How to Freeze Fudge
Yes, this 3-ingredient chocolate fudge freezes beautifully. That makes it ideal for batch prep or making ahead for parties and events.
Here’s how to do it:
- Once the fudge is chilled and cut, wrap individual squares or whole layers in plastic wrap or parchment paper.
- Place them in a freezer-safe zip-top bag or airtight container.
- Label the container with the date, and pop it into the freezer.
Freezer shelf life: Up to 3 months
When you’re ready to enjoy your frozen 3-ingredient chocolate fudge, transfer it to the refrigerator and let it thaw overnight. You can also let it come to room temperature for about 30 minutes if you’re in a hurry. The texture will remain creamy and firm, just like it was freshly made.
Can You Reheat Fudge?
Since fudge is meant to be enjoyed cold or at room temperature, you typically don’t need to reheat it. However, if you prefer a softer, slightly gooier texture, you can warm an individual piece in the microwave for about 5 seconds. Just be careful not to overheat it, or the butter and chocolate may start to separate.
Whether you’re enjoying it fresh, chilled, or thawed from the freezer, this fudge is one of those rare treats that tastes just as good on day five as it did on day one.
Common Mistakes to Avoid in this 3-ingredient chocolate fudge
Even though this is a very simple recipe, there are a few common pitfalls to watch out for. The good news? Once you’re aware of them, they’re super easy to avoid.
Mistake 1: Overheating the Chocolate
This is probably the number one issue people run into. Chocolate is sensitive to heat, and if you cook it too fast or too hot, it can seize or burn. This creates a grainy, dry texture instead of the smooth, creamy result we’re aiming for.
Avoid it by: Keeping the heat low and stirring continuously. Patience is key.
Mistake 2: Using Evaporated Milk Instead of Sweetened Condensed Milk
These two products often sit right next to each other on the grocery store shelf, but they are not interchangeable. Evaporated milk lacks the sugar and thick texture needed for this fudge to set properly.
Avoid it by: Double-checking the label. It should clearly say “sweetened condensed milk.”
Mistake 3: Skipping the Chill Time
If you try to cut into the fudge too early, it may be too soft and sticky, resulting in messy squares that fall apart.
Avoid it by: Letting the fudge chill for at least 2 hours—overnight is even better for clean, firm squares.
Mistake 4: Not Lining the Pan
You might be tempted to skip lining your pan, but this makes it extremely difficult to remove the fudge and cut it neatly.
Avoid it by: Using parchment paper or foil with an overhang. This helps lift the entire block out of the pan easily.
Mistake 5: Overloading with Add-ins
While it’s tempting to throw in all your favorite toppings, too many can overwhelm the fudge and make it hard to slice or set.
Avoid it by: Keeping mix-ins to a handful of ingredients and mixing gently.
By keeping these common mistakes in mind, you’ll save yourself frustration and end up with perfect, bakery-worthy fudge every single time.
Pro Tips of this 3-ingredient chocolate fudge
Want to take your fudge-making game to the next level? These pro tips will help you refine the process and make every batch feel a little more polished and professional.
Tip 1: Use High-Quality Chocolate
Since chocolate is the star of the show, using a good-quality brand can make a big difference in flavor and texture. Brands like Ghirardelli, Guittard, or even a good store-brand dark chocolate chip can elevate your fudge from good to amazing.
Tip 2: Customize the Flavor with Extracts
You don’t need to stop at basic chocolate. Add a dash of vanilla extract, peppermint, or almond extract to give your fudge a unique twist. Just ½ to 1 teaspoon added to the melted mixture can transform the flavor profile.
Tip 3: Toast Your Nuts
If you’re adding nuts, try toasting them lightly in a dry pan or oven first. This enhances their flavor and gives your fudge a deeper, nuttier crunch.
Tip 4: Cut with a Hot Knife
To get those clean, professional-looking edges, heat your knife under hot water and dry it between cuts. It helps the blade glide through the fudge instead of dragging through it.
Tip 5: Double the Batch in a 9×13 Pan
If you’re making this for a crowd or holiday trays, simply double the recipe and pour it into a 9×13-inch pan. You’ll get twice the yield with just a few extra minutes of effort.
Tip 6: Add a Pinch of Salt
Even if you’re not topping it with sea salt, adding a tiny pinch of salt into the mixture itself can help balance the sweetness and enhance the chocolate flavor.
Tip 7: Store with Wax Paper Between Layers
If you’re stacking pieces for storage, place a piece of wax or parchment paper between each layer to prevent them from sticking together.
With these small but impactful tips, you can take a super simple recipe and elevate it into a signature treat that everyone will ask for again and again.
Frequently Asked Questions (FAQs)
When it comes to simple recipes like this one, it’s totally normal to have a few questions—especially if you’re new to making fudge. Here’s a roundup of the most common questions I get, along with straightforward answers to help you feel confident every step of the way.
Can I use evaporated milk instead of sweetened condensed milk?
No, they’re not the same. Sweetened condensed milk is thicker and contains sugar, while evaporated milk is unsweetened and much thinner. Using evaporated milk will result in a loose, runny mixture that won’t set properly.
What kind of chocolate chips work best?
You can use semi-sweet, dark, or milk chocolate chips depending on your flavor preference. Semi-sweet strikes the best balance for most people—it’s rich, chocolatey, and not too sweet. If you like a deeper cocoa flavor, go for dark chocolate. For a lighter, creamier fudge, milk chocolate is great. You can even mix and match for a custom blend.
How long does 3-ingredient chocolate fudge last in the fridge?
When stored in an airtight container, fudge will stay fresh in the fridge for up to two weeks. Make sure to separate layers with parchment or wax paper to keep the pieces from sticking together.
Can I freeze 3-ingredient chocolate fudge?
Absolutely! Fudge freezes beautifully. Wrap individual squares or an entire block in parchment paper and place them in a freezer-safe container or zip-top bag. They’ll last up to three months. Just thaw in the fridge or at room temperature before serving.
My 3-ingredient chocolate fudge is too soft. What went wrong?
There are a couple of possible reasons. First, it may not have chilled long enough. Make sure you’ve given it at least 2 hours to fully set. Second, double-check that you used the correct ingredients (especially sweetened condensed milk and not evaporated). Lastly, if your kitchen is very warm, it may help to store the fudge in the refrigerator instead of leaving it at room temperature.
Can I make this 3-ingredient chocolate fudge recipe dairy-free?
Yes! There are plenty of dairy-free chocolate chips on the market, and you can also use sweetened condensed coconut milk and a plant-based butter substitute. The texture will be slightly different, but still delicious.
How do I prevent my fudge from becoming grainy?
Graininess usually comes from overheating the chocolate or not stirring enough during the melting process. Always melt the mixture over low heat and stir constantly for the smoothest results.
Can I double the recipe?
Definitely. Just double all the ingredients and pour the mixture into a 9×13-inch pan instead of an 8×8. You may need a minute or two more for everything to melt, but otherwise, the process is the same.
What can I add to customize the fudge?
This is where things get fun! You can stir in chopped nuts, crushed cookies, dried fruit, mini marshmallows, or swirl in peanut butter or caramel. Top with flaky sea salt, sprinkles, or even crushed candy canes for a festive twist.
Do I need to use a candy thermometer?
Nope! That’s one of the best parts of this recipe. Because you’re not cooking sugar to a specific temperature, there’s no need for a candy thermometer. It’s nearly foolproof and perfect for beginners or anyone who wants to skip the extra equipment.
With these questions answered, you’re ready to tackle this recipe with confidence—and even have a few tricks up your sleeve for the next time around.
Conclusion & Call to Action
There’s a reason this 3-ingredient chocolate fudge has become a staple in so many kitchens—it’s simple, quick, and absolutely irresistible. Whether you’re preparing for a party, making holiday treats, or just giving in to a late-night chocolate craving, this recipe never disappoints. It proves that sometimes, the most delicious things come from the most humble ingredients.
What I love most about this recipe is that it fits seamlessly into real life. You don’t need a long grocery list or fancy tools. You don’t have to worry about tricky techniques or fragile timing. It’s a cozy little kitchen win that you can make in under 10 minutes and enjoy for days.
It’s also incredibly satisfying to share. I’ve made it with my kids on snowy weekends, wrapped it up for neighbors during the holidays, and brought it to potlucks where it disappeared faster than anything else on the table. Each time, someone asks for the recipe—and I always smile knowing they’re about to discover how ridiculously easy it is to make.
So now it’s your turn. Grab a saucepan, open that can of sweetened condensed milk, and get melting. I promise, once you make this fudge, it’ll earn a permanent spot in your dessert rotation. And once you get the hang of it, you can start experimenting with mix-ins and flavors to create your own signature version.
I’d absolutely love to hear how it turns out for you. Did you go classic or try a fun twist? Tag me on social media or leave a comment with your variation—I always get inspired seeing what others create. Happy fudge making, and enjoy every chocolatey bite!
Print
3-Ingredient Chocolate Fudge – Easy, Creamy, and No Bake
- Total Time: 2 hours 10 minutes (includes chilling)
- Yield: 36–49 squares 1x
- Diet: Vegetarian
Description
This creamy, rich chocolate fudge comes together in minutes using just three ingredients—chocolate chips, sweetened condensed milk, and butter. No baking, no thermometer, and no stress. Just melt, pour, and chill. It’s the perfect make-ahead dessert for holidays, parties, and gifting.
Ingredients
-
1 (10 oz) can sweetened condensed milk
-
3 cups chocolate chips (semi-sweet, milk, or dark)
-
2 tablespoons butter
Instructions
-
Line an 8×8-inch pan with parchment or foil.
-
In a saucepan over low heat, melt butter.
-
Add chocolate chips and sweetened condensed milk. Stir constantly until smooth.
-
Pour into the pan, smooth the top, and chill for at least 2 hours.
-
Cut into squares and serve.
Notes
-
Use high-quality chocolate for best results.
-
Add nuts, sea salt, or crushed cookies for variety.
-
Chill overnight for the cleanest cuts.
- Prep Time: 5 minutes
- Cook Time: 5 minutes
- Category: Dessert
- Method: No-Bake
- Cuisine: American