
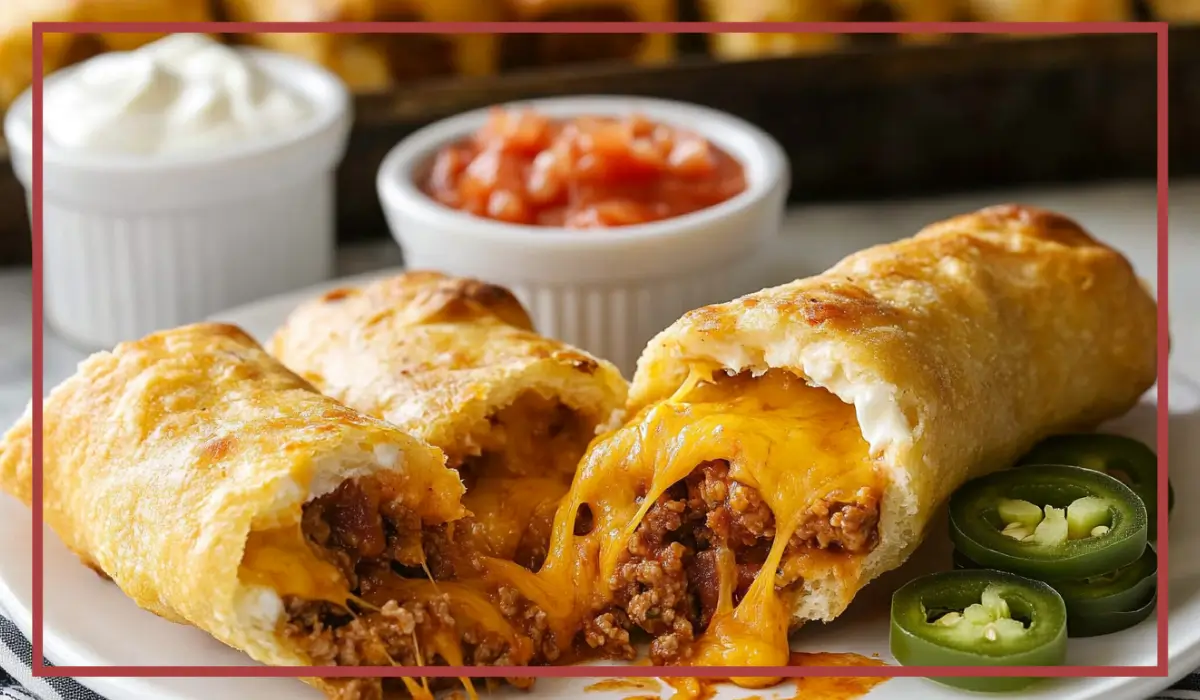
If you’ve ever found yourself torn between craving tacos and wanting something buttery, cheesy, and wrapped in soft, golden dough, this recipe is about to become your new go-to. Taco cheese sticks are the kind of snack that disappears from the table before you’ve even had the chance to grab a second one. They’re warm, cheesy, packed with bold taco flavor, and wrapped in soft, golden pizza dough that bakes up beautifully crisp on the outside and delightfully fluffy on the inside.
What makes this dish truly special is how effortlessly it comes together. With just a handful of everyday ingredients—store-bought pizza dough, ground beef, taco seasoning, cheese sticks, and a quick homemade butter glaze—you can create a snack or appetizer that feels like a total treat without a ton of prep or cleanup. Whether you’re cooking for a family movie night, looking to serve a crowd during game day, or just want something fun to whip up for lunch, these taco cheese sticks check all the boxes.
The first time I made these was during a weekend hangout with my siblings. I needed something filling, fun, and easy to eat with our hands while we played board games. I didn’t expect much—just a fun little experiment—but when I pulled the tray out of the oven, we couldn’t stop ourselves. One bite in, the crispy edges, gooey melted cheese, and that seasoned beef hit us with pure joy. Since then, this recipe has been on repeat.
Even better, you can customize them to your taste. Add jalapeños for heat, swap in ground chicken or turkey for a lighter version, or try a vegetarian filling with beans and corn. The options are endless. But one thing remains true—these taco cheese sticks are always a hit.
Why You’ll Love This Recipe
There are so many reasons to fall in love with this recipe, but let’s start with the most obvious: the taste. Taco cheese sticks deliver bold, savory flavor from the very first bite. The seasoned beef packs in that unmistakable taco essence thanks to the taco seasoning, while the melted Colby Jack and Cheddar cheese blend adds creamy, gooey richness that makes each bite extra indulgent.
Beyond the flavor, this recipe is incredibly easy to make. It’s perfect for beginner cooks or anyone who wants a no-fuss snack that looks and tastes impressive. Using store-bought pizza dough keeps things simple, and rolling each stick only takes a minute or two. The hardest part is waiting for them to bake while your kitchen fills with the mouthwatering smell of butter, garlic, and herbs.
Another huge plus? These taco cheese sticks are kid-friendly and adult-approved. They’re fun to hold, easy to dip, and incredibly satisfying. Whether served with salsa, guacamole, or just on their own, they’re always crowd-pleasers. Plus, they make a fantastic party appetizer, game-day snack, or even a fun lunchbox addition.
If you’re looking to feed a crowd or prepare something in advance, this recipe is perfect. You can make the filling ahead of time, or even assemble the sticks and keep them in the fridge until you’re ready to bake. They also reheat beautifully, which makes them a dream for leftovers (though I’ll be honest—there usually aren’t any).
Finally, the customizable nature of the recipe makes it endlessly versatile. You can go spicy, cheesy, vegetarian, or even gluten-free with a few simple swaps. Whether you’re feeding picky eaters or experimenting with your own twist, there’s a version of this recipe for everyone.
Health Benefits
While taco cheese sticks are definitely in the “comfort food” category, that doesn’t mean they can’t offer some nutritional value too. With the right ingredients and smart swaps, you can turn this indulgent snack into a more balanced option that still satisfies your cravings.
Let’s start with the protein. Ground beef is a great source of high-quality protein, which is essential for building and repairing muscle, supporting your immune system, and keeping you full. Choosing lean ground beef (like 90/10 or 93/7) can help reduce the fat content while still delivering that satisfying flavor and texture.
Next up, the cheese. Colby Jack and Cheddar are rich in calcium and provide essential nutrients like vitamin A and protein. Cheese also adds creaminess and flavor that makes this recipe feel extra comforting. You can opt for low-fat cheese if you’re looking to lighten things up.
Pizza dough provides the carbs that help give you energy. If you’re trying to sneak in a little extra nutrition, you can use a whole wheat pizza dough or even a gluten-free version made from chickpea or cauliflower flour to accommodate dietary needs.
Additionally, this recipe gives you the opportunity to include some veggies if you want. Adding chopped bell peppers, onions, or even black beans to the filling can provide fiber, antioxidants, and more volume without many extra calories.
Even the butter mixture, while indulgent, is used in moderation and adds big flavor without needing to fry anything. You could easily swap butter for olive oil if you’re looking for a heart-healthier fat option.
Finally, the portion size makes a difference. Each taco cheese stick is individually wrapped, which naturally encourages mindful eating. You can easily pair one or two with a salad or veggie side to create a more balanced meal.
Preparation Time, Servings, and Nutritional Information
When it comes to weeknight recipes, timing matters—and this one doesn’t disappoint. Taco cheese sticks come together quickly, with minimal prep and just a short bake time. From start to finish, you’ll need about 30–35 minutes, making this recipe perfect for busy schedules or spontaneous snack cravings.
Here’s the full breakdown:
Preparation Time:
Prep: 15 minutes
Cooking: 10–12 minutes
Cooling: 5 minutes
Total Time: About 30–35 minutes
Servings:
This recipe makes 10 taco cheese sticks, which is great for serving 3–4 people as a main snack or 5–6 people as an appetizer. You can easily double the batch if you’re hosting a crowd or want extra for meal prep.
Nutritional Information (Per Stick – Approximate):
Calories: 280
Protein: 11g
Carbohydrates: 22g
Fat: 17g
Saturated Fat: 7g
Cholesterol: 45mg
Sodium: 480mg
Fiber: 1g
Sugar: 2g
This recipe offers a good mix of protein, fat, and carbs to keep you satisfied. If you’re aiming for a lower calorie version, consider using light cheese and leaner beef, or reducing the amount of butter used in the glaze.
You can also tweak the nutrition profile by using alternative doughs (like whole wheat or low-carb varieties) and adding fiber-rich veggies to the filling. No matter how you adapt it, these taco cheese sticks offer a satisfying snack that doesn’t require deep frying or overly processed ingredients.
Ingredients List
To make 10 delicious taco cheese sticks, you’ll only need a handful of pantry staples and easy-to-find ingredients. Here’s the full list, along with a breakdown of why each ingredient is essential to this recipe’s success.
1 lb. ground beef:
This is the star of the filling. Choose lean ground beef to keep things on the lighter side. You can also substitute with ground turkey, chicken, or even a plant-based ground alternative.
1 packet taco seasoning mix (or use homemade):
This adds instant flavor and saves time. If you prefer homemade, a simple mix of chili powder, cumin, paprika, garlic powder, onion powder, and salt will do the trick.
1 tube Pillsbury Pizza Dough:
This is what makes the recipe so fast and easy. It rolls out smoothly and bakes into a golden, pillowy crust that holds everything together. You can also use homemade pizza dough if you’re feeling extra ambitious.
5 cheese sticks (Colby Jack and Cheddar blend), halved:
These provide the melty, gooey center that makes these sticks irresistible. You can use mozzarella, Monterey Jack, or any cheese that melts well, but the blend of Colby Jack and Cheddar gives a perfect balance of sharp and mild.
4 tablespoons butter, melted:
Butter adds richness and helps the crust turn golden and crisp during baking. It’s also the base of the flavorful garlic-herb topping brushed on before baking.
1 teaspoon garlic powder:
This gives the butter mixture a warm, savory aroma that complements the taco filling beautifully.
1 teaspoon dried parsley:
A little dried parsley adds a pop of color and herby flavor to the topping. You can use fresh if you prefer.
These simple ingredients come together to create something magical—cheesy, crispy, full of taco flavor, and completely crave-worthy.
Step-By-Step Cooking Instructions
This is where the magic really happens. Don’t worry—every step is super straightforward, and even if you’re new to cooking, you’ll be surprised how easily this recipe comes together. By following these instructions, you’ll get perfectly golden, cheesy taco sticks every single time.
Step 1: Preheat Your Oven
Start by preheating your oven to 425°F (220°C). This ensures your oven is nice and hot by the time the taco sticks go in. A hot oven is key to achieving that golden, slightly crispy outer crust while keeping the inside soft and gooey.
While the oven heats, line a large baking sheet with parchment paper or lightly spray it with non-stick cooking spray. This makes cleanup easier and helps prevent sticking.
Step 2: Cook the Taco Meat
Grab a medium skillet and place it over medium-high heat. Add the ground beef and begin to break it up with a spatula or wooden spoon as it browns.
Continue cooking the beef until it’s fully browned and no pink remains. This should take about 6–8 minutes. Make sure to crumble the meat into small pieces—this will help it fit nicely inside the dough.
Once browned, drain off any excess grease carefully. You don’t want extra moisture in the filling, as it could make the dough soggy.
Return the drained beef to the skillet and sprinkle in the taco seasoning. There’s no need to add water like you would for regular taco filling. Just stir the seasoning into the meat until everything is well-coated. The natural moisture from the beef and oils will help the spices cling beautifully.
Let the seasoned meat cool to room temperature. This step is important because hot filling can melt the cheese and soften the dough too early, making it harder to seal.
Step 3: Roll Out and Cut the Dough
Unroll your tube of pizza dough on a clean, lightly floured surface or parchment paper.
Roll it out gently if needed, especially if the dough is thicker in some areas. You want an even rectangle, roughly 12 x 8 inches.
Now, cut the dough lengthwise down the center so you have two long rectangles. Then make four vertical cuts across, creating ten evenly sized rectangles total.
Try to keep the rectangles as uniform as possible to ensure even baking.
Step 4: Add the Filling
Now it’s time to fill each dough rectangle. Place about one heaping tablespoon of the cooled taco meat in the center of each piece. You don’t need to spread it too much—just a neat pile in the middle works best.
Then, place half of a cheese stick directly on top of the meat. If your cheese sticks are very thick, you can gently press them down a bit or trim the ends to fit.
If you want to get creative here, now’s the time. Add some finely chopped jalapeños for heat, a few corn kernels for sweetness, or a sprinkle of green onions for an extra flavor punch.
Step 5: Roll and Seal the Sticks
Now for the fun part—rolling your taco sticks.
Starting at one side of each rectangle, carefully roll the dough over the filling, tucking it as you go. Once the filling is wrapped, pinch the edges tightly to seal. You want to make sure there are no openings for cheese to escape during baking.
Roll them seam-side down and place them on your prepared baking sheet. Make sure to space them at least an inch apart so they can brown evenly.
Don’t worry if they’re not all perfectly shaped—once they bake, they’ll puff up beautifully and take on a rustic charm that’s just part of the homemade magic.
Step 6: Make the Garlic Butter Glaze
In a small bowl, combine the melted butter, garlic powder, and dried parsley. Stir well to combine.
Using a pastry brush, generously brush the tops and sides of each taco stick with the butter mixture. This adds flavor, helps the crust brown, and gives them that signature glossy finish.
If you don’t have a pastry brush, you can spoon the butter over the sticks carefully—it works just as well.
Step 7: Bake to Perfection
Place the baking sheet in the preheated oven and bake for 10–12 minutes. You’ll know they’re ready when the tops are golden brown and the dough feels firm to the touch.
Keep an eye on them during the last minute or two. Depending on your oven, they might brown a little faster.
If you like an extra-crispy exterior, you can switch the oven to broil for the last 1–2 minutes. Just be sure to watch them closely so they don’t burn.
Once baked, remove the tray from the oven and let the taco sticks cool for about 5 minutes. This gives the cheese a chance to set slightly and makes them easier to handle.
Step 8: Serve and Enjoy
Now comes the best part—serving and eating these irresistible taco cheese sticks.
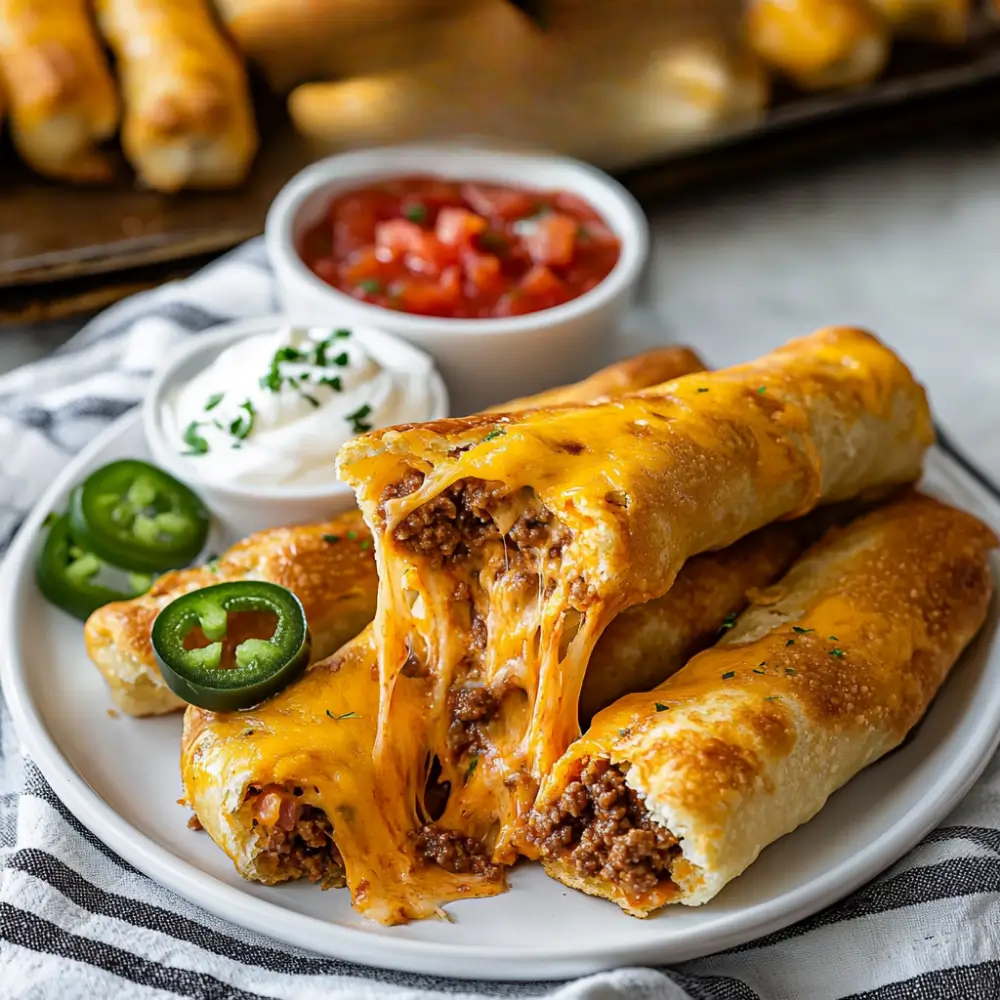
You can serve them plain or with your favorite dipping sauces like salsa, sour cream, guacamole, or even a spicy ranch.
Arrange them on a platter with colorful sides or taco toppings, and watch them disappear.
How to Serve
Taco cheese sticks are incredibly versatile, which makes serving them a total breeze. Whether you’re preparing a casual family dinner, planning a movie night, or need something fast for a party, these little guys fit right in.
First and foremost, serve them hot and fresh out of the oven. The cheese is perfectly melted, the dough is soft and crisp, and the taco meat is still juicy and flavorful. They’re best enjoyed while the cheese is still gooey and stretchy.
For a complete meal, pair them with a vibrant side salad like a simple lettuce and tomato mix, an arugula salad with lime vinaigrette, or a black bean and corn salsa. These fresh flavors balance out the richness of the taco sticks beautifully.
If you’re serving a crowd, consider setting up a DIY dipping station. Offer a variety of dips like:
- Salsa (mild, medium, or hot)
- Guacamole
- Sour cream or Greek yogurt
- Chipotle mayo
- Spicy tomato chutney
These add flavor, fun, and customization to your meal.
Taco cheese sticks also make a fantastic kids’ lunch. They fit easily into lunchboxes, are fun to eat with your hands, and are tasty even when cooled. Pack them with a fruit cup or veggie sticks and you’ve got a balanced, exciting meal.
Want to turn this into a dinner? Serve two or three sticks per person with a side of Mexican-style rice or cilantro-lime quinoa and steamed veggies. It’s easy, filling, and satisfying.
Finally, they’re perfect party food. Just cut them in half for bite-sized pieces and watch them fly off the tray. No utensils required.
Pairing Suggestions
The beauty of taco cheese sticks is that they pair well with so many sides, drinks, and even themed meals. Whether you’re keeping things casual or dressing them up for a weekend get-together, here are some pairing ideas that bring out the best in this dish.
Side Dishes
- Southwest Salad – A crisp, fresh salad with romaine lettuce, black beans, corn, diced tomatoes, and a zesty lime vinaigrette adds contrast and freshness.
- Mexican Rice or Cilantro-Lime Rice – These fluffy, flavorful sides turn your snack into a full meal and soak up all those bold taco spices.
- Roasted Vegetables – Bell peppers, zucchini, and red onions roasted with cumin and olive oil add a healthy, colorful side that complements the richness of the cheese sticks.
- Street Corn (Elote Style) – If you want to keep things festive, serve your taco sticks with grilled or roasted corn topped with mayo, chili powder, lime juice, and a sprinkle of cheese.
- Tortilla Chips with Salsa Trio – Think restaurant-style setup with mild salsa, spicy salsa verde, and a creamy dip. Great for sharing!
Beverage Pairings
- Iced Lime Mint Cooler – Light and refreshing, it cuts through the richness of the cheese sticks.
- Sparkling Lemonade – Crisp and slightly tart, this is perfect if you’re serving these at a kids’ party or summer gathering.
- Non-Alcoholic Sangria – With a mix of fruit juice, soda water, and citrus slices, it adds a festive, fruity twist that complements the spice.
- Classic Iced Tea or Hibiscus Tea (Agua de Jamaica) – These traditional drinks offer a cooling contrast and are a nod to the taco theme.
Storage, Freezing & Reheating Instructions
Let’s be honest—these taco cheese sticks are so delicious that they usually don’t make it past the first round of serving. But in case you find yourself with leftovers or want to make a batch ahead of time, good news: they store, freeze, and reheat beautifully.
Storing Leftovers in the Fridge
If you’ve got a few sticks leftover after dinner, simply let them cool completely before storing. Place them in an airtight container lined with paper towels (to absorb any extra moisture), and refrigerate. They’ll stay fresh in the fridge for up to 3 days.
To maintain the best texture, avoid stacking them directly on top of each other. Instead, separate layers with parchment paper or foil.
Freezing for Later
Want to prep a big batch and freeze them for future meals or snacks? Absolutely possible—and highly recommended. Taco cheese sticks freeze well, whether you’re freezing them before or after baking.
To freeze before baking:
-
Assemble the taco sticks as directed, but don’t brush them with the butter mixture yet.
-
Place them on a baking sheet lined with parchment and freeze for 1–2 hours until solid.
-
Transfer to a freezer-safe zip-top bag or container.
-
Label and date them, and freeze for up to 3 months.
When you’re ready to bake, you don’t need to thaw. Just place them directly on a baking sheet, brush with the butter mixture, and bake at 425°F for about 15–18 minutes or until golden and cooked through.
To freeze after baking:
-
Let the baked sticks cool completely.
-
Wrap each one in foil or plastic wrap, then place in a freezer-safe container or bag.
-
Freeze for up to 2 months.
Reheating Instructions
When reheating from the fridge, the oven or air fryer is your best option.
-
Oven: Preheat to 350°F and bake for 8–10 minutes until heated through.
-
Air Fryer: Heat at 350°F for 5–7 minutes.
-
Microwave: While convenient, the microwave tends to soften the crust. If you choose this method, use short 20-second bursts and reheat only until warmed through.
By reheating the right way, you can enjoy these taco cheese sticks almost as fresh as the first time around.
Common Mistakes to Avoid
Even though this recipe is super beginner-friendly, there are a few small missteps that could throw off your results. Luckily, they’re easy to avoid once you know what to watch for.
Overfilling the Dough
One of the most common mistakes is using too much filling. It’s tempting to pack in as much taco meat and cheese as possible, but overstuffing can lead to torn dough or filling oozing out during baking. Stick to about one tablespoon of meat and half a cheese stick per piece for the best seal and even baking.
Not Sealing the Edges Properly
If the dough isn’t pinched shut tightly, the cheese will melt and leak out in the oven, leaving a mess and a sadly hollow taco stick. Always make sure the seams are well-sealed, and place the sticks seam-side down on the baking sheet to keep them closed while they bake.
Using Hot Filling
This might be a surprising one, but it’s important. If your meat mixture is still hot when you add it to the dough, it will start melting the cheese too early and may soften the dough, making it tricky to handle. Always let the filling cool to room temperature before assembling.
Skipping the Butter Glaze
It might seem like a small detail, but brushing the dough with melted butter, garlic powder, and parsley adds a big boost of flavor and gives your taco sticks that beautiful golden-brown finish. Don’t skip this step—it takes just a minute and makes a huge difference.
Overbaking or Underbaking
Baking for too long can dry out the dough and overcook the filling, while underbaking can leave you with doughy centers. Every oven is a bit different, so start checking at the 10-minute mark and look for a golden-brown crust and slightly firm texture.
Avoiding these simple mistakes ensures every batch of taco cheese sticks turns out just right—crispy, cheesy, and packed with flavor.
Pro Tips
Want to take your taco cheese sticks to the next level? Here are some tried-and-true pro tips to help you get the best results every time.
Use Room Temperature Dough
Cold pizza dough can be stiff and hard to roll out evenly. If you’re using refrigerated dough, let it sit at room temperature for 15–20 minutes before unrolling. This makes it easier to work with and helps you avoid tears or uneven pieces.
Customize the Filling
Feel free to get creative with your taco meat. Add a tablespoon of tomato paste, a squeeze of lime, or some chopped green chilies for extra dimension. You can also toss in finely chopped vegetables like onions, corn, or peppers for more texture and nutrition.
Try Different Cheese Blends
While Colby Jack and Cheddar are classics, mozzarella gives you that iconic cheese pull, and Pepper Jack adds a spicy kick. Mixing cheeses creates a richer, more complex flavor, and you can tailor it to suit your preferences or use what’s in your fridge.
Don’t Forget the Dipping Sauces
Serving with dips isn’t just fun—it elevates the whole experience. A homemade salsa, creamy avocado dip, or smoky chipotle sauce can transform your taco cheese sticks into a gourmet snack. Make a variety of dips to cater to different tastes.
Use an Air Fryer for Reheating
If you’re reheating leftovers, the air fryer is a total game-changer. It crisps up the outside perfectly while keeping the inside warm and cheesy. Just pop them in at 350°F for 5–7 minutes, and they’ll taste freshly baked.
Add a Touch of Spice
If you love heat, add a pinch of cayenne or crushed red pepper flakes to the meat mixture. You can also tuck in a few thin jalapeño slices with the cheese for a bold, spicy surprise.
These small enhancements make a big difference and ensure your taco cheese sticks are packed with flavor, perfectly textured, and impossible to resist.
Frequently Asked Questions (FAQs)
When it comes to making a fun, comforting recipe like taco cheese sticks, a few questions naturally pop up—especially if you’re planning ahead, adapting for dietary needs, or making this for a crowd. Here are the most frequently asked questions, answered in full so you can feel confident every step of the way.
Can I use homemade dough instead of store-bought?
Absolutely. If you love making your own dough or already have a favorite recipe, go for it. Just make sure it’s rolled out thinly and evenly, and that it bakes well at high heat. Homemade dough can add even more flavor and gives you full control over ingredients like flour type and seasonings.
What type of cheese is best for this recipe?
While the recipe calls for a Colby Jack and Cheddar blend, you’re free to use other cheeses that melt well. Mozzarella, Monterey Jack, Pepper Jack, or even a shredded Mexican blend will all work beautifully. For a creamier center, try a mix of mozzarella and cheddar. Just be sure to cut the cheese sticks in half so they fit neatly inside the dough.
Can I make these vegetarian?
Yes, and it’s a great option. You can substitute the ground beef with seasoned black beans, lentils, or a plant-based meat alternative. Just cook your veggie filling with taco seasoning the same way you would for meat, and you’ll still get all that savory, spiced flavor.
Can I prepare these ahead of time?
You sure can. One option is to assemble the taco sticks and refrigerate them, unbaked, for up to 24 hours. Cover them tightly with plastic wrap or foil so the dough doesn’t dry out. When you’re ready to bake, brush with butter and pop them in the oven. This makes them perfect for parties or busy weeknights.
How do I keep them from bursting open in the oven?
The key is not to overfill the dough and to make sure you pinch the edges tightly shut. Place the sticks seam-side down on the baking sheet to help keep them sealed as they bake. Letting the filling cool before assembling also prevents steam from building up inside the dough.
Can I double or triple the recipe?
Definitely. This recipe scales up easily. If you’re feeding a large group, simply double or triple the ingredient amounts and prepare multiple baking sheets. Bake each tray separately or rotate them halfway through baking if you’re using more than one rack.
What dipping sauces work best?
Classic salsa is always a hit, but you can also serve these with guacamole, sour cream, spicy ranch, queso, or even a cilantro-lime yogurt dip. Offering two or three options makes the dish even more fun and customizable.
Are these freezer-friendly?
Yes! You can freeze the assembled sticks before baking or the fully baked ones afterward. For best results, freeze them individually on a tray before transferring to a storage bag. Reheat in the oven or air fryer straight from frozen for a quick snack or meal.
Can I make this recipe gluten-free?
Yes, just use gluten-free pizza dough and ensure your taco seasoning and cheese are certified gluten-free. The result will be just as delicious and satisfying.
Can I use other types of meat?
Of course. Ground chicken or turkey both work well and provide a lighter option. You can also use seasoned shredded chicken or leftover halal roast beef. The key is to keep the filling relatively dry so the dough doesn’t get soggy.
Conclusion & Call to Action
So there you have it—everything you need to make the most craveable, golden, cheesy taco sticks right in your own kitchen. From the buttery, herbed crust to the spicy beef filling and melty cheese core, every bite is packed with comforting flavor and fun textures. Whether you’re serving them for game night, slipping them into a lunchbox, or bringing a tray to your next potluck, taco cheese sticks are guaranteed to steal the spotlight.
What’s great about this recipe is how approachable it is. With just a few simple steps and easy-to-find ingredients, anyone can pull it off. And the best part? You can make it your own. Add some heat, toss in extra veggies, swap in your favorite cheese, or make them entirely vegetarian. No matter how you tweak them, these taco cheese sticks turn out delicious.
If you’ve been looking for a fun, family-friendly dish that brings people together over food, this is the one to try. The combination of seasoned beef, melted cheese, and golden dough is nostalgic, satisfying, and universally loved.
Now it’s your turn. Head into the kitchen, grab that pizza dough and ground beef, and get rolling—literally. I promise this is one of those recipes you’ll make once and then keep coming back to again and again. It’s that good.
And once you’ve made them, I’d love to hear how it went. Did your family go wild for them? Did you add your own twist? Leave a comment below, share your creations on social media, or tag me in your photos. Seeing your version of this recipe is one of my favorite things.
Until then, happy cooking—and don’t forget to save a couple for yourself before they disappear off the tray. These taco cheese sticks never last long.
Print
Taco Cheese Sticks Recipe: Easy Cheesy Snack for Family Nights
- Total Time: 27 minutes
- Yield: 10 sticks 1x
- Diet: Halal
Description
These taco cheese sticks are the ultimate comfort snack—gooey melted cheese, seasoned beef, and soft golden pizza dough brushed with garlic butter. Ready in just 30 minutes!
Ingredients
-
1 lb ground beef
-
1 packet taco seasoning (or homemade)
-
1 tube Pillsbury pizza dough
-
5 cheese sticks (Colby Jack + Cheddar), halved
-
4 tbsp butter, melted
-
1 tsp garlic powder
-
1 tsp dried parsley
Instructions
-
Preheat oven to 425°F and prepare a baking sheet.
-
Cook ground beef in skillet until browned. Drain fat and add taco seasoning. Let cool.
-
Roll out pizza dough and cut into 10 rectangles.
-
Place 1 tbsp taco meat and half a cheese stick on each rectangle.
-
Roll tightly and pinch edges to seal.
-
Mix melted butter, garlic powder, and parsley. Brush onto rolls.
-
Bake 10–12 minutes until golden. Serve warm with dips like salsa or sour cream.
Notes
-
Let the meat cool before assembling to prevent soggy dough.
-
Customize with jalapeños, corn, or black beans for variety.
-
Freeze before or after baking for make-ahead convenience.
- Prep Time: 15 minutes
- Cook Time: 12 minutes
- Category: Snack, Appetizer
- Method: Baking
- Cuisine: Tex-Mex