
Stuffed squash is a delightful dish that brings together a medley of flavors and textures in a beautiful presentation. This recipe not only tantalizes your taste buds but also showcases the vibrant colors of the ingredients. Each bite offers a perfect harmony of roasted squash, savory fillings, and aromatic herbs, making it an incredible choice for family dinners or special occasions. Whether you’re a seasoned chef or an eager home cook, stuffed squash can elevate any meal, proving to be both delicious and visually stunning.
If you’ve never tried stuffed squash before, you’re in for a treat! The succulent squash acts as a vessel for a variety of fillings, ranging from grains and vegetables to meats and cheeses. The amazing flavors meld together during cooking, creating a dish that is both comforting and satisfying. In this guide, you will learn why this recipe is so beloved, how to prepare it, and tips on serving it to make an unforgettable meal. Let’s explore what makes stuffed squash an essential recipe for your culinary repertoire!
Why You’ll Love This Recipe
Stuffed squash is not just a meal; it’s an experience that can bring joy to your dining table. Here are some reasons why you’ll fall in love with this incredible dish:
1. Versatile Ingredients – You can customize the filling to match your dietary preferences, making it suitable for both vegetarians and meat lovers.
2. Seasonal Appeal – Perfect for autumn and winter gatherings, this dish highlights seasonal produce.
3. Nutrient-Dense – Packed with vitamins and minerals, stuffed squash offers a healthy way to enjoy comfort food.
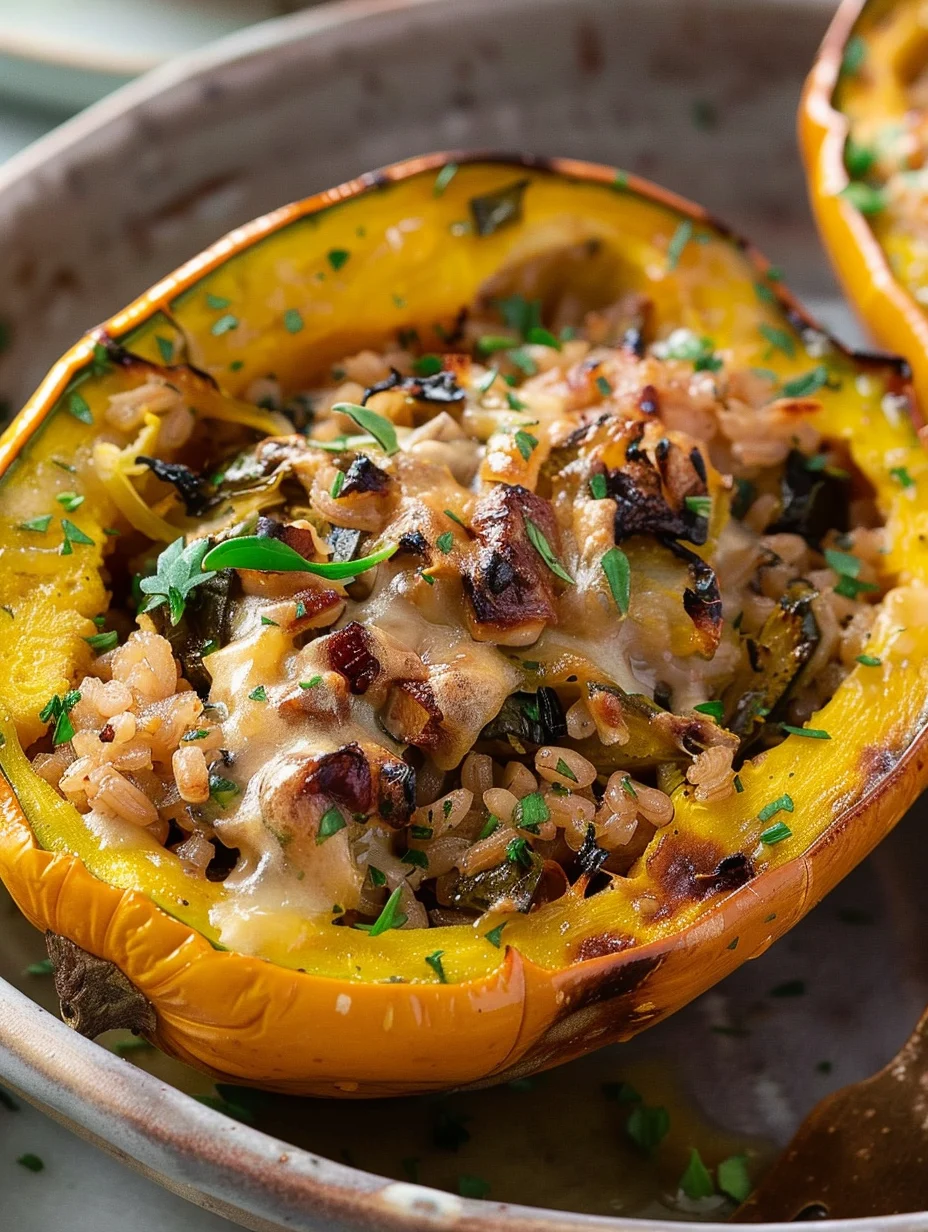
4. Impressive Presentation – The vibrant colors of the squash and filling make it visually stunning, perfect for impressing guests.
5. Ease of Preparation – With straightforward instructions, even novice cooks can create a delicious dish without stress.
6. Leftover Friendly – Any leftover stuffed squash can be stored and reheated, making it a convenient option for meal prep.
These factors contribute to why stuffed squash is a hit for any occasion. Each bite is filled with flavor, and the comforting nature of the dish makes it perfect for family gatherings or cozy nights in.
Preparation and Cooking Time
In total, preparing stuffed squash will take about 1 hour and 15 minutes. Here’s a breakdown of the time required:
– Preparation Time: 30 minutes
– Cooking Time: 30-45 minutes
– Cooling Time: 5 minutes
These times may vary slightly depending on your kitchen experience and equipment, but this framework should provide a good estimate for your cooking adventure.
Ingredients
– 4 medium-sized squash (such as acorn or butternut)
– 1 cup quinoa or rice (cooked)
– 1 cup black beans (canned, drained, and rinsed)
– 1 cup corn (fresh or frozen)
– 1 bell pepper (diced)
– 1 onion (diced)
– 2 cloves garlic (minced)
– 1 teaspoon cumin
– 1 teaspoon paprika
– Salt and pepper to taste
– 1 cup shredded cheese (cheddar or mozzarella)
– Fresh herbs for garnish (such as parsley or cilantro)
Step-by-Step Instructions
Creating stuffed squash can be straightforward if you follow these simple steps:
1. Preheat Oven: Preheat your oven to 375°F (190°C).
2. Prepare Squash: Cut the squash in half lengthwise and scoop out the seeds. Lightly drizzle with olive oil and season with salt and pepper.
3. Roast Squash: Place the squash halves cut-side down on a baking sheet. Roast in the oven for 25-30 minutes until tender.
4. Cook Filling: In a skillet, heat a tablespoon of olive oil over medium heat. Add diced onion and bell pepper, cooking until softened (about 5 minutes).
5. Add Garlic and Spices: Stir in the minced garlic, cumin, and paprika. Cook for an additional minute until fragrant.
6. Combine Filling Ingredients: In a large bowl, mix the cooked quinoa or rice, black beans, corn, and the sautéed vegetable mixture. Season with salt and pepper to taste.
7. Stuff Squash: Remove the squash from the oven and carefully flip them cut-side up. Fill each half with the quinoa mixture, pressing down gently.
8. Top with Cheese: Sprinkle shredded cheese generously on top of the stuffed squash.
9. Bake Again: Return the stuffed squash to the oven and bake for an additional 10-15 minutes until the cheese is melted and bubbly.
10. Garnish and Serve: Once done, remove from the oven and let cool for 5 minutes. Garnish with fresh herbs before serving.
These steps will guide you in creating this amazing dish effortlessly.
How to Serve
To make a lasting impression when serving stuffed squash, consider the following tips:
1. Presentation: Arrange the stuffed squash on a large serving platter for a beautiful display. Drizzle with a balsamic reduction for an elegant touch.
2. Accompaniments: Serve with a light salad or roasted vegetables for a balanced meal.
3. Garnish: Add a sprinkle of fresh herbs or a dollop of sour cream for added flavor and visual appeal.
4. Pairing: This dish pairs well with a crisp white wine or a light beer, enhancing the overall dining experience.
By putting thought into how you serve stuffed squash, you elevate the entire meal, making it memorable for both you and your guests. Enjoy the incredible flavors and satisfying textures that this dish has to offer!
Additional Tips
– Choose the Right Squash: Opt for squash varieties that have a sweet and nutty flavor, such as butternut or acorn squash, for the best taste.
– Experiment with Seasonings: Feel free to add extra spices like chili powder or Italian herbs to the filling for added depth of flavor.
– Use Leftover Fillings: If you have leftover grains or vegetables from another meal, incorporate them into the stuffing to reduce waste and enhance flavor.
– Adjust Cooking Time: Depending on the size of your squash, cooking times may vary. Always check for tenderness with a fork before removing from the oven.
Recipe Variation
Get creative with your stuffed squash by trying these variations:
1. Mediterranean Style: Include feta cheese, olives, and sun-dried tomatoes in the filling for a Mediterranean twist.
2. Mexican-Inspired: Add taco seasoning to the filling and top with avocado and salsa for a zesty flavor profile.
3. Meat Lover’s Delight: Incorporate ground turkey or sausage into the filling for a hearty option that meat lovers will enjoy.
4. Sweet Version: For a dessert twist, fill the squash with a mixture of oats, cinnamon, apples, and nuts, then bake until soft.
Freezing and Storage
– Storage: Store leftover stuffed squash in an airtight container in the refrigerator for up to 4 days to maintain freshness.
– Freezing: You can freeze the stuffed squash before baking. Wrap each half tightly in plastic wrap and foil, and they should last for about 2-3 months. When ready to eat, thaw in the fridge overnight and bake as directed.
Special Equipment
To successfully prepare stuffed squash, you will need the following tools:
– Sharp knife for cutting the squash
– Spoon or melon baller for scooping out the seeds
– Baking sheet for roasting the squash
– Skillet for cooking the filling
– Mixing bowl for combining ingredients
Frequently Asked Questions
Can I use other types of squash?
Yes, you can use various squash types, such as spaghetti squash or acorn squash, depending on your preference.
Is this dish gluten-free?
Yes, by substituting quinoa or rice for any grains that contain gluten, you can keep this dish entirely gluten-free.
Can I make the filling ahead of time?
Absolutely! You can prepare the filling a day in advance and store it in the refrigerator until you’re ready to stuff the squash.
What can I serve with stuffed squash?
Stuffed squash pairs well with a simple green salad or roasted vegetables, enhancing the meal’s overall nutrition.
How do I know when the squash is done cooking?
The squash is done when it is tender to the fork and slightly caramelized around the edges.
Conclusion
Stuffed squash is a versatile and delicious dish that brings warmth and satisfaction to any meal. With its stunning presentation and rich flavors, it’s a perfect choice for family dinners, holiday gatherings, or cozy nights at home. This dish allows for endless variations, making it easy to tailor to your taste preferences. Embrace the joy of cooking and delight in the incredible experience that stuffed squash offers. Whether you’re serving it to guests or enjoying it yourself, you’ll find this recipe to be a memorable addition to your culinary repertoire.

Stuffed Squash: An Amazing Ultimate Recipe for 5-Star Flavor
- Total Time: 7 minute
Ingredients
– 4 medium-sized squash (such as acorn or butternut)
– 1 cup quinoa or rice (cooked)
– 1 cup black beans (canned, drained, and rinsed)
– 1 cup corn (fresh or frozen)
– 1 bell pepper (diced)
– 1 onion (diced)
– 2 cloves garlic (minced)
– 1 teaspoon cumin
– 1 teaspoon paprika
– Salt and pepper to taste
– 1 cup shredded cheese (cheddar or mozzarella)
– Fresh herbs for garnish (such as parsley or cilantro)
Instructions
Creating stuffed squash can be straightforward if you follow these simple steps:
1. Preheat Oven: Preheat your oven to 375°F (190°C).
2. Prepare Squash: Cut the squash in half lengthwise and scoop out the seeds. Lightly drizzle with olive oil and season with salt and pepper.
3. Roast Squash: Place the squash halves cut-side down on a baking sheet. Roast in the oven for 25-30 minutes until tender.
4. Cook Filling: In a skillet, heat a tablespoon of olive oil over medium heat. Add diced onion and bell pepper, cooking until softened (about 5 minutes).
5. Add Garlic and Spices: Stir in the minced garlic, cumin, and paprika. Cook for an additional minute until fragrant.
6. Combine Filling Ingredients: In a large bowl, mix the cooked quinoa or rice, black beans, corn, and the sautéed vegetable mixture. Season with salt and pepper to taste.
7. Stuff Squash: Remove the squash from the oven and carefully flip them cut-side up. Fill each half with the quinoa mixture, pressing down gently.
8. Top with Cheese: Sprinkle shredded cheese generously on top of the stuffed squash.
9. Bake Again: Return the stuffed squash to the oven and bake for an additional 10-15 minutes until the cheese is melted and bubbly.
10. Garnish and Serve: Once done, remove from the oven and let cool for 5 minutes. Garnish with fresh herbs before serving.
These steps will guide you in creating this amazing dish effortlessly.
- Prep Time: 15 minutes
- Cook Time: 30-45 minutes
Nutrition
- Serving Size: 4
- Calories: 320 kcal
- Fat: 10g
- Protein: 12g