
Santa & Rudolph Christmas Cakes are the perfect way to spread joy and cheer during the holiday season. These delightful desserts capture the essence of Christmas with their festive designs and mouthwatering flavors. Imagine gathering around the table with family and friends, sharing these whimsical cakes that not only look incredible but taste even better. From the moment you slice into a Santa & Rudolph Christmas Cake, you’ll experience a blend of joy, nostalgia, and festivity.
The beauty of these cakes lies in their ability to evoke childhood memories, transporting you back to the magic of Christmas. The vibrant colors and playful designs are sure to delight both children and adults alike. Whether you’re hosting a holiday party, attending a festive gathering, or simply looking to treat your loved ones, these cakes will undoubtedly impress. In this article, you’ll discover why you’ll love this recipe, how to prepare the cakes, and tips for serving them perfectly.
The Santa & Rudolph Christmas Cakes are not just desserts; they are a celebration of the holiday spirit. With each bite, you’ll experience a burst of flavors that harmonize beautifully, making every gathering feel special. Let’s dive into what makes this recipe truly extraordinary!
Why You’ll Love This Recipe
The Santa & Rudolph Christmas Cakes bring together a wonderful combination of flavors and creativity. Here are some reasons why you will absolutely adore this recipe:
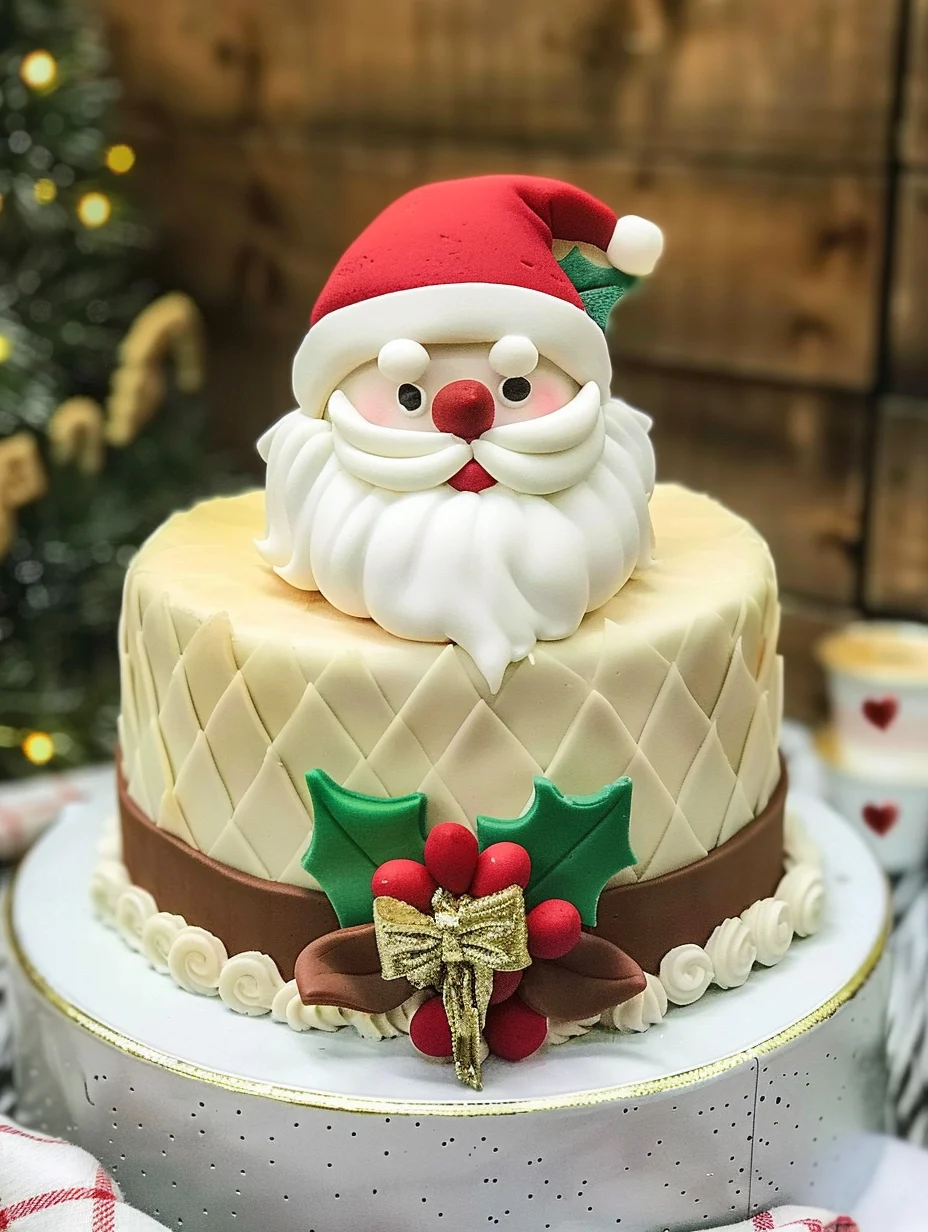
1. Festive Appeal: The cakes are designed to look like Santa and Rudolph, adding a fun and festive touch to your celebrations.
2. Delicious Flavors: With a rich chocolate base and creamy frosting, these cakes are irresistibly tasty.
3. Easy to Make: The recipe is straightforward, making it accessible for bakers of all skill levels.
4. Family Fun: Decorating these cakes can be a fun activity for the entire family, creating lasting memories.
5. Perfect for Gifting: Wrapped beautifully, these cakes make excellent holiday gifts for friends and neighbors.
6. Versatile Options: You can easily customize the flavors or decorations to suit your preferences.
These factors make the Santa & Rudolph Christmas Cakes a delightful addition to your holiday festivities. From the look to the taste, every aspect of these cakes is designed to spread joy and happiness.
Preparation and Cooking Time
Making Santa & Rudolph Christmas Cakes will take approximately 1 hour and 30 minutes from start to finish. Here’s a breakdown of the time required:
– Preparation Time: 30 minutes
– Baking Time: 25-30 minutes
– Cooling Time: 20-25 minutes
– Decoration Time: 15-20 minutes
These times may vary slightly depending on your kitchen setup and experience, but this estimate should help you plan your baking session.
Ingredients
– 2 cups all-purpose flour
– 1 ½ cups granulated sugar
– ¾ cup unsweetened cocoa powder
– 1 cup whole milk
– ½ cup vegetable oil
– 4 large eggs
– 1 tablespoon baking powder
– 1 teaspoon vanilla extract
– ¼ teaspoon salt
– Red and green food coloring
– Buttercream frosting (for decoration)
– Chocolate chips (for eyes and buttons)
– Red candy or M&M’s (for Rudolph’s nose)
– Edible glitter or sprinkles (optional)
Step-by-Step Instructions
Creating Santa & Rudolph Christmas Cakes can be a fun and rewarding experience. Follow these simple steps to bring your cakes to life:
1. Preheat your oven to 350°F (175°C). Grease and flour two 9-inch round cake pans.
2. Mix Dry Ingredients: In a large bowl, sift together the flour, granulated sugar, cocoa powder, baking powder, and salt.
3. Combine Wet Ingredients: In another bowl, whisk together the milk, vegetable oil, eggs, and vanilla extract until well blended.
4. Combine Mixtures: Gradually add the wet ingredients to the dry ingredients, stirring until smooth.
5. Divide Batter: Split the batter into two bowls. Color one bowl with red food coloring and the other with green.
6. Layer the Batter: Pour alternating scoops of the red and green batter into the prepared cake pans, creating a marbled effect.
7. Bake: Place the pans in the oven and bake for 25-30 minutes or until a toothpick inserted in the center comes out clean.
8. Cool: Remove the cakes from the oven and allow them to cool in their pans for 20 minutes. Then transfer them to wire racks to cool completely.
9. Prepare Buttercream Frosting: While the cakes cool, prepare your buttercream frosting. You can divide it into bowls and color portions red, green, and white.
10. Assemble the Cakes: Once the cakes are completely cool, place one layer on a serving platter. Spread frosting on top, then add the second layer.
11. Decorate: Use the colored frosting to create Santa’s hat, face, and Rudolph’s features. Use chocolate chips for eyes and a red candy for Rudolph’s nose.
12. Add Finishing Touches: Sprinkle edible glitter or additional decorations as desired.
These steps will guide you in creating these delightful cakes effortlessly.
How to Serve
To enhance the presentation and enjoyment of your Santa & Rudolph Christmas Cakes, consider the following tips:
1. Display: Use a festive cake stand for an elegant presentation. Surround the cakes with holiday-themed decorations.
2. Slice Size: Cut generous slices but be mindful of portion sizes. Smaller slices encourage guests to try more than one!
3. Accompaniments: Serve with a dollop of whipped cream, ice cream, or a side of fresh berries for added flavor.
4. Beverage Pairing: Pair the cakes with hot cocoa, spiced cider, or a festive holiday punch for a complete experience.
5. Leftovers: If there are any leftovers, store them in an airtight container in the fridge for up to three days.
By putting thought into how you serve these delightful cakes, you elevate the holiday experience for both you and your guests. Enjoy the joy and warmth that comes with each slice of Santa & Rudolph Christmas Cakes!
Additional Tips
– Use Quality Ingredients: For the best flavor, opt for high-quality cocoa powder and pure vanilla extract. This enhances the overall taste of your Santa & Rudolph Christmas Cakes.
– Be Creative with Decorations: Let your imagination run wild! Use edible decorations like candy canes, chocolate shavings, or even edible glitter to make your cakes stand out.
– Test for Doneness: Always check your cakes for doneness by inserting a toothpick into the center. It should come out clean for perfectly baked cakes.
– Adjust Bake Time as Needed: Oven temperatures can vary. Keep an eye on your cakes during the last few minutes of baking to prevent overcooking.
– Chill Your Frosting: If your buttercream frosting is too soft for decorating, chill it in the refrigerator for a few minutes to firm it up.
Recipe Variation
Feel free to switch things up! Here are a few variations to try:
1. Spice It Up: Add a teaspoon of cinnamon or ginger to the batter for a warm, spiced flavor perfect for the holidays.
2. Different Cake Base: Instead of chocolate, try a vanilla or red velvet cake base for a unique twist on the traditional recipe.
3. Fruity Additions: Fold in some crushed cranberries or chopped cherries into the batter for a burst of fruity flavor.
4. Gluten-Free Option: Substitute all-purpose flour with gluten-free flour for a version that accommodates gluten sensitivities.
Freezing and Storage
– Storage: Keep the cake covered at room temperature for up to two days or refrigerated for up to five days to maintain its freshness.
– Freezing: You can freeze the cakes for up to three months. Wrap each cake tightly in plastic wrap and aluminum foil to prevent freezer burn. Thaw in the refrigerator overnight before serving.
Special Equipment
You will need a few essential tools to prepare these cakes successfully:
– Mixing bowls
– Electric mixer or whisk
– 9-inch round cake pans
– Offset spatula for frosting
– Piping bags for decoration
– Cooling racks
Frequently Asked Questions
How can I ensure even baking?
Rotate the cake pans halfway through the baking time to promote even cooking.
Can I make these cakes in advance?
Absolutely! You can bake the cakes a day ahead and frost them just before serving.
What can I use instead of buttercream frosting?
Cream cheese frosting or whipped cream can be delightful alternatives.
Can I personalize the decorations?
Definitely! Use your favorite candies and colors to make the cakes uniquely yours.
How long do leftovers last?
If stored properly, leftovers can last in the refrigerator for up to three days.
Conclusion
The Santa & Rudolph Christmas Cakes are more than just desserts; they embody the spirit of the holiday season. With their festive designs and delicious flavors, they bring joy to any gathering. Baking these cakes not only creates a delightful treat but also fosters cherished memories with family and friends. So gather your loved ones and enjoy the magic of Christmas through these whimsical cakes!

Santa & Rudolph Christmas Cakes: An Amazing Ultimate Recipe
- Total Time: 50 minute
Ingredients
– 2 cups all-purpose flour
– 1 ½ cups granulated sugar
– ¾ cup unsweetened cocoa powder
– 1 cup whole milk
– ½ cup vegetable oil
– 4 large eggs
– 1 tablespoon baking powder
– 1 teaspoon vanilla extract
– ¼ teaspoon salt
– Red and green food coloring
– Buttercream frosting (for decoration)
– Chocolate chips (for eyes and buttons)
– Red candy or M&M’s (for Rudolph’s nose)
– Edible glitter or sprinkles (optional)
Instructions
Creating Santa & Rudolph Christmas Cakes can be a fun and rewarding experience. Follow these simple steps to bring your cakes to life:
1. Preheat your oven to 350°F (175°C). Grease and flour two 9-inch round cake pans.
2. Mix Dry Ingredients: In a large bowl, sift together the flour, granulated sugar, cocoa powder, baking powder, and salt.
3. Combine Wet Ingredients: In another bowl, whisk together the milk, vegetable oil, eggs, and vanilla extract until well blended.
4. Combine Mixtures: Gradually add the wet ingredients to the dry ingredients, stirring until smooth.
5. Divide Batter: Split the batter into two bowls. Color one bowl with red food coloring and the other with green.
6. Layer the Batter: Pour alternating scoops of the red and green batter into the prepared cake pans, creating a marbled effect.
7. Bake: Place the pans in the oven and bake for 25-30 minutes or until a toothpick inserted in the center comes out clean.
8. Cool: Remove the cakes from the oven and allow them to cool in their pans for 20 minutes. Then transfer them to wire racks to cool completely.
9. Prepare Buttercream Frosting: While the cakes cool, prepare your buttercream frosting. You can divide it into bowls and color portions red, green, and white.
10. Assemble the Cakes: Once the cakes are completely cool, place one layer on a serving platter. Spread frosting on top, then add the second layer.
11. Decorate: Use the colored frosting to create Santa’s hat, face, and Rudolph’s features. Use chocolate chips for eyes and a red candy for Rudolph’s nose.
12. Add Finishing Touches: Sprinkle edible glitter or additional decorations as desired.
These steps will guide you in creating these delightful cakes effortlessly.
- Prep Time: 30 minutes
- Cook Time: 25-30 minutes
Nutrition
- Serving Size: 12
- Calories: 320 kcal
- Fat: 12g
- Protein: 5g