
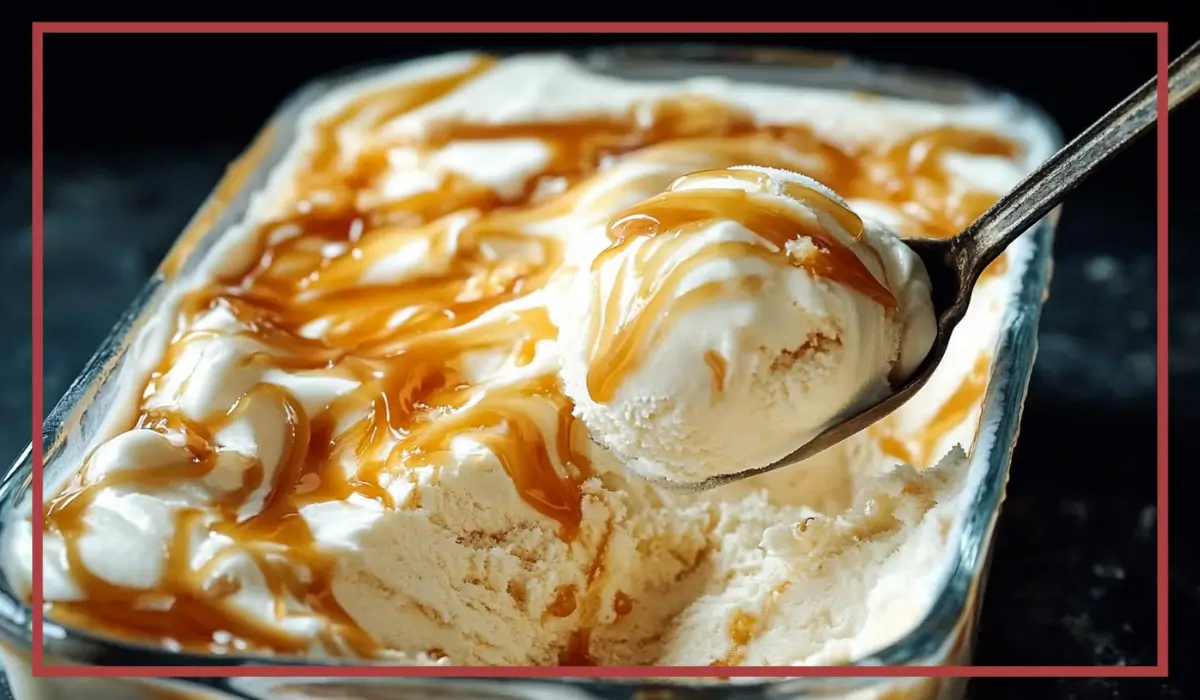
There’s something undeniably comforting about ice cream. It’s nostalgic, it’s creamy, and it never fails to make a day just a little brighter. Whether it’s the end of a long summer day or a celebration with friends and family, ice cream always finds its way to the table. But not just any ice cream—homemade ice cream. And not just any homemade ice cream—salted caramel no-churn ice cream.
The first time I made this recipe, I was skeptical. I’d always believed that good ice cream required an ice cream machine, a long list of ingredients, and lots of churning. But one spoonful of this silky, dreamy, salted caramel delight changed everything. It was rich without being overwhelming, sweet with just the right amount of salt, and had the kind of melt-in-your-mouth texture that you’d expect from a fancy scoop shop.
Now, let me be clear—this isn’t your average ice cream. It’s a decadent, spoon-licking, freezer-stashing masterpiece that you’ll want to make again and again. The fact that it only takes a few ingredients and absolutely no special equipment makes it even more magical. Whether you’re a seasoned home cook or someone who usually buys their ice cream in a tub, this recipe is for you.
What I love most about it is how versatile and foolproof it is. There’s no tempering eggs or worrying about the custard curdling. There’s no machine humming in the background for 30 minutes. Instead, you just whip, fold, freeze, and wait. And once it’s ready? You’ll be rewarded with a dessert that tastes like it took hours to make.
I first made this during a late summer get-together with some close friends. We’d grilled dinner, shared stories under twinkle lights, and I pulled this out as a surprise dessert. Not only did everyone go back for seconds, but someone even asked if I’d picked it up from a boutique ice cream parlor. That’s how good it is. Since then, it’s become my go-to sweet fix when I want something show-stopping but simple. And after you try it once, I’m pretty sure it’ll be your favorite too.
Why You’ll Love This Recipe
There are countless reasons why this salted caramel no-churn ice cream deserves a spot in your recipe collection. First and foremost, it’s incredibly easy to make. You don’t need an ice cream maker, fancy tools, or any complicated steps. Just a few bowls, a whisk (or a hand mixer), and a freezer, and you’re on your way to frozen dessert bliss.
Another reason you’ll fall head over heels for this recipe is the flavor. The combination of sweet, buttery caramel and flaky sea salt is timeless. Each bite delivers layers of richness that dance across your taste buds. The sweetness is perfectly balanced with just a touch of salt, making the overall experience deeply satisfying and addictive in the best way.
Texture is just as important as taste when it comes to ice cream, and this recipe delivers. Thanks to the whipped cream base, the texture is unbelievably smooth and light. It’s airy without feeling icy and rich without feeling heavy. The whipped cream holds onto the air, giving you a soft, scoopable dessert that glides off the spoon with ease.
This recipe is also a hit with both kids and adults. Kids love the sweetness and creamy feel, while adults appreciate the depth that comes from the caramel and sea salt combination. You can serve it at a backyard barbecue, a birthday party, or simply enjoy it on a lazy evening curled up with a good book. It’s flexible and universally appealing.
Not to mention, the ingredients are simple and easy to find. You won’t need to hunt down anything obscure. With heavy cream, sweetened condensed milk, caramel sauce, and a bit of sea salt, you’re good to go. And if you’re feeling extra creative, this recipe makes a great base for customizing with mix-ins like chocolate chips, crushed cookies, or swirls of peanut butter.
So whether you’re craving a spoonful of something sweet or want to impress your guests with a homemade treat, this no-churn salted caramel ice cream is the answer. It’s simple, stunning, and absolutely irresistible.
Health Benefits
While no-churn ice cream is certainly a treat, it still comes with a few health-related positives—especially when enjoyed in moderation and as part of a balanced lifestyle. First, it’s helpful to know exactly what’s in your dessert. When you make ice cream at home, you get to control the ingredients. There are no artificial stabilizers, preservatives, or food dyes. You’re working with real cream, real milk, and real caramel, which is a big plus compared to many store-bought brands.
Heavy cream, one of the base ingredients in this recipe, is high in healthy fats. While you definitely want to enjoy it in moderation, fat is important in a balanced diet. It provides long-lasting energy, supports cell function, and helps your body absorb fat-soluble vitamins like A, D, E, and K.
Sweetened condensed milk, although high in sugar, also offers a dose of calcium and protein. These nutrients support bone health and muscle repair. The portion sizes of homemade ice cream are typically smaller than a heaping store-bought bowl, which makes it easier to enjoy mindfully. And when you’re satisfied with a rich flavor and smooth texture, you’re less likely to overindulge.
Sea salt also plays a surprising role in this recipe. Beyond enhancing the flavor, a pinch of quality sea salt can provide essential trace minerals. It brings out the caramel’s complexity and makes the sweetness pop—creating a more satisfying dessert experience with every spoonful.
Furthermore, preparing food at home is linked to better overall dietary habits. When you take the time to make your own treats, you become more connected to what you eat. This recipe can even be adapted for dietary needs—you can use reduced-sugar condensed milk or opt for low-fat cream options, though the texture will be slightly different.
Finally, there’s the emotional and mental health benefit. Sharing homemade desserts brings people together. Whether it’s a scoop shared over a family dinner or a surprise treat for a friend, this recipe invites warmth, connection, and joy. And that kind of happiness? It’s good for the soul.
Preparation Time, Servings, and Nutritional Information
One of the best things about this salted caramel no-churn ice cream is how little time it takes to pull together. From start to finish (not counting freeze time), you’ll spend no more than 15 minutes in the kitchen. That means you can whip it up in the morning or evening and have it ready for the next day without any stress.
Preparation Time:
Active Time: 15 minutes
Freeze Time: 8 hours (or overnight)
Servings:
Makes approximately 6 to 8 servings, depending on portion size.
Nutritional Information (per serving):
Calories: 320
Fat: 22g
Saturated Fat: 14g
Carbohydrates: 27g
Sugar: 25g
Protein: 4g
Calcium: 10% Daily Value
Sodium: 180mg
This nutritional breakdown is an estimate and can vary based on the caramel sauce used and the size of the servings. You can adjust portion sizes or swap in lighter alternatives to reduce sugar or fat content. However, for best results in texture and taste, using the full-fat versions of heavy cream and condensed milk is highly recommended.
This dessert is best enjoyed in small portions due to its richness. Thankfully, its flavor is so satisfying that just a scoop or two will easily hit the spot.
Ingredients List
To make this luxurious salted caramel no-churn ice cream, you’ll only need six ingredients—most of which you probably already have in your kitchen. Here’s what you’ll need and why each one matters:
1 pint (2 cups) heavy cream, cold
The base of your ice cream, heavy cream is what gives it that rich, creamy texture. When whipped, it traps air and creates the light, fluffy body that mimics churned ice cream.
1 (14-ounce) can sweetened condensed milk
This thick, sweet milk provides the sugar and structure needed to hold the ice cream together. It also adds an unmistakable depth of flavor and helps prevent the mixture from becoming icy in the freezer.
½ cup caramel sauce (store-bought or homemade)
Caramel is the star of the show here. Use a good-quality store-bought caramel or make your own if you’re feeling ambitious. Its buttery, brown-sugar notes bring bold, sweet flavor to every bite.
1 teaspoon sea salt (plus more for garnish)
A pinch of sea salt balances the sweetness and enhances the caramel. It creates that classic salted caramel flavor profile that makes this ice cream so addictive.
Extra caramel sauce, for garnish (optional)
For a little extra flair and visual appeal, drizzle more caramel on top before freezing. It creates gorgeous swirls and boosts the flavor even more.
Flaky sea salt, for topping (optional)
A final sprinkle of sea salt right before serving adds crunch and a sophisticated finish. This step is optional, but it’s highly recommended for anyone who loves a contrast of textures.
With just these six ingredients, you’ll be able to create a frozen treat that rivals anything from a gourmet dessert shop.
Step-By-Step Cooking Instructions
This no-churn salted caramel ice cream is one of the easiest desserts you’ll ever make, and the process can be broken down into five simple steps. There’s no cooking required, no complicated timing, and no need to babysit a machine. Just follow along, and you’ll be scooping perfect ice cream in no time.
Step 1: Whip the Cold Heavy Cream
Start by pouring your cold heavy cream into a large mixing bowl. It’s important that the cream is straight from the fridge, as colder cream whips faster and holds its structure better. You can use either a hand mixer or a stand mixer with a whisk attachment for this part.
Begin whipping the cream on low speed to avoid splattering. As the cream starts to thicken, gradually increase the speed to medium-high. After a few minutes, the cream will form soft peaks—this is when the tips of the cream fold over gently when the whisk is lifted. Continue whipping just a little longer until stiff peaks form. You’ll know you’ve reached this stage when the cream stands tall and firm without collapsing.
Take care not to overwhip. If you continue beyond stiff peaks, the cream can become grainy and begin to separate. If you’re unsure, it’s better to stop slightly early than go too far. Properly whipped cream is essential for that light, scoopable ice cream texture.
Step 2: Gently Fold in the Sweetened Condensed Milk
Once your whipped cream is ready, open the can of sweetened condensed milk and pour it over the whipped cream. This step is all about being gentle. Using a rubber spatula or a large metal spoon, begin folding the condensed milk into the whipped cream.
To fold, use slow, sweeping motions—cut down through the center of the mixture with your spatula, scoop along the bottom of the bowl, and lift the contents up and over. Turn the bowl slightly with each fold to ensure even mixing. Be patient and avoid stirring too vigorously, which would deflate the whipped cream and compromise the final texture.
Continue folding until the mixture is smooth and fully incorporated. The color should be a pale creamy shade, and the texture should remain airy and fluffy.
Step 3: Add the Caramel Sauce and Sea Salt
Now it’s time to add that rich, buttery caramel flavor. Pour in ½ cup of caramel sauce and sprinkle in 1 teaspoon of sea salt. Use the same gentle folding method to incorporate the caramel and salt into the mixture.
You’ll notice the mixture begins to take on a lovely golden hue, and the scent will become even more tempting. As you fold, aim for even distribution, but if you’d like to leave light swirls of caramel throughout, you can stop folding just before it’s fully blended. This creates little pockets of intense flavor and adds visual appeal.
Taste the mixture at this stage to check the balance of sweet and salty. If you prefer a bolder salted caramel flavor, you can add an extra pinch of sea salt to enhance the contrast.
Step 4: Transfer to a Freezer-Safe Container and Garnish
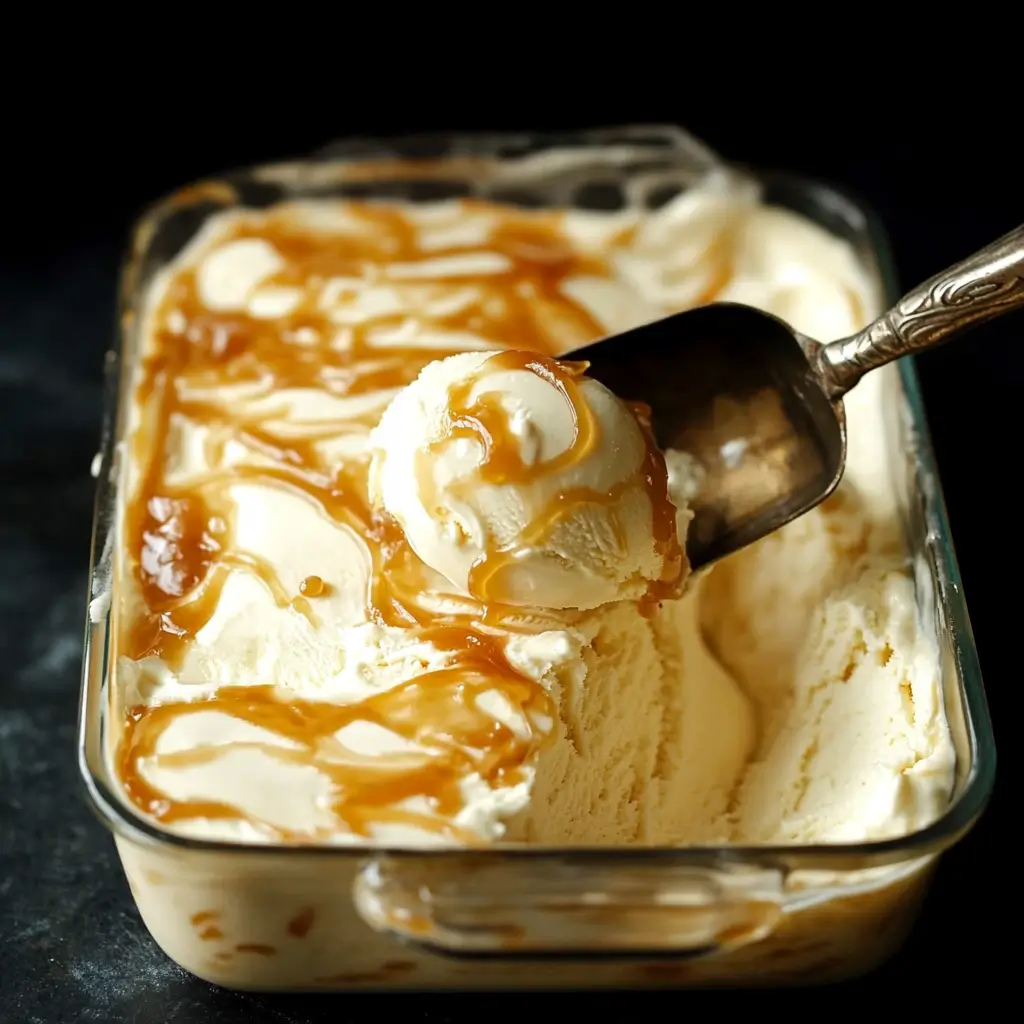
Grab a freezer-safe container for your ice cream. A standard loaf pan works perfectly, but you can also use a glass container or any freezer-safe plastic tub with a lid. Carefully pour the ice cream mixture into the container, using a spatula to smooth the top.
Next, drizzle a little extra caramel sauce over the top. Use the tip of a butter knife or a toothpick to gently swirl the sauce into the surface, creating a marbled effect. This step is optional, but it makes the presentation beautiful and adds a bit more caramel flavor to each bite.
Finally, sprinkle a pinch of flaky sea salt over the top. This final touch not only looks elegant but also gives each scoop a subtle, salty crunch that perfectly complements the creamy sweetness.
Step 5: Freeze Until Firm
Cover the container tightly with plastic wrap or a lid to prevent ice crystals from forming. Place the container in the freezer and let the ice cream set for at least 8 hours. For best results, freeze it overnight.
During the freezing process, the air incorporated from the whipped cream keeps the texture light, while the condensed milk prevents it from becoming too icy. This means you’ll have soft, scoopable ice cream straight from the freezer without the need for softening at room temperature.
When ready to serve, remove the ice cream from the freezer and let it sit at room temperature for 5 minutes to make scooping easier. Then scoop, serve, and enjoy your sweet and salty frozen masterpiece.
How to Serve
One of the beauties of this no-churn salted caramel ice cream is how versatile it is when it comes to serving. Whether you’re going casual with a cone or dressing it up for a special dessert, there are plenty of ways to enjoy this rich, velvety treat.
Start with the classic approach: scoop the ice cream into bowls and sprinkle a touch more flaky sea salt on top for contrast. You can add a light drizzle of caramel sauce for extra indulgence. This simple method really highlights the flavor and texture of the ice cream itself.
If you want to serve it in cones, choose waffle cones or sugar cones that can handle the creamy texture without getting soggy. The crisp bite of a cone adds a lovely contrast to the soft, rich ice cream.
For a more elegant presentation, try scooping the ice cream into small dessert glasses and topping with crushed roasted nuts, such as pecans or almonds. You can also add a dollop of whipped cream and a thin caramel drizzle for a restaurant-style finish.
Another fun idea is to sandwich scoops between two soft cookies for a homemade ice cream sandwich. Chocolate chip, oatmeal, or shortbread cookies pair especially well with the salted caramel flavor.
Finally, consider using this ice cream as part of a layered dessert. You can spoon it over warm brownies or serve it alongside a slice of apple pie for a contrast of warm and cold. The combination of sweet and salty flavors complements a wide variety of desserts, making this ice cream a fantastic finishing touch to any meal.
Pairing Suggestions
To elevate your dessert game, pairing this salted caramel ice cream with the right side dishes or beverages can turn a simple scoop into an unforgettable experience. Here are a few favorite ways to complement this dessert:
Start with baked goods. A warm brownie or blondie served with a scoop of this ice cream creates the ultimate indulgent dessert. The warmth from the baked treat contrasts beautifully with the frozen ice cream, creating a delightful textural experience in every bite.
Fruit is also a natural partner. Sliced bananas, grilled peaches, or caramelized apples all pair wonderfully with the caramel flavor in the ice cream. You can layer them in a dessert bowl or serve on the side for a refreshing twist.
If you’re looking for beverages to pair, a cup of strong coffee or espresso makes a wonderful companion. The bitterness of the coffee balances the sweetness of the ice cream and enhances the caramel notes. For a non-caffeinated option, try serving it with hot spiced chai or a chilled glass of almond milk with a sprinkle of cinnamon.
For more decadent pairings, consider drizzling chocolate or hazelnut sauce on top or alongside a scoop of this ice cream. The nutty, chocolaty flavors deepen the overall dessert profile and create a richer experience.
To keep it light and fresh, pair it with a simple arugula and citrus salad after dinner. While it may sound unconventional, the peppery greens and tangy citrus cleanse the palate, making your ice cream even more satisfying as a final course.
Next, we’ll dive into how to properly store this dessert, how to freeze it for later, and how to reheat or soften it for serving. Let’s keep that homemade goodness tasting as fresh as day one.
Storage, Freezing & Reheating Instructions
Proper storage is key to keeping your no-churn salted caramel ice cream tasting fresh and maintaining that luxurious, scoopable texture. Fortunately, this ice cream holds up beautifully in the freezer and is easy to store for later enjoyment. Let’s walk through the best ways to store, freeze, and serve it again without losing any of its magic.
How to Store in the Freezer
Once you’ve transferred your freshly made ice cream into a container, the most important step is to keep it tightly sealed. Use a freezer-safe, airtight container to prevent the formation of ice crystals. If your container doesn’t have a tight-fitting lid, simply cover the top with a layer of plastic wrap and then add a second layer of foil. This two-step method helps maintain the creamy consistency and protects against freezer burn.
Label your container with the date you made the ice cream. This helps you keep track of how long it’s been in the freezer, ensuring you’re always enjoying it at peak freshness.
How Long Does It Last?
This no-churn ice cream will last in the freezer for up to two weeks, though it’s usually best enjoyed within the first 7–10 days. The reason for the shorter shelf life compared to store-bought ice cream is that it doesn’t contain stabilizers or preservatives. However, the natural ingredients and delicious flavor make it more than worth it.
Over time, even well-covered ice cream can develop tiny ice crystals on the surface. This doesn’t mean it’s spoiled, but the texture may start to change. To minimize this, press a piece of parchment paper or wax paper directly onto the surface of the ice cream before sealing the container.
How to Soften for Serving
Because of the condensed milk and whipped cream base, this ice cream tends to stay fairly soft compared to traditional, custard-based recipes. Still, it helps to let it sit on the counter for about 5–10 minutes before scooping. This brief rest makes it easier to glide your ice cream scoop through the surface and create those perfect, rounded servings.
If you’re in a hurry and need to soften it quickly, avoid microwaving it, which can lead to uneven melting and textural changes. Instead, run your ice cream scoop under warm water for a few seconds and then shake off the excess before scooping. The warm scoop will cut through the ice cream more easily without melting it prematurely.
Can You Refreeze Melted Ice Cream?
If your ice cream has melted significantly, it’s not a good idea to refreeze it. The texture will suffer, becoming icy and grainy rather than smooth and creamy. For that reason, only take out as much as you plan to serve, and return the container to the freezer immediately after scooping.
If you’re serving ice cream for a party or gathering, consider dividing it into smaller containers. That way, you can bring out a little at a time while keeping the rest safely frozen.
Keeping these storage and handling tips in mind ensures that every scoop of your salted caramel no-churn ice cream tastes just as amazing as the first.
Common Mistakes to Avoid
While this recipe is very beginner-friendly, there are a few common pitfalls that can affect your final result. Fortunately, these are easy to avoid with a little extra attention during the preparation process.
Overwhipping the Cream
One of the most common mistakes is overwhipping the heavy cream. It’s tempting to keep going in pursuit of the stiffest peaks possible, but once the cream becomes grainy or starts to separate, it won’t fold smoothly into the other ingredients. This can lead to a dense or uneven texture in the final ice cream. Stop whipping as soon as the cream holds its shape and doesn’t slump when you lift the beater.
Stirring Instead of Folding
When incorporating the condensed milk and caramel sauce, don’t stir aggressively. Stirring can deflate the whipped cream and result in a heavier, less airy texture. Instead, gently fold the ingredients together using a spatula and a light hand. Folding maintains the whipped cream’s volume and ensures that your ice cream stays light and creamy.
Using Warm or Room Temperature Cream
Cold cream is essential for whipping. If the cream is too warm, it may not whip properly, and you’ll struggle to get the stiff peaks needed to form a stable ice cream base. Always use cream that has been well chilled in the refrigerator and, if possible, chill your mixing bowl for a few minutes before starting.
Skipping the Salt
Salt may seem like a minor detail, but it’s essential in this recipe. Without the sea salt, the caramel can come off as overly sweet and one-dimensional. Salt adds depth and enhances the caramel’s complexity, creating that perfect balance of sweet and savory. Be sure to include it—and don’t be afraid to add a touch more as a finishing garnish.
Freezing Too Briefly
No-churn ice cream needs time to fully set. If you try to serve it too soon—say, after just 3 or 4 hours—it may be more like soft serve than scoopable ice cream. While it will still taste great, it won’t have the classic firm texture you expect. Let it freeze for a full 8 hours or overnight to ensure it’s properly set.
By being mindful of these common mistakes, you’ll set yourself up for a successful ice cream experience every time.
Pro Tips
To take your salted caramel no-churn ice cream to the next level, here are some tried-and-true tips that can enhance flavor, texture, and presentation. These pro tips are great whether you’re making this recipe for the first time or the fiftieth.
Tip 1: Chill Everything Before Starting
For best results, make sure your mixing bowl and beaters are cold, just like the cream. Place them in the fridge or freezer for 15–20 minutes before whipping. This little trick helps the cream whip faster and more stably, giving you a better foundation for the ice cream.
Tip 2: Use Homemade Caramel for Extra Depth
While store-bought caramel works perfectly fine, making your own caramel sauce at home can add an entirely new layer of richness. Homemade caramel has a deeper, more complex flavor and lets you control the sweetness and texture. If you have the time, it’s well worth the effort.
Tip 3: Create Caramel Swirls with a Toothpick
For a beautiful marbled effect, reserve a few tablespoons of caramel sauce after folding the rest into the base. After pouring the ice cream into the container, drizzle the reserved caramel on top and use a toothpick or skewer to gently swirl it into the surface. This adds visual appeal and little pockets of intense flavor.
Tip 4: Add a Crunchy Element
Consider stirring in some chopped toasted pecans, crushed cookies, or chocolate chunks right before freezing. The texture contrast makes each bite more interesting and turns your ice cream into a gourmet experience. Just be sure any mix-ins are dry and fully cooled to avoid melting the ice cream base.
Tip 5: Serve with a Warm Dessert
Pairing this ice cream with something warm, like a slice of fresh banana bread or a fudgy brownie, elevates the entire dessert. The contrast of hot and cold, chewy and creamy, sweet and salty is an absolute game-changer.
Using these simple yet effective tips will ensure that your homemade ice cream turns out as decadent, flavorful, and eye-catching as possible. It’s all about the details, and even a small tweak can make a big impact.
Frequently Asked Questions (FAQs)
Even though this salted caramel no-churn ice cream recipe is quite straightforward, it’s completely natural to have a few questions—especially if you’re trying no-churn ice cream for the first time. Below are answers to some of the most common questions to help guide you through the process with confidence and clarity.
Can I use store-bought caramel sauce?
Yes, store-bought caramel sauce works perfectly for this recipe. Look for a high-quality variety with a rich, buttery flavor and minimal additives. Avoid sauces that are overly runny or overly thick, as they can affect the texture of the ice cream. If you have time and want to deepen the flavor even more, feel free to make your own caramel from scratch.
What’s the best container to use for freezing?
A metal loaf pan is a popular choice because it freezes quickly and evenly. However, you can use any freezer-safe container, including glass or plastic containers with tight-fitting lids. The key is to ensure it’s airtight to prevent freezer burn. If your container doesn’t have a lid, cover the surface tightly with plastic wrap followed by aluminum foil.
How do I prevent ice crystals from forming?
To avoid ice crystals, make sure the container is airtight and press a piece of parchment paper or wax paper directly onto the surface of the ice cream before sealing it. Also, avoid frequent opening and closing of the container, and always return it to the freezer immediately after serving.
Can I make this ahead of time?
Absolutely! This ice cream is perfect for preparing ahead. You can make it several days before a party or event, and it will still taste just as creamy and delicious. Just be sure to store it properly and serve it within two weeks for the best flavor and texture.
Is this recipe halal-friendly?
Yes, this version is fully halal-friendly. There’s no alcohol, gelatin, or non-halal dairy used in the base recipe. Just be mindful of the ingredients in your store-bought caramel sauce—choose one that’s free of alcohol-based flavorings or extracts.
Can I make this recipe without sweetened condensed milk?
Unfortunately, no. The sweetened condensed milk is essential to the no-churn method. It replaces both the sugar and the stabilizing effect of an egg custard. If you’re looking for a dairy-free or lower-sugar option, you would need a different base recipe designed for those requirements.
Can I add mix-ins like chocolate chips or nuts?
Yes, absolutely. Fold in your mix-ins right after the caramel is incorporated and just before pouring the mixture into your container. Some popular additions include mini chocolate chips, crushed pretzels, chopped roasted pecans, or cookie crumbles. Just be sure the add-ins are dry and at room temperature so they don’t affect the mixture’s consistency.
Can I use low-fat cream instead of heavy cream?
Technically, you can try, but it’s not recommended. Heavy cream is essential for achieving that light, airy texture. Lower-fat alternatives may not whip properly, which can lead to a dense or icy finished product. For best results, stick with full-fat heavy cream.
How long should I freeze the ice cream before serving?
The ice cream should freeze for at least 8 hours to fully set, but overnight is ideal. If you try to serve it too soon, it may be more like a soft-serve consistency rather than a firm, scoopable ice cream. Patience is key here—waiting longer yields the best texture.
Is this recipe gluten-free?
Yes, as written, this recipe is naturally gluten-free. However, always double-check the labels on your caramel sauce and any optional mix-ins you might add. Some store-bought caramel sauces may contain thickeners or flavorings with hidden gluten.
By having these FAQs at your fingertips, you’ll be able to approach this recipe with total confidence. Whether you’re preparing it for the first time or coming back to make it again, this section will guide you through any uncertainty.
Conclusion & Call to Action
There’s something incredibly rewarding about making your own ice cream at home—especially when it’s as easy and delicious as this no-churn salted caramel version. From the very first spoonful, you’ll taste the love and care that went into every step, and you’ll be amazed at how effortless it was to create such a rich, velvety dessert.
This recipe proves that you don’t need fancy machines or hours of preparation to make something spectacular. With just six ingredients and a few minutes of active time, you can craft a frozen treat that feels luxurious, tastes indulgent, and impresses anyone who takes a bite. Whether you’re serving it at a gathering, ending a family dinner on a sweet note, or treating yourself after a long week, this ice cream fits every occasion.
Don’t be surprised if this becomes your go-to dessert, especially during the warmer months. And once you’ve mastered this basic version, you can begin customizing it with new swirls, textures, and toppings to make it uniquely your own. That’s the beauty of no-churn ice cream—it invites creativity while delivering consistent results.
Now it’s your turn. Head to your kitchen, gather those simple ingredients, and treat yourself to a batch of this dreamy salted caramel goodness. And when you do, I’d love to see how it turns out. Snap a photo, share it on social media, and tag me so I can celebrate your delicious success with you.
Let this be the start of many homemade ice cream adventures. Your freezer—and your taste buds—will thank you.
Print
Salted Caramel Ice Cream – Easy Homemade Dessert Recipe
- Total Time: 8 hours 15 minutes (includes freeze time)
- Yield: 6-8 servings 1x
- Diet: Halal
Description
This silky, sweet and salty no-churn salted caramel ice cream is incredibly easy to make with just 6 ingredients and no ice cream machine required. Perfectly creamy, rich, and delicious with a smooth texture and swirls of buttery caramel.
Ingredients
-
1 pint (2 cups) cold heavy cream
-
1 (14 oz) can sweetened condensed milk
-
½ cup caramel sauce (store-bought or homemade)
-
1 teaspoon sea salt (plus more for garnish)
-
Extra caramel sauce, for garnish (optional)
-
Flaky sea salt, for topping (optional)
Instructions
-
Whip cold heavy cream until stiff peaks form.
-
Gently fold in sweetened condensed milk using a spatula.
-
Add caramel sauce and sea salt, fold gently to combine.
-
Pour into a freezer-safe container. Swirl extra caramel on top and sprinkle with sea salt.
-
Cover and freeze for 8 hours or overnight. Scoop and serve.
Notes
-
Keep your cream and mixing bowl cold for best results.
-
Add crushed cookies, chocolate chips, or nuts for texture.
-
Best enjoyed within 10 days for optimal freshness.
- Prep Time: 15 minutes
- Cook Time: 0 minutes
- Category: Dessert
- Method: No-Churn
- Cuisine: American