
Springtime is the perfect season for creating fun and festive treats, and these Rice Krispie Easter Chicks are a delightful way to celebrate. Whether you are hosting an Easter party, looking for an engaging activity to do with kids, or simply want a cute and delicious snack, these crispy little chicks will brighten up your table. The combination of gooey marshmallows and crunchy Rice Krispies makes for a satisfying bite, while their adorable appearance brings a smile to everyone’s face.
One of the best things about this recipe is how simple it is to make. It requires no baking, uses just a handful of ingredients, and comes together in minutes. This makes it a fantastic option for busy families or anyone who wants a quick and fun holiday treat. You can get creative by customizing their colors, facial expressions, and decorations, making each chick unique.
If you love festive holiday desserts, this recipe is sure to become a favorite. These Rice Krispie Easter Chicks are perfect for sharing with friends and family, giving as gifts, or serving as a delightful centerpiece at your Easter celebration. With easy-to-follow steps and minimal cleanup, even beginners can enjoy making these treats. Keep reading to discover why you’ll love this recipe, how to make the most adorable chicks, and expert tips to make them even more special.
Why You’ll Love This Recipe
There are many reasons to fall in love with these Rice Krispie Easter Chicks, and once you try them, they will become a holiday favorite.
First, they are incredibly easy to make. Unlike traditional baked goods that require precise measurements and oven time, this recipe is straightforward and foolproof. The process involves melting butter and marshmallows, mixing in Rice Krispies, shaping the mixture into balls, and decorating them. Even if you have never made Rice Krispie treats before, this recipe is beginner-friendly and fun for all ages.
Another reason you’ll love these Easter chicks is that they are completely customizable. You can adjust the size, use different colors for a playful twist, or add extra decorations to make each chick unique. This makes them a fantastic activity for children, who will love creating their own edible Easter friends.
Additionally, these treats are great for gifting. If you enjoy making homemade gifts, these cute little chicks are perfect for packaging in festive bags or boxes. They make thoughtful treats for teachers, neighbors, or anyone who deserves a little Easter cheer.
Finally, they are delicious. The crispy, chewy texture combined with the sweet marshmallow flavor makes these chicks irresistible. The addition of chocolate chips and candies enhances the overall taste, making them a treat that both kids and adults will love.
Health Benefits
While Rice Krispie Easter Chicks are primarily a sweet indulgence, they do offer some benefits compared to other desserts.
One key advantage is that they are lower in fat than many baked goods. Unlike cookies or cakes that often contain large amounts of butter and oil, this recipe requires only a small amount of butter. This results in a treat that is less heavy while still being satisfying.
Another benefit is that Rice Krispie treats are gluten-free (as long as you use a certified gluten-free cereal). This makes them an excellent option for people with gluten sensitivities or those who prefer gluten-free desserts.
Additionally, the portion sizes can easily be controlled. Since the chicks are made individually, you can decide how large or small to make them, allowing for better portion management.
For those looking for a slightly healthier version, you can substitute some of the ingredients. For example, using brown rice cereal instead of traditional Rice Krispies can increase fiber content, while reducing the amount of marshmallows or using natural food coloring can make the treats a bit more nutritious.
Preparation Time, Servings, and Nutritional Information
Preparation Time:
- 15 minutes to make the mixture
- 10 minutes to shape and decorate
- 30 minutes to set
Servings:
- Makes approximately 12-15 Rice Krispie Easter Chicks, depending on size
Nutritional Information (per serving):
- Calories: 120
- Fat: 3g
- Carbohydrates: 22g
- Sugar: 12g
- Protein: 1g
Ingredients List
To make these adorable Rice Krispie Easter Chicks, you will need:
- 5 cups Rice Krispies cereal
- 10 oz marshmallows (about 40 regular-sized marshmallows)
- 3 tablespoons butter
- Yellow food coloring
- Mini chocolate chips (for eyes)
- Orange M&Ms or jelly beans (for beaks)
- Orange candy melts or icing (for feet, optional)
Step-By-Step Cooking Instructions
Step 1: Melt the Butter and Marshmallows
In a large pot over low heat, melt the butter. Once the butter has fully melted, add the marshmallows and stir continuously until they are completely melted and smooth.
Step 2: Add Food Coloring
Once the marshmallows are fully melted, stir in yellow food coloring a few drops at a time until you achieve the desired shade. Mix well to ensure an even color.
Step 3: Add the Rice Krispies
Remove the pot from heat and immediately pour in the Rice Krispies cereal. Stir quickly to coat the cereal evenly with the marshmallow mixture.
Step 4: Shape the Chicks
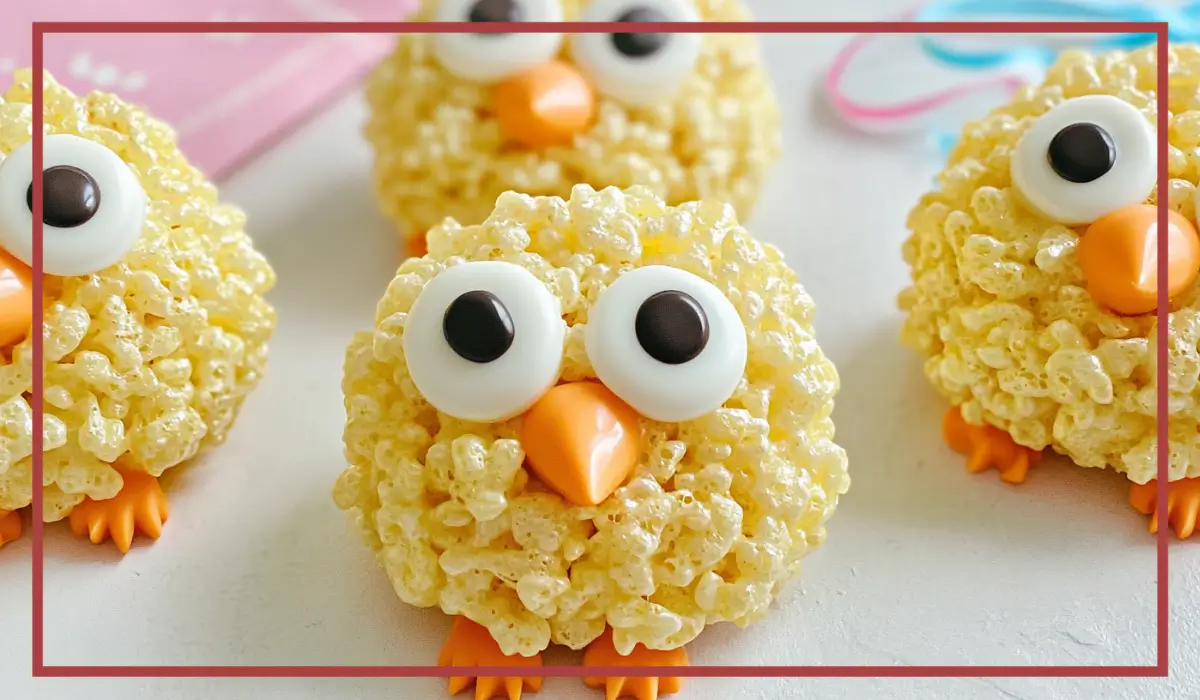
Let the mixture cool slightly, but not too much, as it needs to be moldable. Grease your hands with butter or cooking spray to prevent sticking. Take small portions of the mixture and roll them into round balls to form the bodies of the chicks.
Step 5: Add the Face
While the Rice Krispie balls are still slightly warm, press two mini chocolate chips into each one to create eyes. Then, place an orange M&M or jelly bean in the center to form the beak.
Step 6: Add Feet (Optional)
If you want to add little feet, melt some orange candy melts and use a piping bag or toothpick to draw tiny feet at the base of each chick.
Step 7: Let Set and Serve
Allow the chicks to set at room temperature for about 30 minutes. Once firm, they are ready to serve and enjoy.

How to Serve
These Rice Krispie Easter Chicks are as delightful to present as they are to eat. Their charming appearance makes them a fantastic addition to Easter dessert tables, kids’ parties, and springtime celebrations. Since they are individually portioned, they are easy to serve and enjoy without the need for utensils or plates.
A simple way to serve them is by arranging them on a festive platter lined with colorful Easter grass or shredded paper to resemble a nest. This enhances their visual appeal and adds a seasonal touch to your presentation. Another creative option is to place them in decorative cupcake liners, which makes them easier to grab and prevents them from sticking together.
For a show-stopping display, consider placing them inside an Easter basket along with other themed treats like chocolate eggs and marshmallow bunnies. If you’re serving these at a party, a tiered dessert stand can elevate their appearance and make them the centerpiece of your sweet spread.
If you are gifting them, individually wrap each chick in clear cellophane bags tied with a pastel-colored ribbon. This makes them a perfect homemade treat to share with family, friends, teachers, or coworkers.
For an extra special touch, serve these treats alongside complementary desserts, such as sugar cookies shaped like bunnies, pastel-colored cupcakes, or chocolate-dipped strawberries. They also pair well with beverages like hot chocolate, fruit punch, or vanilla milkshakes.
No matter how you choose to serve them, these Rice Krispie Easter Chicks will bring smiles to everyone who sees them. Their irresistible combination of cuteness and crunch makes them a guaranteed hit at any gathering.
Pairing Suggestions
Pairing these Rice Krispie Easter Chicks with other treats and beverages can enhance their appeal and create a well-rounded dessert experience. Since they are sweet and crispy, they go well with a variety of flavors and textures.
Beverage Pairings:
- Milk: A classic pairing, especially for kids, as it balances out the sweetness of the treats.
- Hot Chocolate: A warm cup of hot cocoa complements the marshmallow flavor beautifully.
- Fruit Punch: A refreshing, fruity drink enhances the fun and festive vibe of these Easter chicks.
- Herbal Tea: A mild, caffeine-free tea like chamomile or mint can provide a soothing contrast to the sweetness.
Dessert Pairings:
- Easter Sugar Cookies: Soft and buttery cookies decorated with pastel icing add variety to your dessert spread.
- Cupcakes: Vanilla or lemon-flavored cupcakes with colorful frosting make a perfect combination with these crispy treats.
- Chocolate-Covered Strawberries: The juicy tartness of strawberries coated in rich chocolate balances out the light crispiness of the chicks.
- Carrot Cake: A spiced carrot cake with cream cheese frosting adds depth and richness to an Easter dessert table.
Savory Pairings:
- Cheese Platter: A selection of mild cheeses and crackers can help balance the sweetness of these treats.
- Deviled Eggs: A classic Easter appetizer that adds a savory contrast to the sugary flavors.
- Fresh Fruit: Slices of pineapple, berries, and grapes offer a refreshing bite between sweet treats.
By incorporating some of these pairings, you can create a more diverse Easter menu that includes a mix of sweet and savory delights. Whether serving these chicks at a party or enjoying them as a snack, the right pairing will make the experience even more enjoyable.
Storage, Freezing & Reheating Instructions
Proper storage ensures that your Rice Krispie Easter Chicks stay fresh and delicious for as long as possible.
Storing at Room Temperature:
If you plan to eat them within a few days, store them in an airtight container at room temperature. Place a sheet of parchment paper between layers to prevent them from sticking together. They will stay fresh for about 3 days before they start to harden.
Refrigeration:
While refrigeration is not necessary, it can help them last a bit longer, especially in warm climates. Store them in a sealed container in the fridge for up to one week. However, note that refrigeration can make them slightly firmer, so allow them to sit at room temperature for about 10 minutes before eating.
Freezing:
If you want to make these in advance, freezing is an excellent option. To freeze:
- Arrange the chicks in a single layer on a baking sheet and place them in the freezer for 30 minutes to firm up.
- Once frozen, transfer them to a freezer-safe ziplock bag or airtight container.
- Label the container with the date and store them in the freezer for up to 3 months.
Reheating or Thawing:
To thaw frozen Rice Krispie Easter Chicks, remove them from the freezer and let them sit at room temperature for about 20-30 minutes before serving. Avoid microwaving, as this can make them too soft and sticky.
By following these storage tips, you can enjoy these adorable treats even after Easter has passed.
Common Mistakes to Avoid
Making Rice Krispie treats is fairly simple, but a few mistakes can affect their texture and appearance. Here are some common pitfalls to watch out for:
1. Overheating the Marshmallows:
Melting marshmallows at too high a temperature can cause them to become too stiff when cooled. Always melt them over low heat and stir frequently to maintain a smooth consistency.
2. Not Greasing Your Hands:
Shaping the chicks can be tricky if the mixture sticks to your hands. Grease your hands with butter or cooking spray before rolling them into balls.
3. Waiting Too Long to Shape Them:
The mixture firms up quickly, so work efficiently when shaping the chicks. If it becomes too stiff, lightly warm your hands to soften the mixture.
4. Adding Decorations Too Late:
Chocolate chips and candy decorations need to be added while the mixture is still warm so they adhere properly.
5. Using Too Much Cereal:
Adding too much Rice Krispies cereal can make the chicks dry and crumbly. Stick to the recommended ratio for the best texture.
Avoiding these mistakes will help you achieve perfectly soft, chewy, and adorable chicks every time.
Pro Tips
For even better results, keep these expert tips in mind:
- Use Gel Food Coloring: Gel food coloring is more concentrated and provides a brighter yellow color without making the mixture too runny.
- Work Quickly: Since the marshmallow mixture sets fast, shape and decorate your chicks immediately.
- Create a Fuzzy Effect: Toss the chicks in finely shredded coconut dyed yellow for a more textured, fluffy look.
- Experiment with Sizes: Make smaller chicks for bite-sized treats or larger ones for a fun Easter centerpiece.
- Make a Variety of Colors: Use pastel-colored food dyes to create a whole collection of festive chicks in pink, blue, and green.
Frequently Asked Questions (FAQs)
1. Can I make these without food coloring?
Yes! They will still taste great, but they won’t have the bright yellow chick look.
2. Can I use mini marshmallows instead of regular ones?
Yes, mini marshmallows melt faster, so they work well in this recipe.
3. Can I use different cereals?
Rice Krispies work best, but you can experiment with puffed rice cereals or cornflakes for a different texture.
4. How long do these treats last?
They stay fresh for 3 days at room temperature and up to 3 months in the freezer.
5. Can I add extra decorations?
Absolutely! Feel free to use sprinkles, candy eyes, or edible glitter to make them even more festive.
Conclusion & Call to Action
These Rice Krispie Easter Chicks are a perfect combination of fun, creativity, and deliciousness. Their cute appearance, crispy texture, and easy preparation make them an excellent Easter treat for all ages. Whether you’re making them for an Easter party, as a homemade gift, or just for fun, they are sure to bring joy to everyone who sees them.
Now that you have all the tips and steps to create the most adorable Easter treats, why not give them a try? Gather your ingredients, get creative with your decorations, and enjoy the process of making these delightful chicks. If you make them, be sure to share your creations with friends and family, and let us know how they turned out. Happy Easter and happy baking!
Print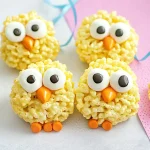
Rice Krispie Easter Chicks – Easy No-Bake Easter Treat
- Total Time: 30 minutes
- Yield: 12-15 chicks 1x
- Diet: Vegetarian
Description
These Rice Krispie Easter Chicks are an easy, no-bake treat that’s perfect for Easter celebrations! With their crispy texture and adorable look, they are fun to make with kids and ideal for parties, gifts, or festive dessert tables.
Ingredients
- 5 cups Rice Krispies cereal
- 10 oz marshmallows (about 40 regular-sized)
- 3 tbsp butter
- Yellow food coloring
- Mini chocolate chips (for eyes)
- Orange M&Ms or jelly beans (for beaks)
- Orange candy melts or icing (for feet, optional)
Instructions
- Melt the Butter & Marshmallows: In a large pot over low heat, melt the butter. Add marshmallows and stir until fully melted.
- Add Food Coloring: Stir in yellow food coloring until evenly mixed.
- Mix in Rice Krispies: Remove from heat and add Rice Krispies cereal. Stir until fully coated.
- Shape into Chicks: Grease your hands and roll the mixture into small balls to form the chick’s body.
- Decorate: Press in mini chocolate chips for eyes and an orange M&M for the beak while the mixture is still slightly warm.
- Add Feet (Optional): Use melted orange candy or icing to pipe small feet.
- Let Set: Allow to cool for 30 minutes before serving.
Notes
- Grease your hands with butter or cooking spray to prevent sticking.
- Use gel food coloring for a more vibrant yellow.
- Store in an airtight container at room temperature for up to 3 days.
- Prep Time: 15 minutes
- Cook Time: 0 minutes (No-bake)
- Category: Dessert
- Method: No-Bake
- Cuisine: American