
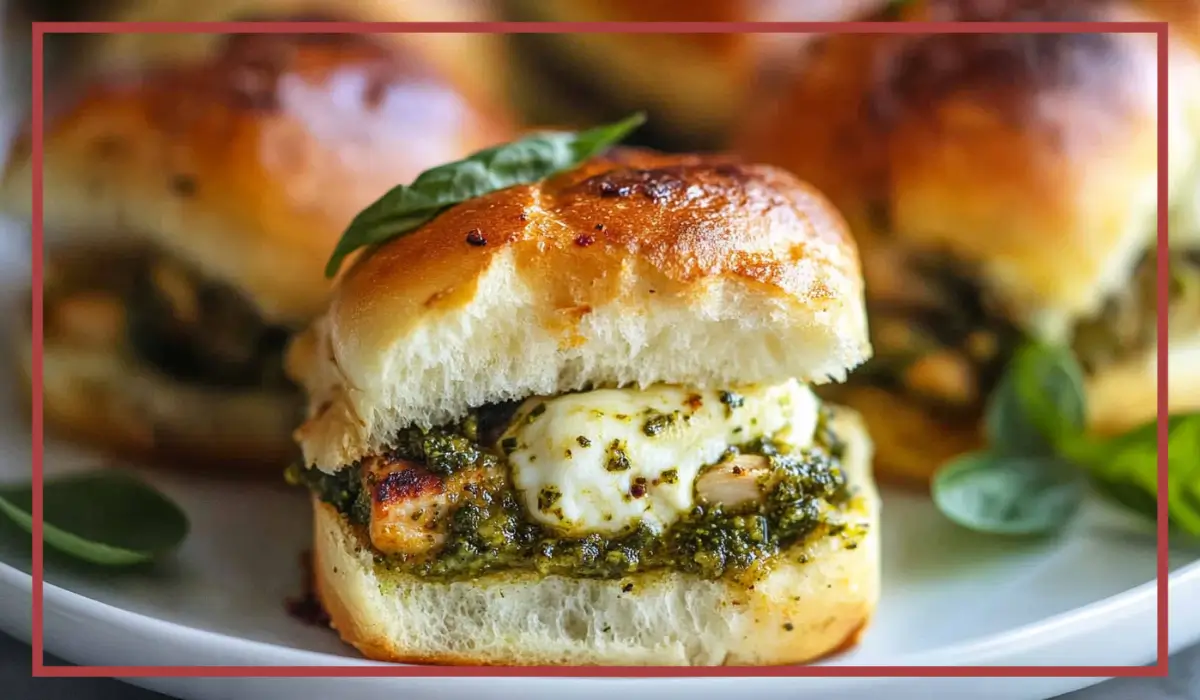
There’s something incredibly satisfying about a warm, cheesy, buttery slider that practically melts in your mouth. And when you add juicy shredded chicken, fresh mozzarella, and that punchy flavor of basil pesto? You’re not just making a snack—you’re creating a serious flavor moment. These pesto chicken sliders are everything you love about comfort food, but with a slightly elevated twist thanks to the freshness of pesto and the creaminess of melted cheese.
What’s even better is how ridiculously easy this recipe is. We’re talking minimal prep, super simple ingredients (many of which you might already have), and just a few minutes of assembly time before everything heads into the oven. Whether you’re feeding a hungry crowd or just want to make something fun and cozy for dinner, these sliders totally deliver.
I actually came across this recipe during one of those midweek slumps, when nothing in the fridge looked inspiring and I needed something comforting—but still a little different. I had some leftover rotisserie chicken, a jar of pesto, and a block of mozzarella. I threw everything together on slider buns, baked them until warm and gooey, and just like that, a family favorite was born. These have quickly become a go-to for weekend movie nights, potlucks, and casual get-togethers.
Another reason I love this recipe? It’s super forgiving. Don’t have fresh mozzarella? Use shredded. Want to skip the mayo? No problem. Prefer to use turkey or add extra cheese? Go right ahead. These sliders are built to adapt to whatever you’ve got on hand, making them perfect for busy home cooks or anyone who wants a no-stress meal with big flavor. Once you try them, I promise they’ll be on regular rotation in your kitchen.
Why You’ll Love This Pesto Chicken Sliders Recipe
There are countless reasons to fall in love with these pesto chicken sliders, but let’s start with the most obvious: they’re absolutely delicious. Between the juicy chicken, fragrant basil pesto, and melty mozzarella, every bite is loaded with flavor. The buttery, golden tops of the buns seal the deal, adding that perfect finishing touch that makes these sliders totally irresistible.
First and foremost, this recipe is incredibly easy to make. You can have everything prepped and ready for the oven in under 15 minutes, especially if you’re using store-bought shredded chicken like rotisserie. It’s one of those dishes that looks like you put in way more effort than you actually did—something we all need a little more of in our lives.
Another huge win? These sliders are incredibly versatile. They work just as well for a casual weeknight dinner as they do for game day snacks or potluck contributions. Kids love them because they’re cheesy and satisfying, while adults appreciate the flavorful twist of pesto that makes these sliders feel just a little more grown-up.
And let’s talk about texture for a moment. The sliders come out of the oven with perfectly toasted, slightly crisped tops thanks to the pesto-butter glaze. Inside, the mozzarella turns gooey and stretchy while the chicken stays tender and flavorful from the layers of pesto. The buns absorb just the right amount of moisture without ever getting soggy, which means each bite is perfectly balanced.
If you’re into meal prep, you’ll also appreciate how well these hold up. They reheat beautifully, so you can make them ahead of time and warm them up for lunches or snacks throughout the week. That’s a total lifesaver if you’re trying to plan ahead or just don’t want to cook every single day.
Finally, this recipe offers a fantastic base to get creative with. You can swap in different cheeses, experiment with other types of pesto like sun-dried tomato or arugula, or even add extras like caramelized onions or roasted peppers. Whatever direction you take it, you’re guaranteed a mouthwatering result.
Health Benefits of these Pesto Chicken Sliders
While pesto chicken sliders are certainly indulgent and comforting, they also come with a few health benefits—especially when you use quality ingredients and make a few thoughtful choices.
To start, chicken is a great source of lean protein, which helps build and repair muscle while keeping you full and energized throughout the day. By using shredded chicken, especially from a roasted or grilled source, you’re skipping the breading and frying that typically comes with chicken in other slider recipes. That’s already a step toward a healthier option.
Then there’s pesto, which might surprise you with its nutritional value. Traditional basil pesto is made from fresh basil, garlic, olive oil, Parmesan cheese, and pine nuts. Basil itself is rich in antioxidants and has anti-inflammatory properties, while olive oil provides heart-healthy monounsaturated fats. Pine nuts also contribute protein, fiber, and essential minerals like magnesium and zinc. So not only does pesto bring bold, vibrant flavor—it also packs a nutritional punch.
Mozzarella, while a cheese, is actually one of the lower-calorie and lower-fat cheese options you can use. It’s also a good source of calcium and protein, and it melts beautifully, which means you don’t need a ton of it to achieve that gooey texture we all love.
If you’re mindful of portion sizes, sliders are an excellent way to enjoy satisfying comfort food without overindulging. Because they’re smaller than regular sandwiches or burgers, it’s easier to control how much you eat while still feeling satisfied. You can pair a couple of sliders with a light side salad or roasted veggies to round out the meal with even more nutrients.
And let’s not forget—you’re baking these sliders rather than pan-frying or deep-frying them. That reduces unnecessary oils and fats, making the final dish a little lighter but no less flavorful. If you want to take things even further, you can opt for whole grain or low-carb slider buns and reduced-fat cheese, or even sneak in some spinach or arugula between the layers for a boost of greens.
So while pesto chicken sliders are definitely a comfort food at heart, they’re also surprisingly balanced—especially when you make a few smart swaps. It’s all about making ingredients work for you without compromising on taste.
Preparation Time, Servings, and Nutritional Information
One of the things I love most about this recipe is how efficient it is. Even if you’re tight on time or juggling a busy schedule, these sliders can come together with very little effort. Here’s what to expect in terms of time, servings, and nutrition.
Total Preparation and Cooking Time
- Prep time: 10–15 minutes
- Cook time: 20–25 minutes
- Total time: About 35–40 minutes
Servings
This recipe makes 18 sliders, which can serve approximately 6 to 8 people depending on how hungry everyone is. If you’re serving them as a main dish, 2 to 3 sliders per person is a good estimate. For parties or as part of a larger spread, you might get away with just 1 or 2 per guest.
Nutrition Facts (Per Slider, Approximate)
- Calories: 230
- Protein: 12g
- Fat: 14g
- Carbohydrates: 15g
- Fiber: 1g
- Sugar: 2g
- Calcium: 150mg
These numbers can vary slightly depending on the brand of pesto and type of mozzarella you use. If you want to lighten things up, consider using part-skim mozzarella or a lighter pesto made with less oil.
In general, you’re getting a well-balanced bite here with a good amount of protein and calcium, plus the satisfying fats from cheese and pesto. When paired with fresh veggies or a side salad, this can be a filling and nutritious meal that doesn’t feel heavy or overly rich.
With all the convenience and satisfaction this recipe offers, it’s no surprise these sliders are always a hit. Now let’s dive into what you’ll need to make them at home.
Ingredients List
This ingredient list is short, sweet, and full of flavor. Every component plays a role in creating sliders that are cheesy, saucy, herby, and totally satisfying. The good news? You might already have most of these items in your fridge or pantry.
Slider Buns
- 18 slider buns, cut in half crosswise
Slider buns are the foundation of this recipe. You want them to be soft but sturdy enough to hold the fillings without falling apart. Hawaiian rolls work great, but any small sandwich bun will do.
Chicken
- 2 cups cooked, shredded chicken
Rotisserie chicken is a huge time-saver here. It’s juicy, flavorful, and already cooked, which means less work for you. You can also use leftover grilled or baked chicken if you have some on hand.
Pesto
- 11 oz pesto sauce (Buitoni Basil Pesto is a great option)
This is where the magic happens. Pesto adds brightness, depth, and that signature Italian flavor. You can use homemade pesto if you prefer, but store-bought works perfectly in this recipe.
Mozzarella Cheese
- 15 slices mozzarella cheese
Mozzarella gives you that signature cheese pull and creamy texture. If you don’t have slices, you can substitute shredded mozzarella or even provolone in a pinch.
Butter and Pesto Topping
- 2 tablespoons butter, melted
- 2 tablespoons pesto (taken from your 11 oz)
This buttery pesto glaze goes on top of the buns before baking and makes them golden, fragrant, and just slightly crisped. It’s a small step with a big payoff.
Mayonnaise (Optional)
- 1/3 cup mayonnaise
Mayo is completely optional, but if you use it, it adds creaminess and helps bind everything together a little more. You can spread it lightly on the bottom buns before layering in the fillings.
These simple, flavorful ingredients come together in a way that feels totally indulgent, but still manageable for a weeknight. Now that you’ve gathered your ingredients, it’s time to get into the fun part—making the sliders. Let’s walk through every step together.
Step-By-Step Cooking Instructions
Let’s dive into the cooking process. This is where all those delicious ingredients come together to create something incredibly satisfying. I’ll guide you through each stage in detail, so even if you’re new to cooking, you’ll feel totally confident making these pesto chicken sliders. And since this recipe is so straightforward, you’ll probably find yourself coming back to it again and again for everything from weeknight dinners to special occasions.
Step 1: Preheat the Oven and Prepare the Baking Dish
Start by preheating your oven to 400°F (204°C). It’s important to give your oven enough time to fully preheat, especially since this recipe relies on even, consistent heat to melt the cheese and toast the buns just right.
Next, grab a 9×13-inch baking dish. Lightly grease it with a little nonstick cooking spray, olive oil, or a dab of butter. This step helps prevent the bottom buns from sticking and allows for a crispier base once baked. If you want even crispier bottoms, you can line the baking dish with parchment paper.
Step 2: Make the Pesto Butter Glaze
In a small bowl, combine 2 tablespoons of melted butter with 2 tablespoons of your pesto sauce. Stir until well combined. This mixture will be brushed over the tops of the slider buns before baking and will help give the finished product a rich, golden finish with lots of herby flavor.
Set the bowl aside while you work on assembling the sliders.
Step 3: Assemble the Bottom Half of the Sliders
Slice your slider buns in half horizontally and place the bottom halves snugly into your greased baking dish. If you’re using soft, pull-apart rolls, you don’t need to separate each bun individually—just slice the entire slab horizontally and keep them together for easy layering.
Now, if you’re using the optional mayonnaise, spread a thin layer across the bottom halves of the buns. This adds extra creaminess and moisture, but feel free to skip it if you’re not a fan of mayo or prefer to keep the recipe a bit lighter.
Step 4: Layer on the Chicken
Distribute your shredded chicken evenly across the bun bottoms. You want each slider to get a generous amount, but be careful not to overload them. The goal is for each bite to feel balanced—not so stuffed that everything falls apart, but still hearty and satisfying.
If you’re using rotisserie chicken, there’s no need to reheat it before baking—it will warm up perfectly in the oven. Make sure the chicken is evenly distributed to prevent any sliders from ending up too empty or too full.
Step 5: Add the Pesto
Spoon your pesto sauce evenly over the shredded chicken layer. Don’t skimp—this is where a lot of the flavor comes from. The pesto will seep into the chicken during baking, infusing it with garlicky, herby goodness.
You can use the back of a spoon or a small spatula to gently spread the pesto so it reaches every nook and cranny. This ensures each slider has that vibrant, basil-packed flavor in every bite.
Step 6: Lay Down the Mozzarella
Now comes the mozzarella. If you’re using slices, arrange them evenly over the pesto-covered chicken, overlapping slightly so each slider gets a good cheesy layer. If you’re using shredded mozzarella, just sprinkle it generously across the top.
The mozzarella will melt down and glue everything together during baking, creating that irresistible cheesy pull when you take a bite. Feel free to add a little extra cheese if you love a gooey, ultra-cheesy texture.
Step 7: Add the Top Buns
Once your layers are complete, place the top halves of the buns over the mozzarella. Press down gently so everything holds together nicely, but not so hard that you flatten the sliders.
At this stage, the sliders are almost ready for the oven—you just need to add the final touch.
Step 8: Brush with Pesto Butter
Take the pesto butter glaze you prepared earlier and use a pastry brush to coat the tops of the slider buns. Make sure to brush evenly so each bun gets a good layer of flavor.
This step not only adds incredible taste, but it also helps the tops turn golden brown and slightly crisp during baking. You’ll notice the difference right away once these come out of the oven.
Step 9: Bake the Sliders
Place the baking dish uncovered in the preheated oven and bake for 10 minutes. This initial bake helps the tops start to crisp up and the cheese to begin melting.
After 10 minutes, cover the dish with foil and bake for another 10 to 15 minutes. This ensures the cheese finishes melting, the chicken is heated through, and the buns don’t dry out. Covering the sliders traps steam, which helps everything come together beautifully without over-browning the tops.
If you prefer extra toasty tops, you can uncover the sliders in the last 2 minutes of baking and switch the oven to broil for a short burst—just be sure to keep a close eye on them to avoid burning.
Step 10: Serve Warm
Once the sliders are hot, cheesy, and perfectly golden, remove them from the oven and let them sit for about 3 to 5 minutes. This little bit of resting time allows the cheese to settle slightly, making the sliders easier to cut and serve.
Use a sharp knife or a spatula to cut along the bun seams and lift each slider out of the baking dish. Serve them warm while the cheese is still gooey and the pesto is fragrant.
Now that you’ve made these delicious sliders, let’s explore how best to serve them and what to pair them with for a complete, crowd-pleasing meal.
How to Serve
Pesto chicken sliders are super versatile, which makes serving them both fun and flexible. Whether you’re putting together a casual dinner or creating a spread for a party, there are so many ways to enjoy them.
You can serve them as a main dish with a couple of light sides. A simple salad or a bowl of roasted vegetables complements the richness of the sliders without overpowering them. Something fresh and slightly acidic, like a tomato cucumber salad with a lemon vinaigrette, adds a refreshing contrast to the savory flavors.
If you’re serving these for a party or game day, keep things finger-friendly. Set out a tray of sliders along with small sides like baked sweet potato fries, veggie sticks with dip, or even small cups of tomato soup for dipping. They’re also amazing with a crunchy slaw or a pasta salad on the side.
For family dinners, serve the sliders with something comforting like mashed potatoes, a bowl of soup, or even over a bed of arugula if you want to sneak in some greens. Kids tend to love these with simple sides like apple slices, carrot sticks, or soft dinner rolls.
You can even turn these sliders into a full platter by mixing things up—add some turkey sliders, vegetarian options, or a few different sauces on the side like garlic aioli or spicy mayo.
Presentation-wise, sliders look great when served straight from the baking dish or arranged on a large serving board with herbs sprinkled around the edges. Don’t forget to have plenty of napkins handy—these sliders are deliciously messy in the best way.
Pairing Suggestions
Pairing your pesto chicken sliders with the right sides and drinks takes your meal from good to absolutely memorable. Because these sliders have bold, herby, and cheesy flavors, it’s best to pair them with dishes and drinks that complement without overwhelming.
Side Dishes
- Fresh Green Salad: A crisp salad with mixed greens, cherry tomatoes, cucumber, and a light vinaigrette provides a refreshing contrast to the richness of the sliders.
- Roasted Vegetables: Think roasted carrots, zucchini, or Brussels sprouts. The caramelized flavor works beautifully alongside the herbaceous pesto and gooey cheese.
- Tomato Soup: A warm bowl of classic tomato soup creates a comforting pairing—perfect for cozy nights or when you’re craving something nostalgic.
- Pasta Salad: A chilled pasta salad with light Italian dressing, olives, and chopped veggies is an easy make-ahead side that brings a summery vibe to the table.
- Sweet Potato Fries: The sweetness of the fries pairs really well with the savory sliders and adds a fun texture contrast.
Drinks
- Iced Mint Lemonade: The bright, citrusy flavor cuts through the richness of the cheese and pesto for a refreshing balance.
- Sparkling Water with Lime: Sometimes simple is best. A cold, fizzy drink with a hint of lime keeps the meal feeling light and fresh.
- Fruit-Infused Water: Add slices of cucumber, strawberry, or orange to a pitcher of chilled water. It’s pretty, hydrating, and a nice complement to bold flavors.
- Light Teas: Try a chilled green tea or herbal blend to keep things simple and healthy.
If you’re hosting guests, consider creating a DIY slider bar with side dish stations so everyone can build their own plate. It makes the experience interactive and fun while giving you a break from constantly playing host. Whether you’re keeping it casual or going all-out, these sliders are versatile enough to fit right in.
Storage, Freezing & Reheating Instructions
One of the best things about these pesto chicken sliders is how well they store and reheat. Whether you’re meal prepping for the week or saving leftovers from a party, you’ll be happy to know that they hold up beautifully and still taste amazing the next day.
Storing Leftovers
If you have leftovers, allow the sliders to cool completely before storing. Once they’ve cooled, place them in an airtight container. You can store them in the refrigerator for up to 3 to 4 days. To prevent sogginess, it’s a good idea to separate the sliders with parchment paper or foil, especially if you’re stacking them.
If you only have a few leftover sliders and want to store them individually, wrap each one tightly in foil. This method makes it easy to grab a single slider and reheat it later without pulling out the entire container.
Freezing for Later
Yes, you can freeze pesto chicken sliders! It’s a great option if you want to prep in advance or avoid waste. To freeze them:
- Let the sliders cool completely.
- Wrap each slider tightly in plastic wrap or foil.
- Place the wrapped sliders in a freezer-safe zip-top bag or airtight container.
- Label with the date and freeze for up to 3 months.
When you’re ready to enjoy them again, there’s no need to thaw if you’re in a hurry. You can bake them straight from the freezer—just be sure to add extra time and keep them covered for the first part of the bake so they heat evenly.
Reheating Sliders
For best results, reheat sliders in the oven. This helps maintain their texture and brings the cheese back to melty perfection.
Oven Method:
Preheat your oven to 350°F (175°C). Place the sliders on a baking sheet, cover with foil, and bake for 10–15 minutes if refrigerated, or 20–25 minutes if frozen. Remove the foil for the last 5 minutes to allow the tops to crisp up.
Microwave Method (Quick Option):
Place a single slider on a microwave-safe plate and cover with a damp paper towel. Microwave on medium power for 30–45 seconds (or until warmed through). This method is great for a quick bite, but keep in mind that the buns may become a little soft.
No matter which method you use, try not to overheat them. You want the cheese melted and the buns warm, but not dried out. A little attention goes a long way in making your leftovers just as delicious as the first round.
Common Mistakes to Avoid
Even though this recipe is super straightforward, there are a few common mistakes that can affect your final results. Let’s walk through them so you can avoid any hiccups and bake your sliders like a pro.
Using Too Much Pesto
Pesto is rich and flavorful, but using too much can make the sliders overly oily and soggy. Stick to the recommended amount for best results. If you love extra sauce, consider serving a little pesto on the side for dipping instead of piling it all on during assembly.
Overloading the Sliders
It’s tempting to go heavy on the chicken or cheese, but too much filling can cause the sliders to fall apart when you try to serve them. Aim for even layers and resist the urge to overstuff.
Skipping the Butter-Pesto Glaze
This step might seem minor, but brushing the tops of the buns with melted butter and pesto makes a huge difference. It adds flavor and helps the buns toast up beautifully in the oven. Skipping it can leave your sliders tasting a little flat.
Not Covering During Baking
If you skip the foil during the second half of baking, the tops of your sliders can over-brown before the cheese has fully melted. Covering them traps steam, keeps everything moist, and ensures the heat reaches all the layers evenly.
Serving Them Immediately Out of the Oven
It’s important to let the sliders rest for a few minutes after baking. This gives the cheese time to settle and helps the sliders hold together when cutting and serving. If you dig in too soon, you might end up with a gooey mess.
By steering clear of these mistakes, you’ll end up with perfect sliders every time—melty, flavorful, and just the right texture.
Pro Tips
Want to take your pesto chicken sliders to the next level? Here are some tried-and-true tips that can elevate your results, streamline the process, and add a little extra flavor to every bite.
1. Toast the Bottom Buns
If you like a crispier texture, you can pre-toast the bottom halves of the slider buns before assembling. Just pop them into the oven for 3–4 minutes before adding the fillings. This helps them stay sturdy and prevents sogginess from the pesto and cheese.
2. Drain the Pesto Slightly
Store-bought pesto can sometimes be a little oily. Before using, give it a quick stir and spoon it out with a slotted spoon to leave behind some of the excess oil. You’ll still get all the flavor without oversaturating the sliders.
3. Use Fresh Mozzarella
If you want a richer, creamier bite, try using slices of fresh mozzarella instead of the standard kind. It melts beautifully and adds a touch of luxury to the sliders.
4. Make It Ahead
You can assemble the sliders a few hours in advance and keep them covered in the refrigerator until ready to bake. Just add 5 extra minutes to the baking time if you’re starting from cold. This makes them perfect for parties or prepping earlier in the day.
5. Customize the Toppings
Want a little crunch? Add thinly sliced red onion or baby spinach between the chicken and cheese. Craving a little heat? Sprinkle some crushed red pepper flakes into the pesto or add a few pickled jalapeños. These sliders are a blank canvas for your favorite flavors.
By using these tips, you can tweak the recipe to suit your tastes and ensure you get consistently delicious results every time you make them.
Frequently Asked Questions (FAQs)
Here are some of the most commonly asked questions about pesto chicken sliders—plus helpful answers to make sure your experience in the kitchen is smooth and stress-free.
Can I use homemade pesto?
Absolutely. Homemade pesto is a great choice if you have fresh basil, garlic, olive oil, Parmesan, and pine nuts on hand. It offers fresher, bolder flavor than most store-bought versions. Just make sure to keep the consistency thick and not too oily to avoid soggy sliders.
Can I use other types of cheese?
Yes! While mozzarella is classic and melts beautifully, you can use provolone, Monterey Jack, cheddar, or even a blend of cheeses. Just choose something that melts well and complements the basil flavor.
Are these sliders spicy?
Not at all—unless you make them spicy. The base recipe is mild and kid-friendly, but you can add heat by mixing red pepper flakes into the pesto or adding spicy elements like jalapeños.
Can I make these sliders vegetarian?
Yes! Just swap the chicken for roasted veggies like zucchini, mushrooms, and red peppers. You can also use plant-based chicken alternatives. Keep everything else the same, and you’ll have delicious veggie sliders.
How long can they sit out at room temperature?
Like most baked goods with dairy and meat, these sliders shouldn’t sit out for more than two hours. If you’re serving them at a party, keep them covered and warm for as long as possible or rotate fresh batches as needed.
What type of buns should I use?
Soft, sweet slider rolls like Hawaiian rolls work beautifully, but any small sandwich bun will do. Just make sure they’re sturdy enough to hold the fillings without falling apart.
Can I freeze them before baking?
Technically, yes—but freezing before baking may cause the buns to become too soft once thawed. It’s usually better to bake them first and freeze the cooked sliders for easier reheating.
What’s the best way to keep them warm for a party?
After baking, keep the sliders covered with foil and place the dish in a warm oven (around 200°F). Alternatively, you can transfer them to a slow cooker set to “warm.” Just make sure not to overcook them while holding.
Can I use a different protein?
Definitely. These sliders also taste great with shredded turkey, leftover grilled chicken, or even cooked ground chicken or turkey. Just avoid overly saucy fillings to keep the sliders from getting soggy.
Do I need to separate the rolls before baking?
Not necessarily. You can leave the bottom buns attached as a slab and layer everything over them for easier assembly. After baking, you can cut along the bun seams to separate the sliders for serving.
Conclusion & Call to Action
These pesto chicken sliders are the ultimate blend of simple and satisfying. With just a few easy steps and a handful of ingredients, you get a dish that feels comforting, flavorful, and just a little bit fancy. Whether you’re hosting friends, feeding your family, or simply treating yourself, these sliders are guaranteed to be a hit.
They’re incredibly versatile, endlessly customizable, and easy to make ahead. Plus, they reheat like a dream, so you can enjoy leftovers without compromising on taste or texture. It’s recipes like this that make weeknight dinners feel effortless and make special occasions just a little more delicious.
If you’ve been looking for a go-to recipe that works for everything from potlucks to lunchboxes, this one is it. The next time you find yourself staring into your fridge wondering what to make, reach for this recipe. You won’t regret it.
Now it’s your turn. Try out these pesto chicken sliders and let me know how it goes. Did you make any fun variations? Did your kids devour them? I’d love to hear about it! Share your feedback, leave a comment, and if you’re feeling extra proud of your sliders, snap a photo and tag me on Instagram or your favorite social platform. I can’t wait to see what you create. Happy cooking!
Print
Pesto Chicken Sliders Recipe – Easy Cheesy Party Favorite
- Total Time: 40 minutes
- Yield: 18 sliders 1x
- Diet: Halal
Description
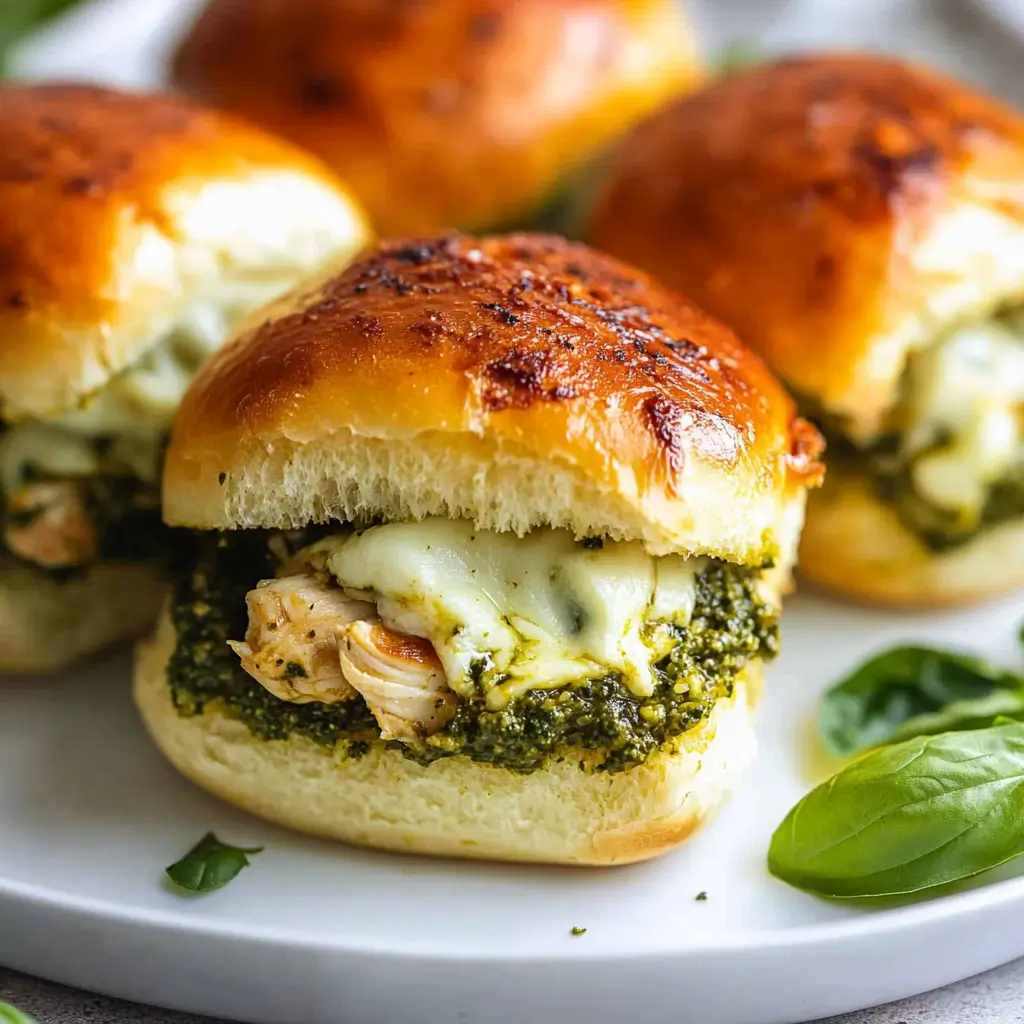
These pesto chicken sliders are loaded with juicy shredded chicken, gooey mozzarella, and vibrant basil pesto, all baked into soft, golden slider buns. They’re incredibly easy to make, kid-friendly, and perfect for parties or weeknight dinners.
Ingredients
-
18 slider buns, cut in half
-
2 cups cooked shredded chicken (rotisserie recommended)
-
11 oz basil pesto (e.g., Buitoni)
-
15 slices mozzarella cheese
-
2 tablespoons butter, melted
-
1/3 cup mayonnaise (optional)
Instructions
-
Preheat oven to 400°F (204°C) and lightly grease a 9×13-inch baking pan.
-
In a small bowl, mix melted butter with 2 tablespoons of pesto and set aside.
-
Place bottom halves of buns in the baking dish. Spread with mayo if using.
-
Layer with shredded chicken, spoonfuls of pesto, and mozzarella slices.
-
Top with remaining buns. Brush the tops with pesto butter.
-
Bake uncovered for 10 minutes. Then cover with foil and bake another 10–15 minutes until heated through and cheese is melted.
-
Let cool for 5 minutes, slice, and serve.
Notes
-
You can use provolone or shredded mozzarella as alternatives.
-
Fresh pesto or store-bought both work well.
-
Add red pepper flakes for a spicy twist.
-
Perfect for freezing and reheating for later meals.
- Prep Time: 15 minutes
- Cook Time: 25 minutes
- Category: Main Course, Appetizer
- Method: Baking
- Cuisine: American