
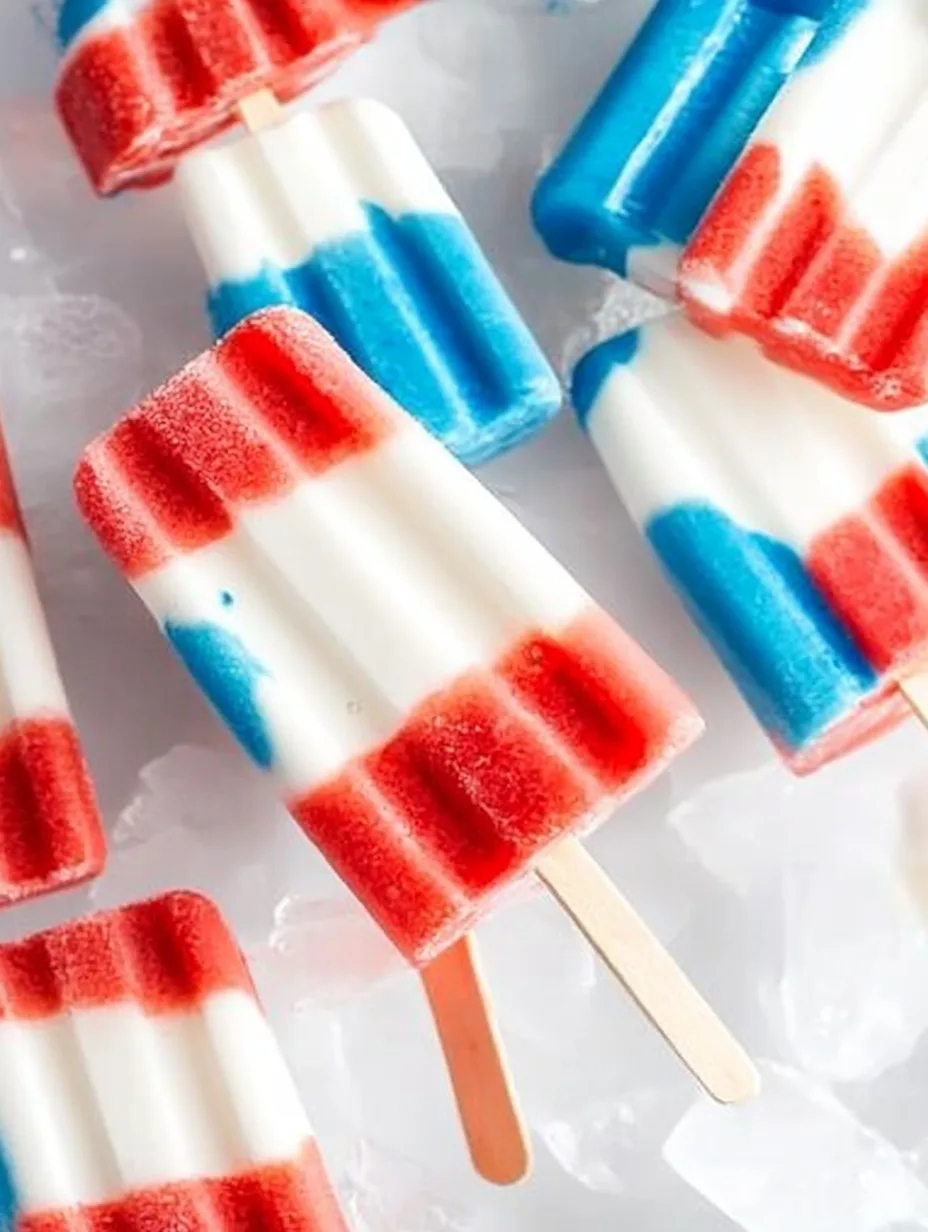
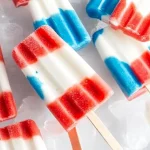
Patriotic Bomb Pops are a delightful summer treat that captures the spirit of celebration. With their vibrant red, white, and blue colors, these iconic frozen pops not only cool you down on hot days but also bring a sense of joy and festivity to any gathering. Crafted with layers of fruity goodness, these treats are perfect for barbecues, holidays, or simply just because! Every bite of these bomb pops provides a refreshing burst of flavor, leaving you craving more.
Imagine enjoying a sunny afternoon with friends and family, each person reaching for a vibrant Patriotic Bomb Pop. The blend of sweet and tart flavors dances on your tongue, merging perfectly with the nostalgic feeling of childhood treat enjoyment. This recipe is not just about quenching your thirst but about creating memories that will last a lifetime. In this guide, we’ll explore why this recipe is a must-try, how to make it effortless, and how best to serve it to create an unforgettable experience.
When you make Patriotic Bomb Pops, you’re not just preparing a dessert; you’re planning a celebration! With the Fourth of July, Memorial Day, or any summer picnic in mind, everyone will appreciate the beauty and deliciousness of these Bomb Pops. Get ready to impress your guests and loved ones with this amazing recipe that bursts with flavor and festivity!
Why You’ll Love This Recipe
Creating Patriotic Bomb Pops can be fun and rewarding for everyone involved. Here are some fantastic reasons why you’ll fall in love with this recipe:
1. Simple Ingredients: Most ingredients are accessible and affordable.
2. Visually Appealing: The red, white, and blue layers create a stunning presentation.
3. Endless Variations: You can experiment with different flavors and fruits based on your preferences.
4. Perfect for Hot Days: These frozen treats are the ultimate way to stay cool during summer.
5. Great for Any Occasion: They add a festive touch to parties, barbecues, or family gatherings.
6. Kid-Friendly Fun: Kids will not only love eating them but also enjoy helping to make them.
With these highlights in mind, it’s easy to understand why Patriotic Bomb Pops are the perfect addition to your summer festivities. Each frozen layer is a delightful combination of flavor and nostalgia that evokes smiles from everyone who indulges!
Preparation and Cooking Time
Making Patriotic Bomb Pops is a straightforward process that doesn’t take much time at all. Here’s a quick breakdown of the necessary time:
– Preparation Time: 45 minutes (this includes blending and layering the ingredients)
– Freezing Time: 4-6 hours (or overnight for best results)
– Total Time: Approximately 5-7 hours, allowing for an enjoyable day of cooling in the freezer.
These estimates may fluctuate depending on how quickly you prepare the ingredients, but they provide a solid guideline for getting started.
Ingredients
– Red Layer:
– 1 ½ cups strawberry puree (fresh or frozen)
– 1 tablespoon honey or sugar (optional)
– White Layer:
– 1 ½ cups yogurt (plain or vanilla)
– 1 tablespoon honey or sugar (to taste)
– Blue Layer:
– 1 ½ cups blueberry puree (fresh or frozen)
– 1 tablespoon honey or sugar (optional)
– Popsicle molds
– Popsicle sticks
Step-by-Step Instructions
Creating Patriotic Bomb Pops is a fun and creative process. Follow these steps for delicious results:
1. Prep Your Molds: Start by washing and drying your popsicle molds thoroughly.
2. Make the Red Layer: In a blender, combine the strawberry puree and honey (if using). Blend until smooth.
3. Fill the Molds: Pour the red layer mixture into the popsicle molds, filling them about one-third full.
4. Freeze: Insert the sticks and freeze for 2-3 hours until set.
5. Prepare the White Layer: In a bowl, mix the yogurt and honey. Stir until well combined.
6. Add the White Layer: Take the pops out of the freezer and carefully pour the yogurt mixture over the red layer until the molds are half full.
7. Refreeze: Return the molds to the freezer for another 1-2 hours to set the white layer.
8. Make the Blue Layer: Combine the blueberry puree and honey in the blender and blend until smooth.
9. Complete the Pops: Fill the molds with the blue layer mixture and insert the sticks.
10. Final Freeze: Freeze the pops for an additional 2-3 hours, or until completely set.
11. Enjoy: Once freezing is complete, remove the pops from the molds and enjoy your Patriotic Bomb Pops!
This simple process allows you to create a delightful layered treat that everyone will love.
How to Serve
Serving Patriotic Bomb Pops can enhance the festive mood of your gathering. Here are some tips to consider when presenting these colorful treats:
1. Plating Ideas: Place the bomb pops on a decorative platter, arranging them in the color order of the American flag for visual appeal.
2. Accompaniments: Consider serving them alongside fresh fruit or whipped cream for added flavor and texture.
3. Drink Pairing: Pair the pops with refreshing drinks like lemonade or iced tea to complement the flavors.
4. Serving Size: Cut the pops in half if they are too large for younger children, making it easier for them to enjoy.
5. Photography: Take stunning photos to capture the moment. The bright colors and exciting shapes will make for incredible social media posts!
By focusing on presentation and serving options, you can elevate the experience of enjoying Patriotic Bomb Pops, making them not just a treat, but a highlight of your summer gatherings.
In summary, patriotic celebrations come alive with the fun and incredible taste of Patriotic Bomb Pops. This recipe brings together simple ingredients and easy preparation to create a visually stunning dessert you’ll enjoy making and sharing. Whether you’re at a picnic, barbecue, or family gathering, these bomb pops are sure to be a hit. Enjoy your summer celebrations with this amazing recipe that is as fun to make as it is delightful to eat!
Additional Tips
– Use Fresh Ingredients: For optimal flavor, use fresh strawberries and blueberries when making your Patriotic Bomb Pops. Fresh fruits provide a vibrant taste that frozen alternatives may lack.
– Blend Thoroughly: Ensure you blend the layers thoroughly for a smoother texture. This will help prevent chunks from forming in your pops.
– Layer Neatly: Take your time while pouring the layers into the molds. This will help maintain distinct colors for a visually appealing final product.
– Experiment with Sweeteners: If you’d like a healthier option, consider using agave syrup or stevia instead of honey or sugar.
Recipe Variation
Get creative! Here are a few variations to elevate your Patriotic Bomb Pops:
1. Tropical Twist: Substitute the strawberry and blueberry layers with mango and passion fruit purees for a tropical flavor boost.
2. Yogurt Alternatives: Use flavored yogurts like coconut or lemon for the white layer to add a unique twist.
3. Sparkling Pop: Add a splash of sparkling water or soda into the yogurt layer for a fizzy sensation in each bite.
Freezing and Storage
– Storage: Keep your Patriotic Bomb Pops in an airtight container or freezer-friendly bag. This ensures they retain their flavor and freshness.
– Freezing: These pops can be stored in the freezer for up to 3 months, making them a perfect make-ahead treat for any summer gathering.
Special Equipment
A few key tools will help simplify your Bomb Pop creation:
– Popsicle molds: These are essential for shaping your pops.
– Blender: Use a blender for achieving smooth fruit purees and yogurt mixtures.
– Sticks: Ensure you have sturdy popsicle sticks for easy handling.
Frequently Asked Questions
Can I make these pops without yogurt?
Yes, you can replace the yogurt layer with a cream cheese mixture or simply omit it altogether for a three-layered pop.
How long will the pops last in the freezer?
Patriotic Bomb Pops can last in the freezer for up to three months if stored properly in an airtight container.
Can I use other fruits?
Absolutely! Feel free to experiment with other fruits like raspberries or blackberries for your layers.
What if my layers are not staying separated?
If the layers blend together, it might be because they were poured too soon. Make sure each layer is frozen adequately before adding the next.
Are these pops gluten-free?
Yes! All the ingredients listed in this recipe are gluten-free.
Conclusion
Patriotic Bomb Pops are more than just a fun treat; they embody the essence of summer celebrations. With their eye-catching colors and refreshing flavors, these pops are perfect for any gathering. By following this recipe, you can create delightful summer memories with friends and family. So, gather your ingredients, get creative, and make this vibrant dessert a highlight of your warm-weather festivities!
Patriotic Bomb Pops: An Incredible Ultimate Recipe for Summer Fun
- Total Time: 54 minute
Ingredients
– Red Layer:
– 1 ½ cups strawberry puree (fresh or frozen)
– 1 tablespoon honey or sugar (optional)
– White Layer:
– 1 ½ cups yogurt (plain or vanilla)
– 1 tablespoon honey or sugar (to taste)
– Blue Layer:
– 1 ½ cups blueberry puree (fresh or frozen)
– 1 tablespoon honey or sugar (optional)
– Popsicle molds
– Popsicle sticks
Instructions
Creating Patriotic Bomb Pops is a fun and creative process. Follow these steps for delicious results:
1. Prep Your Molds: Start by washing and drying your popsicle molds thoroughly.
2. Make the Red Layer: In a blender, combine the strawberry puree and honey (if using). Blend until smooth.
3. Fill the Molds: Pour the red layer mixture into the popsicle molds, filling them about one-third full.
4. Freeze: Insert the sticks and freeze for 2-3 hours until set.
5. Prepare the White Layer: In a bowl, mix the yogurt and honey. Stir until well combined.
6. Add the White Layer: Take the pops out of the freezer and carefully pour the yogurt mixture over the red layer until the molds are half full.
7. Refreeze: Return the molds to the freezer for another 1-2 hours to set the white layer.
8. Make the Blue Layer: Combine the blueberry puree and honey in the blender and blend until smooth.
9. Complete the Pops: Fill the molds with the blue layer mixture and insert the sticks.
10. Final Freeze: Freeze the pops for an additional 2-3 hours, or until completely set.
11. Enjoy: Once freezing is complete, remove the pops from the molds and enjoy your Patriotic Bomb Pops!
This simple process allows you to create a delightful layered treat that everyone will love.
- Prep Time: 15 minutes
- Cook Time: 4-6 hours (freezing)
Nutrition
- Serving Size: 10 pops
- Calories: 80 kcal
- Fat: 0g
- Protein: 2g