
There’s just something undeniably special about cookie dough. Maybe it’s the buttery texture that melts in your mouth, or the sweet vanilla aroma that instantly transports you back to childhood. If you grew up helping someone bake—your mom, your grandma, or even an older sibling—you probably remember swiping a spoonful of raw dough straight from the mixing bowl. But as adults, we now know that raw eggs and untreated flour can pose health risks. That’s why this eggless Oreo cookie dough recipe is such a game-changer. It brings back all that comfort and nostalgia, minus the worry.
This recipe is designed to be completely safe to eat raw, thanks to two important adjustments: no eggs, and heat-treated flour. So not only are you getting a rich, sweet, creamy dough bursting with crunchy Oreo chunks, but you’re also protecting your health at the same time. It’s a total win-win.
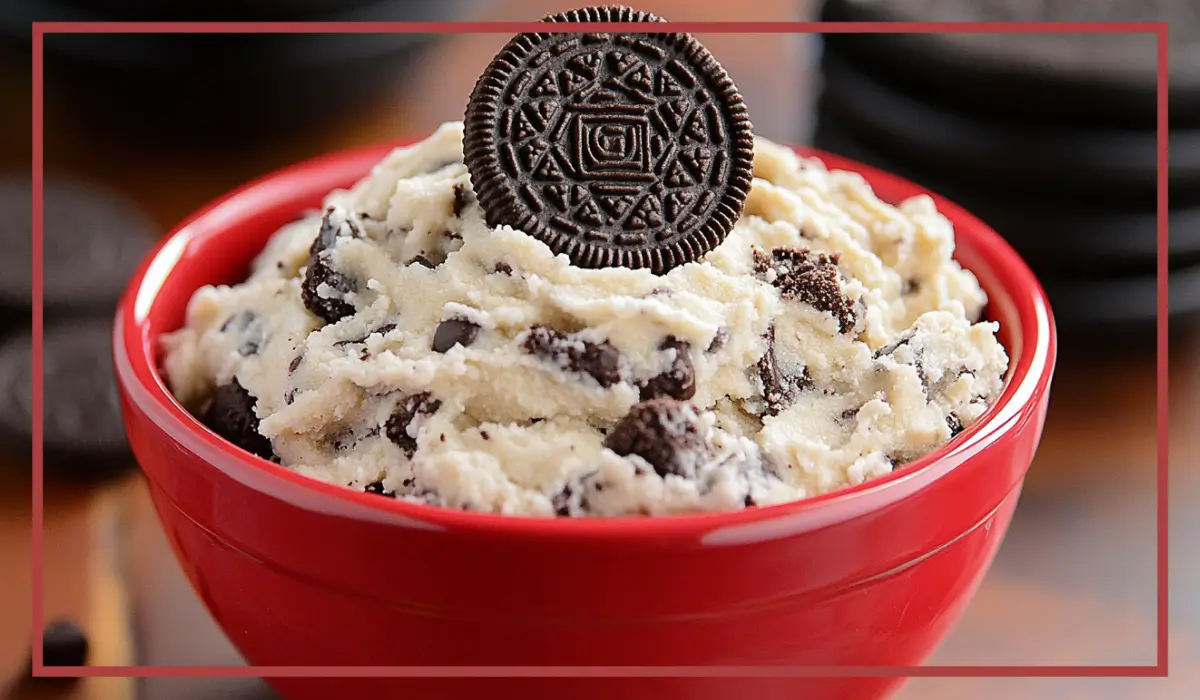
What makes this particular recipe stand out even more is its ease. With just a few pantry staples—like flour, sugar, butter, milk, and vanilla—you can whip up a batch of edible cookie dough in no time. The Oreos bring in that perfect contrast of textures: the creaminess of the base paired with the chocolatey crunch of cookies. It’s indulgent, satisfying, and ideal for when you need a sweet fix fast.
Plus, it’s incredibly versatile. Whether you eat it straight with a spoon, roll it into bite-sized balls for parties, or use it as a layer in your favorite dessert parfait, this Oreo cookie dough does not disappoint. It’s the kind of recipe you’ll find yourself coming back to again and again.
Why You’ll Love This Oreo cookie dough Recipe
There are countless reasons to fall head-over-heels in love with this Oreo cookie dough recipe. To start, it’s a safe, no-bake treat you can enjoy without any hesitation. Traditional cookie dough recipes contain raw eggs, which can carry bacteria like salmonella. They also include untreated flour, which might harbor harmful germs. But here, we eliminate both of those risks by using no eggs and baking the flour to kill off any potential bacteria. You can dig in with confidence.
Another reason this recipe is a standout is how simple it is. With just a few common ingredients and a single mixing bowl, you’re looking at less than 15 minutes from start to finish. No stand mixer? No problem. You can use a hand mixer or even a sturdy spatula if needed. It’s one of those recipes that makes you feel like a dessert wizard with very little effort.
Beyond safety and ease, the flavor and texture of this dough is next-level good. It’s soft and creamy, with a rich buttery base and just the right amount of vanilla. The crushed Oreos add a perfect crunch and a touch of chocolate flavor without overwhelming the dough. You’re left with a satisfying bite that feels indulgent, nostalgic, and comforting all at once.
It’s also perfect for all kinds of eaters. Since there are no eggs, it’s a great option for anyone with egg allergies or dietary restrictions. You can even make it dairy-free by using plant-based butter and non-dairy milk. Kids love it, adults love it—it’s a treat that brings people together.
Whether you’re having a cozy movie night, planning a no-bake dessert for a party, or just want something sweet at the end of a long day, this edible Oreo cookie dough is a guaranteed crowd-pleaser.
Health Benefits of This Eggless Edible Dough
Now, let’s be real. Cookie dough isn’t meant to be a health food. It’s a treat, and that’s okay. But even within the realm of indulgence, this recipe offers a few key advantages that make it a smarter choice compared to traditional raw cookie dough.
First and foremost, the absence of eggs eliminates one of the biggest concerns associated with eating raw dough: the risk of salmonella. Raw eggs can carry this harmful bacteria, which can cause food poisoning, especially in children, older adults, and people with weakened immune systems. By skipping the eggs entirely, you’re making a safer choice without compromising on flavor or texture.
Second, we’re treating the flour before using it. You might not realize it, but raw flour can also carry bacteria like E. coli. By baking the flour at a low temperature before mixing it into the dough, we’re neutralizing those risks. It’s a quick and easy step that makes a big difference in keeping this dessert safe for everyone.
In terms of ingredients, this recipe is made with simple, recognizable components. You won’t find any preservatives, artificial flavorings, or mystery additives here. If you’re someone who values clean, homemade treats, this dough fits right into that lifestyle.
Additionally, it’s customizable to fit different dietary needs. You can make it dairy-free by swapping in vegan butter and plant-based milk. It’s already egg-free and doesn’t require baking, which makes it a friendly option for those with limited kitchen access or younger kids who want to help out in the kitchen.
And let’s not forget the mental health benefits of indulging in something delicious. There’s something deeply satisfying about enjoying a spoonful of cookie dough that reminds you of being a kid. That kind of joy is good for the soul.
So while this isn’t a superfood or a low-calorie snack, it’s a treat you can feel good about enjoying occasionally, especially when you’ve taken the steps to make it safely and with love.
Preparation Time, Servings, and Nutritional Information
When a sweet craving strikes, you want something fast, easy, and satisfying—and this recipe absolutely delivers. From start to finish, the entire process takes less than 15 minutes. That includes heat-treating the flour, mixing the ingredients, and folding in the Oreo pieces.
Here’s a quick breakdown of the time you’ll need:
Prep Time: 5 minutes
Heat-Treating Time: 10 minutes (can be done in advance)
Total Time: 15 minutes
This recipe yields about 1 to 1½ cups of cookie dough, depending on how generous you are with your Oreo chunks. That’s roughly 4–6 servings, depending on portion size. Of course, if you’re anything like me, you might be tempted to call it two servings—but I won’t judge!
Nutritional Information (per serving, assuming 6 servings):
Calories: 220
Total Fat: 12g
Saturated Fat: 7g
Carbohydrates: 26g
Sugar: 16g
Protein: 2g
Cholesterol: 20mg
Sodium: 90mg
Fiber: 1g
Keep in mind, this is a treat and should be enjoyed in moderation. However, it’s also a great recipe to share, and makes for a fun, safe dessert to serve at parties, sleepovers, or as a cute after-dinner indulgence.
Ingredients List
What’s especially great about this recipe is how few ingredients it requires—and how likely you already have most of them in your pantry. Each component plays an important role in building that rich, classic cookie dough flavor we all love.
Here’s what you’ll need:
1 cup all-purpose flour (heat-treated): This is the base of the dough, providing structure and thickness. Heat-treating it makes it safe to consume raw.
⅓ cup unsalted butter, softened: Butter gives the dough its richness and smooth, creamy texture. Softened butter is easier to blend with the sugar, creating that fluffy, whipped consistency.
⅓ cup granulated sugar: Sugar adds sweetness and helps create a light, smooth texture when creamed with the butter. You can experiment with a mix of brown sugar and white sugar if you want a more caramel-like depth.
2 tablespoons milk (any kind): Milk adds moisture and helps bind the dough together. You can use dairy or any plant-based milk you like—almond, soy, oat, or coconut all work well.
1 teaspoon pure vanilla extract: Vanilla brings warmth and flavor depth to the dough. It’s subtle, but essential.
¼ teaspoon salt: Just a small pinch, but it balances the sweetness and enhances the overall flavor.
8 regular Oreo cookies, crushed into chunks: This is the fun part. Crushing Oreos by hand or with a rolling pin gives you uneven chunks for contrast. Some pieces stay crisp, others soften slightly in the dough. It’s the perfect bite.
Optional Add-Ins: Want to get creative? Try mixing in white chocolate chips, sprinkles, or peanut butter swirls.
Step-By-Step Cooking Instructions
To make this dough, you don’t need a stand mixer or any fancy equipment. Just a bowl, a spoon or hand mixer, and a love for cookie dough. Let’s walk through the entire process, step by step, so you can feel confident from beginning to end.
Step 1: Heat-Treat the Flour
Before anything else, you’ll need to make the flour safe to eat. This is a crucial step, so don’t skip it.
Preheat your oven to 350°F (177°C).
Spread the flour evenly across a rimmed baking sheet.
Bake for 5–10 minutes, or until it reaches an internal temperature of 160°F. You can check this with a food thermometer.
Let the flour cool completely before using it. You can even heat-treat it in bulk and store it in a sealed container for future no-bake recipes.
Step 2: Crush the Oreo Cookies
Place your Oreos in a zip-top plastic bag, press the air out, and seal it.
Use a rolling pin or your hands to gently crush the cookies. You want chunks, not fine crumbs—think texture and variety. Set them aside.
Step 3: Cream the Butter and Sugar
In a large mixing bowl, combine the softened butter and granulated sugar.
Using a hand mixer or spatula, beat the mixture until it’s light and fluffy. This will take about 2–3 minutes.
The sugar should be well incorporated, and the texture should be smooth.
Step 4: Add Milk, Vanilla, and Salt
Pour in the milk and vanilla extract.
Add the salt.
Mix until everything is fully combined. The mixture will become a bit creamier, which is exactly what you want.
Step 5: Stir in the Flour
Add the cooled, heat-treated flour to the bowl.
On low speed or with a spatula, mix until the flour is just incorporated.
Don’t overmix—stop as soon as the dough comes together. It should be thick but smooth.
Step 6: Fold in the Oreo Chunks
Gently fold in the crushed Oreos. Use a spatula to distribute them evenly throughout the dough.
Again, don’t overmix. You want to keep some large chunks for texture.
Step 7: Serve and Store
Scoop the dough into bowls, roll it into bite-sized balls, or eat it straight from the spoon.
To store, place the dough in an airtight container and refrigerate. It will stay fresh for up to 1 week. You can also freeze it for longer storage.

How to Serve
Now that your Oreo cookie dough is perfectly whipped and ready to enjoy, it’s time to get creative with how you serve it. While a spoon straight out of the bowl is always a solid option, this dough lends itself beautifully to several fun, shareable, and even fancy presentations.
One of the simplest serving ideas is portioning the dough into small bowls or ramekins and topping it with an extra crushed Oreo or a drizzle of melted chocolate. This makes it feel a bit more elevated, like a plated dessert, while still staying true to its homey charm.
You can also roll the dough into bite-sized balls and serve them chilled on a party platter. They’re easy to grab, kid-friendly, and make an ideal treat for events like birthdays, movie nights, or holiday gatherings. For a finishing touch, roll each ball in crushed Oreos, sprinkles, mini chocolate chips, or drizzle them with a light glaze made from powdered sugar and milk.
If you’re feeling really extra, consider layering this cookie dough into a dessert parfait. Start with a glass, add a scoop of dough, a layer of whipped cream or vanilla yogurt, some fresh fruit or more cookie crumbs, and repeat. It’s the perfect balance of textures and flavors in every spoonful.
Another fantastic option is using the dough as a topping for ice cream. Imagine a big scoop of vanilla or cookies-and-cream ice cream with chunks of Oreo cookie dough on top—it’s rich, creamy, crunchy, and cool all in one bite.
Of course, this dough is also delicious straight out of the fridge. Chilling firms it up a bit, giving it that classic cookie dough texture and making it easy to portion out and enjoy one scoop at a time.
Whether you serve it at a party, sneak a spoonful during a late-night craving, or dress it up as part of a dessert board, this Oreo cookie dough fits into any moment that calls for something sweet and fun.
Pairing Suggestions
Pairing edible cookie dough with the right sides or beverages can take your snacking experience to the next level. While the dough itself is rich and satisfying, combining it with contrasting flavors and textures can make it even more memorable.
One of the easiest pairings is a tall glass of cold milk. The milk not only balances out the sweetness and richness of the dough but also brings in a classic, nostalgic touch. Whether you go with dairy, almond, oat, or soy milk, it’s the perfect match for the creamy, cookie-loaded dough.
Another favorite is fresh fruit. You might not immediately think of pairing fruit with cookie dough, but the brightness of strawberries, raspberries, or sliced bananas can help cut through the richness and add a refreshing contrast. Try making a fruit and dough platter for something a bit unexpected and fun.
For a slightly more indulgent take, pair your Oreo dough with a scoop of ice cream. Cookies-and-cream, vanilla bean, or even caramel swirl are all excellent choices. You can serve them side-by-side or turn them into an ice cream sandwich by flattening a scoop of dough and layering it between two smaller scoops of ice cream.
If you’re putting together a dessert spread, this cookie dough works well with other no-bake treats like chocolate truffles, brownie bites, or marshmallow cereal bars. Each brings its own flavor and texture to the table while complementing the dough’s rich profile.
For drinks, coffee or espresso makes a surprisingly delicious pairing. The bitterness of the coffee contrasts with the sweet dough, making each bite taste more balanced. For an even cozier experience, try a cup of hot cocoa topped with marshmallows on the side—perfect for chilly evenings.
And if you’re hosting a gathering, consider creating a DIY dessert bar. Offer bowls of toppings like chocolate chips, sprinkles, mini marshmallows, crushed nuts, or caramel sauce and let everyone customize their own cookie dough cup. It’s interactive, festive, and absolutely delicious.
Storage, Freezing & Reheating Instructions
While this dough is best enjoyed fresh, it stores wonderfully and can be made ahead, which makes it super convenient for meal prep or spontaneous dessert cravings.
To store the dough in the refrigerator, transfer it to an airtight container and keep it chilled for up to one week. The texture may firm up slightly in the fridge, especially if you’ve used dairy butter, but it’ll still be perfectly scoopable. If you prefer a softer dough, just let it sit at room temperature for 10–15 minutes before serving.
For longer storage, you can freeze the dough. Scoop it into small balls and place them on a parchment-lined baking sheet. Freeze for about 1 hour, or until firm. Then transfer the frozen balls to a freezer-safe container or zip-top bag. This way, they won’t stick together. You can keep them frozen for up to 3 months.
When you’re ready to eat the frozen dough, you have a couple of options. You can let it thaw in the fridge overnight or leave it at room temperature for 20–30 minutes until it softens. If you’re in a hurry and want it soft quickly, pop it in the microwave for about 5–8 seconds—just be careful not to melt it completely.
This dough is not designed to be baked into cookies, so avoid trying to cook it in the oven. Since it lacks eggs and leavening agents, it won’t hold its shape or bake properly. If you’re craving baked cookies, you’ll want to follow a traditional cookie recipe.
By storing the dough properly, you’ll always have a sweet treat on hand for those moments when a craving hits—or when guests pop by unexpectedly.
Common Mistakes to Avoid
Even though this recipe is simple, there are a few pitfalls to watch out for. Avoiding these common mistakes will ensure your cookie dough turns out perfectly creamy, sweet, and safe to eat.
Skipping the flour heat-treatment step is the number one mistake people make with edible cookie dough. While it’s easy to overlook, raw flour can contain harmful bacteria like E. coli. Taking just 10 minutes to heat-treat your flour makes a huge difference and ensures your dough is safe to consume.
Using cold butter is another misstep. If your butter isn’t properly softened, it won’t blend well with the sugar, and you’ll end up with a gritty texture instead of a smooth, fluffy dough. Set your butter out at room temperature about 30 minutes before you plan to start mixing.
Overmixing the dough can also cause problems. Once you add the flour, mix only until it’s just combined. Overworking the dough can make it too dense and gluey, which will ruin that creamy texture you’re going for.
Crushing the Oreos too finely is another issue. While you want them broken up, turning them into crumbs removes the texture contrast that makes this dough so delicious. Use your hands or a rolling pin and stop before the pieces get too small.
Adding too much liquid can throw off the consistency. Stick to the recommended amount of milk. If you feel like your dough is too thick, add just a teaspoon at a time. Too much liquid will make the dough soupy, and you’ll lose that satisfying cookie dough texture.
Finally, storing the dough improperly can lead to it drying out. Always use an airtight container, and if you’re freezing it, make sure it’s well-sealed to prevent freezer burn.
By keeping these common mistakes in mind, you’ll set yourself up for success every single time you make this edible Oreo cookie dough.
Pro Tips
Want to take your cookie dough game to the next level? These pro tips will help you perfect your dough and make it uniquely your own.
Prep the flour ahead of time. If you plan to make edible doughs often, consider heat-treating a few cups of flour at once. Once cooled, store the treated flour in an airtight container, clearly labeled, so you can skip this step next time.
Use room temperature ingredients. For the best texture, your butter should be soft but not melted, and your milk should be room temp too. This helps everything mix together more evenly and smoothly.
Add a pinch of brown sugar. For a more complex flavor, you can replace one tablespoon of granulated sugar with brown sugar. It gives the dough a subtle caramel note and enhances the overall taste.
Chill the dough before serving. While the dough is delicious at room temperature, chilling it for 20–30 minutes gives it a firmer, more scoopable texture that’s closer to traditional cookie dough. It also allows the flavors to meld beautifully.
Experiment with mix-ins. While Oreos are amazing, don’t be afraid to get creative. White chocolate chunks, peanut butter cups, toffee bits, or even crushed pretzels can add exciting new flavors and textures.
Make mini dough bites for snacks. Roll the dough into small balls and freeze them. These make great single-serve treats that you can enjoy straight from the freezer—no thawing needed.
Use a cookie scoop for perfect portions. If you’re serving this dough at a party or just want neat, even servings, a cookie scoop makes it super easy to portion without a mess.
With these tips, you’ll be turning out bakery-worthy edible cookie dough that looks and tastes amazing every time.
Frequently Asked Questions (FAQs)
When it comes to making edible cookie dough at home—especially one that skips the eggs and uses heat-treated flour—there are naturally a few questions that pop up. Below are some of the most common queries to help you feel even more confident when whipping up this recipe.
Can I use store-bought heat-treated flour instead of doing it myself?
Yes, you can absolutely use store-bought heat-treated flour if it’s available to you. Some specialty baking stores and online retailers carry it. It’s a great time-saver and ensures consistent safety and quality. However, if you prefer to do it yourself, the process is simple and budget-friendly.
What kind of milk works best in this recipe?
Any type of milk will do. You can use cow’s milk for a classic taste or opt for a plant-based milk like almond, oat, soy, or coconut. The flavor differences are subtle, but if you use a flavored milk (such as vanilla almond milk), it might add a slight flavor boost to the dough.
Is this recipe suitable for vegans?
It can be! To make it vegan, simply replace the butter with a plant-based butter substitute and use a non-dairy milk. Be sure to check your Oreos, too—while many varieties are dairy-free, it’s always good to double-check for any limited-edition flavors.
Can I bake this dough into cookies?
This dough is not designed for baking. Since it doesn’t contain eggs or leavening agents like baking soda or baking powder, it won’t rise or develop the chewy texture of a traditional cookie. If you want to bake cookies, use a proper cookie recipe instead.
How do I know when the flour is safe to use?
The safest way to be sure is by using a food thermometer. The flour needs to reach an internal temperature of 160°F (71°C) to kill any harmful bacteria. Make sure it cools completely before using it in the dough.
Can I use gluten-free flour?
Yes, you can substitute with a 1:1 gluten-free all-purpose flour blend. Just make sure to heat-treat it the same way as you would with regular flour. Keep in mind that the texture may vary slightly depending on the blend.
Why is my dough too sticky or too dry?
If your dough is too sticky, it may need a bit more flour—add it one tablespoon at a time. If it’s too dry or crumbly, try adding a teaspoon of milk at a time until you get the texture you want. This can depend on environmental factors like humidity and how you measured your ingredients.
Can I make this recipe in advance?
Yes, and it stores beautifully. You can make the dough up to 3 days in advance and keep it refrigerated in an airtight container. For longer storage, freeze it and thaw it in the fridge overnight when you’re ready to enjoy it.
Is it safe for kids to eat this dough?
Absolutely! Since there are no raw eggs and the flour is heat-treated, this dough is safe for kids. It’s a fun recipe to make with them, too—just supervise during the heat-treatment step for safety.
Can I double or triple the recipe?
Definitely. This recipe scales well. Just multiply all the ingredients accordingly. If you’re making a larger batch, be sure to spread the flour evenly when heat-treating so it bakes thoroughly and evenly.
Conclusion & Call to Action
There’s something irresistibly comforting about a batch of homemade cookie dough, and when it’s safe to eat, simple to make, and packed with crunchy Oreo goodness, it’s hard not to fall completely in love with it. Whether you’re treating yourself after a long day, whipping up something sweet for friends, or looking for an easy activity to do with your kids, this eggless Oreo cookie dough delivers on all fronts.
It’s creamy, it’s indulgent, it’s bursting with those nostalgic cookie-and-cream flavors, and best of all—it’s completely safe to eat straight from the bowl. No baking required, no raw eggs, and no worries. Just pure, delicious joy in every bite.
Plus, it’s endlessly customizable and forgiving. Want to make it vegan? Easy. Need it gluten-free? Not a problem. Looking to change up the mix-ins? The sky’s the limit. This is the kind of recipe that becomes a go-to favorite in your dessert rotation—not just because it tastes amazing, but because it always brings a smile.
So now it’s your turn. Grab those Oreos, treat your flour, and let the butter soften on the counter. Then dive in, mix it up, and enjoy a scoop (or three) of this dreamy edible cookie dough. If you try it, I’d absolutely love to hear how it turns out for you. Share your version, tag me in your photos, or leave a comment with your favorite mix-ins or serving ideas. There’s nothing better than seeing how others make these recipes their own.
Whether you’re making this for yourself or sharing it with others, I hope this edible Oreo cookie dough brings you all the sweet, cozy vibes. You deserve it.
Print
Oreo Cookie Dough Without Eggs – Easy Edible Recipe
- Total Time: 15 minutes
- Yield: 4-6 servings 1x
- Diet: Vegetarian
Description
This creamy, indulgent Oreo cookie dough is completely safe to eat raw—no eggs, no baking, and just 15 minutes to make. It’s the perfect quick treat!
Ingredients
-
1 cup all-purpose flour (heat-treated)
-
⅓ cup unsalted butter, softened
-
⅓ cup granulated sugar
-
2 tablespoons milk (any kind)
-
1 teaspoon pure vanilla extract
-
¼ teaspoon salt
-
8 regular Oreo cookies, crushed into chunks
Instructions
-
Heat-treat flour at 350°F (177°C) for 5–10 minutes. Let cool.
-
Crush Oreos into chunky pieces. Set aside.
-
In a bowl, cream softened butter and sugar until light and fluffy.
-
Add milk, vanilla, and salt. Mix until combined.
-
Stir in cooled flour until just mixed.
-
Fold in crushed Oreos gently.
-
Serve at room temperature or chilled. Store leftovers in an airtight container in the fridge for up to 1 week.
Notes
-
For vegan version: use plant-based butter and non-dairy milk.
-
Don’t skip the flour heat-treatment step—it’s essential for safety.
-
Try mix-ins like mini chocolate chips or sprinkles.
- Prep Time: 5 minutes
- Cook Time: 10 minutes (heat-treating flour)
- Category: Dessert, Snack
- Method: No-Bake
- Cuisine: American