
There’s something about homemade ice cream that brings back childhood memories in the best possible way. For me, it’s a flashback to hot summer days, barefoot in the backyard, listening to the hum of bees and the jingle of the neighborhood ice cream truck. But even though I love a good scoop of creamy, cold dessert, I’ve always been a little intimidated by the idea of making ice cream from scratch. The egg yolks, the double boiler, the ice cream maker—it all just seemed like too much for a casual No-churn vanilla ice cream dessert.
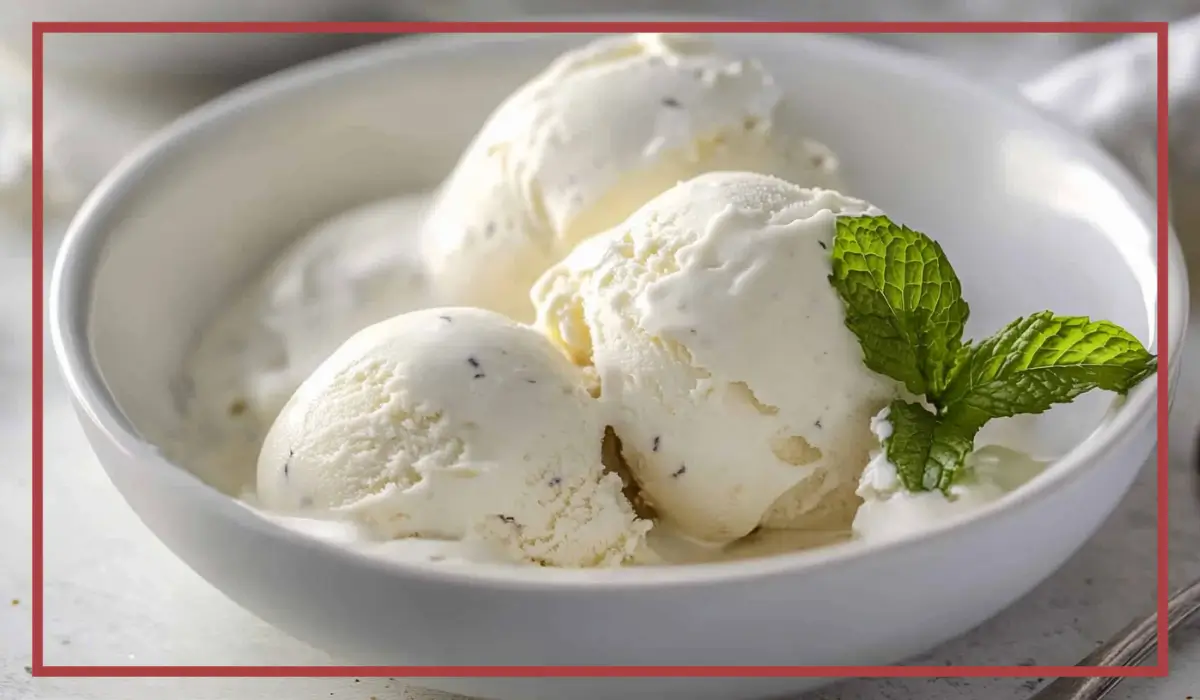
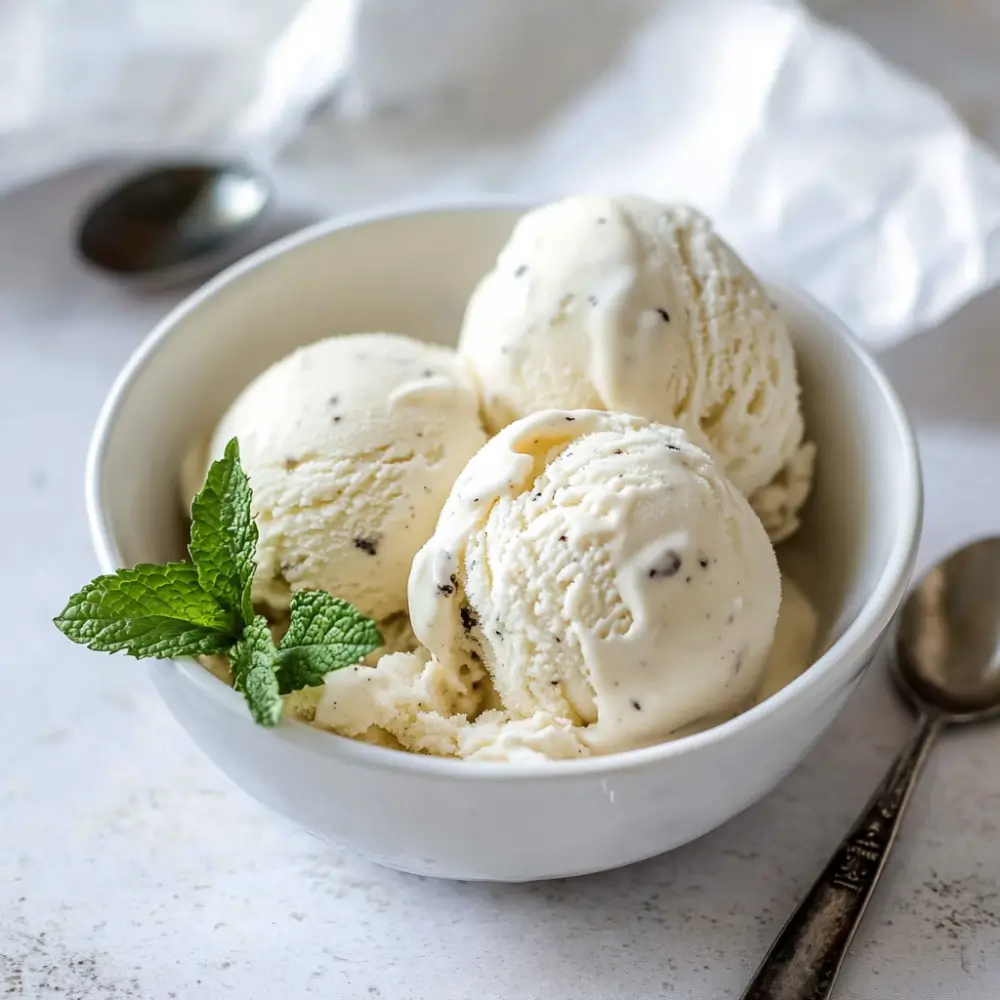
That was until I discovered this no-churn vanilla ice cream recipe. It’s completely transformed the way I think about making ice cream at home. This recipe is beautifully simple, using just three ingredients that you probably already have in your kitchen: sweetened condensed milk, vanilla extract, and heavy whipping cream. No fancy machines, no stove, no custard base—just a few minutes of mixing and a few hours of freezing. The result is smooth, creamy, and bursting with that classic vanilla flavor we all crave.
What makes this recipe extra special is how incredibly satisfying the process is. From the moment the whipped cream starts forming stiff peaks to the final swirl of the velvety base into the pan, every step is easy, quick, and honestly, kind of fun. It’s a perfect project to do with kids, a great make-ahead treat for gatherings, and a reliable go-to when you want something sweet and impressive without a lot of effort.
I first made this ice cream one summer when we had guests over for a last-minute barbecue. I didn’t have dessert planned, but I had the ingredients for this in my pantry and fridge. By whipping it up in ten minutes, popped it in the freezer, and by the time we finished dinner, dessert was ready. Everyone was floored. Since then, it’s been my secret weapon for summer hosting and cozy nights in. Whether you’re an experienced home cook or just getting started in the kitchen, this no-churn ice cream is a recipe you’ll come back to again and again.
Why You’ll Love This No-churn vanilla ice cream Recipe
There are so many reasons to fall in love with this recipe, but let’s break it down. First and foremost, the simplicity. This is the kind of dessert that makes you feel like a kitchen wizard with barely any effort. You don’t need to cook anything, you don’t need to chill bowls overnight (though chilling helps), and you certainly don’t need an expensive appliance taking up counter space. All you need is a mixing bowl and a few minutes to spare.
Next, let’s talk about the texture. Thanks to the whipped cream, this ice cream is incredibly light and airy, yet it stays rich and creamy. The sweetened condensed milk does a lot of the heavy lifting—it adds just the right amount of sweetness and helps the ice cream freeze with a smooth, scoopable texture. It’s not icy, it’s not grainy, and it doesn’t freeze rock-solid like some homemade versions do. Instead, it has that luscious consistency you’d expect from a high-end ice cream shop.
Another reason to love it? It’s endlessly customizable. Think of this vanilla base as a blank canvas. You can fold in crushed cookies, swirls of jam, bits of chocolate, chopped nuts, or even fresh fruit. Also, you can flavor the base with extracts like almond, coconut, or mint. You can layer it with sauces like caramel, fudge, or peanut butter. And every variation starts from the same, ultra-simple base.
And let’s not forget how family-friendly it is. This is a fun one to make with kids because it’s safe, quick, and totally mess-proof. There’s no hot stove or sharp tools involved, and they’ll love getting to pick their own mix-ins. Plus, watching the cream whip and transform is like a little science experiment in your own kitchen.
In short, you’re going to love this recipe because it’s easy, reliable, and completely delicious. Whether you’re craving something sweet late at night or planning a dessert for a crowd, this no-churn vanilla ice cream checks all the boxes.
Health Benefits of this No-churn vanilla ice cream
While ice cream may not be the first thing that comes to mind when you think of healthy eating, there are actually a few surprising health benefits to making your own at home—especially with a simple, no-churn recipe like this one.
First, let’s talk about control. When you make ice cream yourself, you know exactly what’s going into it. That means no artificial preservatives, no mysterious flavor enhancers, and no ingredients you can’t pronounce. You get to choose high-quality cream, a pure vanilla extract, and a sweetened condensed milk that fits your preferences. If you’re trying to avoid additives or unnecessary chemicals, this homemade version is a great alternative to many store-bought brands.
Secondly, this recipe uses a base of heavy cream, which is rich in healthy fats. While it’s important to enjoy it in moderation, full-fat dairy can actually provide some important nutrients like fat-soluble vitamins (A, D, E, and K), as well as calcium and phosphorus. These nutrients support strong bones, healthy skin, and hormone function. And because the cream is whipped to incorporate air, each serving feels rich and indulgent without needing a huge amount.
Vanilla extract also brings some unexpected perks. Pure vanilla contains antioxidants that help neutralize free radicals in the body. It also has mild anti-inflammatory properties and has even been linked to improved mood in aromatherapy studies. So that deliciously fragrant vanilla flavor isn’t just comforting—it can be good for your well-being, too.
Moreover, because this recipe is naturally egg-free, it’s a safer choice for those with egg allergies or sensitivities. It’s also gluten-free, assuming your condensed milk and vanilla extract are certified gluten-free, making it more accessible to people with dietary restrictions.
Another benefit? You’re not tempted to overindulge right away. Since the ice cream needs to freeze for a few hours before serving, it encourages more mindful eating. You make it, you wait, and by the time you’re scooping it out, it feels like a true treat—something special and earned.
Lastly, making ice cream from scratch can contribute to emotional wellness. Cooking (or in this case, no-cooking) can be a very grounding, joyful activity. Creating something from start to finish, especially something that brings joy to others, is a fantastic way to unwind and boost your mood.
So yes, while this no-churn vanilla ice cream may be a dessert, it comes with a handful of thoughtful, health-conscious benefits that make it even easier to enjoy.
Preparation Time, Servings, and Nutritional Information
One of the most attractive things about this recipe—besides the taste—is just how little time it takes to put together. Unlike traditional ice cream recipes that might span hours from start to finish, this one can be prepped in under ten minutes. Then all it needs is a few hours in the freezer before it’s ready to enjoy.
Preparation Time:
Prep time: 10 minutes
Freeze time: 4 to 6 hours (preferably overnight)
Total time: 4 to 6 hours and 10 minutes
Servings:
This recipe makes approximately 6 generous servings or 8 smaller scoops. It fits perfectly in a standard 9×5-inch loaf pan.
Nutritional Information (per serving):
Calories: 310
Fat: 24g
Saturated Fat: 15g
Carbohydrates: 20g
Sugar: 19g
Protein: 4g
Fiber: 0g
Sodium: 60mg
Please note that these values are approximate and can vary based on the specific brands of ingredients used.
The ice cream is rich and satisfying, so even a small scoop goes a long way. If you’re looking to reduce the sugar slightly, you can experiment with a lower-sugar sweetened condensed milk or make your own version at home using natural sweeteners. Just keep in mind that changing the sweetener could affect the final texture, so make adjustments carefully.
Ingredients List
This recipe is a shining example of how just a few simple ingredients can create something truly special. Each one plays an important role in the final texture and flavor of the ice cream, so let’s take a closer look at what you’ll need.
Sweetened Condensed Milk (1 14-ounce can):
This is the backbone of the recipe. Sweetened condensed milk brings both the sugar and the smooth, thick texture that keeps the ice cream creamy and scoopable without churning. Its richness helps mimic the mouthfeel of traditional churned ice cream while ensuring stability in the freezer.
Vanilla Extract (2 teaspoons):
Vanilla extract is what gives this ice cream its warm, comforting flavor. Use a high-quality pure vanilla extract if possible—it really makes a difference. You can even try using vanilla bean paste or the seeds scraped from a real vanilla bean for an extra-intense flavor and a touch of elegance with those signature black specks.
Heavy Whipping Cream (2 cups, cold):
The heavy cream is whipped to stiff peaks and then folded into the condensed milk mixture. This whipped cream is what gives the ice cream its light, airy texture and helps create volume and structure. Make sure it’s well-chilled for best results.
Optional Tools:
Mixing bowls (chilled if possible)
Electric mixer (hand or stand)
Rubber spatula
9×5-inch loaf pan
Parchment paper or plastic wrap
Freezer
With just these three core ingredients and a handful of basic kitchen tools, you’ll be well on your way to homemade ice cream bliss. And the best part is, because the base is so neutral, it welcomes all kinds of add-ins and flavor twists. Keep reading for variations and pro tips!
Step-By-Step Cooking Instructions of this No-churn vanilla ice cream
Making this no-churn vanilla ice cream couldn’t be easier, but there are a few simple techniques that ensure your ice cream turns out light, creamy, and beautifully scoopable. Below, I’ll walk you through each step so you feel confident from start to finish.
Step 1: Chill Your Tools
Before you begin, place your mixing bowls and beaters in the fridge or freezer for about 10 to 15 minutes. While this isn’t strictly necessary, starting with cold tools makes it easier to whip the cream quickly and helps it hold its shape better. If you’re using a metal bowl, it chills faster and stays cold longer, which is ideal.
You should also line your loaf pan with parchment paper and place it in the freezer. This gives the base a cold surface to land on and speeds up the initial freezing process.
Step 2: Mix the Sweetened Condensed Milk and Vanilla
In a chilled medium mixing bowl, pour the entire can of sweetened condensed milk. Add the vanilla extract and whisk gently to combine. You don’t need to beat this mixture—just stir until the vanilla is evenly incorporated. If you’re using vanilla bean paste or scraped vanilla beans, this is the time to add them.
At this stage, you can also stir in any flavoring extracts, spices (like a pinch of cinnamon or nutmeg), or liqueur alternatives like rose water or orange blossom (just a few drops go a long way). The goal is to flavor the condensed milk evenly before folding in the whipped cream.
Step 3: Whip the Heavy Cream
In your second chilled bowl, pour in the cold heavy whipping cream. Using an electric mixer on medium-high speed, begin whipping the cream. It will first turn foamy, then soft peaks will start to form. Continue whipping until stiff peaks form—this means that when you lift the beaters, the cream holds its shape and doesn’t slump over.
Be careful not to over-whip. If you go too far, the cream will start to look grainy or turn into butter. Stop as soon as you have stiff, glossy peaks.
Step 4: Fold the Whipped Cream into the Base
Using a rubber spatula, scoop about one-third of the whipped cream into the condensed milk mixture. Gently fold the cream in by scraping the bottom of the bowl and lifting the mixture over itself in a slow, deliberate motion. Don’t stir vigorously—you want to keep the air in the whipped cream to maintain the light texture of the final product.
Once the first third is incorporated, add the next third, and then the last. Continue folding until everything is fully combined and no streaks remain. The mixture should be smooth, airy, and slightly fluffy. If you’re adding any mix-ins like chocolate chips, cookie crumbs, or swirls, now is the time to fold those in.
Step 5: Pour into the Pan
Retrieve your chilled loaf pan from the freezer. Pour the ice cream mixture into the pan, using your spatula to gently smooth the top. If desired, you can add more toppings or swirls on top—think caramel drizzle, sprinkles, or a scattering of crushed candy.
Once the mixture is in the pan, cover it with plastic wrap or foil to prevent freezer burn. Make sure the wrap touches the surface of the ice cream to limit ice crystal formation.
Step 6: Freeze
Place the pan in the freezer and freeze for at least 4 to 6 hours, though overnight is best. This gives the mixture time to fully firm up and develop its scoopable texture. After about 4 hours, you’ll notice it’s firm but still soft enough to scoop easily. For a firmer, more traditional ice cream texture, let it freeze overnight.
Step 7: Scoop and Enjoy
When you’re ready to serve, remove the pan from the freezer and let it sit at room temperature for 5 to 10 minutes. This softens the ice cream just enough to make scooping easier. Use an ice cream scoop dipped in hot water for clean, smooth scoops.
And that’s it! You’ve made a homemade, creamy, dreamy ice cream without a machine and without breaking a sweat.
How to Serve
This no-churn vanilla ice cream is incredibly versatile, which means there are endless ways to enjoy it. Whether you’re going for a classic presentation or a creative twist, here are some of my favorite serving suggestions:
Serve it in a bowl with your favorite toppings. Think hot fudge, caramel sauce, chopped nuts, or rainbow sprinkles. You can also add a dollop of whipped cream and a cherry on top for the full sundae experience.
Scoop it into a waffle cone or sugar cone for a nostalgic, handheld dessert. The texture is firm enough to hold its shape but soft enough to scoop without too much effort.
Layer it into a parfait glass with fruit, crushed cookies, or brownie bits for a layered dessert that looks as good as it tastes.
Pair it with warm desserts. It’s incredible alongside a fresh-out-of-the-oven brownie, apple crisp, or chocolate lava cake. The contrast between hot and cold is unbeatable.
Use it to make ice cream sandwiches. Scoop a generous portion between two homemade cookies or thin slices of cake and freeze for a few minutes to firm up. It’s a crowd-pleaser every single time.
Add a scoop to your iced coffee or cold brew for a quick and creamy affogato-style treat that’s both refreshing and indulgent.
No matter how you serve it, this ice cream holds its own. It’s smooth, flavorful, and rich enough to be enjoyed simply, straight out of the pan with a spoon (no judgment here).
Pairing Suggestions
Even though vanilla ice cream is often considered simple, it pairs beautifully with a wide range of flavors. Whether you’re creating a full dessert spread or just enhancing your scoops with a little extra flair, here are a few ideas to elevate your experience.
Fruits: Fresh berries like strawberries, raspberries, and blueberries pair wonderfully with vanilla ice cream. The tartness of the fruit contrasts nicely with the sweet creaminess. You can also try grilled peaches or caramelized bananas for something a bit more indulgent.
Baked Goods: Vanilla ice cream is a natural partner for warm baked treats. Serve it with brownies, blondies, pies, tarts, or cookies. A slice of apple pie or peach cobbler with a scoop on top is a timeless combo that never fails.
Sauces: Drizzle with caramel, chocolate ganache, berry compote, or honey for an instant upgrade. A spoonful of peanut butter or Nutella melted and swirled over the top is another dreamy choice.
Spices and Herbs: Add a sprinkle of cinnamon, nutmeg, or cardamom for warmth. You can also garnish with fresh mint leaves or a touch of crushed pink peppercorn for something unexpected.
Beverages: Serve alongside a cup of hot tea or coffee for a warm-cold contrast. For something more indulgent, make a homemade iced coffee float or blend the ice cream into a creamy milkshake.
With these pairing suggestions, your no-churn vanilla ice cream can become the centerpiece of your dessert table—or simply the finishing touch on a cozy weeknight dinner.
Continuing right where we left off, let’s dive into storing, freezing, reheating (yes, there are tips for that too), and everything else you need to know to make this your go-to dessert for any season.
Storage, Freezing & Reheating Instructions
One of the biggest perks of making no-churn vanilla ice cream is how well it stores. Since this recipe uses sweetened condensed milk, which acts as a stabilizer, it keeps beautifully in the freezer for a good amount of time without getting icy or hard as a rock. That means you can make a batch ahead of time and enjoy a scoop whenever the craving hits.
Storing in the Freezer
Once your ice cream has been poured into the loaf pan and frozen for at least four to six hours, it’s ready to be enjoyed. After the initial freeze, it’s best to transfer the ice cream into an airtight, freezer-safe container with a tight-fitting lid. This helps protect it from absorbing any freezer odors and prevents freezer burn.
If you’re sticking with the loaf pan, just be sure to press a sheet of parchment paper or plastic wrap directly onto the surface of the ice cream, then cover the pan tightly with aluminum foil or an airtight lid if you have one that fits.
Properly stored, your homemade ice cream will stay fresh in the freezer for up to two weeks. After that, it’s still safe to eat, but the texture and flavor may start to decline slightly as ice crystals form.
Preventing Ice Crystals
To help minimize ice crystal formation (which can lead to a gritty or icy texture), always cover the surface of the ice cream before sealing the container. Keeping the container as full as possible also helps by reducing the amount of air inside, which is where most freezer burn starts.
Avoid storing the ice cream in the freezer door, where the temperature fluctuates more. Instead, keep it tucked in the back where the temperature stays consistently cold.
Softening for Serving
Since no-churn ice cream doesn’t contain the same additives or air content as commercial varieties, it can sometimes freeze a little firmer. That’s totally normal. Just let the container sit at room temperature for 5 to 10 minutes before scooping. You can also run your ice cream scoop under hot water and dry it off before scooping for cleaner, smoother servings.
Can You Reheat Ice Cream?
Technically, ice cream isn’t something you “reheat,” but there are a few tricks for reviving ice cream that’s been in the freezer too long. If it’s frozen too hard or has developed ice crystals, transfer it to the fridge for 15–20 minutes to soften gently and allow some of the crystals to melt down. Stirring it gently after it softens a bit can help restore some creaminess.
Refreezing Tips
If you’ve let your ice cream sit out a little too long and it’s partially melted, you can pop it back in the freezer, but the texture might not be exactly the same. To maintain the smoothest results, avoid letting it melt all the way and refreezing repeatedly.
So, while reheating may not be part of the process here, proper softening and smart storage techniques will keep your ice cream delicious for days—and even weeks—to come.
Common Mistakes to Avoid
As easy and forgiving as this recipe is, there are a few common mistakes that can affect your final result. Here are some of the top things to watch out for, and how to avoid them for the best batch every single time.
1. Not Whipping the Cream Enough
This step is crucial to getting the right texture. If your whipped cream is too soft (or too stiff and over-whipped), the final ice cream may either be too dense or end up separating slightly. You’re looking for stiff peaks that are still glossy—not dry or crumbly. If you lift the beaters and the peaks hold their shape without drooping, you’re in the sweet spot.
2. Overmixing the Base
Folding the whipped cream into the condensed milk needs a gentle hand. It’s easy to get carried away and accidentally deflate all that precious air you whipped into the cream. Use a rubber spatula and fold slowly, lifting and turning the mixture instead of stirring vigorously. The air is what gives your ice cream its creamy, soft texture—so treat it with care.
3. Using Warm or Room-Temperature Cream
This might seem minor, but cold cream whips much faster and holds peaks better than room-temperature cream. If your cream is too warm, it may not whip at all. Always keep it in the fridge until the moment you need it, and chill your mixing bowl if you can—it really makes a difference.
4. Skipping the Cover When Freezing
Leaving the ice cream exposed in the freezer is a surefire way to invite ice crystals and unwanted flavors from other foods. Always press plastic wrap, parchment, or wax paper directly onto the surface before covering with foil or a lid. It helps seal in freshness and prevents freezer burn.
5. Not Letting It Freeze Long Enough
It’s tempting to dive right in after just a couple of hours, but for the best texture, this ice cream really needs a full overnight freeze. At the very least, give it four to six hours before scooping. If it’s still too soft, just pop it back in for another hour or two and be patient—it’s worth the wait.
Avoiding these five pitfalls will set you up for a flawless batch of no-churn vanilla ice cream, every single time.
Pro Tips
Now that you’ve got the basics down, let’s level up your ice cream game with a few pro tips. These are the little extras that make a big difference and turn a great batch into a truly outstanding one.
Use Pure Vanilla Extract or Vanilla Bean Paste
This ice cream is all about the vanilla flavor, so quality matters. A pure vanilla extract (not imitation) gives a warm, rounded flavor that really shines. If you want to go all out, vanilla bean paste or actual vanilla beans add rich flavor and those gorgeous little black flecks that make your dessert look gourmet.
Toast Your Mix-Ins
If you’re adding nuts or shredded coconut to your ice cream, give them a quick toast in a dry skillet before folding them in. Toasting brings out their flavor and adds a little crunch that holds up better in the freezer.
Chill Everything in Advance
We already talked about chilling your cream and bowls, but even chilling your mix-ins (especially sauces or jams) can help. It keeps the mixture from softening too much and helps everything freeze evenly.
Layer, Don’t Mix for Swirls
If you’re adding sauces like fudge, caramel, or jam, don’t stir them in. Instead, pour a third of the base into the pan, drizzle in the sauce, add another layer, and repeat. This gives you beautiful swirls and prevents everything from blending into a single flavor.
Experiment with Small Batches of Flavors
If you want to try out a few different flavors in one batch, divide your base into smaller bowls before adding mix-ins. That way, you can have half vanilla-chocolate chip and half strawberry swirl—all from the same batch.
These tips make the process smoother and the result even more delicious. You’ll be surprised how a few simple tweaks can elevate your homemade ice cream into something truly memorable.
Frequently Asked Questions (FAQs)
Can I use store-brand condensed milk, or should I buy a premium brand?
Yes, store-brand sweetened condensed milk works just fine in this recipe. The most important thing is to make sure it’s sweetened condensed milk, not evaporated milk—they’re very different products.
What’s the best way to get perfect scoops?
Let the ice cream sit at room temperature for 5 to 10 minutes before scooping. Dip your scoop in warm water, then dry it off before each scoop. This helps it glide through the ice cream and gives you picture-perfect servings.
Can I make this with lower-fat cream or milk alternatives?
You need heavy cream for this recipe to work. Milk or lighter cream won’t whip properly and won’t give you that creamy texture. If you’re dairy-free, there are no-churn recipes that use coconut cream or cashew cream, but those require some different steps.
How long does the ice cream last in the freezer?
When stored properly in an airtight container with the surface covered, it’s best enjoyed within 2 weeks for optimal flavor and texture. After that, it’s still safe to eat, but it may become slightly icy.
Can I make this ahead of time for a party?
Absolutely! In fact, it’s ideal for making ahead. Just whip it up the night before, freeze overnight, and it’ll be perfectly scoopable by the time your guests are ready for dessert.
Why is my ice cream too hard to scoop?
If it’s too hard, it might have frozen too long or too cold. Let it sit at room temperature for a few minutes and it will soften up. Also, avoid placing it near the freezer’s cooling vent, where it can get overly frozen.
Can I double the recipe?
Yes! Just be sure you have a big enough mixing bowl and pan. You might need two loaf pans or one larger freezer-safe container. Whip the cream in batches if needed to maintain texture.
Is it okay to refreeze melted ice cream?
If it has only partially melted and hasn’t been sitting out for long, you can refreeze it—but the texture might suffer. Fully melted ice cream shouldn’t be refrozen for safety reasons.
Can I add food coloring or sprinkles for kids?
Definitely. A few drops of food coloring can make it fun and festive. Just be careful not to over-stir. For sprinkles, fold them in gently at the end to avoid color bleeding.
How do I make this gluten-free?
The base is naturally gluten-free. Just make sure your mix-ins (like cookies or candies) are certified gluten-free if you’re serving someone with a sensitivity.
Conclusion & Call to Action
And there you have it—your complete guide to making the creamiest, easiest no-churn vanilla ice cream right in your own kitchen. With just three simple ingredients, a little bit of time, and no special equipment, you can whip up a dessert that rivals your favorite scoop shop.
Whether you’re making it for a cozy night in, a family gathering, or just because you have a craving, this recipe is one of those low-effort, high-reward creations that never disappoints. Plus, once you master the base, you can start exploring all kinds of flavor variations, mix-ins, and pairings. It’s the kind of recipe that grows with you—and always has room for a little creativity.
So next time you’re staring into the freezer aisle trying to decide between rocky road and vanilla bean, skip the store-bought stuff and make your own. I promise, once you try this no-churn version, you’ll never look back.
Now I’d love to hear from you—what will you mix into your first batch? Classic chocolate chips? A swirl of jam? Something bold and unexpected? Whatever you try, snap a photo and share it! I love seeing your creations and hearing how you make the recipe your own. Don’t forget to leave a comment with your favorite mix-ins or tips for fellow ice cream lovers.
Here’s to creamy scoops, easy recipes, and desserts that bring a little more joy into your day. Happy freezing!
Print
No-Churn Vanilla Ice Cream: Creamy, Easy, and Only 3 Ingredients
- Total Time: 4–6 hours (freezing)
- Yield: 6 servings 1x
- Diet: Gluten Free
Description
A rich, creamy, and foolproof no-churn vanilla ice cream that takes just 3 ingredients and 10 minutes to prepare—no ice cream maker required!
Ingredients
-
1 (14 oz) can sweetened condensed milk
-
2 teaspoons pure vanilla extract
-
2 cups heavy whipping cream, cold
Instructions
-
Chill your mixing bowls and loaf pan in the freezer for 10–15 minutes.
-
In a chilled bowl, mix sweetened condensed milk and vanilla extract until combined.
-
In another chilled bowl, whip heavy cream on medium-high speed until stiff peaks form.
-
Gently fold whipped cream into the sweetened condensed milk mixture using a rubber spatula.
-
Pour the mixture into the prepared pan and smooth the top.
-
Cover with plastic wrap and freeze for at least 4–6 hours or overnight.
-
Let sit for 5–10 minutes before scooping and serving.
Notes
-
Use pure vanilla extract or vanilla bean paste for richer flavor.
-
Add your favorite mix-ins like chocolate chips, cookie crumbles, or caramel swirls.
-
Store in an airtight container for up to 2 weeks.
- Prep Time: 10 minutes
- Cook Time: 0 minutes
- Category: Dessert
- Method: No-churn
- Cuisine: American