
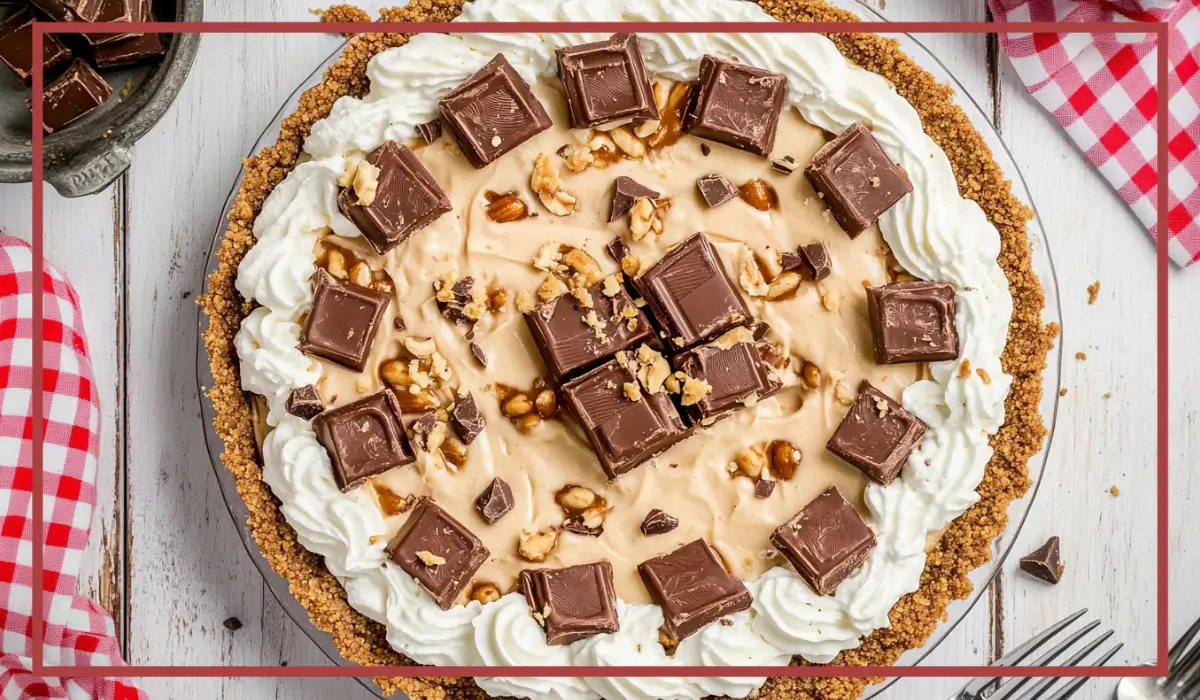
There are few things in life more satisfying than the rich, creamy, and decadent bite of a chilled dessert after a long day. But when that dessert is a No-Bake Snickers Pie packed with peanut butter, fluffy cream, chocolate, and caramel? That’s not just dessert. That’s a full-blown moment of happiness on a plate.
This pie recipe is for anyone who craves that perfect balance between sweet, salty, creamy, and crunchy—all rolled into one slice of heaven. It’s that type of dessert you bring to a potluck, and suddenly everyone’s asking, “Who brought the pie?” It’s got that nostalgic, indulgent flavor that reminds you of birthday parties, summer BBQs, and that one magical dessert your aunt used to make but never wrote down.
One of the best parts? This Snickers pie requires no baking whatsoever. It comes together with minimal effort, and the fridge does all the hard work. So, whether you’re a total kitchen newbie or just looking for a no-fuss dessert to whip up in a pinch, this is your new go-to.
And honestly, this pie has become a bit of a tradition in my house. I made it for a family gathering on a whim, and ever since then, it’s been requested at almost every holiday and celebration. Even my cousins who are picky about desserts come back for seconds.
What makes this pie so irresistible is the layered texture and flavor. You get that tangy cream cheese base, a hit of creamy peanut butter, fluffy Cool Whip for that lightness, and of course, chunks of Snickers that melt into little gooey bits in every bite. All of that sits on a buttery Oreo crust that makes each forkful rich and chocolatey. It’s indulgent, yes—but it’s absolutely worth it.
So if you’re ready for a dessert that’s as simple to make as it is show-stopping, this No-Bake Snickers Pie is exactly what you need.
Why You’ll Love This No-Bake Snickers Pie Recipe
There are so many reasons why this pie will become your new favorite dessert, but let’s start with the obvious: it’s insanely easy to make. You don’t need an oven, a fancy mixer, or any special culinary skills. If you can stir and chill, you can make this pie.
First off, the flavor combination is unbeatable. You’ve got peanut butter, cream cheese, chocolate, caramel, and fluffy whipped topping. It’s like all the best desserts got together and created a pie baby. Each ingredient brings something special to the table: the peanut butter gives it a salty-sweet edge, the cream cheese adds richness, and the chopped Snickers add those chewy, crunchy bites that surprise you with every forkful.
Then there’s the texture, which is what takes this dessert to the next level. The filling is light and creamy thanks to the Cool Whip, but also dense enough to hold its shape when sliced. The chopped Snickers create these pockets of chewy nougat and crisp peanuts, while the Oreo crust adds a firm base with just the right amount of crunch.
This pie is also incredibly versatile and forgiving. If you accidentally mix a little too hard or your Snickers aren’t perfectly chopped, it’ll still turn out delicious. Plus, you can easily swap the crust or mix in other candy bars if you’re feeling creative.
It’s family-friendly, too. Kids love it because, well, it tastes like candy. Adults love it because it feels like a throwback to childhood but with a more grown-up twist. It’s great for holidays, birthdays, cookouts, or even just a random Tuesday when you need something sweet.
And the best part? You can make it ahead of time. That means no scrambling last minute. Just mix, chill, and enjoy. Trust me, you’ll find yourself making this again and again.
Health Benefits of this No-Bake Snickers Pie
Now, let’s be honest—this is a dessert, and it’s not pretending to be a salad. But even indulgent treats like this can have some interesting redeeming qualities, especially when enjoyed in moderation.
To start, peanut butter is one of the key ingredients here, and it’s actually quite nutritious. It’s rich in protein and healthy fats, which help keep you full and satisfied. Peanut butter also contains essential nutrients like vitamin E, magnesium, and potassium. While it’s calorie-dense, it offers a good dose of plant-based protein and fiber, making it a better option than many empty-calorie sweets.
Then we’ve got cream cheese, which, although indulgent, also provides some calcium and a small amount of protein. When combined with the peanut butter and the Cool Whip, the overall mixture becomes a satisfying and satiating dessert that doesn’t leave you constantly reaching for more. That’s the magic of healthy fats—they’re filling and help curb sugar cravings.
Let’s not forget the Snickers bars, which bring in a mix of caramel, peanuts, and nougat. The peanuts add another layer of protein and healthy fat, giving this dessert a bit more staying power than, say, a sugar cookie. And while the added sugars are definitely present, the variety of textures and ingredients helps you feel satisfied with a smaller portion.
The Oreo crust adds carbs and sugars, but it also makes the dessert more enjoyable and celebratory—because part of what makes food healthy is how it fits into your life. If it brings joy, satisfies your sweet tooth, and helps you create happy memories around the table, that’s a kind of health that’s just as important.
Finally, when you make desserts like this at home, you’re in control of the ingredients. You can choose reduced-fat cream cheese, natural peanut butter with less sugar, or even make your own crust if you want to reduce processed foods. So yes, this pie is definitely a treat—but it’s a treat you can enjoy without guilt, knowing that it’s made with real ingredients, plenty of love, and some surprising nutritional benefits.
Preparation Time, Servings, and Nutritional Information
One of the best things about this recipe—aside from how delicious it is—is how quick and easy it is to prepare. Let’s break it down so you can plan accordingly.
Total Prep Time: 15–20 minutes
Chilling Time: Minimum 4 hours (overnight is best for firm slices)
Total Time from Start to Serve: About 4 hours and 20 minutes
Servings: 8 generous slices
As for nutritional information, here’s an approximate breakdown per serving. Keep in mind, this is an indulgent dessert, but still relatively moderate in portion size:
Calories per serving: 420
Total Fat: 27g
Saturated Fat: 12g
Protein: 6g
Carbohydrates: 36g
Sugar: 28g
Fiber: 1g
Sodium: 250mg
These numbers can vary slightly depending on the specific brands of ingredients you use, but overall, this pie offers a satisfying balance of macronutrients for a dessert. If you’re looking to reduce calories or sugar, consider using light cream cheese, sugar-free Cool Whip, or even substituting with a nut butter alternative that’s lower in sugar.
Ingredients List of this No-Bake Snickers Pie
You’ll love how simple and straightforward the ingredient list is. These are items you can easily find at any grocery store, and you might already have some of them in your pantry or fridge.
- 1 (8 oz) package cream cheese, softened
This gives the filling its rich, velvety base. Be sure to soften it before mixing so it blends smoothly without lumps. - 1 (8 oz) container Cool Whip, thawed
Cool Whip adds that light, airy texture that makes the filling feel whipped and fluffy. If it’s still frozen, let it sit in the fridge for a few hours before using. - ½ cup creamy peanut butter
Creamy is the way to go here. It blends better and creates that luscious peanut butter flavor throughout the filling. - ½ cup powdered sugar
This adds just enough sweetness to balance the tang of the cream cheese and the saltiness of the peanut butter. - 1 pre-made Oreo pie crust (or graham cracker crust)
Oreo crusts pair perfectly with the Snickers candy bars, but a graham cracker crust works just as well if you prefer a lighter base. - 1 cup chopped Snickers bars (reserve some for topping)
Roughly chop the Snickers so you get a mix of big and small chunks. This adds texture and delicious surprise bites in the filling. - Chocolate syrup, for drizzling (optional)
This is totally optional but adds a lovely visual and flavor finish when you’re ready to serve. - Caramel sauce, for drizzling (optional)
Again, optional, but highly recommended. The caramel really pulls together all the flavors and makes each slice feel like a dessert from your favorite bakery.
Now that we’ve got everything ready, let’s move on to putting this beauty together step-by-step.
Step-By-Step Cooking Instructions
Making this No-Bake Snickers Pie is genuinely one of the most satisfying and straightforward desserts you’ll ever whip up. There’s no baking, no water baths, and no stress. Just mix, chill, and enjoy. Below, I’ll guide you through each step with plenty of helpful tips and transitions to make sure your pie turns out absolutely perfect—even if it’s your first time making a no-bake dessert.
Step 1: Prepare Your Work Area
Before you dive into mixing, it’s always helpful to have everything in place. This not only speeds up the process but also ensures you don’t forget any ingredients.
- Start by gathering all your ingredients on the counter.
- Make sure the cream cheese is softened. If you forgot to take it out ahead of time, you can microwave it in 10-second intervals until just soft—but not melted.
- Make sure your Cool Whip is thawed. If it’s still frozen, leave it in the fridge for a few hours or place it on the counter for 20–30 minutes until soft.
Step 2: Mix the Cream Cheese, Peanut Butter, and Powdered Sugar
This is the heart of your filling and sets the tone for the rest of the dessert.
- In a large mixing bowl, add the softened cream cheese, ½ cup creamy peanut butter, and ½ cup powdered sugar.
- Using a hand mixer or a stand mixer fitted with the paddle attachment, beat on medium speed until the mixture is smooth, creamy, and well combined.
- Scrape down the sides of the bowl a few times to make sure there are no lumps hiding at the bottom.
Pro Tip: Don’t rush this step. Taking a little extra time to ensure everything is creamy will result in a perfectly smooth pie filling later.
Step 3: Fold in the Cool Whip
Now that you have a rich, creamy base, it’s time to lighten it up with Cool Whip.
- Gently add the thawed Cool Whip into your bowl.
- Use a rubber spatula to fold it in. This means you’ll carefully mix by turning the spatula from the bottom of the bowl to the top in a circular motion.
- Continue folding until the mixture is fluffy and uniform in color.
Why fold and not stir? Stirring aggressively can deflate the whipped topping. Folding keeps the filling airy and light.
Step 4: Add the Chopped Snickers
Here’s where the magic happens. The Snickers bring in those pockets of caramel, nougat, peanuts, and chocolate, making every bite exciting.
- Chop your Snickers bars into small, bite-sized pieces. You want some variety in size, so don’t worry about perfection here.
- Reserve about ¼ cup of chopped pieces for the garnish.
- Gently stir the rest into the filling, making sure they’re evenly distributed.
Pro Tip: If your Snickers are sticky and hard to chop, pop them in the fridge for 10–15 minutes first. They’ll firm up and be easier to dice.
Step 5: Assemble the Pie
Now it’s time to bring it all together in your crust.
- Take your pre-made Oreo or graham cracker crust and place it on a flat surface or serving plate.
- Spoon the filling into the crust. Don’t worry if it looks like too much—it’s supposed to be piled high.
- Use a spatula to spread the filling evenly across the crust, smoothing the top as you go.
Optional step: If you want to go above and beyond, press a few Snickers chunks lightly into the top for a peekaboo effect when you slice.
Step 6: Chill the Pie
This is probably the hardest part—waiting. But trust me, the chilling time makes all the difference.
- Cover the pie loosely with plastic wrap or foil.
- Place it in the refrigerator for at least 4 hours, but ideally overnight.
- This chilling time allows the filling to firm up, making it easy to slice and giving all the flavors time to blend together.
Shortcut tip: If you’re short on time, place the pie in the freezer for about 2 hours. Just remember to let it sit at room temperature for 15–20 minutes before serving so it’s easier to slice.
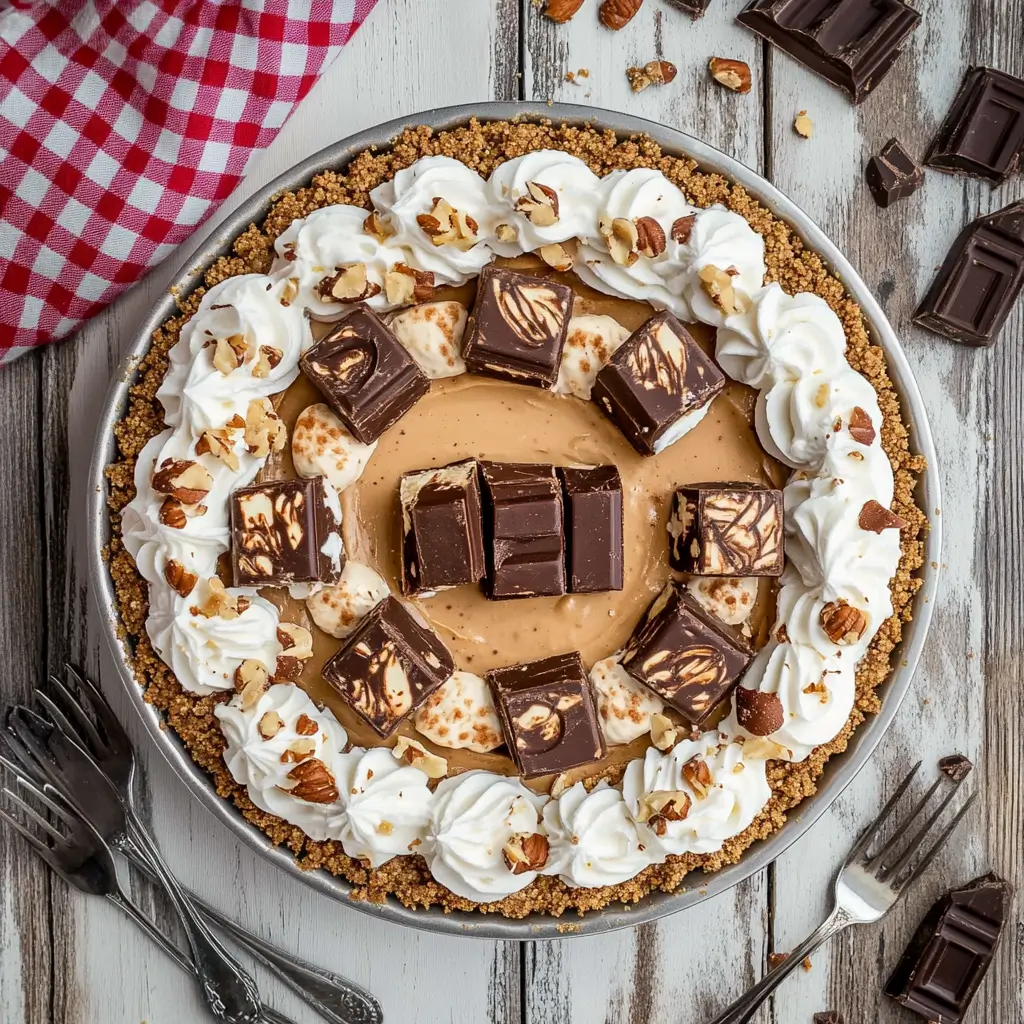
Step 7: Garnish and Serve
Now for the finishing touches—the part that makes your pie look as amazing as it tastes.
- Sprinkle the reserved chopped Snickers on top of the chilled pie.
- Drizzle with chocolate syrup and caramel sauce in a zigzag pattern. You can use a spoon or a squeeze bottle for more control.
- Slice into 8 equal portions using a sharp knife. For cleaner slices, wipe the blade with a warm, damp cloth between cuts.
Serving tip: Serve slices chilled and, if you’re feeling extra, with a dollop of whipped cream on the side.
Now you’re ready to wow your family, friends, or just yourself with a rich, creamy, perfectly sweet Snickers pie that took less than 30 minutes of actual work.
How to Serve this No-Bake Snickers Pie
This pie is already stunning on its own, but there are a few ways to elevate your presentation and serving experience even more. Whether you’re making it for a holiday spread or just a casual dessert night, here are some creative ideas.
- Serve chilled straight from the fridge: This is the classic and easiest way. The texture is firm and creamy, and it’s super refreshing—especially on warmer days.
- Add extra whipped cream on top: A swirl of whipped cream not only looks beautiful but also adds extra fluffiness to each bite.
- Top with a scoop of vanilla ice cream: Especially if you’re serving it after dinner, a scoop of ice cream makes it feel more like a full dessert course.
- Pair with hot drinks: Coffee, tea, or even hot cocoa make a nice contrast with the cold, rich pie.
- Use as a party dessert: Cut the pie into smaller squares instead of slices and serve in mini cupcake liners for a crowd-friendly dessert tray.
Whether you’re serving it plated or buffet-style, this pie is bound to draw attention and compliments.
Pairing Suggestions for this No-Bake Snickers Pie
A rich dessert like this one pairs beautifully with a variety of foods and drinks. You can easily turn it into the centerpiece of a full dessert table or match it with just the right beverage to bring out its best flavors.
Beverage Pairings
- Hot Coffee or Espresso: The bitterness of coffee balances the sweetness of the pie perfectly. If you like a bit of indulgence, try it with a flavored latte like vanilla or caramel.
- Chai Tea or Black Tea: The spices in chai create a warming contrast with the chilled pie.
- Milk or Almond Milk: For a more classic pairing, a tall glass of cold milk or unsweetened almond milk keeps the focus on the pie’s richness.
Food Pairings
- Fruit Salad: Something light and fresh like a bowl of melon, berries, or citrus helps balance the pie’s dense texture.
- Mini Cheese Board: If you’re hosting, offer a small cheese board with mild cheeses, crackers, and grapes for a nice salty-sweet combo.
- Crunchy Cookies: Serve alongside crisp, not-too-sweet cookies for added crunch and texture contrast.
These pairings help you create a dessert experience that’s more than just a slice of pie—it becomes a whole moment to savor.
Storage, Freezing & Reheating Instructions
Storing this No-Bake Snickers Pie is incredibly simple, and it holds up beautifully in both the fridge and freezer. Whether you’re making it ahead for a party or saving leftovers, here’s how to keep it tasting fresh.
Storing in the Fridge
- Wrap the pie tightly with plastic wrap or aluminum foil.
- Store in the refrigerator for up to 5 days.
- Always keep it chilled when not serving, as the filling can soften too much if left at room temperature for extended periods.
Freezing the Pie
- To freeze the whole pie, first let it chill and firm up in the fridge for several hours.
- Once it’s solid, wrap it in a layer of plastic wrap, then a second layer of foil for added protection.
- Label it and freeze for up to 3 months.
- To thaw, move the pie from the freezer to the refrigerator and let it thaw overnight before serving.
Freezing Individual Slices
- Slice the pie into individual portions after it has chilled.
- Place each slice on a parchment-lined baking sheet and freeze until solid.
- Wrap each slice in plastic wrap and store in a freezer-safe bag or container.
- When ready to eat, thaw in the fridge or enjoy slightly frozen for a cool, ice cream-like treat.
Reheating (Not Recommended)
Because this is a chilled dessert, reheating isn’t part of the process. However, if your pie is frozen and you’d like to enjoy it with a softer texture, just let it sit at room temperature for 10–15 minutes before serving.
Keeping your pie fresh and fabulous is easy, and these storage tips mean you can make it ahead with confidence.
Common Mistakes to Avoid in this No-Bake Snickers Pie
Even though this No-Bake Snickers Pie is incredibly simple, there are still a few common pitfalls that can affect the final result. Let’s go through them so you can confidently avoid any kitchen mishaps and ensure your pie comes out perfectly creamy, flavorful, and sliceable.
Using Cold Cream Cheese
One of the most frequent issues in no-bake desserts is using cream cheese straight from the fridge. Cold cream cheese is firm and can be tough to blend, leading to a lumpy texture in your filling.
Solution: Always let your cream cheese soften at room temperature for about 30 to 45 minutes before mixing. If you’re in a rush, microwaving in short 10-second bursts works too—just be careful not to melt it.
Overmixing the Filling
While mixing is essential for a smooth filling, overmixing—especially after adding the Cool Whip—can deflate the light, airy texture that makes this pie so dreamy.
Solution: Mix thoroughly until smooth in the early steps, but once you add the whipped topping, switch to folding gently with a spatula instead of aggressively stirring or using a mixer.
Not Chilling Long Enough
It can be tempting to dive into your pie after only a couple of hours, but slicing too early will lead to a soft, runny filling that doesn’t hold its shape.
Solution: Allow the pie to chill in the refrigerator for at least 4 hours, but overnight is ideal. The longer it chills, the better the texture becomes.
Overfilling the Crust
The filling is rich and generous, which is amazing—but if your crust isn’t deep enough, you might end up with overflow.
Solution: Use a deep-dish pie crust if possible. If you’re using a standard crust, just be mindful not to mound the filling too high.
Improperly Storing Leftovers
Leaving the pie out on the counter for hours or loosely covering it in the fridge can lead to a dry or soggy top layer, and it won’t be as enjoyable the next day.
Solution: Store the pie tightly wrapped in plastic wrap or in an airtight container in the fridge to preserve freshness and texture.
By watching out for these small but significant details, your no-bake pie experience will be smooth and satisfying every single time.
Pro Tips
Now that you know what not to do, let’s focus on what you can do to elevate your No-Bake Snickers Pie and make it truly unforgettable. These pro tips will help you perfect the texture, maximize flavor, and add some extra flair to your presentation.
Let the Pie Chill Overnight for Best Results
While 4 hours is the minimum, letting the pie sit overnight in the refrigerator gives the filling more time to set. This results in clean slices and a firmer texture that still melts in your mouth.
Why it works: Extended chilling allows the fats in the cream cheese and peanut butter to firm up while the whipped topping stabilizes the entire filling.
Use a Warm Knife for Perfect Slices
If you’ve ever struggled to slice a chilled dessert cleanly, this tip is for you.
How to do it: Run a sharp knife under hot water, wipe it dry, and then slice. Repeat between each cut for smooth, picture-perfect slices.
Customize with Extra Candy Mix-ins
If Snickers aren’t your only candy bar love, you can mix things up by tossing in chopped Twix, Reese’s, Kit-Kats, or even mini marshmallows for added texture.
Why it’s great: This allows you to adapt the pie to what you have on hand—or cater to different candy preferences for parties and holidays.
Use Natural Peanut Butter for a Richer Flavor
Traditional peanut butter works great, but natural or unsweetened versions bring out a bolder peanut flavor and give you a little more control over the sweetness.
What to watch out for: Natural peanut butter can be runnier, so give it a good stir and use slightly less if needed to maintain a thick filling consistency.
Add a Pinch of Salt
This small trick enhances all the other flavors in the pie—especially the caramel and chocolate. It balances the sweetness and makes everything pop.
How to use: Add just a pinch (1/8 teaspoon) of sea salt to the filling mixture when combining the cream cheese, peanut butter, and sugar.
These little details may seem small, but they’ll make a big impact on the flavor, texture, and overall wow-factor of your dessert.
Frequently Asked Questions (FAQs)
Even with simple recipes, questions can pop up—especially the first time you make something. Here are some of the most common questions about No-Bake Snickers Pie, answered in detail to guide you to pie success.
Can I make this pie ahead of time?
Absolutely, and it’s even recommended. The pie actually tastes better after it’s had time to chill and firm up. Make it the night before you plan to serve it for the best results.
Can I use a homemade crust?
Yes, you can! If you’d like to skip the store-bought crust, you can make your own Oreo or graham cracker crust using crushed cookies and melted butter. Press the mixture into a pie plate and refrigerate for about an hour before adding the filling.
Can I use light or reduced-fat ingredients?
Definitely. Light cream cheese and sugar-free Cool Whip work well in this recipe. Just keep in mind that texture might be slightly softer, so extra chilling time may help it set properly.
What if I don’t have Cool Whip?
If Cool Whip isn’t your thing or you prefer homemade ingredients, you can substitute with freshly whipped cream. Whip 1 cup of heavy cream with 2 tablespoons of powdered sugar until stiff peaks form. Use it in place of the Cool Whip.
Can I freeze the pie for longer storage?
Yes! After chilling and setting, wrap the pie in plastic wrap and foil, and freeze for up to 3 months. Thaw overnight in the fridge before serving.
Can I make this pie nut-free?
Because Snickers and peanut butter both contain peanuts, this pie isn’t naturally nut-free. However, you can use a peanut-free candy bar alternative and substitute sunflower seed butter or cookie butter for a similar creamy effect.
My filling seems too soft. What went wrong?
It could be due to not chilling long enough or using ingredients that were too warm. Make sure to chill for at least 4 hours and use softened—but not melted—cream cheese.
Can I add extra toppings?
Yes, and it’s encouraged! Some delicious options include chopped nuts, mini chocolate chips, a sprinkle of sea salt, or crushed pretzels for a salty crunch.
Is this recipe suitable for kids?
Definitely! Kids love the candy-filled filling, and since there’s no baking or hot equipment involved, older kids can even help make it. It’s a fun family activity with a sweet reward.
Can I make it in a different shape?
Sure! You can make this in a springform pan for a cheesecake-style dessert or use individual cups for mini pie servings. Just adjust the chill time based on the size and thickness of your filling.
These FAQs should clear up any doubts and make the whole process feel even more approachable.
Conclusion & Call to Action
There’s something truly magical about a dessert that delivers maximum flavor with minimum effort, and this No-Bake Snickers Pie is exactly that. It brings together creamy, nutty, chocolatey, and caramel goodness in a way that’s equal parts nostalgic and indulgent.
Whether you’re making this for a holiday gathering, a weekend treat, or just because you had a long day and need a dessert hug, this pie never disappoints. It’s the kind of recipe that people talk about long after the last slice is gone. It’s got that perfect combination of rich flavor, dreamy texture, and just enough crunch to keep every bite interesting.
Plus, it’s incredibly flexible. You can make it ahead, freeze it, tweak the mix-ins, or adjust the sweetness. And since there’s no oven involved, it’s a fantastic option for summer parties, beginner bakers, or anyone who wants to whip up something amazing without turning on the heat.
So here’s your next step: gather those ingredients, block out 20 minutes, and get ready to create your new favorite dessert. I promise it’ll become a go-to in your recipe box, just like it has in mine.
And when you do make it? I’d love to hear about it! Drop a comment below, share it with your family, or even snap a photo and tag me on social media. Seeing your creations always makes my day. Happy no-baking!
Print
No-Bake Snickers Pie Recipe – Easy, Creamy, and Irresistible
- Total Time: 4 hours 15 minutes (including chilling)
- Yield: 8 slices 1x
- Diet: Halal
Description
A rich and creamy no-bake dessert made with cream cheese, peanut butter, Cool Whip, and chopped Snickers in a chocolate Oreo crust. Perfect for holidays, parties, or any time you crave a quick and decadent treat.
Ingredients
-
1 (8 oz) package cream cheese, softened
-
1 (8 oz) container Cool Whip, thawed
-
½ cup creamy peanut butter
-
½ cup powdered sugar
-
1 pre-made Oreo pie crust (or graham cracker crust)
-
1 cup chopped Snickers bars (reserve some for topping)
-
Chocolate syrup (optional)
-
Caramel sauce (optional)
Instructions
-
In a bowl, beat cream cheese, peanut butter, and powdered sugar until smooth.
-
Fold in Cool Whip gently until fully combined.
-
Stir in chopped Snickers, reserving a few for topping.
-
Spoon filling into the crust and smooth the top.
-
Chill for at least 4 hours, ideally overnight.
-
Garnish with remaining Snickers and drizzle with chocolate and caramel sauce before serving.
Notes
-
Chill overnight for best texture.
-
Use a warm knife for clean slices.
-
Substitute with homemade crust if preferred.
-
Easily customize with other candy bars or toppings.
- Prep Time: 15 minutes
- Cook Time: 0 minutes (no bake)
- Category: Dessert
- Method: No-Bake
- Cuisine: American