
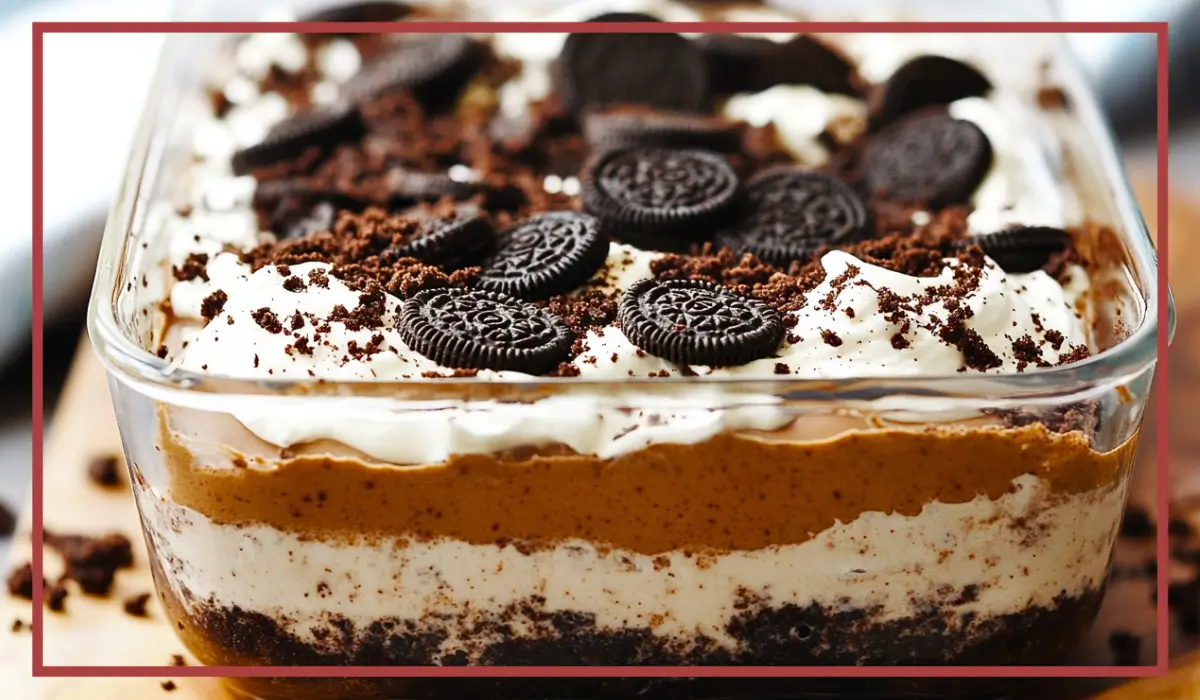
There’s something undeniably comforting about an Oreo dessert. The combination of crunchy, chocolatey cookies and smooth, creamy filling is a match made in dessert heaven. Now, imagine layering all that goodness with a fluffy cream cheese mixture, rich chocolate pudding, and a final cloud of whipped topping. That’s exactly what this Heavenly No-Bake Oreo Dessert is all about—a dessert so effortless and delicious, it will become a staple in your recipe collection.
This dessert is ideal for those moments when you need a sweet treat but don’t want to deal with complicated steps or lengthy baking times. Since it requires no baking at all, it’s perfect for hot summer days when turning on the oven is out of the question. Plus, it’s incredibly easy to make ahead of time, making it an excellent option for parties, gatherings, or meal prepping a little indulgence for the week.
I still remember the first time I made this dessert for a potluck. Within minutes, the tray was nearly empty, and people kept asking, “Who made this? Can I get the recipe?” That’s when I knew this Oreo dessert wasn’t just another sweet treat—it was a showstopper. Now, it has become my go-to dessert whenever I need to impress a crowd with minimal effort.
Another reason why this dessert is so special is its versatility. You can customize it in so many ways—switch up the pudding flavor, add different mix-ins, or even experiment with peanut butter or caramel for a fun twist. The possibilities are endless, and the result is always delicious.
If you love Oreos (and let’s be real, who doesn’t?), this no-bake dessert is a must-try. It’s quick, simple, and unbelievably satisfying, making it the perfect addition to your recipe rotation. Get ready to experience layers of crunchy, creamy, and chocolatey goodness in every bite!
Why You’ll Love This No-Bake Oreo Dessert Recipe
There are countless reasons why this Oreo dessert is a must-try. Let’s break it down so you can see why it deserves a spot on your dessert table:
1. No-Bake Simplicity
This recipe is completely oven-free, making it one of the easiest desserts you’ll ever prepare. Simply mix, layer, and chill—no fuss, no stress!
2. Decadent Layers of Flavor
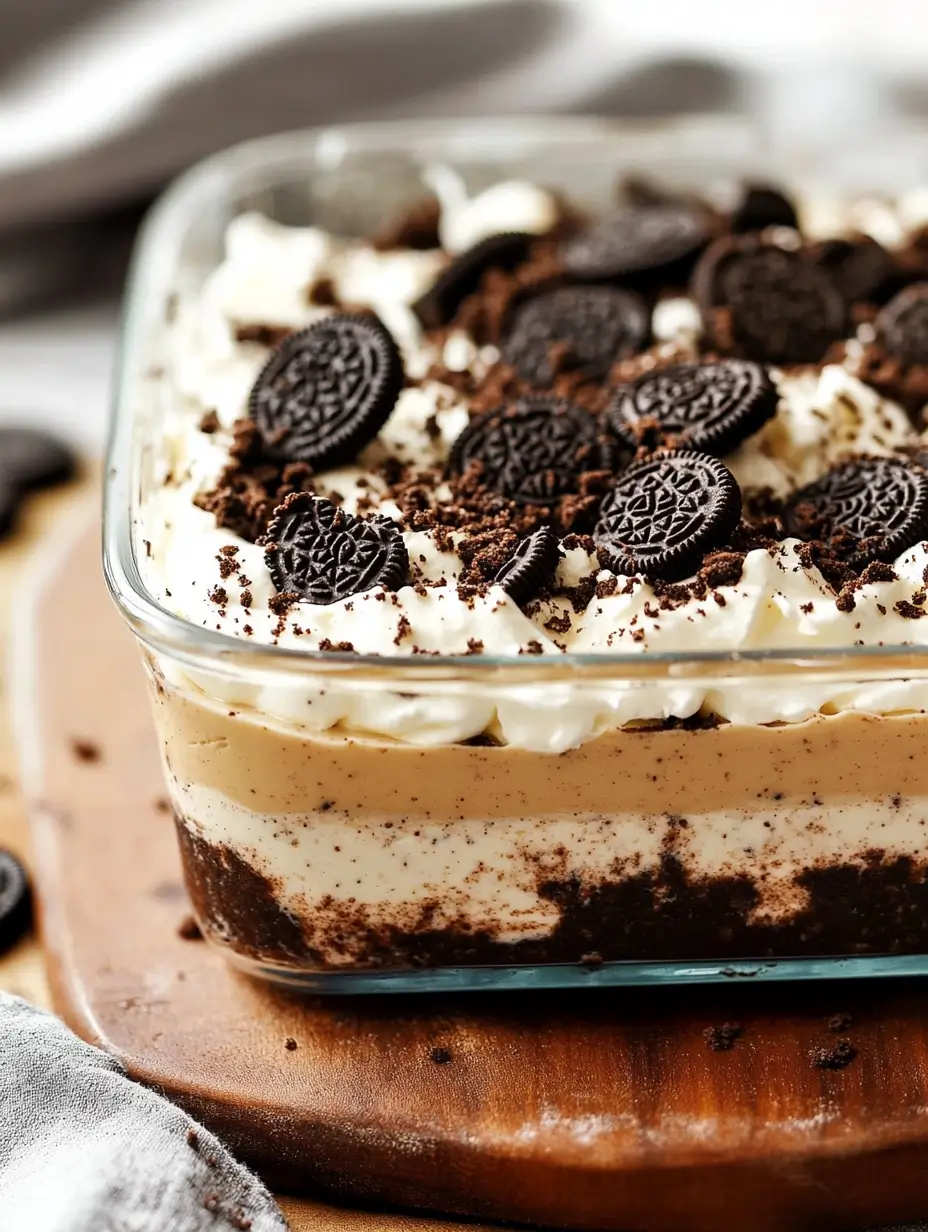
Each layer in this dessert brings something special to the table. You get the crunchy, buttery Oreo crust, the light and fluffy cream cheese layer, the smooth, rich chocolate pudding, and the airy whipped topping. When combined, these layers create a dessert that’s perfectly balanced in texture and taste.
3. Quick and Easy Preparation
With only 15 minutes of active prep time, this recipe is ideal for busy schedules. Whether you’re making a last-minute dessert for a party or simply craving something sweet, you can put this together in no time.
4. Family-Friendly and Crowd-Pleasing
Both kids and adults love Oreos, making this dessert a guaranteed hit. Bring it to a potluck, family gathering, or holiday party, and watch it disappear within minutes.
5. Make-Ahead Convenience
Since this dessert needs time to chill, it’s perfect for making ahead. You can prepare it the night before and let the flavors meld together for an even better taste the next day.
6. Customizable to Your Taste
You can easily switch things up by using different pudding flavors, adding chopped nuts or chocolate chips, or drizzling caramel on top for extra indulgence.
Now that you know why this dessert is a game-changer, let’s talk about its health benefits.
Health Benefits
While this is undeniably a sweet and indulgent dessert, some of its ingredients provide surprising health benefits.
1. Cocoa’s Antioxidant Power
Oreo cookies contain cocoa, which is rich in flavonoids, a type of antioxidant that supports heart health. Dark chocolate, in particular, has been linked to improved circulation and reduced inflammation.
2. Dairy for Bone Strength
The cream cheese, milk, and whipped topping in this recipe provide calcium, which is essential for strong bones and teeth. Dairy also contains protein, which helps with muscle growth and repair.
3. Mood-Boosting Effects
Chocolate is known to stimulate serotonin production, which can help boost your mood and reduce stress. So yes, enjoying this dessert can make you feel happier!
Of course, this is a treat meant to be enjoyed in moderation, but knowing it has some nutritional benefits makes it even more enjoyable. Now, let’s move on to the preparation time and nutrition details.
Preparation Time, Servings, and Nutritional Information
- Prep Time: 15 minutes
- Chill Time: 4 hours (overnight is best)
- Total Time: Approximately 4 hours 15 minutes
- Servings: 12
Nutritional Information (Per Serving)
- Calories: 350
- Carbohydrates: 40g
- Protein: 4g
- Fat: 18g
- Sugar: 25g
Now that we have all the basics covered, let’s go over the ingredients you’ll need to make this delicious no-bake Oreo dessert.
Ingredients List of the No-Bake Oreo Dessert
The Crust:
- 36 Oreo cookies (crushed)
- ½ cup butter (melted)
The Cream Cheese Layer:
- 8 oz cream cheese (softened)
- 1 cup powdered sugar
- 1 ½ cups whipped topping (like Cool Whip)
The Pudding Layer:
- 2 boxes (3.9 oz each) instant chocolate pudding mix
- 3 cups cold milk
The Topping:
- 2 ½ cups whipped topping
- 10 Oreo cookies (crushed, for garnish)
Now that we’ve gathered all the ingredients, let’s move on to the step-by-step instructions for making this easy and delicious dessert.
Step-By-Step Cooking Instructions
1: Prepare the Oreo Crust
- Crush the Oreo cookies using a food processor or place them in a zip-top bag and crush them with a rolling pin.
- In a mixing bowl, combine the crushed Oreos with melted butter and mix until the crumbs are evenly coated.
- Press the mixture firmly into the bottom of a 9×13-inch baking dish to form an even crust.
- Place the dish in the refrigerator while you prepare the next layer.
2: Make the Cream Cheese Layer
- In a large mixing bowl, beat the softened cream cheese and powdered sugar until smooth and creamy.
- Gently fold in the whipped topping, making sure not to deflate it.
- Spread the cream cheese mixture evenly over the chilled Oreo crust.
3: Prepare the Chocolate Pudding Layer
- In another bowl, whisk together the instant chocolate pudding mix and cold milk until it thickens (about 2 minutes).
- Pour the pudding over the cream cheese layer and spread it evenly.
4: Add the Final Topping
- Spread the remaining whipped topping over the pudding layer.
- Sprinkle crushed Oreos on top for decoration and extra crunch.
5: Chill and Serve
- Cover the dessert with plastic wrap and refrigerate for at least 4 hours, preferably overnight.
- When ready to serve, slice into squares and enjoy.
This is just the beginning! Keep reading for serving ideas, pairing suggestions, storage tips, common mistakes, pro tips, and frequently asked questions. You’ll have everything you need to make this the best no-bake Oreo dessert ever.
How to Serve
This Heavenly No-Bake Oreo Dessert is best served chilled, straight from the fridge, so the layers hold their shape and the flavors are at their best. It’s the perfect dessert for any occasion, whether you’re serving it at a birthday party, a family gathering, or just as a special treat for yourself.
Serving Suggestions:
- Garnish with Whole Oreos: For a stunning presentation, place a few whole Oreo cookies on top before serving. It adds a little extra crunch and makes the dessert look even more tempting.
- Drizzle with Chocolate or Caramel Sauce: A light drizzle of warm chocolate or caramel sauce over the top gives the dessert a gourmet touch. The rich sauce pairs beautifully with the creamy layers.
- Add Fresh Berries: If you want to balance the sweetness, serve this dessert with a side of fresh strawberries or raspberries. Their slight tartness contrasts beautifully with the creamy sweetness of the pudding and whipped layers.
- Dust with Cocoa Powder or Chocolate Shavings: A sprinkle of cocoa powder or some finely grated chocolate adds an elegant and sophisticated finish.
- Serve with Ice Cream: If you really want to go all out, pair this dessert with a scoop of vanilla or cookies-and-cream ice cream. The extra cold and creamy texture makes it even more indulgent.
However you choose to serve it, one thing is certain—this dessert will be the first thing to disappear from the table.
Pairing Suggestions
While this no-bake Oreo dessert is delightful on its own, pairing it with the right drink or side can take the experience to the next level. Here are some perfect pairings that complement the rich and creamy flavors of this dessert.
1. Classic Beverages
- Cold Milk: The classic combination of Oreos and milk works just as well with this dessert. A cold glass of milk cuts through the richness and enhances the cookies-and-cream flavors.
- Hot Coffee or Espresso: If you love the contrast of bitter and sweet, a strong cup of coffee or espresso balances the creamy, chocolatey layers beautifully.
- Hot Chocolate: Double down on the chocolate experience with a cup of hot cocoa topped with whipped cream. This is especially great in the colder months.
2. Light and Refreshing Drinks
- Iced Coffee or Iced Mocha: A chilled coffee drink adds a nice contrast to the creamy texture and complements the chocolate flavor.
- Milkshakes: A vanilla or cookies-and-cream milkshake makes for a fun and indulgent pairing.
- Fruit Smoothies: A refreshing strawberry or mixed berry smoothie can add a fruity brightness that balances the dessert’s richness.
3. Additional Dessert Pairings
- Cheesecake: If you’re creating a dessert spread, pairing this Oreo dessert with a light, creamy cheesecake can offer a variety of textures and flavors.
- Brownies: Serve small brownie bites alongside this dessert for an extra dose of chocolate.
- Fruit Platter: Fresh fruit like strawberries, bananas, and blueberries provide a refreshing contrast to the rich, chocolatey layers.
No matter what you pair this dessert with, it will be a crowd favorite!
Storage, Freezing & Reheating Instructions
Since this is a chilled, no-bake dessert, proper storage is key to keeping it fresh and delicious for as long as possible. Here’s how you can store, freeze, and enjoy leftovers.
Refrigeration (Best for Short-Term Storage)
- Store the dessert covered with plastic wrap or in an airtight container in the refrigerator for up to 4 days.
- If the dessert sits out at room temperature for more than 2 hours, it’s best to refrigerate it immediately to maintain freshness.
Freezing (Best for Long-Term Storage)
- This dessert freezes beautifully, making it perfect for preparing ahead of time.
- To freeze, wrap the dessert tightly in plastic wrap, then cover it with aluminum foil or place it in an airtight freezer-safe container.
- It can be frozen for up to 3 months.
- When ready to serve, thaw overnight in the refrigerator. Avoid thawing at room temperature, as it can cause the layers to become too soft and lose their texture.
Reheating Instructions
- Since this is a no-bake dessert, it does not require reheating.
- If frozen, simply allow it to thaw in the refrigerator before serving.
Proper storage ensures that every bite stays just as delicious as when it was first made!
Common Mistakes to Avoid
Even though this is an easy, foolproof recipe, there are a few common mistakes that can affect the final result. Here’s how to avoid them.
1. Not Crushing the Oreos Finely Enough
- If the Oreo crust isn’t finely crushed, it may not hold together properly.
- Use a food processor for best results or crush them in a zip-top bag using a rolling pin until they form a fine, even crumb.
2. Using Warm Ingredients
- Make sure your cream cheese is softened but not melted before mixing. If it’s too warm, the texture will be runny.
- Use cold milk for the pudding layer to ensure it thickens properly.
3. Overmixing the Whipped Topping
- When folding the whipped topping into the cream cheese mixture, be gentle. Overmixing can cause the topping to lose its light, fluffy texture.
4. Skipping the Chilling Time
- Chilling for at least 4 hours (preferably overnight) is crucial. If you rush this step, the layers won’t set properly, and the dessert will be too soft.
5. Storing It Incorrectly
- Always keep the dessert covered in the refrigerator to prevent it from absorbing other odors and drying out.
Avoid these common mistakes, and your dessert will turn out perfect every time!
Pro Tips
Want to take your no-bake Oreo dessert to the next level? Here are some pro tips to make it even better.
1. Use Double-Stuffed Oreos
- If you love extra creamy layers, use double-stuffed Oreos for the crust and topping.
2. Let the Dessert Sit Overnight
- While 4 hours is the minimum chilling time, letting it sit overnight allows the flavors to meld beautifully.
3. Add a Crunchy Element
- If you want extra texture, mix in chopped chocolate chips, nuts, or crushed pretzels into the topping.
4. Experiment with Different Pudding Flavors
- Try cookies and cream, vanilla, butterscotch, or even banana pudding for a fun twist.
5. Serve in Individual Cups for a Party
- Instead of using a baking dish, layer the dessert in small cups or jars for easy, grab-and-go servings.
Frequently Asked Questions (FAQs)
1. Can I make this dessert ahead of time?
Yes! This dessert is perfect for making ahead. In fact, it tastes even better the next day.
2. Can I use homemade whipped cream instead of Cool Whip?
Absolutely! Just make sure it’s stabilized whipped cream so that it holds its shape.
3. Can I use different pudding flavors?
Yes! Try vanilla, butterscotch, or cookies-and-cream pudding for a fun variation.
4. Can I freeze this dessert?
Yes, you can freeze it for up to 3 months. Thaw it in the fridge before serving.
5. Can I make this gluten-free?
Yes! Use gluten-free Oreos and make sure your pudding mix is gluten-free.
Conclusion & Call to Action
Now that you have all the details on how to make this Heavenly No-Bake Oreo Dessert, it’s time to give it a try! This dessert is easy, delicious, and guaranteed to impress anyone who takes a bite.
If you make this recipe, let me know how it turned out! Share your photos and tag me—I’d love to see your delicious creations. Enjoy every chocolatey, creamy bite!
Print
No-Bake Oreo Dessert – Easy & Creamy Chocolate Delight
- Total Time: 4 hours 15 minutes (includes chilling)
- Yield: 12 servings 1x
- Diet: Vegetarian
Description
A rich, creamy, and chocolatey no-bake Oreo dessert that’s easy to make and perfect for any occasion. With layers of crushed Oreos, a smooth cream cheese mixture, rich chocolate pudding, and fluffy whipped topping, this dessert is a crowd-pleaser that requires no oven time!
Ingredients
For the Crust:
- 36 Oreo cookies (crushed)
- ½ cup butter (melted)
For the Cream Cheese Layer:
- 8 oz cream cheese (softened)
- 1 cup powdered sugar
- 1 ½ cups whipped topping (Cool Whip)
For the Pudding Layer:
- 2 boxes (3.9 oz each) instant chocolate pudding mix
- 3 cups cold milk
For the Topping:
- 2 ½ cups whipped topping
- 10 Oreo cookies (crushed, for garnish)
Instructions
- Make the Crust: Combine crushed Oreos with melted butter and press into a 9×13-inch baking dish. Chill while preparing the next layers.
- Prepare the Cream Cheese Layer: Beat cream cheese and powdered sugar until smooth. Fold in whipped topping and spread over the crust.
- Make the Pudding Layer: Whisk chocolate pudding mix and cold milk until thickened. Spread over the cream cheese layer.
- Add the Final Topping: Spread whipped topping over the pudding and sprinkle crushed Oreos on top.
- Chill & Serve: Refrigerate for at least 4 hours (preferably overnight), then slice and enjoy!
Notes
- For extra crunch, use double-stuffed Oreos.
- Let the dessert chill overnight for the best flavor.
- Customize by using different pudding flavors like vanilla or butterscotch.
- Prep Time: 15 minutes
- Cook Time: 0 minutes
- Category: Dessert
- Method: No-Bake
- Cuisine: American