
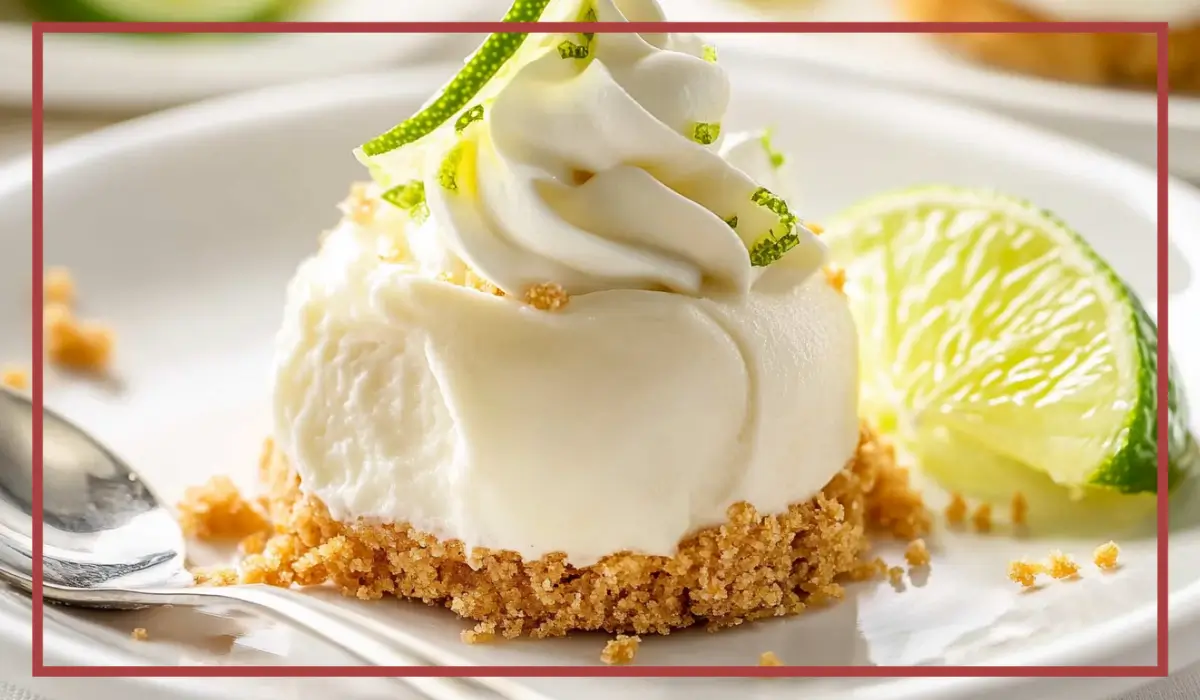
There’s something undeniably magical about the perfect combination of creamy, tangy, and sweet. That’s exactly what you get with these no-bake mini key lime pies. They’re like little bites of sunshine, tucked into a cool, refreshing dessert that’s not only stunning to look at but incredibly easy to make. Whether you’re planning a summer cookout, hosting a weekend brunch, or just need a midweek pick-me-up, these mini pies are here to brighten your day.
I still remember the first time I made these for a family get-together. I was looking for something different—something that felt special without keeping me in the kitchen all day. I needed a dessert that felt light but still packed with flavor, and that’s when I discovered the beauty of key lime pie in a no-bake, individual-sized format. The moment I took my first bite, I knew it was going to become a staple in our house. Creamy, tart, with just enough sweetness and a buttery graham cracker crust—it checked all the boxes. And since then, it’s been one of those “request recipes” everyone asks for.
What’s great about this dessert is that you don’t even need to turn on your oven. That’s right, absolutely no baking involved. The crust sets perfectly in the freezer, the filling becomes rich and velvety, and the whole thing comes together with a handful of pantry staples. Plus, making them in individual molds or cupcake liners adds such a fun, elegant twist. It’s one of those treats that looks way more impressive than the effort it takes to make.
So if you’re craving something fresh and indulgent—but want to keep things easy and stress-free—these no-bake mini key lime pies are your answer. Let’s dive into why you’ll fall in love with them just like I did.
Why You’ll Love This No-Bake Key Lime Pies Recipe
There are so many reasons these no-bake mini key lime pies should be your next go-to dessert. First and foremost, they’re incredibly easy to make. You don’t need to be a professional baker, and there’s no fancy equipment required. If you can mix, fold, and freeze, you can absolutely master this recipe.
Let’s talk about flavor. The filling is luscious and creamy, with the perfect balance of tart key lime juice and sweetened condensed milk. The cream cheese adds richness and a bit of tang that complements the lime beautifully. Then you’ve got the whipped topping folded in, which gives the filling a light and airy texture—almost like a mousse, but denser and more satisfying.
Now pair that with the crust. Graham cracker crumbs mixed with melted butter create a buttery, crunchy base that contrasts perfectly with the smooth filling. Each bite gives you a bit of crunch followed by silky, citrusy creaminess. It’s a texture lover’s dream.
On top of that, these mini pies are incredibly versatile. You can make them ahead, store them in the freezer, and pull them out whenever you need a quick dessert. They’re also super customizable—add a dollop of whipped topping, a slice of fresh lime, or even a sprinkle of toasted coconut for a little twist.
And let’s not forget presentation. Because they’re made in cupcake molds or liners, they’re perfectly portioned and look absolutely adorable on a platter. Whether you’re serving a crowd or just treating yourself, they make dessert feel a little more special.
Lastly, this recipe is family-friendly and perfect for all ages. Kids love the sweet, creamy filling, while adults appreciate the tangy lime punch. It’s a win-win all around.
Health Benefits
While no one is claiming these no-bake mini key lime pies are a health food, they do have a few redeeming qualities that make them a better choice compared to many traditional desserts. First off, this recipe requires no eggs or flour, which can be a great bonus for those with sensitivities or dietary preferences.
Key lime juice, the star of the show, is actually a great source of vitamin C. This antioxidant helps boost your immune system, supports skin health, and can even help reduce inflammation in the body. While you’re not getting a mega-dose in each pie, every little bit adds up.
Cream cheese and whipped topping provide calcium and a small amount of protein, while the sweetened condensed milk gives a rich flavor without the need for additional sugar. That means you’re getting a big flavor payoff without having to add any granulated sugar, which helps you control the sweetness more easily.
Another benefit is portion control. Because these pies are made in individual servings, it’s easier to enjoy a treat without going overboard. Each pie gives you just enough sweetness to satisfy your cravings without making you feel heavy or sluggish afterward.
Plus, since these are no-bake, you’re avoiding the need for high-temperature cooking or added fats used in baking. This means the ingredients retain more of their original nutritional value, and you can keep your kitchen cool—especially important in the warmer months.
If you want to make them a bit lighter, you can opt for low-fat cream cheese and reduced-fat whipped topping. The texture and flavor still hold up beautifully, and you’ll save on calories and saturated fat. For those with dietary restrictions, it’s easy to make this recipe gluten-free by using gluten-free graham crackers for the crust.
All in all, while these mini pies are definitely a treat, they come with some unexpected perks that make them a smarter indulgence.
Preparation Time, Servings, and Nutritional Information
One of the most appealing aspects of this recipe is how little time it takes to put together. You’re looking at around 20 minutes of active prep time, and then the rest is just chilling in the freezer. That means you can whip these up in the morning and have them ready for dessert by dinnertime with zero stress.
Preparation Time
Prep Time: 20 minutes
Chilling Time: 4 hours (minimum)
Total Time: 4 hours 20 minutes
Servings
This recipe makes approximately 12 mini pies, depending on how much filling you use in each mold or liner. They’re perfectly portioned and easy to scale up if you’re serving a larger crowd.
Nutritional Information (Per Serving)
Calories: Approximately 310
Protein: 4g
Carbohydrates: 28g
Sugars: 18g
Fat: 20g
Saturated Fat: 12g
Cholesterol: 40mg
Sodium: 140mg
These values are approximate and may vary depending on the exact brands and ingredient quantities used. If you’re trying to lighten things up, consider using reduced-fat cream cheese and light whipped topping.
Ingredients List of these No-Bake Key Lime Pies
What makes this recipe so accessible is that you only need a handful of simple ingredients—most of which you probably already have in your pantry or fridge. Here’s what you’ll need and why each one matters:
Graham Cracker Crumbs – 1½ cups (or 1 sleeve of graham crackers, crushed)
This forms the base of the crust. Graham crackers have a naturally sweet, nutty flavor that pairs beautifully with citrus. If you’re using whole crackers, just crush them in a food processor or inside a zip-top bag using a rolling pin.
Unsalted Butter – 4 oz, melted
Butter holds the graham cracker crumbs together and gives the crust that rich, slightly salty edge that balances the sweet filling.
Cream Cheese – 8 oz, softened
This provides the creamy, tangy foundation of the filling. Make sure it’s fully softened before mixing to avoid lumps and ensure a silky smooth texture.
Sweetened Condensed Milk – 1 (14 oz) can
This adds sweetness and creaminess without needing to use additional sugar. It also helps bind the filling together while giving it that signature richness.
Key Lime Juice – ¾ cup, freshly squeezed or bottled
Key lime juice gives the pie its bright, tangy flavor. If you can’t find fresh key limes, bottled key lime juice works just fine. Regular lime juice can also be used, though it’s slightly more acidic.
Whipped Topping – 8 oz (plus more for garnish)
This gets folded into the filling to make it light and airy. It also makes for a beautiful topping just before serving. You can use store-bought whipped topping or make your own from whipped cream.
Optional Garnishes:
Extra whipped topping, lime slices, lime zest, or toasted coconut can be added for decoration and extra flavor.
Now that you’ve got everything ready, let’s walk through the step-by-step instructions to bring this sweet little masterpiece to life.
Step-By-Step Cooking Instructions
Step 1: Prepare the Graham Cracker Crust
- Start by placing your graham crackers into a food processor and pulsing them until fine crumbs form. If you don’t have a food processor, place the crackers in a sealed zip-top bag and crush them with a rolling pin.
- Measure out 1½ cups of crumbs and transfer them to a medium-sized bowl.
- Melt the unsalted butter and pour it over the crumbs. Use a spoon or rubber spatula to mix until the crumbs are evenly coated and have the texture of wet sand.
- Set the crust mixture aside while you prepare the filling.
Step 2: Make the Creamy Key Lime Filling
- In a large mixing bowl, add the softened cream cheese. Beat it with a hand mixer or stand mixer until smooth and fluffy. This step is essential to ensure a lump-free filling.
- Add the sweetened condensed milk to the bowl and continue mixing until well combined. The mixture should be smooth, thick, and slightly glossy.
- Next, pour in the key lime juice. Continue mixing on low speed until everything is fully incorporated. You’ll notice the filling will begin to thicken slightly due to the acidity in the lime juice.
- Now it’s time to gently fold in the whipped topping. Using a spatula, fold the whipped topping into the filling mixture in two additions. This keeps the texture light and airy. Make sure there are no streaks left.
Step 3: Assemble the Mini Pies
- Line a muffin tin with silicone cupcake molds or paper cupcake liners. Silicone molds are great for easy release, but paper liners work well too.
- Using a spoon or small ice cream scoop, fill each mold about three-quarters of the way full with the key lime filling.
- Once filled, add a spoonful of the graham cracker crust mixture on top of each pie. Lightly press it down with the back of the spoon so it adheres to the filling.
Step 4: Freeze Until Set
- Place the filled muffin tin on a baking sheet for stability and transfer it to the freezer.
- Freeze for at least 4 hours, or until the pies are completely firm to the touch. Overnight freezing works well if you’re making them ahead of time.
Step 5: Unmold and Garnish
- When you’re ready to serve, remove the pies from the freezer. Let them sit at room temperature for about 3–5 minutes.
- To help release them from silicone molds, you can dip the bottom of the mold in warm water for a few seconds.
- Flip each pie so the graham cracker crust is on the bottom, and place them on a serving platter.
- Garnish with a swirl of whipped topping, a thin slice of lime, or a sprinkle of lime zest if desired.

How to Serve these No-Bake Key Lime Pies
Once your no-bake mini key lime pies are frozen and perfectly set, it’s time for the fun part—serving them up. These little treats are already adorable on their own, but with a bit of thoughtful presentation, they can easily become the star of any dessert table. Whether you’re serving them at a dinner party, packing them for a picnic, or just enjoying them with your family after dinner, there are plenty of ways to elevate the experience.
One of the simplest serving options is to place the mini pies directly onto a decorative dessert plate. You can arrange a few slices of fresh lime or sprinkle some extra graham cracker crumbs around the plate to add visual interest. A small dollop of whipped topping piped on top adds that bakery-finish look, and it melts slightly against the frozen filling for an extra creamy bite.
For gatherings or events, consider serving them in their paper liners. Not only does this keep things neat and tidy, but it also adds a charming, rustic look—especially if you use colorful or themed liners to match your occasion. Kids love the fun presentation, and adults will appreciate the grab-and-go convenience.
If you’re aiming for a more elegant dessert course, try plating the mini pies upside down with the graham cracker crust on the bottom, just like a traditional slice. Add a drizzle of sweetened condensed milk or a swirl of lime-infused whipped cream on the plate. A few mint leaves or edible flowers can also elevate the look, making it restaurant-worthy without much extra effort.
For a tropical twist, pair the mini pies with a spoonful of toasted coconut or crushed pistachios on top. The added crunch and nutty flavor complement the creamy filling and bring a whole new dimension to each bite.
If you’re serving children or want a fun DIY element, set up a “decorate-your-own-pie” station with bowls of toppings like mini chocolate chips, crushed cookies, fresh berries, or even tiny meringues. It turns dessert into a fun, interactive experience that’s sure to be a hit with all ages.
No matter how you serve them, be sure to let them sit at room temperature for 5–10 minutes before serving. This softens the texture slightly and brings out the flavors more fully, giving you the perfect bite every time.
Pairing Suggestions
These mini key lime pies are bright, tangy, and refreshing, which makes them incredibly versatile when it comes to pairing with other dishes and drinks. Whether you’re planning a full meal or just want to complement your dessert with the perfect beverage, here are some ideas to make your experience even more delicious.
Beverage Pairings
Because key lime pie is naturally citrus-forward and slightly rich, pairing it with light, refreshing drinks works best. Sparkling water with a splash of lime or mint makes a great non-alcoholic option. You can also try herbal iced teas—chamomile, mint, or hibiscus pair especially well with the zesty lime flavor.
If you’re serving this at a brunch or special event, mocktails like lime mojitos or citrus spritzers are excellent choices. For a cozy winter version, try pairing the pies with a warm herbal tea such as lemongrass or ginger tea. These help balance the cool, creamy texture with a little bit of warmth.
Side Dishes
For a more complete dessert course, think about pairing the pies with other light sweets that won’t overpower the flavor. A bowl of fresh fruit—especially berries like strawberries, raspberries, or blueberries—brings in natural sweetness and vibrant color. A scoop of coconut or mango sorbet can also add a tropical flair while complementing the lime base.
Mini pies also work well as part of a dessert platter. Include other no-bake treats like chocolate truffles, lemon bars, or fruit skewers to create a variety of textures and flavors. Your guests will appreciate the assortment, and everything will feel cohesive with the tropical citrus theme.
Main Course Pairings
If you’re planning a full meal, these pies make an excellent finish to a range of cuisines. They pair especially well with grilled dishes—think grilled chicken, turkey burgers, or even halal BBQ options. Their citrus brightness helps cleanse the palate after smoky or spicy mains.
For a lighter dinner, pair them with seafood dishes like grilled salmon, baked cod, or shrimp skewers. The lime in the dessert mirrors the citrus often found in seafood seasonings, tying the whole meal together beautifully.
If you’re going vegetarian, they also follow nicely after dishes like roasted vegetable quinoa salad, creamy pasta primavera, or falafel wraps. The pies offer a cool, refreshing contrast to those savory flavors.
However you serve them, these no-bake mini key lime pies are the kind of dessert that fits in just about anywhere. Light, flavorful, and always a crowd-pleaser—they’re easy to pair with anything you’re serving.
Storage, Freezing & Reheating Instructions
One of the best parts of these no-bake mini key lime pies is how wonderfully they store. You can make them ahead, freeze them for later, or even keep a batch on hand for spontaneous sweet cravings. With just a bit of planning, you can always have a refreshing dessert ready to go.
Refrigerator Storage
If you’re planning to eat them within a couple of days, you can keep the mini pies in the refrigerator. Store them in an airtight container and place a piece of parchment or wax paper between layers if you’re stacking them. They’ll stay fresh in the fridge for up to 3 days.
Keep in mind that refrigerator storage will give the pies a softer texture compared to the firm, frozen version. This isn’t a bad thing—it’s just a different experience. Some people prefer the cool and creamy fridge-set version, especially if you like a texture closer to mousse or cheesecake.
Freezer Storage
For longer-term storage, freezing is the way to go. Once the pies are fully set, transfer them from the muffin tin into a freezer-safe container. You can freeze them in their molds or remove them and place them flat on a baking sheet first to prevent sticking. Once frozen solid, transfer them to a large container or zip-top freezer bag with parchment paper between layers to avoid sticking.
They’ll stay fresh in the freezer for up to 2 months. Be sure to label the container with the date so you don’t forget when you made them.
How to Thaw and Serve
To serve from frozen, take out as many mini pies as you need and let them sit at room temperature for about 5–10 minutes. This softens them just enough to make the texture creamy and rich while still holding their shape.
Avoid microwaving them to thaw—they’re best enjoyed slowly thawed at room temp to preserve that silky texture.
Reheating
There’s no actual reheating involved with these no-bake pies since they’re meant to be served cold. However, if you want a softer, melt-in-your-mouth experience, letting them sit at room temp a bit longer (10–15 minutes) will bring them closer to a cheesecake consistency.
Portioning and Leftovers
Because these pies are already portioned individually, it’s easy to only thaw what you need. No waste, no mess, and no complicated slicing. Leftovers can be returned to the freezer if they’ve only sat out for a short time, but for best quality, try to eat thawed pies within a day or two.
Having these mini pies in your freezer is like having a secret weapon. Anytime guests drop by or you’re just craving something sweet, they’re right there, ready to go.
Common Mistakes to Avoid
Even though these mini key lime pies are simple to make, there are a few easy-to-overlook mistakes that can affect the final result. Let’s walk through them so you can avoid them and get perfect pies every time.
1. Not Softening the Cream Cheese Enough
This step is key. If your cream cheese is too cold, it won’t blend smoothly with the condensed milk and lime juice. You’ll end up with a lumpy filling instead of that silky, creamy texture we’re going for. Let your cream cheese sit at room temperature for at least 30 minutes before mixing.
2. Overmixing the Filling After Adding Whipped Topping
Once you fold in the whipped topping, be gentle. Overmixing can deflate the mixture, leading to a denser filling. Use a spatula to fold in the topping slowly, and stop once the mixture is fully combined and there are no streaks.
3. Skipping the Chill Time
These pies need time to set in the freezer—at least four hours, ideally overnight. If you try to serve them too soon, the filling won’t hold its shape, and the texture will be too soft. Plan ahead to allow them the time they need.
4. Not Pressing the Crust Firmly Enough
The graham cracker topping should be gently pressed onto the filling so it sticks when you unmold the pies. If you don’t press it in a bit, it may fall off or separate when you flip them over. A light but firm press with the back of a spoon works great.
5. Using the Wrong Type of Lime Juice
While regular lime juice works in a pinch, key lime juice really is the star. It has a slightly sweeter, more floral flavor that’s essential to getting that authentic taste. If you can find it bottled, go with that—or better yet, use freshly squeezed key limes.
By avoiding these common pitfalls, you’ll be setting yourself up for success and creating a dessert that’s smooth, flavorful, and absolutely foolproof.
Pro Tips
Now that you know the step-by-step instructions and common pitfalls to avoid, let’s take things one step further with some pro tips. These are little nuggets of wisdom that can make a big difference when it comes to flavor, texture, presentation, and convenience. Whether it’s your first time making no-bake mini key lime pies or your tenth, these helpful tricks will help you level up your dessert game.
1. Use a Food Processor for the Crust
If you’re using whole graham crackers, a food processor is your best friend. It gives you perfectly even crumbs in seconds, and the finer the crumbs, the better the crust holds together. This is especially helpful if you’re serving the pies to guests and want that professional, uniform finish.
2. Don’t Skip the Crust-to-Filling Ratio Test
Before assembling the pies, do a quick test by layering a spoonful of filling and a spoonful of crust in one mold. This helps you gauge if you have enough filling and crust to go around for the entire batch. Adjust the amounts as needed before you fill up all the molds.
3. Use a Cookie Scoop for Perfect Portions
To make filling the molds easier and cleaner, use a small cookie scoop or ice cream scoop. It gives you evenly sized portions and keeps things tidy—no dripping or uneven layers.
4. Add Lime Zest to the Filling for Extra Brightness
If you really want to boost that citrus punch, add a teaspoon or two of finely grated lime zest to the filling. It adds a floral, zesty fragrance and little pops of brightness in every bite. Be sure to zest the limes before juicing them.
5. Line the Muffin Tin with Silicone or Paper Liners
This step can’t be emphasized enough. Silicone liners are reusable and pop out super easily, while paper liners add charm and make clean-up a breeze. Trying to freeze and unmold the pies without any liner can lead to a sticky, broken mess.
6. Don’t Overfill the Molds
Leave a little space at the top of each mold so that the crust topping has room to sit flat. This also makes it easier to transport the muffin tin to the freezer without spills.
7. Add a Pinch of Salt to the Crust
A tiny bit of salt enhances the flavor of the graham cracker crust and balances the sweetness of the filling. Just 1/8 teaspoon can make a surprising difference.
8. Make It Ahead for Parties
These pies are ideal for entertaining because they can be made days in advance. They store beautifully in the freezer and are easy to plate and garnish right before serving. Less stress on the day of your event, more time to enjoy.
9. Use Decorative Garnishes Thoughtfully
If you’re adding garnishes like whipped topping or lime slices, wait until just before serving. If added too soon and then frozen, whipped topping can lose its fluff and the limes may dry out or become bitter.
10. Keep a Batch in the Freezer for Emergency Dessert Cravings
Once you try these, you’ll understand the importance of having a secret stash. They’re perfect for unexpected guests, last-minute celebrations, or just a Tuesday night when you want something sweet and satisfying.
Incorporating these tips will not only make the recipe easier and more foolproof, but also help you create mini pies that are more flavorful, beautifully presented, and worthy of any occasion.
Frequently Asked Questions (FAQs)
With any recipe—especially a no-bake dessert—there are always a few questions that come up. Here’s a helpful FAQ section to guide you through some of the most common inquiries and concerns, whether you’re a first-timer or just looking to troubleshoot.
Can I use regular lime juice instead of key lime juice?
Yes, absolutely. While key lime juice has a more floral, sweet-tart flavor, regular lime juice will still work well in this recipe. Just know that it may result in a slightly sharper, more acidic flavor. If using regular limes, you can also mix in a bit of lemon juice to mimic the unique taste of key limes.
Can I make this recipe dairy-free?
You can! Use dairy-free cream cheese, such as those made with cashew or almond bases, and opt for a coconut-based whipped topping. There are also vegan condensed milk alternatives available. Keep in mind the texture and taste may be slightly different, but still delicious.
How long do the No-Bake Key Lime Pies need to freeze?
The pies need at least 4 hours in the freezer to set properly, but overnight is even better. This ensures they’re firm enough to unmold and hold their shape.
Can I double the No-Bake Key Lime Pies recipe?
Definitely. This recipe scales beautifully. If you’re serving a crowd or want to keep extras on hand, simply double each ingredient. You may need additional muffin tins or molds, so plan accordingly.
What if I don’t have cupcake liners?
If you don’t have liners, you can spray a nonstick muffin tin with cooking spray, but removing the pies will be more difficult. Using silicone molds or liners is highly recommended for easy removal and clean presentation.
Is it possible to use a crust on the bottom instead of the top?
Yes! To make a more traditional pie-style base, press the graham cracker crust into the bottom of each cupcake mold before filling. Chill or freeze the crust briefly before adding the filling to ensure it stays firm.
What kind of whipped topping should I use?
Store-bought whipped topping (like a non-dairy frozen topping) works great and provides stability. You can also use freshly whipped cream, but it’s best to stabilize it with a bit of powdered sugar if you plan to freeze the pies for longer periods.
Can I add extra flavor to the filling?
Yes, absolutely. A splash of vanilla extract or a pinch of coconut extract can add a fun twist. You can also fold in crushed berries or a swirl of fruit preserves for a new flavor profile.
How should I store leftovers?
Store any leftovers in a freezer-safe container. For best texture and flavor, consume within 2 months. Thaw a few minutes before serving for best results.
Do these travel well?
They can travel short distances if kept in a cooler with ice packs. If you’re taking them to a potluck or picnic, freeze them solid first and pack them in a container that keeps them upright. Serve them as soon as you arrive for the best presentation.
These questions cover most of the common concerns, but if you have more, feel free to experiment. This is a very forgiving recipe, and once you’ve tried it once, you’ll be confident making adjustments to suit your taste or dietary needs.
Conclusion & Call to Action
No-bake mini key lime pies are the kind of dessert that checks all the boxes: easy to make, packed with fresh flavor, freezer-friendly, and stunning to serve. Whether you’re celebrating something special or just want to treat yourself, this recipe is a total winner. From their silky, citrusy filling to the buttery graham cracker crunch, every bite delivers that perfect balance of sweet and tart in a way that feels light yet satisfying.
The best part is that you don’t need to be a pro to pull this off. With a handful of ingredients and a little bit of freezer time, you can create a dessert that rivals any bakery version. And once you see how quickly they disappear from the table, you’ll want to keep a batch ready to go at all times.
I hope this recipe becomes a favorite in your kitchen just like it has in mine. The joy of pulling one of these from the freezer, garnishing it with a little whipped topping, and watching someone’s face light up after the first bite—there’s nothing better.
So what are you waiting for? Go grab those graham crackers and limes, and let’s make some magic. And when you do, I’d love to hear how it turned out. Share your creations, leave a comment, or tag me online—I’m always excited to see your version of this sunny little treat.
Happy no-baking, and enjoy every bite of your mini key lime pies!
Print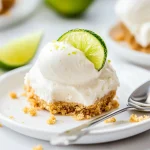
No-Bake Key Lime Pies – Easy, Creamy, and Refreshing
- Total Time: 4 hours 20 minutes (including freeze time)
- Yield: 4-6 servings 1x
- Diet: Vegetarian
Description
These no-bake mini key lime pies are creamy, tangy, and irresistibly refreshing. Made with a buttery graham cracker crust and whipped topping, they’re the perfect easy dessert for summer parties or a make-ahead treat.
Ingredients
-
1½ cups graham cracker crumbs (or 1 sleeve of graham crackers, crushed)
-
4 oz unsalted butter, melted
-
8 oz cream cheese, softened
-
1 (14 oz) can sweetened condensed milk
-
¾ cup key lime juice, freshly squeezed or bottled
-
8 oz whipped topping (plus more for garnish)
Instructions
-
Mix graham cracker crumbs with melted butter; set aside.
-
In a large bowl, beat softened cream cheese until smooth.
-
Add sweetened condensed milk and mix until fully combined.
-
Mix in key lime juice until the mixture thickens slightly.
-
Fold in whipped topping gently until no streaks remain.
-
Spoon filling into cupcake molds, filling ¾ of the way.
-
Top with graham cracker mixture and press gently.
-
Freeze for at least 4 hours or until fully set.
-
Unmold, garnish with whipped topping and lime slices. Serve chilled.
Notes
-
Use silicone molds for easy removal.
-
Add lime zest to the filling for extra citrus flavor.
-
Let sit at room temp for 5–10 minutes before serving.
- Prep Time: 20 minutes
- Cook Time: 0 minutes
- Category: Dessert
- Method: No-Bake, Freezer
- Cuisine: American