
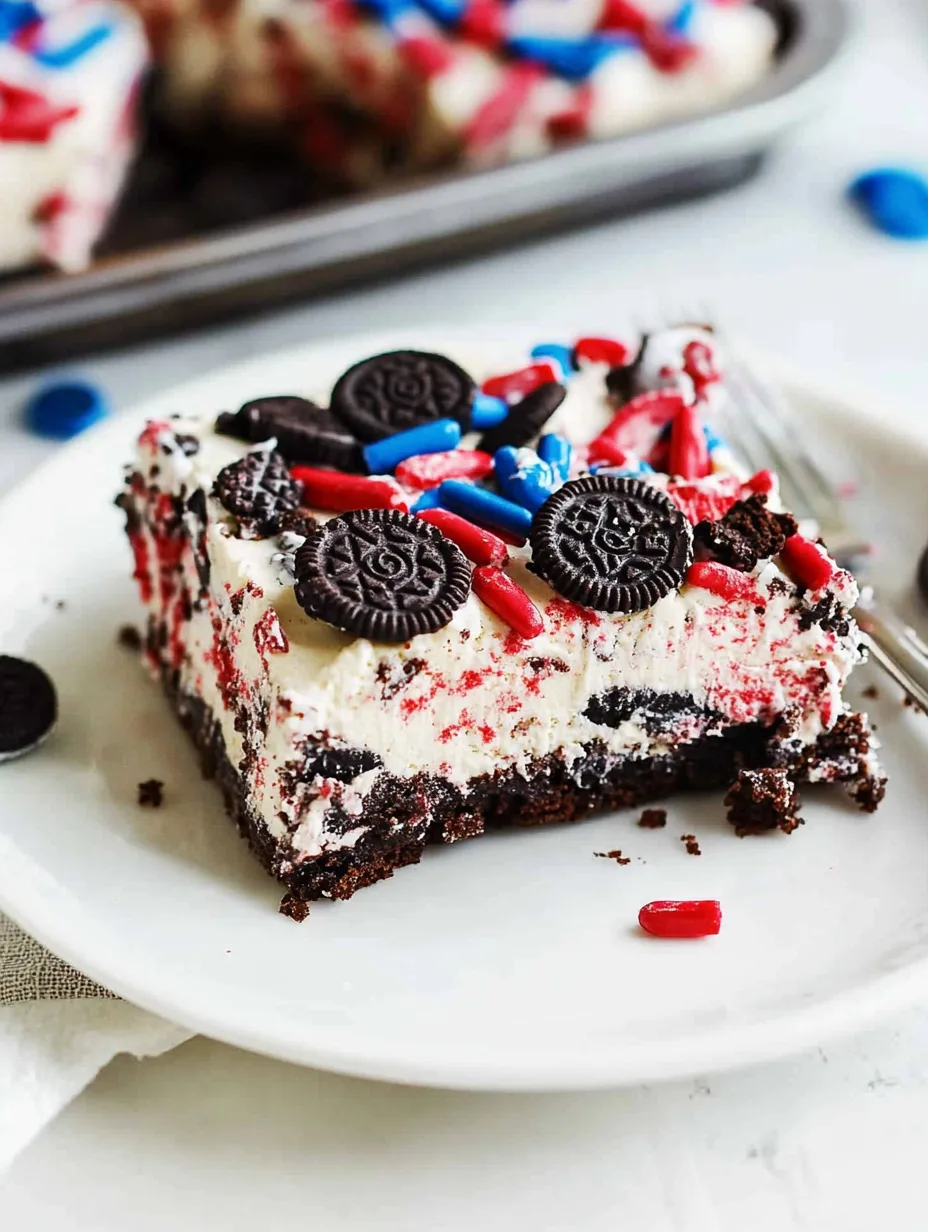
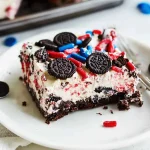
No Bake Fireworks Oreo Cheesecake Bars is an incredible dessert that will light up any occasion. With their vibrant colors and delightful taste, these cheesecake bars captivate both the eyes and the palate. The combination of creamy cheesecake, crunchy Oreo crust, and colorful fireworks sprinkles creates a dessert that feels festive and celebratory. Perfect for parties, holidays, or just a sweet treat after a long day, these cheesecake bars are sure to impress your family and friends with their amazing flavors and presentation.
When it comes to no-bake desserts, simplicity and flavor are key. No Bake Fireworks Oreo Cheesecake Bars deliver on both accounts. The use of easy-to-find ingredients makes it accessible for bakers of all skill levels. Plus, there’s no need for an oven, which makes this recipe perfect for hot summer days. You can whip it up quickly and let the refrigerator do the work.
Imagine cutting into a chilled, creamy slice of this cheesecake, revealing the bright pops of color from the fireworks sprinkling. It’s a fun twist on a classic dessert that evokes joy in every bite. Let’s explore why this recipe is destined to become a staple in your dessert arsenal!
Why You’ll Love This Recipe
There are countless reasons to adore No Bake Fireworks Oreo Cheesecake Bars. Here’s a closer look at some of the standout features that make this recipe irresistible:
1. Effortless Preparation: No baking means quick assembly. You can impress guests in a short amount of time.
2. Deliciously Decadent: Each bite is a creamy explosion of flavor, combining the classic taste of Oreos with cheesecake perfection.
3. Festive Appeal: The colorful sprinkles elevate the visual appeal, making them perfect for celebrations.
4. Versatile Base: You can easily customize the filling by adding your favorite mix-ins, like chocolate chips or candy.
5. Kid-Approved: Children love the vibrant colors and crunchy texture, making it an excellent choice for family gatherings.
6. Make-Ahead Friendly: Prepare these bars a day in advance for hassle-free entertaining.
With these enticing qualities, it’s easy to see why the No Bake Fireworks Oreo Cheesecake Bars have become a favorite among dessert lovers.
Preparation and Cooking Time
Preparing No Bake Fireworks Oreo Cheesecake Bars is quick and straightforward. Take a look at the estimated times below:
– Preparation Time: 20 minutes
– Chill Time: 4 hours (minimum)
– Total Time: 4 hours 20 minutes
The wait time is primarily due to the chilling process, allowing the bars to set perfectly. Though it may require some patience, the short preparation time makes it worthwhile!
Ingredients
– 24 Oreo cookies (crushed)
– 4 tablespoons unsalted butter (melted)
– 1 cup cream cheese (softened)
– 1 cup powdered sugar
– 1 teaspoon vanilla extract
– 1 ½ cups whipped topping (thawed)
– ½ cup fireworks sprinkles
– Extra sprinkles for decoration (optional)
Step-by-Step Instructions
Creating No Bake Fireworks Oreo Cheesecake Bars is a breeze! Simply follow these easy steps to whip up this delightful dessert:
1. Prepare the Crust: In a medium bowl, combine crushed Oreo cookies and melted butter. Mix until evenly coated.
2. Form the Base: Press the crust mixture into the bottom of a greased 9×9-inch baking dish, ensuring it’s tightly packed.
3. Make the Filling: In a large bowl, beat the softened cream cheese until smooth.
4. Incorporate Sugar and Vanilla: Add powdered sugar and vanilla extract to the cream cheese. Mix until fully combined.
5. Fold in Whipped Topping: Gently fold in the whipped topping until the mixture is smooth and creamy.
6. Add Sprinkles: Stir in the fireworks sprinkles, making sure they are evenly distributed throughout the filling.
7. Spread the Filling: Pour the cheesecake filling over the prepared crust, smoothing the top with a spatula.
8. Chill: Cover the baking dish with plastic wrap and refrigerate for at least 4 hours or until firm.
9. Slice: Once set, remove from the refrigerator, and cut into bars of your preferred size.
10. Decorate: Top with additional sprinkles before serving, if desired.
These steps guide you through creating a colorful and delicious dessert that is sure to delight!
How to Serve
Presentation and serving can elevate your No Bake Fireworks Oreo Cheesecake Bars. Here are some ideas to make your dessert unforgettable:
1. Traditional Style: Serve bars on a decorative platter, offering each slice on individual plates for added elegance.
2. Garnish: Add a dollop of whipped cream on top for a festive touch. Sprinkling additional fireworks sprinkles enhances the cheerful appeal.
3. Themed Serving: Coordinate the colors of the sprinkles with party themes or holidays to reinforce the festive spirit.
4. Beverage Pairing: Consider pairing these bars with milk, iced coffee, or a fun, colorful punch to complement the sweetness.
5. Family Style: Present it as a whole for a casual gathering, inviting guests to cut their slices, creating a fun, communal atmosphere.
By putting thought into serving, you’ll create a memorable experience for your guests that highlights the delightful flavors and design of the cheesecake bars.
In conclusion, No Bake Fireworks Oreo Cheesecake Bars are an amazing and ultimate treat that can transform any gathering into a colorful celebration. With their effortless preparation and festive appearance, they are guaranteed to be a hit at any event. Follow this recipe and get ready to bask in the compliments!
Additional Tips
– Choose Fresh Ingredients: Using fresh cream cheese and whipped topping can elevate the taste of your No Bake Fireworks Oreo Cheesecake Bars.
– Crush Oreos Properly: Ensure the Oreo cookies are finely crushed for a uniform crust. Larger pieces can create a crumbly base.
– Let It Chill: For the best texture, allow the bars to chill longer than the minimum time. Overnight is ideal for a firmer slice.
– Experiment with Sprinkles: Use seasonal or themed sprinkles to match holidays or events, adding a personal touch to your dessert.
Recipe Variation
Get creative with your No Bake Fireworks Oreo Cheesecake Bars! Here are some fun variations to try:
1. Cheesecake Swirls: Add a layer of fruit preserves or chocolate sauce between the crust and cheesecake filling for a delightful surprise.
2. Different Cookie Base: Swap out Oreo cookies for other flavored cookies, like chocolate chip or peanut butter, for a unique flavor twist.
3. Add Ins: Mix in crushed candy bars or nuts to the filling for extra texture and flavor.
4. Chocolate Lovers Version: Incorporate melted chocolate into the filling for a richer chocolate flavor.
Freezing and Storage
– Storage: Keep your cheesecake bars covered in the refrigerator. They stay fresh for about 5–7 days.
– Freezing: If you want to save some for later, freeze them! Wrap individual slices in plastic wrap and store them in an airtight container. They can last up to 3 months in the freezer.
Special Equipment
To make your No Bake Fireworks Oreo Cheesecake Bars, you’ll need a few essential kitchen items:
– Mixing Bowls: Two sizes are ideal for making the crust and filling.
– Electric Mixer: Use this for blending the cream cheese smoothly.
– Spatula: A silicone spatula works great for spreading the filling and scraping bowls clean.
– 9×9 inch Baking Dish: This size is perfect for the amount of filling in the recipe.
– Plastic Wrap: For covering the dish while chilling in the refrigerator.
Frequently Asked Questions
Can I make this recipe gluten-free?
Absolutely! Substitute gluten-free Oreo cookies for the crust, and you’ll have a delicious gluten-free treat.
What can I use if I don’t have whipped topping?
You can use homemade whipped cream, but adjust the sugar content accordingly for sweetness.
Can I add fresh fruit to the filling?
Yes! Chopped strawberries or blueberries can be added for a fruity twist. Just make sure to adjust the whipping cream for a smoother consistency.
How long do these bars need to set?
While 4 hours is the minimum, overnight is best for achieving the perfect texture.
Can I double the recipe?
Yes, you can double the ingredients and use a larger baking dish for a bigger batch.
Conclusion
No Bake Fireworks Oreo Cheesecake Bars are the perfect way to celebrate any occasion with a vibrant and delicious twist on traditional cheesecake. Their bright colors and fantastic flavors make them a hit for kids and adults alike. With simple ingredients and an easy-to-follow process, these bars will soon become a staple dessert, impressing everyone at your gatherings. Try making them today, and watch as they disappear quickly from the dessert table!
No Bake Fireworks Oreo Cheesecake Bars: An Amazing Ultimate Recipe
- Total Time: 14 minute
Ingredients
– 24 Oreo cookies (crushed)
– 4 tablespoons unsalted butter (melted)
– 1 cup cream cheese (softened)
– 1 cup powdered sugar
– 1 teaspoon vanilla extract
– 1 ½ cups whipped topping (thawed)
– ½ cup fireworks sprinkles
– Extra sprinkles for decoration (optional)
Instructions
Creating No Bake Fireworks Oreo Cheesecake Bars is a breeze! Simply follow these easy steps to whip up this delightful dessert:
1. Prepare the Crust: In a medium bowl, combine crushed Oreo cookies and melted butter. Mix until evenly coated.
2. Form the Base: Press the crust mixture into the bottom of a greased 9×9-inch baking dish, ensuring it’s tightly packed.
3. Make the Filling: In a large bowl, beat the softened cream cheese until smooth.
4. Incorporate Sugar and Vanilla: Add powdered sugar and vanilla extract to the cream cheese. Mix until fully combined.
5. Fold in Whipped Topping: Gently fold in the whipped topping until the mixture is smooth and creamy.
6. Add Sprinkles: Stir in the fireworks sprinkles, making sure they are evenly distributed throughout the filling.
7. Spread the Filling: Pour the cheesecake filling over the prepared crust, smoothing the top with a spatula.
8. Chill: Cover the baking dish with plastic wrap and refrigerate for at least 4 hours or until firm.
9. Slice: Once set, remove from the refrigerator, and cut into bars of your preferred size.
10. Decorate: Top with additional sprinkles before serving, if desired.
These steps guide you through creating a colorful and delicious dessert that is sure to delight!
- Prep Time: 15 minutes
- Cook Time: Total Time: 15 minutes
Nutrition
- Serving Size: 12 bars
- Calories: 250 kcal
- Fat: 15g
- Protein: 2g