
There’s something about a no-bake dessert that feels like the ultimate kitchen hack. It’s the kind of recipe you keep in your back pocket for when you’re short on time but still want to make something seriously delicious. These No-Bake Chocolate Peanut Butter Crispy Rice Bars are exactly that. They’re rich, chewy, and crispy all at once, and they come together with just a few pantry staples.
When I first made these, it was late at night, and I was craving something sweet but didn’t want to turn on the oven. I had a box of crispy rice cereal, half a jar of peanut butter, some chocolate chips, and maple syrup. I didn’t think much of it at the time, but after one bite, I knew I had stumbled upon something that would become a regular in my kitchen.
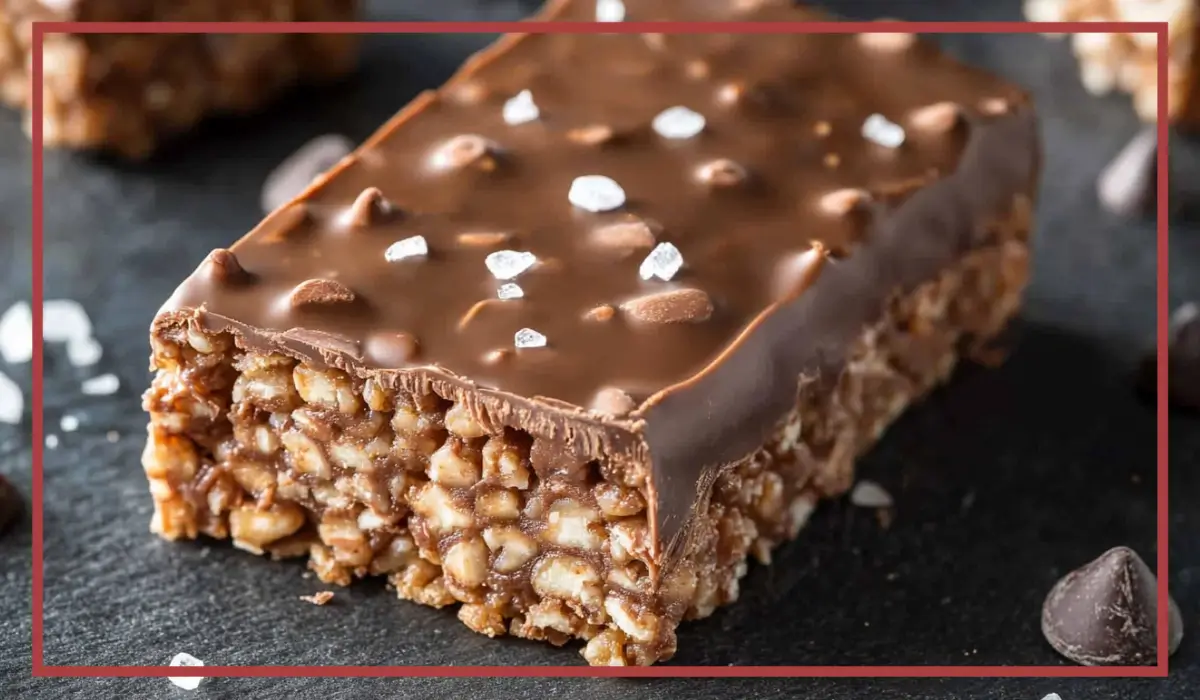
The texture is where the magic really happens—those crisp rice bits give you that nostalgic snap and crunch, while the melted chocolate and peanut butter make the bars rich and velvety. You get a perfect balance of salty and sweet, with the coconut oil tying everything together into a smooth, melt-in-your-mouth treat.
These bars are also completely customizable. You can swap in almond butter, use sugar-free chocolate, or add a sprinkle of sea salt on top for an extra flavor punch. And because they’re no-bake, they’re great for kids to help with, making them a fun and easy family activity.
Whether you’re prepping lunchbox snacks, planning a picnic, or just need a late-night sweet fix, this recipe will deliver every single time.
Why You’ll Love This No-bake chocolate bars Recipe
There are so many reasons why these No-Bake Chocolate Peanut Butter Crispy Rice Bars deserve a permanent spot in your dessert rotation. First and foremost, they’re incredibly easy to make. With only six ingredients and no oven time required, this is the kind of recipe you can whip up in minutes—even if you’re juggling a dozen other things.
One of the most appealing parts of this No-bake chocolate bars recipe is its versatility. If you’ve got food allergies in the house or are trying to be mindful of certain dietary needs, these bars are endlessly adaptable. They’re naturally gluten-free if you use gluten-free crispy rice cereal, and they can be made dairy-free or vegan with a few simple substitutions.
The flavor is another huge win. Chocolate and peanut butter are a classic pairing for a reason—they just work. The chocolate chips bring a rich sweetness, while the peanut butter adds a creamy, nutty depth that complements the light crispness of the cereal. Add in the coconut oil for a silky texture and maple syrup for a natural sweetness, and you’ve got a snack that hits every note.
These bars are also incredibly satisfying. They’ve got a little bit of everything: crunch, chewiness, richness, and a smooth melt-in-your-mouth finish. You get the kind of treat that feels indulgent but is actually made from real, wholesome ingredients.
They’re perfect for meal prep, too. Make a batch at the start of the week and store them in the fridge or freezer for a grab-and-go snack that’s always ready when you are. And if you have little ones at home, these are a great way to get them excited about helping in the kitchen. No knives, no stove—just mixing, pressing, chilling, and enjoying.
Health Benefits of this No-bake chocolate bars
While these bars taste like dessert, they also come with a few hidden health perks that make them a more balanced indulgence. Let’s start with peanut butter. It’s a great source of healthy fats and plant-based protein, which helps you feel full and satisfied. If you opt for a natural peanut butter that’s low in added sugars and oils, you’re getting a heart-healthy base ingredient that supports sustained energy.
Maple syrup is another standout. Unlike refined white sugar, maple syrup contains antioxidants and minerals like manganese and zinc. It’s still a sweetener, of course, but it’s a better-for-you option that gives your body a little something extra. Plus, its rich, almost caramel-like flavor adds a deeper note of sweetness that complements the peanut butter beautifully.
Then there’s the coconut oil. This ingredient not only adds a luxurious texture but also provides medium-chain triglycerides (MCTs), which are known for being more readily used by the body as energy compared to other fats. Coconut oil is also naturally dairy-free, making it a great alternative to butter if you’re keeping things vegan.
Crispy rice cereal may seem simple, but it’s a smart choice for a light, low-fat base that provides structure without weighing the bars down. You can also find versions that are fortified with essential vitamins and minerals, especially if you’re buying gluten-free or organic brands.
Finally, the chocolate chips offer more than just flavor. Dark chocolate, especially when made with 70% cocoa or more, contains antioxidants called flavonoids. These compounds support heart health and may help lower blood pressure when consumed in moderation.
When you put it all together, you’ve got a no-bake dessert that satisfies your sweet tooth while giving you some real nutritional value. They’re proof that wholesome and indulgent can absolutely go hand in hand.
Preparation Time, Servings, and Nutritional Information
One of the biggest perks of this recipe is how quickly it comes together. From start to finish, you’re looking at less than 15 minutes of active time, with just an hour or so of chilling time. That means you can whip up a batch in the morning and have them ready by the time your afternoon cravings hit.
Preparation Time:
Prep Time: 10 minutes
Chill Time: 1 hour
Total Time: 1 hour 10 minutes
Servings:
This recipe yields approximately 16 bars, depending on how large you cut them. They’re perfectly portioned for snacks, lunchboxes, or a little treat after dinner.
Nutritional Information (per bar):
Calories: 210
Protein: 4g
Fat: 12g
Carbohydrates: 22g
Fiber: 2g
Sugar: 10g
Of course, these numbers may vary slightly depending on the specific brands and ingredients you use. For example, using sugar-free chocolate chips or a low-carb syrup alternative can reduce the total sugar content. Similarly, using almond butter instead of peanut butter can shift the flavor and fat profile slightly.
Despite being a dessert-style recipe, these bars offer a surprisingly balanced nutritional breakdown. You’re getting a solid mix of healthy fats, plant-based protein, and complex carbs—all in a portion-controlled format. They’re not just empty calories; they actually deliver some fuel to keep you going.
These bars are a great choice if you’re trying to eat more mindfully without feeling deprived. They’re also excellent for kids since they’re nutty, chocolatey, and naturally sweet—but still pack a bit of nutrition in every bite.
Ingredients List of these No-bake chocolate bars
Here’s everything you’ll need to make these bars. Each ingredient is simple, pantry-friendly, and serves a specific purpose to make the bars perfectly chewy, sweet, and satisfying.
3 cups crispy rice cereal
This is the foundation of your bars. It gives them that light, crispy texture that contrasts beautifully with the soft chocolate-peanut butter mixture. Make sure to choose a gluten-free version if needed.
1½ cups chocolate chips
These bring that rich, fudgy flavor. You can go classic with semi-sweet, or opt for dark chocolate if you prefer a deeper cocoa flavor. For a dairy-free version, choose vegan chocolate chips. Sugar-free chips also work well here.
1 cup peanut butter
Peanut butter adds creaminess, richness, and that unmistakable nutty flavor. Smooth, natural peanut butter works best. You can easily swap this for almond butter, cashew butter, or even sunflower seed butter if you need a nut-free version.
½ cup maple syrup
Maple syrup is the natural sweetener that binds everything together. It has a lovely, almost caramel-like flavor that complements the chocolate and peanut butter. You can substitute with honey or a sugar-free maple-flavored syrup if desired.
¼ cup coconut oil
This helps to smooth out the chocolate mixture and gives the bars a slightly firm yet silky texture when chilled. If you’re not a fan of coconut flavor, use refined coconut oil, which has a more neutral taste. You can also substitute with butter or vegan butter if preferred.
These ingredients combine to create a rich, chewy base that sets perfectly once chilled. There are no eggs, no flour, and absolutely no baking required, which makes this one of the easiest and most foolproof recipes you can have in your dessert toolkit.
Step-By-Step Cooking Instructions
Making these bars is a simple process that doesn’t require any special equipment or fancy kitchen skills. As long as you can stir, pour, and press, you’re already halfway there.
Step 1: Prepare your pan
Start by lining an 8×8-inch square baking dish with parchment paper. This will make it much easier to lift the bars out once they’ve set. You can also lightly grease the sides of the pan with a bit of coconut oil or non-stick spray to help with clean release.
Step 2: Add the cereal to a mixing bowl
In a large mixing bowl, add the 3 cups of crispy rice cereal. Set it aside for now. You’ll be pouring your melted mixture over this in just a few minutes, so make sure you’ve got a big enough bowl to handle some heavy-duty stirring.
Step 3: Melt the chocolate, peanut butter, syrup, and oil
In a microwave-safe bowl or saucepan, combine the chocolate chips, peanut butter, maple syrup, and coconut oil.
Microwave method: Heat on high in 30-second increments, stirring well between each round, until the mixture is completely melted and smooth. This usually takes about 90 seconds total.
Stovetop method: Use a small saucepan over medium-low heat. Stir constantly until the chocolate is melted and everything is combined into a thick, glossy mixture.
Tip: Don’t overheat it—once the mixture is melted and smooth, immediately remove it from the heat to prevent it from seizing up.
Step 4: Combine the cereal and the chocolate mixture
Pour the melted chocolate-peanut butter mixture over the bowl of crispy rice cereal.
Using a silicone spatula or large wooden spoon, stir gently but thoroughly until all the cereal is coated. Make sure to get into the corners and the bottom of the bowl so that no dry patches are left behind. The mixture should look glossy and slightly sticky.
Step 5: Press into the pan
Transfer the mixture to your prepared 8×8-inch pan. Use a spatula, your hands, or the back of a spoon to press it down firmly and evenly.
Optional tip: Lay a second piece of parchment paper on top and use the bottom of a glass or measuring cup to press the mixture down tightly for extra compact bars.
Step 6: Chill until set
Place the pan in the refrigerator and chill for at least 1 hour, or until the bars are firm to the touch. You can also put them in the freezer for 30 minutes if you’re short on time.
Step 7: Slice and serve
Once the bars are completely set, lift them out of the pan using the edges of the parchment paper. Place on a cutting board and slice into squares or rectangles.
Serving size tip: For smaller bites, cut into 20–24 mini bars. For a heartier treat, stick with 12–16 pieces.
From start to finish, this entire process takes less than 15 minutes of hands-on time. It’s an excellent recipe for kids to help with, and it’s basically impossible to mess up. Even if your bars don’t look perfect, they’ll taste amazing—and that’s what really matters.

How to Serve these No-bake chocolate bars
Now that your No-Bake Chocolate Peanut Butter Crispy Rice Bars are perfectly chilled and cut, let’s talk about how to serve them for maximum enjoyment. These bars are wonderfully versatile, which means you can enjoy them in a bunch of different ways depending on the occasion and who you’re serving.
For everyday snacking, simply serve them straight from the fridge. They’re firm, chewy, and deliciously rich, making them ideal for a mid-afternoon pick-me-up or a sweet ending to your lunch. If you’re packing them in lunchboxes, wrap each bar individually in parchment paper or place them in a reusable snack container to keep them fresh and mess-free.
For a more elevated experience, try plating them as part of a dessert board. Pair the bars with fresh berries, sliced bananas, and maybe a few roasted nuts on the side. The combination of textures and flavors will make even a casual snack feel special.
These bars are also freezer-friendly, so you can keep a batch on hand for those moments when you need something quick and satisfying. Serve them chilled directly from the freezer for a firmer, candy-bar-like texture, or let them sit at room temperature for a few minutes to soften slightly and become extra chewy.
If you’re serving guests or taking these to a party, consider drizzling a little melted chocolate on top or sprinkling with flaky sea salt for a gourmet touch. You can also cut them into bite-sized cubes and skewer them with toothpicks for a fun, shareable dessert option.
For kids, serve the bars alongside a glass of milk or a fruit smoothie to balance the sweetness with some nutrition. For adults, they go beautifully with a cup of coffee or tea, especially in the afternoon when you need a little energy boost.
Whatever the setting, these bars are designed to be simple, satisfying, and always ready to impress.
Pairing Suggestions
While these bars are delicious all on their own, pairing them with the right foods and drinks can elevate the experience and bring out the best in their flavor and texture. Here are some pairing ideas to make your snack or dessert moment even more satisfying.
Beverage Pairings:
A glass of cold milk—whether dairy or plant-based—makes a classic companion. The creaminess of the milk complements the richness of the chocolate and peanut butter, creating that nostalgic pairing we all know and love.
If you’re more of a coffee person, a medium roast or cold brew works beautifully. The slight bitterness of coffee cuts through the sweetness of the bars, balancing the flavors in every bite.
For tea lovers, opt for a black tea like English breakfast or Earl Grey. The warmth and slight tannins in the tea highlight the deep cocoa notes in the bars.
If you’re looking for a refreshing, non-caffeinated option, a fruity herbal tea—like raspberry or hibiscus—offers a tart contrast to the sweetness of the bars. Or serve them with a smoothie made with bananas and almond milk for a more filling snack.
Food Pairings:
Pair these bars with a fruit bowl featuring berries, orange slices, or even thinly sliced apples. The natural sweetness and acidity of the fruit balance the richness of the bars and add a bright, fresh note to the plate.
For a more indulgent dessert plate, serve the bars alongside mini scoops of dairy-free vanilla or chocolate ice cream. You can even crumble the bars on top of a scoop for an extra crunchy texture and chocolatey goodness.
Want to keep it wholesome? Serve the bars with a handful of roasted nuts or a dollop of Greek-style yogurt for a more balanced snack. The added protein helps keep you full while the bars satisfy your sweet craving.
Whatever you pair them with, these bars are adaptable, crowd-pleasing, and downright delicious.
Storage, Freezing & Reheating Instructions
One of the best things about these No-Bake Chocolate Peanut Butter Crispy Rice Bars is how easy they are to store. Whether you want to enjoy them throughout the week or save a stash for later, here’s how to keep them fresh and delicious.
Refrigerator Storage:
Once the bars are cut, store them in an airtight container. You can separate the layers with parchment paper to prevent sticking. In the fridge, they’ll keep well for up to 1 week. They’ll stay firm and chewy, and the texture actually improves a bit with time as the flavors meld together.
Freezer Storage:
To store for longer, these bars freeze beautifully. Lay the cut bars on a baking sheet and freeze them for 1–2 hours, just until solid. Then transfer the bars to a freezer-safe container or zip-top bag, separating layers with parchment paper. They’ll keep for up to 3 months.
When you’re ready to enjoy, you can either let them thaw in the fridge overnight or leave them at room temperature for about 10–15 minutes. If you like a firmer texture, you can eat them straight from the freezer. They’ll be more like a crunchy chocolate bar this way—still totally tasty.
Reheating Tips:
Since these are no-bake, there’s no actual cooking involved when it comes to enjoying leftovers. However, if you prefer a softer, gooier texture, you can warm an individual bar in the microwave for about 10–15 seconds. Be careful not to overheat—it’s a quick zap just to make the chocolate and peanut butter a little more melty.
If you’re using the bars as a dessert base (for example, crumbled over ice cream), this quick warm-up can make them even more irresistible.
With these storage and reheating tips, you’ll always have a delicious, wholesome treat ready whenever those cravings strike.
Common Mistakes to Avoid
Even though this is a no-bake recipe, a few small missteps can affect the final texture and flavor of your bars. Here are some common mistakes to watch out for and how to avoid them.
1. Using too much cereal:
It might be tempting to pack in more crispy rice cereal to stretch the batch, but this can result in dry, crumbly bars. Stick with the 3-cup measurement for the perfect chewy-to-crispy ratio. If you do add more, increase the chocolate mixture accordingly.
2. Not melting the chocolate mixture properly:
Whether you’re using the microwave or stovetop, it’s important to melt the chocolate, peanut butter, syrup, and oil just until smooth. Overheating can cause the chocolate to seize, turning grainy and clumpy. Always stir between heating intervals and remove from heat as soon as everything is melted.
3. Skipping the chill time:
Chilling is essential for the bars to set properly. If you try to cut them too soon, they’ll fall apart or stick to your knife. Give them at least an hour in the fridge, or use the freezer for a quicker set time.
4. Not pressing the mixture firmly into the pan:
Lightly pressing the mixture won’t compact it enough, leading to loose, crumbly bars. Use the back of a spoon, a piece of parchment paper, or the bottom of a glass to press the mixture down firmly and evenly into the pan.
5. Storing them at room temperature in hot weather:
Because of the coconut oil and chocolate, these bars will soften or even melt if left out in warm temperatures. Always store them in the fridge or freezer to maintain their texture and shape.
Avoiding these simple mistakes will help you get perfect bars every time—crispy, chewy, and totally satisfying.
Pro Tips
Even though this recipe is incredibly simple, a few extra tips and tricks can take your No-Bake Chocolate Peanut Butter Crispy Rice Bars from good to unbelievably great. These are the kind of things you might not think about the first time, but once you try them, they make all the difference.
1. Use parchment paper to press down the mixture.
After pouring the mixture into your pan, place a piece of parchment paper over the top and use your hands or the bottom of a glass to press it down evenly. This prevents sticking and helps compact everything so the bars hold together better when sliced.
2. Chill longer for cleaner slices.
If you’re looking for perfect edges and that Instagram-worthy clean-cut bar, chill the mixture for at least 2 hours—or better yet, overnight. A longer chill allows everything to firm up completely, making slicing a breeze.
3. Don’t skip the salt (if using unsweetened ingredients).
If your peanut butter and chocolate chips are unsweetened or lightly sweetened, adding a pinch of sea salt to the mixture can really round out the flavors. It balances the sweetness and enhances that classic chocolate-peanut butter combo.
4. Toast your cereal for extra flavor.
For an added depth of flavor, toast the crispy rice cereal in a dry skillet for 2–3 minutes over medium heat before mixing. It adds a slightly nutty flavor and a bit more crunch, which really takes the texture to the next level.
5. Experiment with add-ins.
Feel free to customize with mix-ins like mini marshmallows, crushed pretzels, shredded coconut, or chopped nuts. Just be sure not to overdo it—too many extras can make the bars harder to stick together. Aim for no more than ½ cup of add-ins total.
6. Use a sharp, warm knife for slicing.
Run your knife under warm water and wipe it dry before slicing. This helps cut through the bars cleanly, especially if they’re straight from the fridge or freezer.
Following these tips will ensure that your bars not only taste incredible but also look bakery-level beautiful. Little adjustments can make a big difference, especially when it comes to texture and flavor balance.
Frequently Asked Questions (FAQs)
Can I use a different nut or seed butter instead of peanut butter?
Absolutely! This recipe works wonderfully with almond butter, cashew butter, sunflower seed butter, or even soy nut butter. Just make sure the texture is smooth and pourable. If your nut butter is extra thick, you might need to slightly warm it to mix well with the chocolate and syrup.
What if I don’t have coconut oil?
You can substitute coconut oil with regular butter, vegan butter, or even a neutral-flavored oil like avocado oil. Each option will slightly affect the taste and texture, but the bars will still come together beautifully.
Are these bars gluten-free?
They can be! Just be sure to use a certified gluten-free crispy rice cereal. Some cereals may contain barley malt or other gluten-containing ingredients, so always check the label to be safe.
Can I use honey instead of maple syrup?
Yes, honey can be used as a substitute for maple syrup. Keep in mind that it has a stronger flavor and is slightly thicker, which might make the bars a bit firmer once chilled. For a vegan option, stick with maple syrup or a plant-based alternative.
Can I make these bars sugar-free?
Yes, you can. Use sugar-free chocolate chips and a sugar-free maple syrup substitute to significantly reduce the sugar content. Make sure your nut butter doesn’t have added sugar either.
How long do these bars last in the fridge?
Stored in an airtight container, these bars will stay fresh in the fridge for up to 7 days. For longer storage, freeze them for up to 3 months.
Can I double the recipe?
Definitely. You can double all the ingredients and press the mixture into a 9×13-inch pan instead of an 8×8. Just make sure to press it down evenly and chill it thoroughly before slicing.
Do they need to be stored in the fridge?
Yes, especially if your kitchen is warm. Because of the chocolate and coconut oil, the bars can soften or melt at room temperature. For best results, keep them chilled until serving.
What can I do if the bars fall apart when slicing?
This usually happens if the mixture wasn’t pressed firmly enough or didn’t chill long enough. Next time, make sure to pack the mixture tightly into the pan and chill for at least an hour (longer if possible) before slicing.
Can I add protein powder to these bars?
Yes, you can stir in a scoop of your favorite protein powder along with the cereal, but reduce the cereal slightly to account for the extra dry ingredient. Choose a flavor that complements chocolate and peanut butter, like vanilla or chocolate protein powder.
Conclusion & Call to Action
These No-Bake Chocolate Peanut Butter Crispy Rice Bars are the kind of recipe that you’ll find yourself coming back to again and again. They’re simple, fuss-free, and endlessly customizable, making them ideal for everything from meal prep to party treats. Whether you’re making them for yourself, your family, or a crowd, they deliver every single time.
What I love most about these bars is how they strike that perfect balance. They’re indulgent, but made with real, nourishing ingredients. They feel like a treat, but don’t require complicated steps or fancy tools. And they’re quick—like under-15-minutes quick—which is exactly what most of us need when life gets hectic and we still want something delicious.
This is also a great recipe for getting kids involved in the kitchen. Since there’s no baking involved, it’s safe and fun for little helpers. They’ll love measuring, stirring, pressing, and of course, taste-testing.
So now it’s your turn. Grab that cereal, that jar of peanut butter, and some chocolate chips, and go whip up a batch of these dreamy no-bake bars. I promise they’ll become one of your go-to favorites.
And if you make them, I’d love to hear how they turned out. Did you make any fun substitutions or add-ins? Did they disappear at your last get-together? Leave a comment below and share your experience!
Better yet, snap a photo of your finished bars and tag me on Instagram. I absolutely love seeing your creations—it’s one of the best parts of sharing recipes like this one. Until next time, happy no-baking!
Print
No-Bake Chocolate Bars with Peanut Butter – Easy Rice Treats
- Total Time: 1 hour 10 minutes (including chilling)
- Yield: 16 bars 1x
- Diet: Gluten Free
Description
These no-bake chocolate peanut butter bars are chewy, crispy, rich, and so easy to make with just 6 pantry staples and no oven required. Perfect for quick snacks, lunchboxes, or a wholesome dessert.
Ingredients
-
3 cups crispy rice cereal (gluten-free if needed)
-
1½ cups chocolate chips (dairy-free or sugar-free if preferred)
-
1 cup peanut butter (or almond, cashew, sunflower, or soy nut butter)
-
½ cup maple syrup (or sugar-free alternative)
-
¼ cup coconut oil (or butter/vegan butter)
Instructions
-
Line an 8×8-inch baking dish with parchment paper.
-
Add crispy rice cereal to a large bowl and set aside.
-
In a saucepan or microwave-safe bowl, melt chocolate chips, peanut butter, maple syrup, and coconut oil until smooth.
-
Pour the melted mixture over the cereal and stir until fully coated.
-
Transfer to the lined pan, press down firmly and evenly.
-
Refrigerate for 1 hour until set.
-
Slice into bars and enjoy!
Notes
-
Store in the fridge for up to 1 week or freeze for up to 3 months.
-
Add toppings like flaky sea salt or shredded coconut for extra flavor.
-
For a nut-free version, use sunflower or soy nut butter.
- Prep Time: 10 minutes
- Cook Time: 0 minutes
- Category: Snack, Dessert
- Method: No-Bake
- Cuisine: American