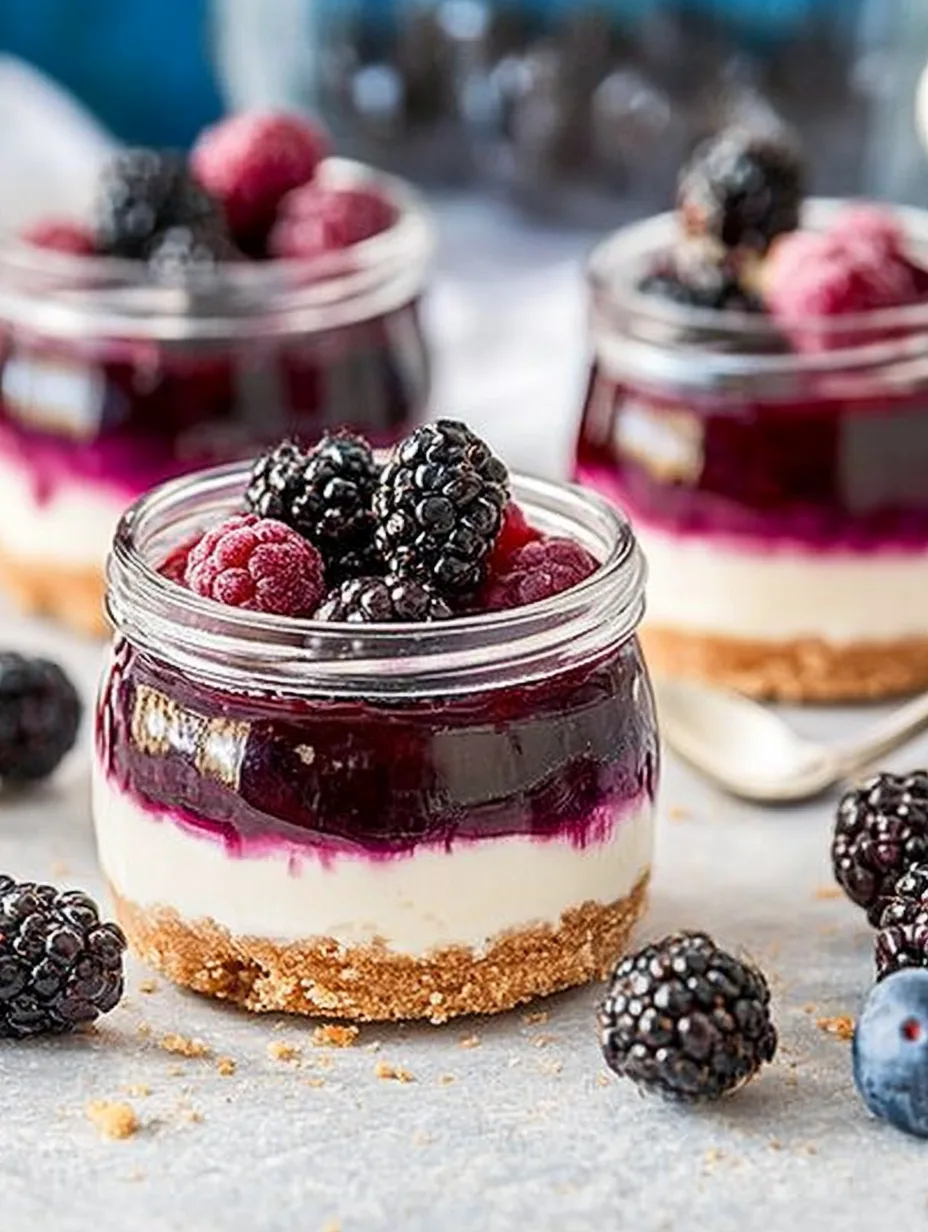
Individual Berry No Bake Cheesecakes are a delightful and refreshing dessert perfect for any occasion. With their creamy texture and fresh berry topping, these cheesecakes are not only easy to make but also incredibly delicious. Ideal for warm weather or when you’re short on time, this dessert brings together a fantastic blend of flavors in every bite. Whether you’re planning a summer picnic, a birthday party, or just treating yourself after a long day, these individual cheesecakes will impress your family and friends.
What makes the Individual Berry No Bake Cheesecakes truly special is their versatility and the vibrant flavors they showcase. The creamy cheesecake filling contrasts beautifully with the sweet-tart berries arranged on top. You will savor the delightful taste that encapsulates the essence of summer, making every bite nothing short of amazing. This guide will explore why this recipe stands out, how to prepare it, and tips for serving. Get ready to whip up these delicious desserts that are sure to leave everyone wanting more!
Why You’ll Love This Recipe
There are numerous reasons to fall in love with Individual Berry No Bake Cheesecakes. Here are just a few of the highlights:
1. No Baking Required – This recipe is perfect for those hot days when you don’t want to turn on the oven.
2. Quick and Easy – With minimal preparation time, these cheesecakes can be assembled in no time.
3. Perfect Servings – Individual portions mean no mess, and everyone gets their own delightful dessert.
4. Versatile Toppings – You can use any berries you desire, or even switch it up with other seasonal fruits.
5. Eye-Catching Presentation – The colorful berries on top add a stunning visual appeal to the dessert.
6. Make Ahead of Time – These cheesecakes can be made in advance, making them perfect for gatherings.
These factors alone make Individual Berry No Bake Cheesecakes a must-try, as they blend convenience with delightful flavors!
Preparation and Cooking Time
To create these scrumptious Individual Berry No Bake Cheesecakes, you’ll need approximately 2 hours, which consists of preparation and chilling time. Here’s a breakdown of that time:
– Preparation Time: 30 minutes
– Chilling Time: 1.5 hours
Keep in mind that chilling time is crucial for achieving the perfect cheesecake texture. Therefore, planning ahead will ensure you serve your cheesecakes at their best.
Ingredients
– 1 ½ cups graham cracker crumbs
– ½ cup unsalted butter, melted
– 2 cups cream cheese, softened
– 1 cup powdered sugar
– 1 teaspoon vanilla extract
– 1 cup heavy cream
– Fresh berries (strawberries, blueberries, raspberries, or blackberries)
– Mint leaves (for garnish, optional)
Step-by-Step Instructions
Creating these Individual Berry No Bake Cheesecakes is simple. Just follow these steps:
1. Prepare the Crust: In a medium bowl, combine the graham cracker crumbs and melted butter. Mix until the crumbs are fully coated.
2. Assemble the Crust: Evenly distribute the crumb mixture into individual serving cups or small jars. Press down firmly to form a base.
3. Cream Cheese Mixture: In a large mixing bowl, blend the softened cream cheese until smooth. Gradually add the powdered sugar and vanilla extract, mixing until combined.
4. Whip the Cream: In a separate bowl, whip the heavy cream until stiff peaks form.
5. Combine: Gently fold the whipped cream into the cream cheese mixture. Take care not to deflate the whipped cream for a light and airy texture.
6. Fill the Cups: Spoon or pipe the cheesecake mixture on top of the prepared crusts. Be sure to fill them to the top.
7. Chill: Cover the cheesecakes with plastic wrap and refrigerate for at least 1.5 hours to set.
8. Add Berries: Before serving, top each cheesecake with fresh berries. You can create a beautiful pattern or simply pile them on.
9. Garnish: For an extra touch, add a mint leaf on top of the berries.
Following these detailed steps will help you create an exquisitely indulgent dessert!
How to Serve
When it comes to serving your Individual Berry No Bake Cheesecakes, presentation and flavor are key. Consider the following tips:
1. Chill Thoroughly: Ensure that the cheesecakes have set properly in the fridge. The cooler, the better!
2. Use Attractive Serveware: Present the cheesecakes in clear cups or jars to showcase the colorful layers and toppings.
3. Accompaniments: Pair with a drizzle of fruit sauce or chocolate sauce for added flavor and decadence.
4. Fresh Mint: Adding a sprig of mint not only enhances the presentation but also adds an aromatic touch.
5. Offer Variety: If you made a few different flavors, present them together for a stunning dessert platter.
6. Encourage Seconds: These delightful little cheesecakes are so light and delicious that guests will want to come back for more!
By putting thought into how you serve your Individual Berry No Bake Cheesecakes, you will elevate the overall experience and create lasting memories for you and your guests.
Conclusion
Individual Berry No Bake Cheesecakes offer a delightful dining experience that exceeds expectations. Their amazing flavors and appealing presentation make them a dessert that everyone will love. Plus, the easy preparation and hands-off chilling time allow you to enjoy the company of friends and family without spending hours in the kitchen.
This wonderful recipe brings together a creamy, dreamy filling topped with fresh and vibrant fruits. Every bite is a burst of flavor that dances on your palate. Whether you’re making these for a special occasion or simply for a well-deserved treat, these cheesecakes are bound to become a favorite in your home. So go ahead, grab your ingredients, and create these incredible Individual Berry No Bake Cheesecakes today!
Additional Tips
– Use Fresh Berries: The flavor of your Individual Berry No Bake Cheesecakes will greatly benefit from the use of fresh, seasonal berries. They add vibrancy and freshness to the dessert.
– Experiment with Flavors: Consider adding a splash of lemon juice or zest to the cheesecake filling for a bright, citrusy twist. This can enhance the overall flavor profile.
– Use a Piping Bag: For a more elegant presentation, use a piping bag to fill the cups with the cheesecake mixture. This allows for a neat and professional look.
– Adjust the Sweetness: If you prefer a less sweet cheesecake, feel free to reduce the amount of powdered sugar in the filling to suit your taste.
Recipe Variation
Consider trying these fun variations on the classic Individual Berry No Bake Cheesecakes:
1. Chocolate Berry Cheesecakes: Add melted dark chocolate to the cream cheese mixture for a rich chocolate flavor. Top with raspberries for a perfect pairing.
2. Lemon Curd Cheesecakes: Incorporate lemon curd into the cheesecake filling for a zesty kick. Top with a mix of fresh berries for color and texture.
3. Nut Crust Option: For a gluten-free alternative, replace the graham cracker crumbs with finely crushed almonds or walnuts mixed with melted butter.
Freezing and Storage
– Storage: Keep your Individual Berry No Bake Cheesecakes covered in the refrigerator. They will stay fresh for up to 3 days.
– Freezing: These cheesecakes can be frozen, but they are best enjoyed fresh. If you choose to freeze them, wrap each cheesecake individually in plastic wrap and then in aluminum foil. They can last for up to 3 months in the freezer. Thaw in the refrigerator before serving.
Special Equipment
You might need a few simple kitchen tools to make your Individual Berry No Bake Cheesecakes an easy task:
– Mixing bowls: For preparing the crust and filling mixtures.
– Hand mixer or stand mixer: For blending the cream cheese and whipping the cream effectively.
– Measuring cups and spoons: To ensure accurate ingredient measurements.
– Individual serving cups or jars: Perfect for presenting your cheesecakes.
– Piping bag (optional): For easy filling of the cheesecake mixture into cups.
Frequently Asked Questions
Can I use frozen berries?
Yes, you can use frozen berries. Just make sure to thaw and drain excess liquid before using them as a topping to prevent the cheesecakes from becoming too watery.
How long will the cheesecakes stay fresh?
When stored in the refrigerator, they will remain fresh for about 3 days.
Can I replace the cream cheese?
Yes, you can use mascarpone cheese or a vegan cream cheese alternative for a different flavor or dietary need.
What can I use instead of graham cracker crumbs?
Crushed digestive biscuits, vanilla wafers, or any cookie of your choice can work well.
Do I have to chill them for the full 1.5 hours?
For best results, it’s advisable to chill them for the full time recommended to achieve the perfect texture.
Conclusion
Individual Berry No Bake Cheesecakes are a fantastic dessert choice, combining a creamy base with fresh, vibrant toppings. They are deliciously easy to prepare, making them ideal for any occasion. The ability to customize toppings and flavors ensures that you can cater to various tastes and preferences. Adding a personal touch to each cheesecake makes them even more special. So gather your ingredients and create these delightful treats that promise fresh flavors and an elegant presentation.

Individual Berry No Bake Cheesecakes: An Amazing Ultimate Recipe
- Total Time: 15 minute
Ingredients
– 1 ½ cups graham cracker crumbs
– ½ cup unsalted butter, melted
– 2 cups cream cheese, softened
– 1 cup powdered sugar
– 1 teaspoon vanilla extract
– 1 cup heavy cream
– Fresh berries (strawberries, blueberries, raspberries, or blackberries)
– Mint leaves (for garnish, optional)
Instructions
Creating these Individual Berry No Bake Cheesecakes is simple. Just follow these steps:
1. Prepare the Crust: In a medium bowl, combine the graham cracker crumbs and melted butter. Mix until the crumbs are fully coated.
2. Assemble the Crust: Evenly distribute the crumb mixture into individual serving cups or small jars. Press down firmly to form a base.
3. Cream Cheese Mixture: In a large mixing bowl, blend the softened cream cheese until smooth. Gradually add the powdered sugar and vanilla extract, mixing until combined.
4. Whip the Cream: In a separate bowl, whip the heavy cream until stiff peaks form.
5. Combine: Gently fold the whipped cream into the cream cheese mixture. Take care not to deflate the whipped cream for a light and airy texture.
6. Fill the Cups: Spoon or pipe the cheesecake mixture on top of the prepared crusts. Be sure to fill them to the top.
7. Chill: Cover the cheesecakes with plastic wrap and refrigerate for at least 1.5 hours to set.
8. Add Berries: Before serving, top each cheesecake with fresh berries. You can create a beautiful pattern or simply pile them on.
9. Garnish: For an extra touch, add a mint leaf on top of the berries.
Following these detailed steps will help you create an exquisitely indulgent dessert!
- Prep Time: 30 minutes
- Cook Time: N/A
Nutrition
- Serving Size: 6
- Calories: 270 kcal
- Fat: 17g
- Protein: 3g

