
Homemade Pierogi are a delightful way to experience the warmth and comfort of traditional Eastern European cuisine. These dumplings, filled with a variety of ingredients, are not just a dish; they are a culinary hug that brings families together. With their soft, chewy dough and delicious fillings, homemade pierogi can evoke wonderful memories of family gatherings and celebrations. Whether enjoyed as a main dish or a side, these pierogi are sure to impress everyone at your table.
If you’ve never had the pleasure of tasting homemade pierogi, you’re in for a real treat. The moment you take your first bite, you’ll experience the incredible combination of flavors and textures. Each dumpling is a little pocket of happiness, filled with ingredients that can range from savory potatoes and cheese to sweet fruits. The versatility of pierogi means there’s a filling for everyone!
In this guide, you’ll discover why making homemade pierogi is a must, how to prepare them from scratch, and tips for serving these delightful dumplings. So roll up your sleeves and get ready to create a dish that will be loved by friends and family alike!
Why You’ll Love This Recipe
Homemade pierogi are a dish that brings joy to the table for many reasons. Here are just a few:
1. Customizable Fillings: You can mix and match fillings to suit your taste. From classic potato and cheese to sauerkraut and mushroom, or even fruit fillings for dessert, there’s a combination for everyone.
2. Family Tradition: Making pierogi can be a bonding experience for families. It’s a wonderful way to pass down recipes and traditions through generations.
3. Freezer Friendly: Once you make a batch, you can freeze them for later use, making for quick meals in the future.
4. Comfort Food: There’s something incredibly satisfying about biting into a warm, hearty pierogi. They deliver a sense of comfort that’s hard to beat.
5. Perfect for Gatherings: Whether it’s a holiday, a family reunion, or just a cozy dinner, homemade pierogi are perfect for sharing.
6. Easy to Follow: The steps for making pierogi are straightforward, making it accessible for cooks of all skill levels.
With these advantages, it’s easy to see why homemade pierogi are adored by many. Each bite is a flavor-packed journey that can bring a smile to anyone’s face!
Preparation and Cooking Time
Making homemade pierogi does require some time and effort, but the results are worth it. Here’s a breakdown of the time you’ll need:
– Preparation Time: 1 hour
– Cooking Time: 30 minutes
– Total Time: 1 hour and 30 minutes
These times may vary depending on your experience and how many pierogi you’re making, but this should give you a good estimate to start.
Ingredients
– For the Dough:
– 3 cups all-purpose flour
– 1 large egg
– 1 teaspoon salt
– 1 cup warm water (more if needed)
– For the Potato and Cheese Filling:
– 2 cups mashed potatoes
– 1 cup shredded cheddar cheese
– 1 small onion, finely chopped
– 2 tablespoons butter
– Salt and pepper to taste
– For Serving:
– Sour cream
– Fresh chives or green onions, chopped
– Additional melted butter (optional)
Step-by-Step Instructions
Creating homemade pierogi is a rewarding experience. Follow these steps for perfect results:
1. Make the Dough: In a large bowl, combine flour and salt. Create a well in the center and add the egg. Gradually mix in warm water until a dough forms. Knead for about 5-7 minutes, until smooth. Cover and let it rest for 30 minutes.
2. Prepare the Filling: In a skillet, melt butter over medium heat. Add chopped onion and sauté until golden brown. In a bowl, combine mashed potatoes, cheddar cheese, sautéed onions, and season with salt and pepper to taste.
3. Roll Out the Dough: After the dough has rested, divide it into quarters. Roll out one quarter on a floured surface to about 1/8 inch thick. Keep the remaining dough covered to prevent it from drying out.
4. Cut the Dough: Use a round cutter or glass to cut out circles from the rolled dough, about 3 inches in diameter.
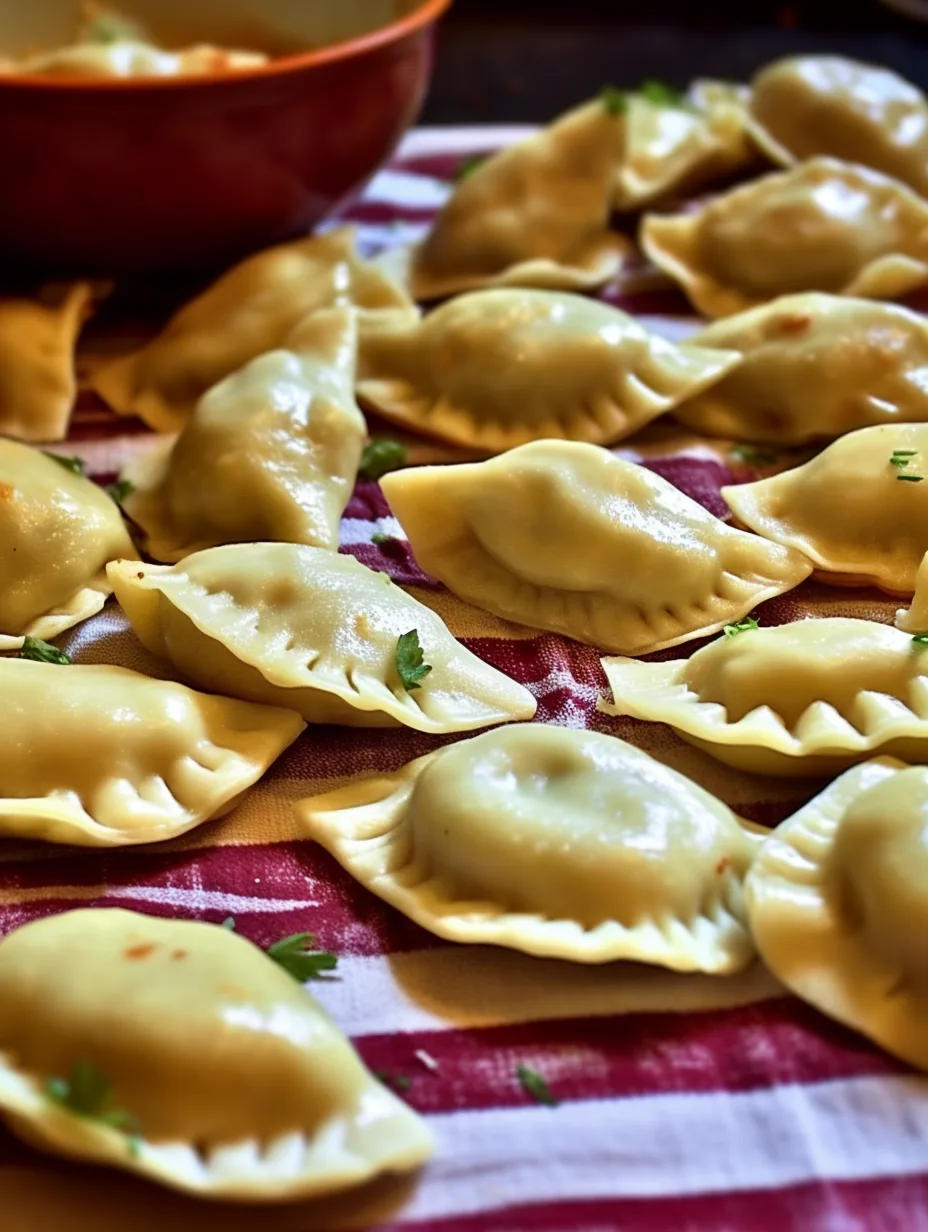
5. Fill the Pierogi: Place a teaspoon of the filling in the center of each circle. Fold the dough over to create a half-moon shape. Press the edges together firmly to seal, ensuring there are no air pockets.
6. Cook the Pierogi: Bring a large pot of salted water to a boil. Gently add the pierogi in batches (don’t overcrowd the pot). Cook until they float to the surface, about 3-4 minutes. Remove with a slotted spoon and drain.
7. Optional – Sauté the Pierogi: In a skillet, melt some butter. Add the boiled pierogi and sauté until golden and crispy on both sides.
8. Serve: Transfer the pierogi to a serving platter. Drizzle with melted butter and top with sour cream and chopped chives or green onions.
How to Serve
When it comes to serving homemade pierogi, presentation and accompaniments can enhance the experience:
1. Plate Beautifully: Arrange the pierogi neatly on a large serving platter. You can garnish with fresh herbs or a sprinkle of paprika for a pop of color.
2. Accompaniments: Serve with a generous dollop of sour cream on the side. You can also provide caramelized onions or crispy bacon bits for added flavor.
3. Beverage Pairing: Homemade pierogi pair well with a variety of beverages. Consider serving with a refreshing glass of iced tea, a light beer, or even a robust red wine.
4. Make It a Meal: To create a hearty meal, serve your pierogi alongside a green salad or roasted vegetables. This adds balance and elevates the overall dining experience.
5. Sharing is Caring: Encourage your guests to grab a pierogi and enjoy it with their favorite toppings. The interactive nature of serving pierogi makes it a fun dining experience!
By focusing on presentation and thoughtful accompaniments, your homemade pierogi will be a hit at any gathering. Enjoy the delicious flavors and the joy of sharing this incredible dish!
Additional Tips
– Use Fresh Ingredients: Fresh ingredients enhance the flavor of your pierogi. For instance, use freshly mashed potatoes and freshly grated cheese for a delightful taste.
– Don’t Rush the Dough: Allowing the dough to rest is crucial. This makes it easier to roll out and helps achieve the perfect texture.
– Seal Properly: Ensure that the edges of your pierogi are sealed tightly. This prevents them from opening during cooking.
– Experiment with Flavors: Don’t hesitate to try different herbs or spices in your filling for a unique twist.
Recipe Variation
Feel free to get creative with your pierogi! Here are some delicious variations to try:
1. Sweet Cheese Filling: Substitute the potato filling with a mixture of ricotta cheese, powdered sugar, and vanilla extract for a delightful dessert option.
2. Meat Filling: Use ground meat mixed with onions and spices for a hearty filling. Cook the meat beforehand to enhance the flavors.
3. Vegetable Medley: Use a mix of sautéed vegetables, such as spinach, mushrooms, and bell peppers, for a vegetarian option.
4. Herbed Potato Filling: Add fresh herbs like dill or chives to your potato filling for extra flavor.
Freezing and Storage
– Storage: Store cooked pierogi in an airtight container in the refrigerator for up to 3 days. This keeps them fresh and ready to reheat.
– Freezing: For longer storage, you can freeze uncooked pierogi. Place them on a baking sheet in a single layer until frozen, then transfer to a freezer bag. They will last for up to 3 months. When ready to cook, boil them straight from the freezer without thawing.
Special Equipment
To make the process of preparing homemade pierogi easier, consider having the following tools on hand:
– Rolling Pin: For rolling out the dough evenly.
– Dough Cutter: To easily cut circles from the rolled dough.
– Large Pot: A big pot is necessary for boiling the pierogi.
– Slotted Spoon: Useful for removing the pierogi from boiling water without breaking them.
– Skillet: For sautéing the pierogi if you choose to crisp them up after boiling.
Frequently Asked Questions
Can I make the dough ahead of time?
Yes, you can prepare the dough a day in advance. Just store it in the refrigerator, wrapped tightly.
What can I do if the dough is too sticky?
If the dough is sticky, gradually add a little more flour until it reaches the right consistency.
How do I know when my pierogi are cooked?
Pierogi are cooked when they float to the surface of the boiling water. Let them cook for an additional 1-2 minutes after they float.
Can I use store-bought dough?
While homemade dough is recommended for the best flavor and texture, you can use store-bought dough in a pinch.
What’s the best way to reheat pierogi?
To reheat, you can either boil them briefly or sauté them in a skillet with a little butter until heated through.
Conclusion
Homemade pierogi are not just a meal; they are a celebration of tradition and flavors. With their tender dough and endless filling possibilities, these dumplings provide comfort and joy to all who enjoy them. Whether you stick with the classic potato and cheese or venture into creative variations, homemade pierogi are sure to be a hit at any gathering. Embrace the process of making them, share them with loved ones, and enjoy the delicious results!

Homemade Pierogi: An Incredible Ultimate Recipe for 10 People
- Total Time: 1 hour 30 minutes
Ingredients
– For the Dough:
– 3 cups all-purpose flour
– 1 large egg
– 1 teaspoon salt
– 1 cup warm water (more if needed)
– For the Potato and Cheese Filling:
– 2 cups mashed potatoes
– 1 cup shredded cheddar cheese
– 1 small onion, finely chopped
– 2 tablespoons butter
– Salt and pepper to taste
– For Serving:
– Sour cream
– Fresh chives or green onions, chopped
– Additional melted butter (optional)
Instructions
Creating homemade pierogi is a rewarding experience. Follow these steps for perfect results:
1. Make the Dough: In a large bowl, combine flour and salt. Create a well in the center and add the egg. Gradually mix in warm water until a dough forms. Knead for about 5-7 minutes, until smooth. Cover and let it rest for 30 minutes.
2. Prepare the Filling: In a skillet, melt butter over medium heat. Add chopped onion and sauté until golden brown. In a bowl, combine mashed potatoes, cheddar cheese, sautéed onions, and season with salt and pepper to taste.
3. Roll Out the Dough: After the dough has rested, divide it into quarters. Roll out one quarter on a floured surface to about 1/8 inch thick. Keep the remaining dough covered to prevent it from drying out.
4. Cut the Dough: Use a round cutter or glass to cut out circles from the rolled dough, about 3 inches in diameter.
5. Fill the Pierogi: Place a teaspoon of the filling in the center of each circle. Fold the dough over to create a half-moon shape. Press the edges together firmly to seal, ensuring there are no air pockets.
6. Cook the Pierogi: Bring a large pot of salted water to a boil. Gently add the pierogi in batches (don’t overcrowd the pot). Cook until they float to the surface, about 3-4 minutes. Remove with a slotted spoon and drain.
7. Optional – Sauté the Pierogi: In a skillet, melt some butter. Add the boiled pierogi and sauté until golden and crispy on both sides.
8. Serve: Transfer the pierogi to a serving platter. Drizzle with melted butter and top with sour cream and chopped chives or green onions.
- Prep Time: 1 hour
- Cook Time: 30 minutes
Nutrition
- Serving Size: 10
- Calories: 200 kcal
- Fat: 6g
- Protein: 5g