
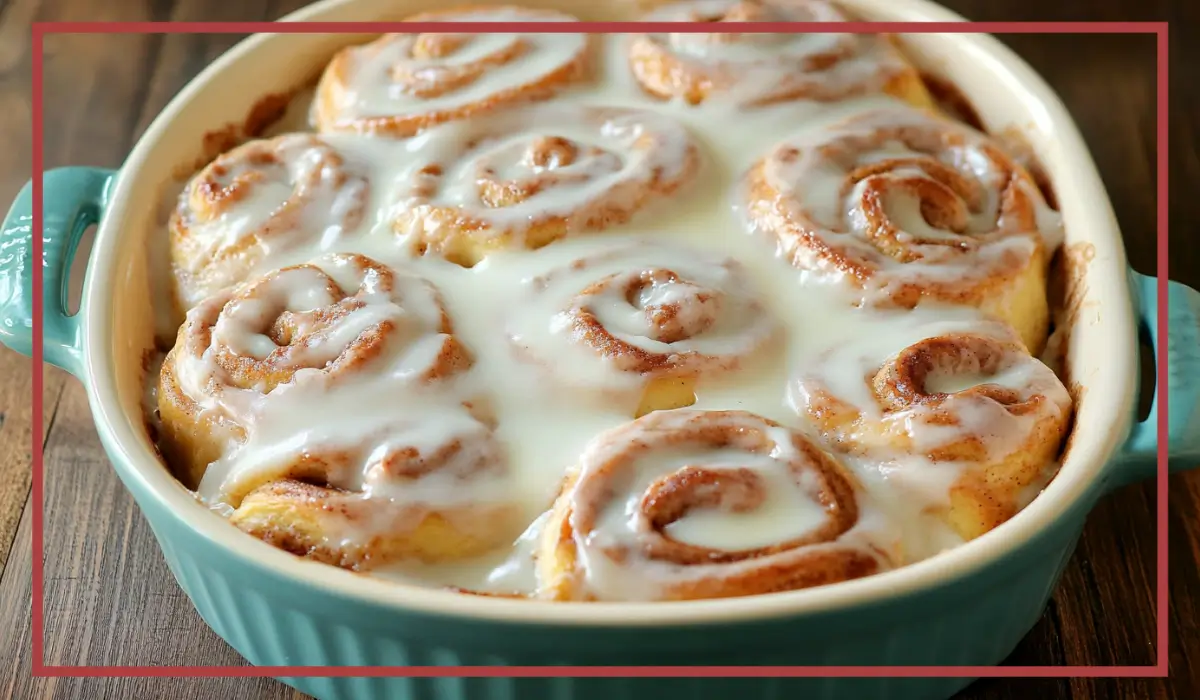
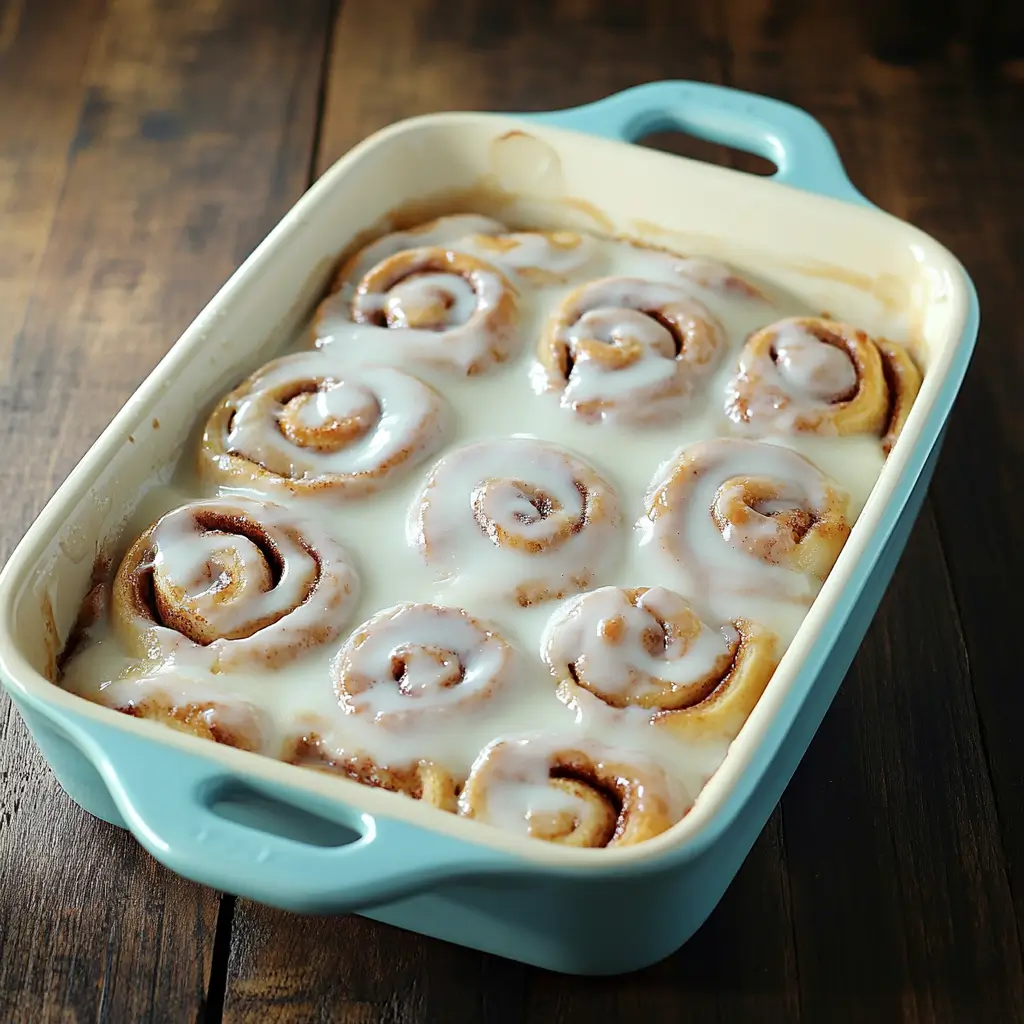
There’s something universally comforting about a warm Homemade cinnamon rolls. That soft, fluffy dough. The gooey, spiced cinnamon-sugar filling. The rich, tangy cream cheese frosting melting over the top, dripping into every swirl. It’s a treat that goes beyond taste—it’s about comfort, nostalgia, and joy all wrapped into one beautiful roll.
Baking cinnamon rolls at home might sound like a big project, but I promise it’s much more approachable than you think. With a few pantry staples and a little bit of time, you’ll have a pan of golden, homemade rolls that taste like they came straight from a bakery.
I still remember the first time I made these from scratch. I was a little intimidated by the yeast, unsure if the dough would rise, and fully convinced I’d mess something up. But once I pulled them from the oven—golden, fluffy, and already smelling like heaven—I was hooked. And after slathering on the cream cheese icing and tasting that first warm bite, I knew this would be a recipe I’d come back to again and again.
This recipe has become a tradition in my house, especially on cozy weekends or holiday mornings. It’s the kind of recipe that invites you to slow down, take your time, and enjoy the process. And the end result? Totally worth it. Soft, tender rolls with the perfect balance of sweetness, spice, and creaminess.
Whether you’re a seasoned baker or just starting out, these cinnamon rolls are simple enough to tackle with confidence. And once you do, I promise you’ll want to make them for every brunch, birthday, or just-because morning.
Why You’ll Love This Homemade cinnamon rolls Recipe
It’s Not Just a Cinnamon Roll, It’s an Experience
There are a lot of cinnamon roll recipes out there, but here’s what makes this one truly special: the texture, the flavor, and the ease. Let’s start with the dough—it’s soft, tender, and just the right amount of buttery. The combination of milk, egg, and melted butter gives it that rich flavor and light texture, while the touch of vanilla adds something a little extra to every bite.
Now let’s talk filling. We’re using a dreamy mixture of softened butter, brown sugar, white sugar, cinnamon, and a splash of vanilla. It spreads easily over the rolled-out dough, and once baked, it melts into those delicious swirls that make every bite feel like dessert.
And then comes the cream cheese icing. Oh yes. It’s thick, tangy, just sweet enough, and made with real cream cheese and powdered sugar. A little milk brings it to the perfect pourable consistency so that it can ooze into every warm crevice of the rolls.
This Homemade cinnamon rolls recipe is approachable and forgiving, which makes it great for beginners. You don’t need a stand mixer or any fancy tools—just a bowl, a spoon, and your hands. The dough comes together quickly, and there’s a short proof time so you’re not waiting around all morning.
You’ll love how these rolls make your kitchen smell like a bakery, how they look golden and beautiful straight from the oven, and most importantly, how they taste—soft and gooey on the inside, slightly crisp on the edges, and full of buttery, cinnamon sweetness.
Plus, these cinnamon rolls are incredibly versatile. Want to prep them the night before and bake them in the morning? Totally doable. Want to add chopped nuts or a sprinkle of cardamom? Go for it. This recipe is as adaptable as it is delicious.
Health Benefits of these Homemade cinnamon rolls
Sweet Doesn’t Have to Mean Unhealthy
While Homemade cinnamon rolls are undeniably a treat, that doesn’t mean they can’t have a few nutritional benefits, too—especially when made from scratch with whole ingredients.
Let’s start with cinnamon. This humble spice is more than just flavorful; it’s packed with antioxidants and has anti-inflammatory properties. Some studies even suggest cinnamon may help regulate blood sugar levels when consumed in moderation, which makes it a surprisingly smart choice for a sweet filling.
Next up is the dough. By making your own dough at home, you get to control what goes into it. That means no preservatives, artificial colors, or unpronounceable additives. The milk in the dough provides calcium and protein, and the egg adds a nice boost of additional protein and healthy fats.
The use of brown sugar in the filling adds depth of flavor while also providing small amounts of minerals like iron and potassium. And while sugar should always be enjoyed in moderation, using both white and brown sugars gives this recipe a rich taste without going overboard on sweetness.
Finally, the cream cheese frosting isn’t just for indulgence—it also offers calcium and a bit of protein. You can easily lighten it up by using reduced-fat cream cheese or cutting back slightly on the sugar without sacrificing that creamy texture.
Making these Homemade cinnamon rolls at home gives you the freedom to tweak ingredients to suit your nutritional needs. Use organic milk, swap in a plant-based butter, or experiment with a low-sugar glaze. You’re in control, which is one of the healthiest choices you can make in the kitchen.
Preparation Time, Servings, and Nutritional Information
Quick Prep, Big Reward
Preparation Time:
- Dough Prep: 20 minutes
- Rising Time: 10 minutes
- Assembly: 15 minutes
- Baking Time: 25 minutes
- Cooling + Frosting: 10 minutes
Total Time: ~1 hour 20 minutes
Servings:
- Makes 12 cinnamon rolls
Nutritional Information (per roll, with icing):
- Calories: 320
- Protein: 5g
- Carbohydrates: 44g
- Sugars: 24g
- Fat: 13g
- Saturated Fat: 7g
- Cholesterol: 45mg
- Sodium: 140mg
Keep in mind that these numbers can shift slightly based on the specific brands you use and any customizations you make.
Ingredients List of these Homemade cinnamon rolls
What You’ll Need
For the Dough:
- ½ stick unsalted butter (melted): Adds richness and flavor to the dough.
- ¾ cup milk (warm, around 100–110°F): Helps activate the yeast and tenderize the dough.
- ¼ cup granulated sugar: Feeds the yeast and sweetens the dough.
- 1 packet active dry yeast (about 2¼ teaspoons): The leavening agent that makes the dough rise.
- 1 egg: Adds structure and a touch of richness.
- ¼ teaspoon salt: Balances sweetness and enhances flavor.
- 1 teaspoon vanilla extract: Adds warmth and depth to the dough’s flavor.
- About 2½ cups all-purpose flour (added gradually): Provides structure and texture.
For the Cinnamon Filling:
- ½ stick unsalted butter (softened): Makes the filling creamy and spreadable.
- ½ cup brown sugar: Adds molasses richness and deep flavor.
- ½ cup granulated sugar: Balances the brown sugar with a lighter sweetness.
- 2 tablespoons cinnamon: The star of the show—warm, spicy, and comforting.
- 1 teaspoon vanilla extract: Enhances the flavor of the filling.
For the Cream Cheese Icing:
- 4 oz cream cheese (softened): Creamy, tangy base for the frosting.
- 1 cup powdered sugar: Sweetens and thickens the icing.
- 1 teaspoon vanilla extract: Adds flavor and warmth.
- 1–2 tablespoons milk: Adjusts the consistency so it’s perfectly pourable.
Step-by-Step Cooking Instructions
From Dough to Done – Every Step Explained
1. Activate the Yeast
Start by melting the butter and warming the milk together in the microwave until the mixture reaches around 100–110°F. This is the ideal temperature for activating yeast—warm but not hot. Stir in the granulated sugar and sprinkle the active dry yeast over the top. Give it a gentle mix, then cover with a towel and let it sit for 10 minutes. After this time, it should look frothy and bubbly. If not, your yeast may be expired or the milk was too hot or cold. Don’t skip this step—it’s key to soft, fluffy rolls.
2. Mix the Dough
To the frothy yeast mixture, add the egg, salt, and vanilla extract. Stir to combine. Now start adding the flour gradually, about ½ cup at a time. Stir until a soft, slightly sticky dough forms. You may not need the full 2½ cups—go by feel. Once the dough starts pulling away from the sides of the bowl, transfer it to a floured surface and knead it gently for a minute or two. Form it into a smooth ball.
3. First Proof
Place the dough ball into a greased bowl. Cover with a towel or plastic wrap, and place in a warm oven (turned off!) to rise for about 10 minutes. It won’t double in size during this short rise, but it will puff slightly and become easier to roll out.
4. Make the Filling
In a bowl, mix together the softened butter, brown sugar, white sugar, cinnamon, and vanilla. Stir until it becomes a creamy, spreadable mixture. This filling should be thick enough to stay in place when you spread it across the dough.
5. Roll and Fill the Dough
On a floured surface or pastry mat, roll the dough into a large rectangle—about 14 by 18 inches and ¼-inch thick. Try to keep it even so your rolls bake uniformly. Use a spatula or the back of a spoon to spread the cinnamon filling evenly over the dough, all the way to the edges.
6. Roll It Up
Starting from one of the short sides (the 14-inch side), roll the dough up tightly into a log. Take your time to keep the roll firm and even. Once it’s rolled, gently pinch the seam to seal.
7. Slice into Rolls
Use a serrated knife or unflavored dental floss to cut the log into 12 equal pieces. To use floss, slide it under the roll, cross the ends over the top, and pull in opposite directions for a clean cut.
8. Second Rise
Place the rolls into a greased 9×13 baking dish, leaving a little space between each one. Cover again and let them rest for about 20 minutes while you preheat the oven to 350°F. They’ll puff up slightly during this time, which helps them bake up fluffy and light.
9. Bake
Bake the cinnamon rolls in the preheated oven for 20–25 minutes, or until they’re lightly golden on top. The centers should be cooked through but still soft. Remove from the oven and allow to cool for about 10 minutes before frosting. This slight cooling helps the frosting stay creamy instead of melting into a glaze.
10. Make the Cream Cheese Icing
While the rolls are baking or cooling, beat the softened cream cheese, powdered sugar, vanilla extract, and 1 tablespoon of milk in a bowl until smooth and creamy. Add more milk if needed to get a spreadable consistency.
11. Ice the Rolls
Spread the icing generously over the warm rolls, letting it melt slightly into all those cinnamon-sugar crevices. You can go heavy or light depending on how sweet you want them. Personally, I say go all in.
How to Serve these Homemade cinnamon rolls
Making Your Cinnamon Rolls the Star of the Table
Serving these homemade cinnamon rolls is one of the best parts—they’re just so versatile and satisfying. Whether you’re planning a cozy family breakfast, a celebratory brunch, or a lazy Sunday treat, these rolls are guaranteed to bring smiles all around.
You can serve them straight from the pan, still warm and gooey, letting everyone dig in with a fork or gently peel their roll away from the batch. For a more elegant presentation, you can arrange them on a platter or individual plates and top with an extra swirl of icing or a light dusting of powdered sugar for that bakery-style finish.
To create a full breakfast spread, pair your cinnamon rolls with savory items like scrambled eggs, turkey sausage, or a fresh fruit salad. The sweetness of the rolls balances beautifully with the saltiness of savory sides, creating a well-rounded meal.
If you’re hosting brunch, consider making a “build-your-own” breakfast bar with eggs, toast, yogurt, and these cinnamon rolls as the centerpiece. They’ll stand out not only for their flavor but also for their beautiful spiral shape and the luscious layer of cream cheese frosting.
For a more casual moment, these rolls make a fantastic afternoon snack with a cup of tea or coffee. Warm one up in the microwave for about 20 seconds and enjoy it with your favorite hot drink. It’s the perfect pick-me-up.
You can also turn them into dessert. Add a scoop of vanilla ice cream on top of a warm roll and drizzle with caramel sauce for a decadent post-dinner treat. The contrast of hot and cold, creamy and sticky, is completely irresistible.
Pairing Suggestions
Complete the Meal With These Tasty Companions
While cinnamon rolls are undeniably the star of any breakfast or brunch table, the right pairings can enhance their flavor and create a more satisfying dining experience. Whether you’re going for sweet, savory, or a bit of both, these pairing ideas will help round out your meal.
Beverage Pairings:
Cinnamon rolls pair beautifully with a variety of beverages. For a classic choice, try them with a steaming cup of coffee. A bold roast helps cut through the richness of the icing and complements the warmth of the cinnamon. If you prefer something lighter, a chai latte or spiced herbal tea echoes the flavor profile of the rolls perfectly.
For a non-caffeinated option, warm milk or a golden turmeric latte can offer a comforting, mellow drink that won’t overpower the sweet flavors. And if you’re serving these for a brunch celebration, a cold glass of sparkling apple cider or a fruit punch works wonderfully for both kids and adults.
Savory Pairings:
Adding something savory to the mix helps balance the sweetness. Try pairing your cinnamon rolls with scrambled eggs, veggie omelets, or turkey bacon for a satisfying, protein-packed contrast. A tray of roasted potatoes or a simple frittata also complements the richness of the rolls without stealing the spotlight.
Fresh Additions:
A bowl of fresh berries, a sliced melon platter, or a citrus salad brightens the meal and refreshes the palate between bites of cinnamon goodness. The acidity and juiciness of fruit help cleanse your taste buds, keeping every bite of your roll just as exciting as the first.
Spreads and Extras:
If you’re serving a crowd and want to add variety, consider offering extra toppings or spreads alongside the rolls. Whipped butter, cinnamon honey, or flavored cream cheese give guests a fun way to customize their treat. You could even serve the icing on the side for those who prefer a lighter drizzle or want to dip as they eat.
Storage, Freezing & Reheating Instructions
Keeping Your Cinnamon Rolls Fresh and Delicious
One of the best parts about these cinnamon rolls is that they keep well, which means you can make them ahead, store leftovers, or freeze a batch for a later date. Here’s how to make the most of every roll—whether you’re baking for today or planning ahead for the week.
Storing Leftovers:
If you have leftover cinnamon rolls (which might be a big “if”), store them in an airtight container at room temperature for up to two days. If your kitchen is especially warm or humid, pop them in the fridge to keep the icing fresh. Stored properly, they’ll stay soft and delicious.
When refrigerating, place a piece of parchment paper or plastic wrap between the rolls and the lid of the container to prevent the icing from sticking. Let refrigerated rolls come to room temperature before eating, or warm them gently in the microwave to revive their gooey texture.
Freezing Before Baking:
If you want to prepare the rolls ahead of time, assemble them completely—roll, cut, and place them in the pan—but do not bake. Instead, cover the pan tightly with plastic wrap and a layer of foil, then freeze for up to one month.
When ready to bake, let the rolls thaw in the fridge overnight and rise in a warm spot for about 30–45 minutes before baking. This allows the yeast to re-activate and gives you that same fluffy texture as fresh dough.
Freezing After Baking:
You can also freeze baked cinnamon rolls (with or without icing). Wrap each roll individually in plastic wrap, then place them all in a freezer-safe bag or container. They’ll keep well for up to 3 months.
To reheat, unwrap a roll and warm it in the microwave for 30–45 seconds. For oven reheating, place the rolls in a baking dish, cover with foil, and warm at 300°F for about 10 minutes. If frozen with icing, the topping will melt a little, which actually makes them even gooier and more delicious.
Best Practices for Reheating:
Microwave: Quick and easy—just don’t overdo it or they can dry out. Start with 20 seconds and add time as needed.
Oven: Ideal for batch warming. Keeps the edges slightly crisp and the centers fluffy.
Avoid the toaster oven unless the rolls are un-iced, as the frosting may burn or bubble awkwardly.
Common Mistakes to Avoid
Bake With Confidence By Dodging These Pitfalls
Even though this recipe is beginner-friendly, a few common mistakes can trip up bakers. Luckily, most of them are easy to avoid once you know what to watch for.
1. Using Milk That’s Too Hot or Too Cold:
Yeast needs warmth to activate, but high heat can kill it. Aim for milk that’s warm to the touch—about 100–110°F. If you’re unsure, use a kitchen thermometer. If it feels like a comfortable bath, you’re probably in the right zone.
2. Skipping the Yeast Activation Step:
If your yeast doesn’t foam during activation, don’t continue. It’s a sign that your yeast may be dead or expired, and your rolls won’t rise. Always check that frothy layer before moving forward.
3. Adding Too Much Flour:
A common mistake is adding too much flour because the dough feels sticky. It should be tacky but not wet. Add flour gradually and stop once the dough pulls away from the bowl and is easy to handle. Too much flour leads to dense, dry rolls.
4. Overbaking:
Keep an eye on the oven during the last few minutes. Cinnamon rolls should be golden on top but still soft. Overbaking can cause the rolls to dry out, especially in the center. A baking time of 20–25 minutes is usually just right.
5. Frosting Too Soon or Too Late:
Icing hot rolls will cause the frosting to melt and slide off, while waiting too long can cause it to sit stiffly on top. Aim to frost the rolls while they’re still warm, but not piping hot—about 10 minutes out of the oven is perfect.
Pro Tips
Insider Tricks for the Best Ever Cinnamon Rolls
Use a Pastry Mat or Parchment Paper When Rolling Dough:
This helps prevent sticking and reduces the need for excess flour, which can make the dough dry. Plus, clean-up is easier.
Cut the Rolls with Floss for Perfect Spirals:
It might sound strange, but unflavored dental floss slices through the dough without squishing the rolls. Just loop it under the dough, cross the ends, and pull tight. No distortion, no mess.
Let the Dough Rest Before Rolling Out:
If the dough resists or shrinks when you try to roll it out, let it rest for 5–10 minutes. This relaxes the gluten and makes rolling easier.
Add a Pinch of Salt to the Icing:
Just a tiny bit of salt (less than ⅛ tsp) in the icing can enhance the flavor and cut through the sweetness, balancing the taste beautifully.
Double the Filling for Extra Gooey Rolls:
If you’re a fan of extra sticky, sweet centers, go ahead and double the filling recipe. Just be prepared for slightly messier—but ultra delicious—results.
Frequently Asked Questions (FAQs)
Your Top Questions Answered in One Place
When it comes to homemade cinnamon rolls, questions are totally normal—especially if you’re baking with yeast for the first time or trying to get that perfect bakery-style result. Here are some of the most common questions I hear from fellow bakers, along with helpful answers and tips to make the process easier and stress-free.
1. Can I use instant yeast instead of active dry yeast?
Yes, absolutely. If you’re using instant yeast, you can skip the proofing step and add it directly to the flour. However, I still like to mix it with the warm milk and sugar because it ensures the yeast is active and gives you that nice bubbly start. Just remember that instant yeast may rise a little faster, so keep an eye on your dough.
2. How do I know when the dough has enough flour?
Great question. Dough should be soft and slightly tacky but not overly sticky. If it sticks to your hands like glue, you need more flour. If it’s dry or cracking, you’ve gone too far. The best approach is to add the flour slowly—start with 2 cups and add 1 tablespoon at a time until it comes together.
3. Can I make these ahead of time?
Yes, you can prepare the cinnamon rolls the night before, cover them tightly in the baking dish, and refrigerate overnight. In the morning, let them sit at room temperature for about 45 minutes to an hour before baking. This is a great option for special occasions or holiday mornings when you want a no-fuss breakfast.
4. Why didn’t my dough rise?
This usually happens when the yeast is expired or was killed by milk that was too hot. Always check the temperature of your milk and make sure your yeast is fresh. If your dough doesn’t rise at all after 10–15 minutes in a warm place, it’s best to start over with new yeast.
5. What’s the best way to reheat leftover cinnamon rolls?
Microwaving is the easiest method—just warm a roll for about 20–30 seconds until it’s soft and warm. If you’re reheating a larger batch, cover them with foil and warm in a 300°F oven for 10 minutes. Add a bit of extra icing after reheating if desired.
6. Can I freeze the dough?
Yes, you can freeze unbaked rolls after assembling them. Wrap the pan tightly in plastic and foil, then freeze. When ready to bake, thaw overnight in the fridge, then allow them to come to room temperature and rise before baking as usual.
7. What can I substitute for cream cheese in the icing?
If you don’t have cream cheese, try using Greek yogurt or mascarpone. Even a simple glaze of powdered sugar, vanilla, and milk will work in a pinch. The cream cheese adds tang, but there are plenty of delicious alternatives.
8. Can I make these dairy-free?
Definitely. Use plant-based milk (like almond or oat), a dairy-free butter alternative, and vegan cream cheese for the icing. The texture will still be soft and the flavor amazing.
9. How do I keep the filling from leaking out during baking?
Rolling the dough tightly helps, but it’s normal for some filling to bubble out—especially with extra gooey versions. Using softened (not melted) butter in the filling mixture helps it stay put. Also, make sure the log seam is sealed well before slicing.
10. Can I add nuts, raisins, or other mix-ins?
Absolutely. Finely chopped pecans or walnuts make a great addition to the filling. Raisins, dried cranberries, or even mini chocolate chips can be added too. Just make sure they’re evenly distributed across the filling before rolling up the dough.
Conclusion & Call to Action
Ready to Bake the Best Cinnamon Rolls of Your Life?
There’s just something so deeply satisfying about pulling a tray of homemade cinnamon rolls out of the oven. The smell alone is enough to stop anyone in their tracks, and that first bite—warm, soft, sweet, and just a little gooey—is the kind of comfort we all need now and then.
Whether you’re baking these for a special brunch, a weekend treat, or just because you want to make your kitchen smell amazing, this recipe is designed to deliver. It’s simple enough for beginners and flexible enough for experienced bakers to customize and make their own. You don’t need a stand mixer or any fancy equipment—just a little time, a warm oven, and maybe some eager taste testers hanging around your kitchen.
My favorite thing about these cinnamon rolls, though, isn’t just how delicious they are. It’s the ritual of making them—the measuring, mixing, rolling, and frosting. It’s slowing down for a moment and creating something from scratch that brings people together. Whether it’s breakfast with your family, brunch with friends, or a quiet solo treat, these cinnamon rolls always feel like a celebration.
Now it’s your turn. I hope you give this recipe a try and that it becomes a favorite in your home, just like it is in mine. When you do, I’d love to hear how it turned out for you. Leave a comment, share a photo, or tag me on social media so I can see your beautiful cinnamon swirls in all their glory.
Happy baking—and don’t forget to save one roll for yourself before they disappear. You’ve earned it.
Print
Homemade Cinnamon Rolls with Cream Cheese Frosting
- Total Time: 1 hour 20 minutes
- Yield: 12 cinnamon rolls 1x
- Diet: Vegetarian
Description
Soft, gooey, and packed with warm cinnamon-sugar filling, these homemade cinnamon rolls are topped with a rich cream cheese frosting and perfect for breakfast, brunch, or dessert.
Ingredients
-
Dough:
-
½ stick unsalted butter (melted)
-
¾ cup warm milk (100–110°F)
-
¼ cup granulated sugar
-
1 packet active dry yeast (2¼ tsp)
-
1 egg
-
¼ tsp salt
-
1 tsp vanilla extract
-
~2½ cups all-purpose flour
-
-
Cinnamon Filling:
-
½ stick unsalted butter (softened)
-
½ cup brown sugar
-
½ cup granulated sugar
-
2 tbsp cinnamon
-
1 tsp vanilla extract
-
-
Cream Cheese Icing:
-
4 oz cream cheese (softened)
-
1 cup powdered sugar
-
1 tsp vanilla extract
-
1–2 tbsp milk (for consistency)
-
Instructions
-
Mix warm milk and melted butter with sugar, then stir in yeast. Let sit 10 minutes.
-
Add egg, salt, and vanilla. Gradually add flour and mix to form dough. Knead gently.
-
Cover and let rise in a warm place for 10 minutes.
-
Mix filling ingredients into a spreadable paste.
-
Roll dough into a rectangle, spread filling, roll tightly, and cut into 12 pieces.
-
Place in greased baking dish, let rest, then bake at 350°F for 20–25 minutes.
-
Beat icing ingredients until smooth and spread over warm rolls.
Notes
-
Ensure yeast is active and foamy before proceeding.
-
For even slices, use unflavored dental floss.
-
Let rolls cool for 10 minutes before icing.
-
Can be prepped ahead and baked the next day.
-
Freeze unbaked or baked rolls for later enjoyment.
- Prep Time: 45 minutes
- Cook Time: 25 minutes
- Category: Breakfast / Dessert
- Method: Baking
- Cuisine: American