
There’s just something magical about a flaky, buttery pinwheel that’s still warm from the oven. You know the kind—crispy on the outside, melty on the inside, and packed with layers of savory flavor that hit all the right notes. These Ham and Cheese Pinwheels made with crescent roll dough are exactly that kind of treat. They’re simple to make, quick to bake, and they vanish in no time because everyone—yes, everyone—loves them.
I first made these pinwheels on a whim during a weekend get-together. I had a can of crescent dough in the fridge, some leftover deli ham, and a few slices of Swiss cheese. I rolled them up with a smear of Dijon mustard, baked them until golden and bubbly, and just like that—my kitchen turned into a little bakery of savory perfection. The best part? I barely spent 15 minutes prepping.
What makes this recipe so special is its versatility. Whether you’re planning a brunch, a lunchbox surprise, a party appetizer, or even a lazy dinner, these pinwheels rise to the occasion. You can swap out the cheese, switch up the seasoning, or even go full vegetarian with your fillings. And yet, every version delivers that same warm, melty satisfaction.
They’re also incredibly beginner-friendly. No fancy skills required—just roll, slice, and bake. If you’ve never made pinwheels before, you’re in for a very fun (and rewarding) surprise. And if you’re a seasoned home cook, you’ll appreciate how fast and flexible this recipe is. Plus, the ingredients are all things you can find at any grocery store, which means no extra errands or complicated prep.
So whether you’re craving a comforting snack or need something crowd-pleasing and easy, this recipe is here to save the day. Let’s dive into the full breakdown and make these savory little spirals the star of your next meal or get-together.
Why You’ll Love This Recipe
If you’re looking for a go-to snack or appetizer that never fails, this ham and cheese pinwheel recipe checks all the boxes. It’s the kind of recipe you keep coming back to because it’s just that good—and that easy.
First and foremost, the flavor combination is a classic for a reason. The saltiness of the ham, the gooey melt of the cheese, the slightly tangy Dijon mustard, and that golden crescent dough all come together in a bite that’s both comforting and addictive. And if you’re not into mustard, no worries—it’s completely optional. You can go with mayo, honey mustard, or leave it out entirely. The base flavors hold strong.
One of the top reasons people love this recipe is because of how incredibly simple it is. Crescent roll dough makes the process effortless. You don’t need to worry about making pastry from scratch or fussing over multiple steps. Just unroll, layer, roll up, slice, and bake. That’s it. You get a tray of hot, fresh, cheesy pinwheels in under 30 minutes from start to finish.
Another great thing about these pinwheels is how versatile they are. Want to make them spicy? Add some pepper jack or a few jalapeño slices. Need a vegetarian version? Swap the ham for sautéed mushrooms or spinach. Have picky eaters? Go mild with cheddar and turkey. You can customize them to suit just about any palate or dietary need.
They’re also great for so many occasions. Think brunch tables, potlucks, party trays, school lunches, or even a quick dinner with a salad on the side. They reheat well, freeze beautifully, and disappear fast, which makes them a total winner for meal prep and leftovers.
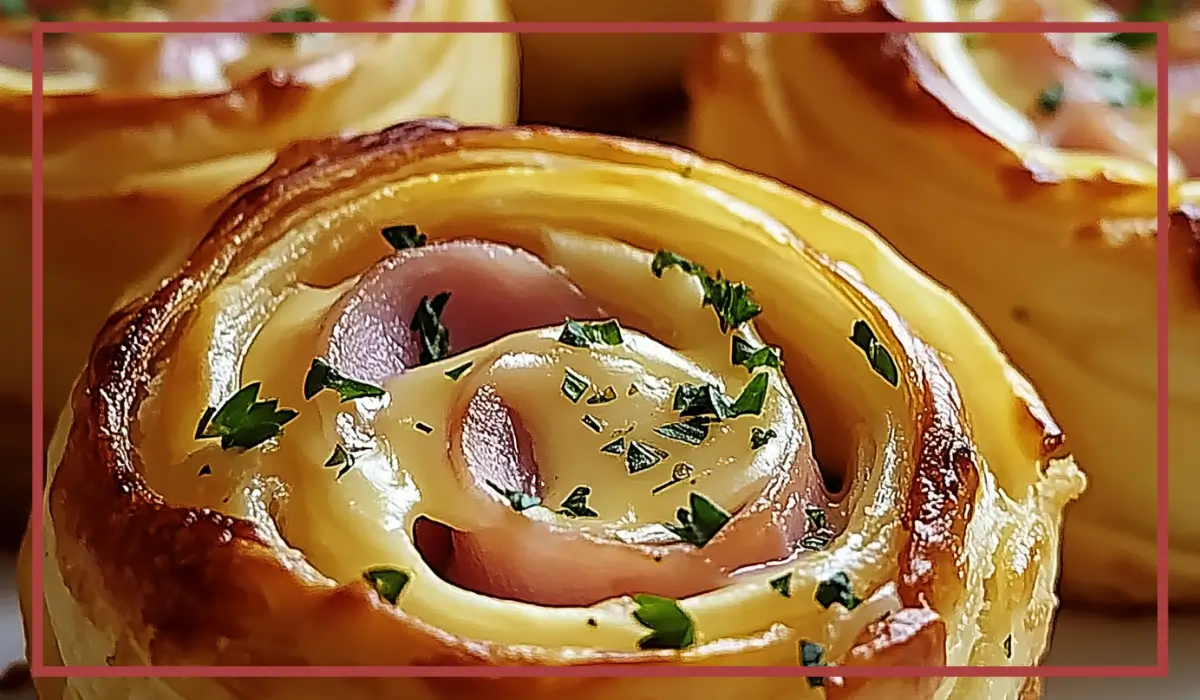
Lastly, they look beautiful. That golden spiral of melty cheese and savory meat baked into flaky pastry is the kind of thing that makes people think you spent way more time and effort than you actually did. So go ahead and impress your guests—or yourself—with something that tastes like it came from a bakery, but was actually whipped up in your own kitchen.
Health Benefits
While these pinwheels fall under the comfort food category, they can still be part of a balanced and satisfying diet, especially when made with a few smart ingredient choices. You don’t have to sacrifice flavor to enjoy something that fits into your health goals.
Let’s start with protein. Thanks to the ham and cheese, each pinwheel delivers a decent amount of protein. Protein is essential for muscle repair, energy, and keeping you full longer, making these pinwheels a more satisfying option than a bag of chips or sugary snacks.
The choice of cheese also plays a role. Swiss cheese, for instance, is lower in sodium and fat than some other cheeses and is a good source of calcium, which supports bone health. You can also swap in mozzarella for lower fat content or go with sharp cheddar if you want more flavor from a smaller amount.
Crescent roll dough is definitely a comfort-food element, but it doesn’t mean you’re off-track. Paired with lean deli ham and a moderate amount of cheese, it becomes part of a sensible portion. You can also opt for whole wheat pastry dough if you’re looking for more fiber, or use puff pastry for a special occasion treat.
And let’s talk about the optional additions—Dijon mustard, Italian herbs, and garlic powder. Dijon adds flavor without extra fat or sugar, and herbs like oregano, thyme, and basil offer antioxidants and anti-inflammatory compounds. Garlic powder isn’t just tasty—it can also support immune function.
Finally, making these at home gives you full control over the ingredients. You can avoid preservatives, adjust salt levels, and choose quality proteins and cheeses. Unlike pre-packaged snacks, you know exactly what’s going into your food.
So while these pinwheels are deliciously indulgent, they can absolutely be enjoyed as part of a thoughtful, nourishing approach to eating. Add a side salad or some raw veggies for a more complete meal, and you’ve got yourself a well-rounded plate of goodness.
Preparation Time, Servings, and Nutritional Information
Before jumping into the ingredients and instructions, let’s quickly look at the practical side of this recipe. It’s always helpful to know how much time and how many people it’ll serve so you can plan accordingly.
Total Prep and Cooking Time:
Prep time: 10–15 minutes
Baking time: 12–15 minutes
Total time: Around 25–30 minutes
Servings:
This recipe yields approximately 8–10 pinwheels, depending on how thick you slice them. It’s perfect for serving 4 people as a snack or 2–3 as a light meal. You can easily double or triple the batch for larger gatherings.
Nutritional Information (per serving – approx. 2 pinwheels):
Calories: ~250 kcal
Protein: 12g
Carbohydrates: 18g
Fat: 15g
Sodium: 600mg
Calcium: 15% DV
Of course, these values may vary depending on the type of cheese and ham you use, as well as whether you include optional ingredients like butter or mustard. If you’re watching your intake, opt for lower-sodium ham and reduced-fat cheese, and use a light brush of butter rather than a full tablespoon.
Now that you know what to expect time-wise and nutrition-wise, let’s gather everything you’ll need for these dreamy, cheesy pinwheels.
Ingredients List
Here’s the full breakdown of what you’ll need to make these ham and cheese pinwheels. Every ingredient serves a purpose, and you probably already have most of them on hand.
1 (8-ounce) can refrigerated crescent roll dough
This is the base of your pinwheels. Crescent dough is light, flaky, and bakes up golden and soft with the perfect amount of crunch on the edges. You can also use puff pastry for an even flakier, crispier result.
8 slices of deli ham, thinly sliced
Ham adds that savory, salty flavor that balances perfectly with the cheese. Go for thin slices so the dough rolls easily. Turkey ham or smoked chicken also works well if you want to switch it up.
8 slices of Swiss cheese (or cheddar, mozzarella, pepper jack, etc.)
Swiss is a classic here because of its mild, nutty flavor and meltability. If you’re a fan of sharper or more flavorful cheeses, try cheddar or pepper jack. Mozzarella works great for a gooey, kid-friendly version.
2 tablespoons Dijon mustard (optional)
This adds a tangy layer that cuts through the richness of the cheese. Not everyone loves mustard, so you can skip it or replace it with honey mustard, mayo, or even a thin layer of pesto for a fun twist.
1 tablespoon melted butter
Brushed on top for that golden finish and a little extra richness. It helps the seasonings stick and gives a beautiful bakery-style look.
1 teaspoon Italian seasoning (or poppy seeds, optional)
This brings a boost of herbal aroma and depth. You can also go classic with just poppy seeds or try everything bagel seasoning for a more modern flavor.
½ teaspoon garlic powder (optional)
A little sprinkle gives extra flavor and warmth. You can skip it, but it definitely adds something special.
Step-By-Step Cooking Instructions
Making these ham and cheese pinwheels is wonderfully straightforward, and with just a few simple steps, you’ll have warm, cheesy spirals ready to serve. The key is to work carefully when rolling and slicing to ensure your pinwheels stay tightly packed and bake evenly. Let’s walk through each part of the process in detail, from prep to presentation.
Step 1: Preheat and Prepare Your Baking Surface
Before you start working with the dough, set your oven to 375°F (190°C). It’s important to let it fully preheat while you prep so that the pinwheels bake evenly and puff up properly.
Line a baking sheet with parchment paper to prevent sticking and make cleanup easier. If you don’t have parchment paper, you can lightly grease the sheet with oil or butter, but parchment gives the best results for even browning.
Step 2: Roll Out the Crescent Dough
Unroll the can of refrigerated crescent dough onto a clean surface. It will likely come in triangle segments with perforated seams. Use your fingers to gently press the seams together and flatten the dough into a single, even sheet.
If your kitchen is warm or the dough feels too soft, place it in the fridge for 5–10 minutes before working with it. This helps keep the dough firm, making it easier to roll and slice later.
You can also use a rolling pin to gently roll the dough into a more rectangular shape. Aim for an even thickness throughout—about ¼ inch is perfect.
Step 3: Spread the Sauce (Optional)
If you’re using Dijon mustard, now’s the time to spread it. Use a spoon or pastry brush to apply a thin, even layer across the surface of the dough. Be careful not to use too much, as it can make the dough slippery and harder to roll.
You can substitute or skip the mustard depending on your taste preferences. Honey mustard adds a bit of sweetness, mayonnaise gives a creamy richness, and pesto brings a herby depth. Each option adds its own unique character to the final dish.
Step 4: Layer the Ham and Cheese
Once your dough is prepped and your spread is on, begin layering the ham slices evenly over the entire surface of the dough. Slightly overlap each piece so that every bite is packed with flavor.
Next, layer on the cheese slices. Place them directly over the ham, again slightly overlapping. You can use Swiss for a mild, nutty taste, cheddar for sharpness, mozzarella for gooeyness, or pepper jack for a spicy kick. The key is to ensure full coverage from edge to edge without stacking the slices too thickly.
If you’re feeling adventurous, you can also sprinkle in some extras here—think thin slices of tomato, a handful of baby spinach, or even a few caramelized onions. Just don’t overload the dough, or it might tear when you roll it up.
Step 5: Roll the Dough Tightly
Starting from the long edge of the rectangle, begin rolling the dough tightly into a log. Take your time and roll as evenly as possible to ensure the spiral effect stays intact. Gently press as you go to keep the filling secure and the dough tight.
If any cheese or ham peeks out the sides, don’t worry. Just tuck it in or press the edge of the dough to seal it. Once you’ve reached the end, press the seam gently to seal the log.
If the dough feels very soft or warm at this stage, place the log in the fridge for 10 minutes before slicing. This firms it up and helps you get clean, even pinwheels.
Step 6: Slice Into Pinwheels
Using a sharp knife (a serrated bread knife works well here), slice the log into 1-inch thick rounds. You should end up with about 8 to 10 pinwheels, depending on your roll’s length and how thick you slice them.
To prevent squishing the dough as you cut, use a gentle sawing motion and let the knife do the work. If the dough drags or tears, clean your knife between cuts.
Place each pinwheel flat on your prepared baking sheet, leaving at least an inch between each one so they have room to puff up and expand during baking.
Step 7: Add Seasonings and Butter
In a small bowl, melt 1 tablespoon of butter. Brush the tops of each pinwheel lightly with the melted butter. This adds flavor, helps with browning, and gives the pinwheels a glossy finish.
Sprinkle the tops with Italian seasoning, garlic powder, or poppy seeds—whatever suits your taste. This extra touch enhances the look and flavor, making your pinwheels feel even more special.
For a more elevated finish, consider brushing with egg wash instead of butter (1 beaten egg with 1 tablespoon of water). This gives a shinier, bakery-style crust.
Step 8: Bake Until Golden
Place the baking sheet on the center rack of your preheated oven. Bake the pinwheels for 12 to 15 minutes, or until they are golden brown on top, puffed up, and the cheese is melted and bubbly.
Keep an eye on them during the last few minutes, as oven temperatures can vary. If your pinwheels are browning too quickly, loosely tent them with foil to prevent over-browning.
If you want an extra crispy finish, switch to broil for the last 1–2 minutes of baking. Just be sure to watch closely so they don’t burn.
Step 9: Let Them Cool Slightly
Once the pinwheels are out of the oven, let them cool for about 3 to 5 minutes on the baking sheet. This helps the cheese set slightly and makes them easier to handle.
Serve warm, either straight from the tray or arranged on a platter with dipping sauces on the side. Ranch dressing, honey mustard, or marinara sauce all pair beautifully.
That’s it—you’ve made hot, cheesy, flaky ham and cheese pinwheels with barely any effort. Whether you serve them fresh or pack them up for later, they’re sure to be a hit every time.

How to Serve these Ham and cheese pinwheels
These ham and cheese pinwheels are delicious enough to enjoy straight out of the oven, but they can also be dressed up in so many fun and creative ways depending on the occasion. Here are a few favorite ways to serve them that will elevate their appeal even more.
For casual get-togethers or family nights, serve them on a wooden board alongside a few dipping sauces. Think of a mini snack board with ranch, Dijon, or honey mustard. Add some crunchy veggies like carrots, celery, or cucumber slices to round things out.
If you’re offering them as part of a brunch spread, pair them with scrambled eggs, roasted potatoes, and a simple fruit salad. The pinwheels bring that savory, cheesy element that complements lighter sides beautifully.
They also work as a light lunch or dinner when served with a fresh green salad. Try an arugula salad with a lemon vinaigrette or a simple garden salad with cucumbers, tomatoes, and a sprinkle of feta cheese.
For kids, these are great finger foods. Serve them with apple slices or grapes for a quick after-school snack or school lunchbox addition. They’re soft, flavorful, and easy for little hands to hold.
And if you’re making these for a party, consider doubling the recipe and placing them on a warming tray so guests can grab them while mingling. They’re the kind of appetizer that disappears fast, so don’t be surprised if your tray empties before you can even blink.
Pairing Suggestions of these Ham and cheese pinwheels
To make these pinwheels part of a well-balanced meal or a festive spread, pair them with sides and drinks that complement their rich, cheesy flavor. The goal is to create harmony—think light, crisp textures and flavors that contrast the warm, melty center of each roll.
For a complete lunch or dinner, start with a salad. A citrusy kale salad with oranges and almonds works beautifully. Or go with a classic Caesar salad, adding croutons for crunch and a zesty dressing to cut through the richness of the cheese and ham.
Roasted or grilled vegetables are also a great choice. Roasted broccoli, asparagus, or brussels sprouts bring a delicious earthiness that plays well with the pinwheels’ savory notes.
If you’re serving them during a brunch or breakfast-for-dinner setup, add scrambled eggs, roasted potatoes, and fresh berries. The pinwheels act as the savory centerpiece around which everything else falls into place.
For beverages, pair with sparkling water flavored with citrus or herbs. Lemon-lime, cucumber-mint, or grapefruit-rosemary waters are all refreshing and help cleanse the palate.
If you’re planning a more indulgent pairing, go for fresh juices like apple cider in fall or watermelon juice in summer. For kids, serve with milk or a fruit smoothie for a filling combo.
By pairing smartly, you can turn these easy pinwheels into a well-rounded experience that feels thoughtful and satisfying. Whether you’re going for casual or fancy, there’s a perfect match out there for every bite.
Storage, Freezing & Reheating Instructions
One of the best things about these ham and cheese pinwheels—aside from how quickly they disappear—is how well they store. Whether you’re making a batch in advance for a party or stashing leftovers for later, these little spirals hold up beautifully with the right storage methods.
Storing Leftovers
If you have any leftovers (which is a big if), allow the pinwheels to cool completely before storing. Place them in an airtight container and refrigerate. They’ll stay fresh for up to 3 days in the fridge.
To keep them from getting soggy, it helps to place a paper towel at the bottom of the container to absorb any excess moisture. You can also layer another sheet of paper towel between layers if you’re stacking them.
Freezing for Later
These pinwheels are totally freezer-friendly, which makes them perfect for meal prepping or having an easy appetizer ready at a moment’s notice. To freeze, first allow the pinwheels to cool completely. Then, arrange them in a single layer on a baking sheet and freeze for 1–2 hours until solid. Once frozen, transfer them to a freezer-safe container or a resealable freezer bag. Be sure to label them with the date.
They can be frozen for up to 3 months without losing their flavor or texture. When you’re ready to enjoy them again, there’s no need to thaw first.
Reheating Instructions
To reheat refrigerated pinwheels, place them on a baking sheet and warm them in a preheated oven at 350°F (175°C) for about 8–10 minutes. This brings back their crispiness without overcooking the filling. Avoid using the microwave if possible, as it can make the dough soggy. If you must, microwave them in 20-second intervals until warm, ideally with a cup of water in the microwave to add moisture.
For frozen pinwheels, you can reheat directly from frozen. Bake in a 350°F (175°C) oven for 15–18 minutes or until heated through and the cheese is bubbly again. If they begin to brown too quickly, cover loosely with foil.
With these storage and reheating tips, you’ll always have a cheesy, savory snack just minutes away, whether you’re feeding a crowd or treating yourself on a quiet evening.
Common Mistakes to Avoid in these Ham and cheese pinwheels
Even with a simple recipe like this, there are a few pitfalls that can lead to less-than-perfect pinwheels. Don’t worry—we’ve all been there. Here’s what to watch out for, and how to avoid the most common mistakes.
Rolling the Dough Too Tightly or Loosely
If you roll the dough too tightly, the filling may squeeze out the sides during baking. If it’s too loose, the spirals may unravel or bake unevenly. Aim for a snug, gentle roll—tight enough to hold the shape, but not so tight that everything gets compressed.
Overloading the Fillings
It’s tempting to pile on extra cheese or ham, but overfilling makes the dough harder to roll and can lead to tearing. Stick to a single, even layer of each filling to get the perfect balance between structure and flavor.
Not Sealing the Dough Edges
Make sure to press the edge of the dough firmly into the roll to seal it. If the edge isn’t sealed, the pinwheel can come undone while baking, and you’ll lose that pretty spiral shape.
Using Wet Ingredients
Watery fillings—like wet spinach or juicy tomatoes—can make the dough soggy. If you’re using any ingredients that release moisture, be sure to pat them dry first or sauté them briefly to reduce water content.
Cutting with a Dull Knife
A dull knife will squash the dough and ruin your pinwheel shape. Use a sharp, serrated knife for the cleanest cuts, and wipe it between slices if things start to get sticky.
By being mindful of these small but important details, you’ll end up with picture-perfect pinwheels every time—crispy, golden, cheesy, and irresistible.
Pro Tips of these Ham and cheese pinwheels
Want to take your ham and cheese pinwheels to the next level? These tried-and-true pro tips will help you elevate both the flavor and the presentation, whether you’re cooking for a crowd or just for fun.
Chill the Dough Before Slicing
Once you’ve rolled your dough into a log, pop it into the fridge for about 10–15 minutes before slicing. This makes it easier to cut neat rounds without the dough becoming sticky or losing its shape.
Use Parchment for Even Baking
Always bake pinwheels on parchment paper. It prevents sticking, promotes even browning, and makes cleanup a breeze. Plus, the bottoms get beautifully crisp without overbaking.
Try Different Cheese Combinations
You don’t have to stick to just one cheese. Combining a gooey cheese like mozzarella with a sharper cheese like cheddar creates an irresistible flavor blend. Add a sprinkle of Parmesan on top for a savory kick.
Don’t Skip the Butter Brush
Brushing the tops with butter before baking helps them brown evenly and adds an extra layer of flavor. For a richer, golden finish, you can use an egg wash instead (1 egg beaten with 1 tablespoon of water).
Add a Dipping Station
If you’re serving these at a gathering, create a little dipping station with a variety of sauces. Try honey mustard, ranch, spicy sriracha mayo, or even a homemade herbed yogurt dip. It adds an interactive and fun element to your spread.
With these simple upgrades, you’ll turn an already great snack into a show-stopping appetizer that gets rave reviews every time.
Frequently Asked Questions (FAQs)
These ham and cheese pinwheels are pretty straightforward, but a few common questions come up often. Here are the answers you need to feel completely confident as you bake.
Can I use puff pastry instead of crescent roll dough?
Absolutely. Puff pastry makes for a flakier, more delicate texture and is a great option if you want a more upscale version of this recipe. Just be sure to thaw the pastry completely before using, and handle it gently to avoid tearing.
What type of ham works best?
Deli-style sliced ham is ideal because it rolls easily and evenly. You can use smoked, honey, or black forest ham—whatever suits your flavor preferences. Avoid thicker cuts, as they can make rolling difficult.
Can I make these Ham and cheese pinwheels ahead of time?
Yes, you can assemble the pinwheels, cover them tightly, and refrigerate them unbaked for up to 24 hours. When you’re ready to bake, just slice and pop them in the oven. You can also freeze them before baking for longer storage.
Can I freeze them after baking?
Definitely. Once baked, let them cool, then freeze in a single layer before transferring to a container or freezer bag. Reheat from frozen in a 350°F oven until hot and crispy.
What if I don’t like mustard?
No problem! You can skip the mustard entirely or use mayonnaise, ranch dressing, or even a light tomato sauce instead. The pinwheels will still be delicious.
How do I keep the cheese from leaking out?
Rolling the dough tightly and sealing the edge helps. Also, try to keep the cheese away from the outer edges when layering—this keeps it from melting out during baking.
Are these good for kids?
Absolutely. Kids love the mild, cheesy flavor and the fun spiral shape. Use cheddar or mozzarella for a more kid-friendly taste, and skip the mustard or strong seasonings if needed.
Can I make them vegetarian?
Yes. Replace the ham with sautéed mushrooms, spinach, or roasted red peppers. Just be sure to remove excess moisture from your veggies to prevent soggy dough.
How do I keep the pinwheels crispy when reheating?
Reheat in the oven rather than the microwave. A few minutes at 350°F will restore the crispness. If reheating from frozen, bake a little longer—about 15–18 minutes.
What’s the best way to serve these for a party?
Arrange them on a platter with a variety of dipping sauces and serve them warm. Use a warming tray or cover with foil and keep in a 200°F oven until ready to serve.
These FAQs should help clear up any lingering doubts and get you excited to roll up your sleeves and bake.
Conclusion & Call to Action
By now, you’ve got everything you need to make the ultimate ham and cheese pinwheels—an easy, versatile, and endlessly delicious recipe that’s sure to become a go-to in your kitchen. Whether you’re cooking for a casual lunch, a cozy family gathering, or prepping appetizers for a celebration, these little golden spirals are a guaranteed hit.
They’re cheesy and comforting, but they’re also quick to make and totally customizable. The crescent dough makes the process nearly foolproof, and the results? Soft in the center, crispy on the edges, and packed with rich, melty flavor in every bite.
Don’t be afraid to play around with the ingredients, try new filling combos, or serve them in different ways. With a little creativity, you can turn a humble snack into something truly memorable. And once you master the basic technique, you’ll find yourself returning to it over and over again.
So go ahead and give these ham and cheese pinwheels a try. Gather your ingredients, roll up that dough, and fill your kitchen with the smell of something warm, buttery, and absolutely irresistible. I promise—your friends and family will thank you.
When you make them, I’d love to hear how they turn out. Share your favorite filling combos, tell me what sauces you served on the side, or tag a photo so I can see your pinwheel magic in action. Happy baking!
Print
Ham and Cheese Pinwheels with Crescent Dough
- Total Time: 25 minutes
- Yield: 8–10 pinwheels 1x
- Diet: Halal
Description
These warm, flaky ham and cheese pinwheels are made with buttery crescent dough and packed with melty cheese and savory deli ham. Quick to prepare and impossible to resist, they make the perfect appetizer, snack, or party food!
Ingredients
-
1 (8-ounce) can refrigerated crescent roll dough (or puff pastry)
-
8 slices deli ham, thinly sliced
-
8 slices Swiss cheese (or cheddar, mozzarella, pepper jack)
-
2 tbsp Dijon mustard (optional – or use honey mustard/mayo)
-
1 tbsp melted butter
-
1 tsp Italian seasoning (or poppy seeds, optional)
-
½ tsp garlic powder (optional)
Instructions
-
Preheat oven to 375°F (190°C). Line a baking sheet with parchment paper.
-
Roll out crescent dough and press seams together to form a single sheet.
-
Spread a thin layer of Dijon mustard, if using.
-
Layer ham and cheese slices evenly over the dough.
-
Starting from the long edge, roll the dough into a tight log.
-
Slice into 1-inch pinwheels.
-
Place on baking sheet, brush with melted butter, and sprinkle with seasoning.
-
Bake for 12–15 minutes or until golden and bubbly.
-
Let cool slightly before serving.
Notes
-
Chill the rolled dough before slicing for cleaner cuts.
-
Customize with different meats, cheeses, or vegetarian fillings.
-
Serve with dipping sauces like honey mustard, ranch, or marinara.
- Prep Time: 10 minutes
- Cook Time: 15 minutes
- Category: Appetizer, Snack
- Method: Baking
- Cuisine: American