
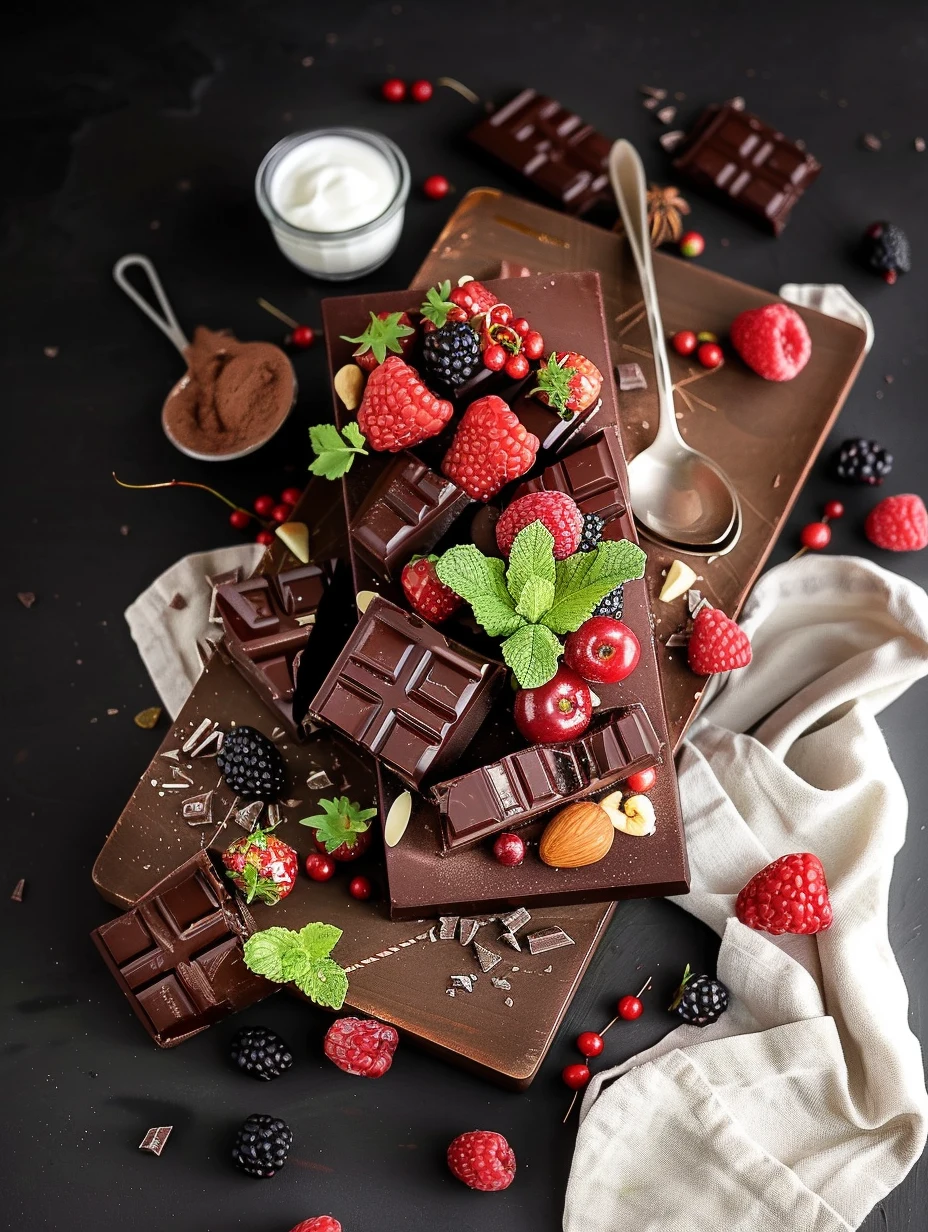
Gourmet Chocolate Dessert Board is an amazing way to elevate any gathering or special occasion. This visually stunning display of decadent treats brings together a variety of flavors and textures that will delight chocolate lovers and food enthusiasts alike. Imagine a beautifully arranged platter filled with rich chocolate truffles, creamy chocolate mousse, crunchy chocolate-covered pretzels, and fresh fruits—each bite is a journey of indulgence that excites the senses.
Creating a Gourmet Chocolate Dessert Board is not just about the chocolate; it’s about the experience. The artful presentation transforms a simple dessert into a centerpiece that invites conversation and admiration. Friends and family will be drawn to the board, eager to explore and taste everything it has to offer. Whether you’re planning a birthday party, a holiday celebration, or simply a cozy night in, this dessert board is sure to impress.
In this guide, we will explore why you’ll love this recipe, the preparation and cooking time involved, the ingredients you’ll need, and step-by-step instructions for creating the ultimate Gourmet Chocolate Dessert Board. Let’s embark on this delicious journey together!
Why You’ll Love This Recipe
The Gourmet Chocolate Dessert Board is not just a treat for the taste buds; it’s an experience that brings joy and delight. Here are several reasons why you’ll adore this recipe:
1. Customization: You can tailor the board to suit your preferences. Include your favorite chocolates, fruits, and snacks for a personal touch.
2. Easy to Assemble: Unlike traditional baking, the dessert board requires minimal preparation and no complex cooking techniques.
3. Visually Appealing: The vibrant colors and diverse textures create an eye-catching display that enhances any event.
4. Perfect for Sharing: This dessert board encourages sharing and interaction, making it ideal for gatherings.
5. Suitable for All Ages: Everyone, from kids to adults, loves chocolate, making it a universally appealing dessert.
6. Endless Combinations: With countless options for ingredients, you can create a different board each time, ensuring it never gets boring.
These factors make the Gourmet Chocolate Dessert Board a must-try for any chocolate aficionado or anyone looking to impress their guests.
Preparation and Cooking Time
Creating your Gourmet Chocolate Dessert Board is simple and straightforward. Here’s the breakdown of the time required:
– Preparation Time: 20 minutes
– Assembly Time: 15 minutes
– Total Time: 35 minutes
This quick setup means you can focus on enjoying your gathering rather than spending hours in the kitchen.
Ingredients
– Assorted chocolates (truffles, bars, chocolate-covered nuts)
– Chocolate mousse (store-bought or homemade)
– Chocolate-covered pretzels
– Fresh fruits (strawberries, raspberries, bananas, or apple slices)
– Whipped cream (optional)
– Nuts (almonds, walnuts, or pecans)
– Decorative elements (mint leaves, edible flowers, or chocolate shavings)
Step-by-Step Instructions
Creating a Gourmet Chocolate Dessert Board is a delightful process. Follow these steps to assemble your board:
1. Choose the Board: Select a large wooden or marble board for a rustic look or a sleek platter for a modern touch.
2. Arrange the Chocolates: Start by placing assorted chocolates in different sections of the board. This will be the focal point.
3. Add Chocolate Mousse: Use small bowls for the chocolate mousse. Position them strategically on the board for balance.
4. Incorporate Pretzels: Fill in spaces with chocolate-covered pretzels, adding a crunchy texture to the mix.
5. Include Fresh Fruits: Scatter fresh fruits around the board. Their colors will brighten the presentation and provide a refreshing contrast.
6. Add Nuts: Fill small gaps with nuts for additional crunch and flavor. These can also add a touch of elegance.
7. Garnish: Finish the board with decorative elements like mint leaves or edible flowers to elevate its visual appeal.
8. Serve with Whipped Cream: If desired, place a small bowl of whipped cream on the board for dipping.
9. Final Touches: Before serving, step back and adjust any elements for an aesthetically pleasing arrangement.
This simple yet effective process ensures that your Gourmet Chocolate Dessert Board will be a showstopper.
How to Serve
To make the most of your Gourmet Chocolate Dessert Board, consider the following serving tips:
1. Presentation: Ensure the board is easily accessible to guests. Place it on a central table where everyone can gather around.
2. Utensils: Provide small forks, skewers, or toothpicks for easy tasting. This encourages guests to sample a variety of treats.
3. Pairing Suggestions: Offer complementary beverages like coffee, dessert wine, or hot chocolate to enhance the tasting experience.
4. Encourage Sharing: Create a communal atmosphere by inviting guests to mix and match their favorite chocolates and fruits.
5. Mind the Timing: If using fresh fruits, serve the board soon after assembling to maintain their freshness.
By following these serving tips, you’ll create an inviting and enjoyable experience that everyone will remember!
Additional Tips
– Use Seasonal Fruits: Opt for fruits that are in season for the best flavor and freshness. Berries, peaches, or even citrus can add a delightful twist.
– Layer Textures: Mix crunchy items like nuts and pretzels with creamy elements like mousse to enhance the sensory experience.
– Themed Boards: For special occasions, theme your board with colors and flavors that match the event. Consider using dark chocolate for a sophisticated soirée or bright fruits for a summer picnic.
Recipe Variation
Feel free to experiment with different combinations to create a unique Gourmet Chocolate Dessert Board:
1. Savory Touch: Incorporate cheese, like brie or goat cheese, alongside the chocolate for a sweet and savory contrast.
2. Spicy Kick: Add chili chocolate or spiced nuts to introduce an unexpected heat that pairs beautifully with sweet elements.
3. Vegan Option: Use dairy-free chocolates, coconut cream for mousse, and a variety of plant-based snacks to create a vegan-friendly board.
Freezing and Storage
– Storage: While it’s best to serve the Gourmet Chocolate Dessert Board fresh, any leftovers can be stored in an airtight container in the refrigerator for 1-2 days.
– Freezing: If you have leftover chocolate mousse, it can be frozen for up to 2 months. Just make sure to store it in a freezer-safe container.
Special Equipment
To create your Gourmet Chocolate Dessert Board, you might find the following tools helpful:
– Large serving board or platter
– Small bowls for dips or mousse
– Tongs or small serving utensils
– Knife for cutting fruits or chocolate bars
– Toothpicks or skewers for easy serving
Frequently Asked Questions
Can I use store-bought chocolate mousse?
Yes, using store-bought mousse saves time and still delivers delicious results.
How do I keep the fruits fresh?
Serve the dessert board shortly after assembling. If you need to prepare in advance, soak fruits like apples in lemon water to prevent browning.
What chocolates should I include?
Include a variety of chocolates, such as dark, milk, and white chocolate, to cater to different preferences.
Is there a way to make this board gluten-free?
Absolutely! Just use gluten-free pretzels and ensure all other ingredients are gluten-free.
How do I clean the board after use?
Clean the board with warm, soapy water and dry immediately to maintain its quality.
Conclusion
Creating a Gourmet Chocolate Dessert Board is a delightful and creative endeavor. With its perfect blend of flavors, textures, and visual appeal, this dessert board is bound to be a hit at any gathering. Whether you’re celebrating a special occasion or simply indulging in a sweet night at home, this guide provides everything you need to craft a memorable experience. So gather your favorite chocolates, fruits, and nuts, and let your creativity shine as you assemble your very own Gourmet Chocolate Dessert Board!

Gourmet Chocolate Dessert Board: An Incredible Ultimate Guide to Indulgence
- Total Time: 15 minutes
Ingredients
– Assorted chocolates (truffles, bars, chocolate-covered nuts)
– Chocolate mousse (store-bought or homemade)
– Chocolate-covered pretzels
– Fresh fruits (strawberries, raspberries, bananas, or apple slices)
– Whipped cream (optional)
– Nuts (almonds, walnuts, or pecans)
– Decorative elements (mint leaves, edible flowers, or chocolate shavings)
Instructions
Creating a Gourmet Chocolate Dessert Board is a delightful process. Follow these steps to assemble your board:
1. Choose the Board: Select a large wooden or marble board for a rustic look or a sleek platter for a modern touch.
2. Arrange the Chocolates: Start by placing assorted chocolates in different sections of the board. This will be the focal point.
3. Add Chocolate Mousse: Use small bowls for the chocolate mousse. Position them strategically on the board for balance.
4. Incorporate Pretzels: Fill in spaces with chocolate-covered pretzels, adding a crunchy texture to the mix.
5. Include Fresh Fruits: Scatter fresh fruits around the board. Their colors will brighten the presentation and provide a refreshing contrast.
6. Add Nuts: Fill small gaps with nuts for additional crunch and flavor. These can also add a touch of elegance.
7. Garnish: Finish the board with decorative elements like mint leaves or edible flowers to elevate its visual appeal.
8. Serve with Whipped Cream: If desired, place a small bowl of whipped cream on the board for dipping.
9. Final Touches: Before serving, step back and adjust any elements for an aesthetically pleasing arrangement.
This simple yet effective process ensures that your Gourmet Chocolate Dessert Board will be a showstopper.
- Prep Time: 15 minutes
- Cook Time: 0 minutes
Nutrition
- Serving Size: 8-10
- Calories: 350 kcal
- Fat: 15g
- Protein: 5g