
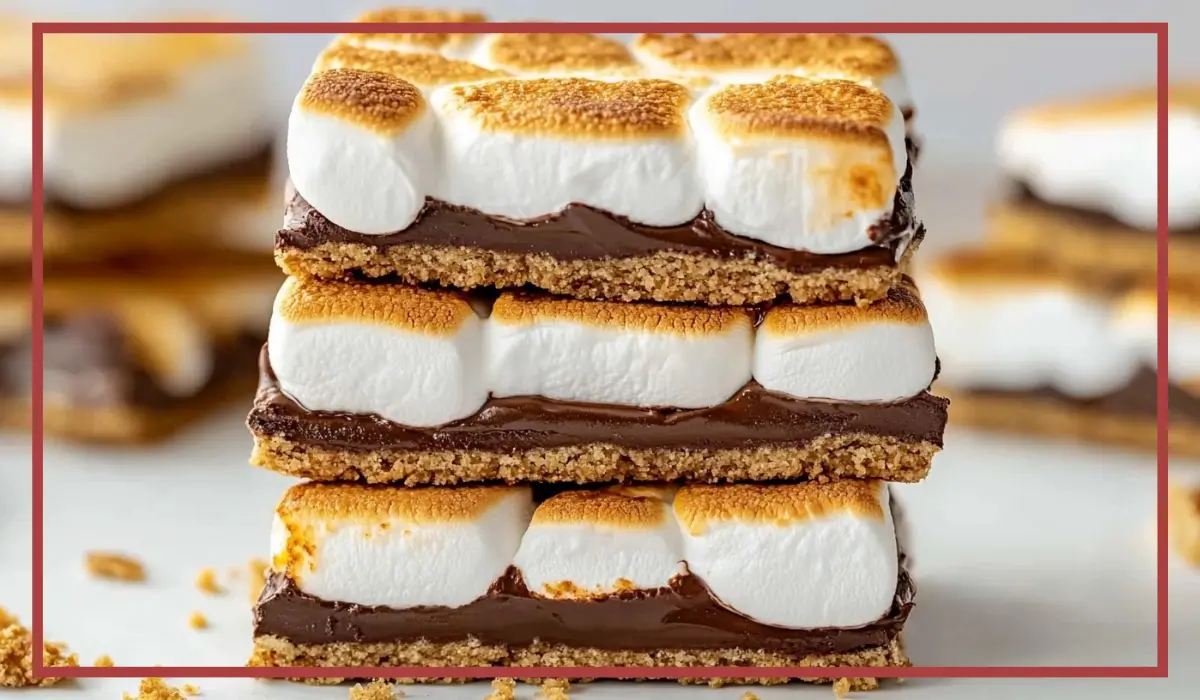
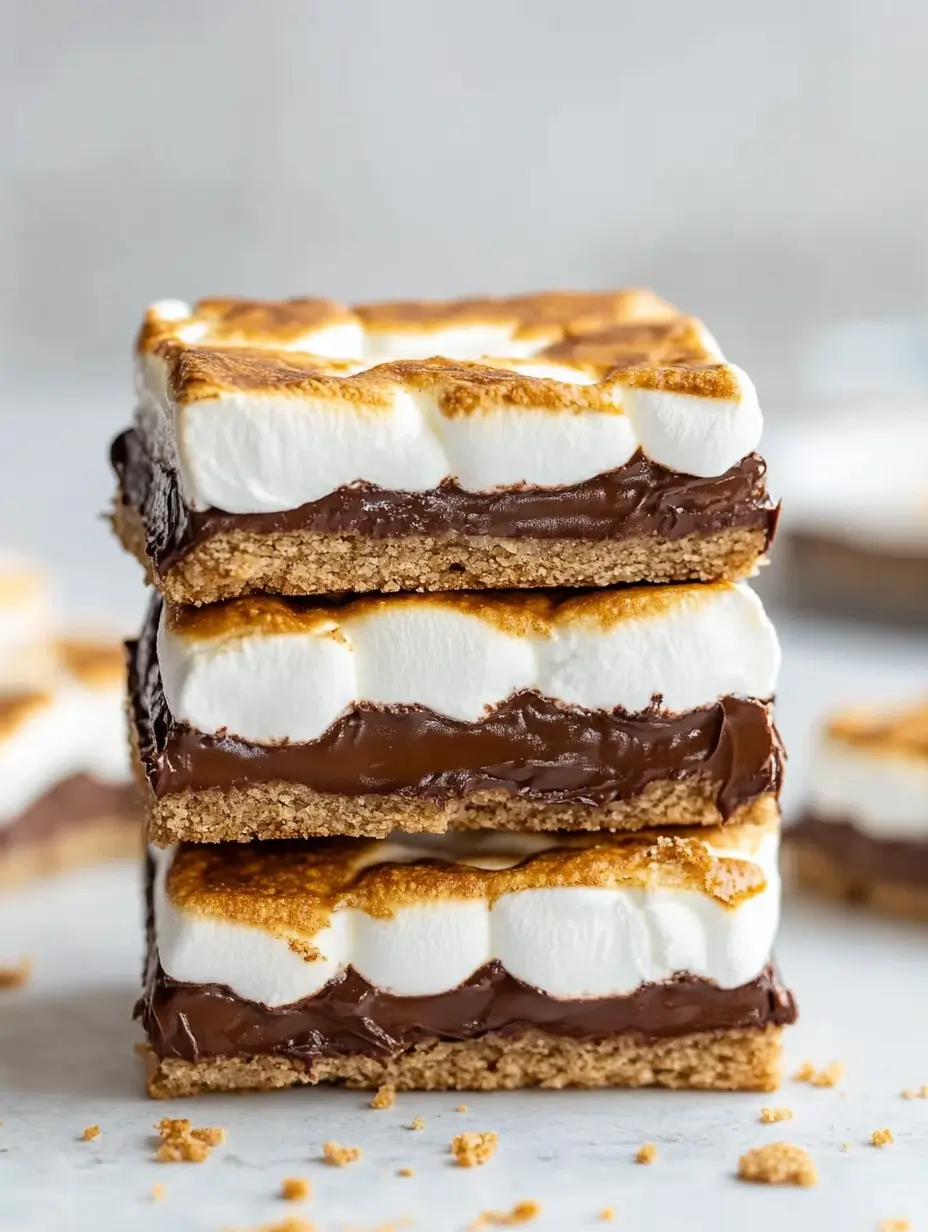
S’mores are the quintessential campfire treat, evoking memories of crisp nights, starry skies, and the comforting crackle of a fire. But what if you could recreate that nostalgic flavor without leaving your kitchen? Enter these Gooey S’mores Bars—a quick and easy indoor version of the classic treat that’s perfect for any occasion. With a buttery graham cracker crust, rich layers of melted chocolate, and toasted marshmallows on top, these bars deliver all the deliciousness of s’mores without the need for a campfire.
These bars are a hit at family gatherings, potlucks, and even lazy Sunday afternoons when you just need a sweet pick-me-up. The best part? They come together in under 30 minutes, making them perfect for busy schedules or last-minute dessert needs.
I first made these s’mores bars on a rainy day when a backyard bonfire wasn’t in the cards. My kids were craving s’mores, and I wasn’t about to disappoint them. The kitchen experiment turned into an instant family favorite. Now, they’re a staple in our house, especially during the colder months when outdoor fun isn’t always possible.
Why You’ll Love These Gooey S’mores Bars
1. Easy to Make
You don’t need any fancy equipment or special skills to whip up these bars. With just a few basic ingredients and simple steps, you’ll have a crowd-pleasing dessert in no time.
2. Nostalgic and Delicious
The combination of graham crackers, chocolate, and marshmallows is a classic for a reason. Each bite is a perfect balance of crunchy, creamy, and gooey.
3. Perfect for Any Occasion
Whether you’re hosting a party, celebrating a holiday, or simply treating yourself, these s’mores bars are versatile enough to suit any event.
4. Kid-Friendly
Kids love helping out with this recipe. From pressing the crust into the pan to sprinkling marshmallows on top, it’s a fun and interactive experience for little hands.
5. Customizable
Want to make them gluten-free? Use gluten-free graham crackers. Looking for a nutty twist? Add peanut butter or sprinkle some crushed nuts over the top. These bars are endlessly adaptable to suit your preferences.
Preparation Time and Servings
- Preparation time: 10 minutes
- Cooking time: 15 minutes
- Total time: 25 minutes
- Servings: Approximately 16 bars
Ingredients
For the Crust:
- 2 cups graham cracker crumbs ????
- 8–12 tablespoons unsalted butter, melted ????
- ½ cup powdered sugar ????
For the Filling:
- 4 extra-large Hershey’s chocolate bars (4.4 ounces each) ????
- 1 package mini marshmallows (approximately 10 ounces) ☁️
Step-by-Step Instructions
Prepare the Crust
- Preheat the Oven: Start by preheating your oven to 350°F (175°C). This will ensure the crust bakes evenly. ????
- Combine Ingredients: In a medium-sized bowl, mix together the graham cracker crumbs, powdered sugar, and melted butter. Stir until the crumbs are well-coated and the mixture feels like wet sand. ????➕????➕????➡️????
- Press into Pan: Transfer the mixture into a greased 9×13-inch baking pan. Use the back of a spoon or the bottom of a glass to press the crumbs into an even layer. Packing it tightly is key to a sturdy crust. ????➡️????
- Bake the Crust: Place the pan in the oven and bake for 5–8 minutes, or until the edges start to turn golden brown. Remove from the oven and let it cool slightly while you prepare the next layer. ⏲️????
Add the Chocolate Layer
- Break and Arrange Chocolate: Break the Hershey’s chocolate bars into smaller pieces and arrange them evenly over the warm crust. ????➡️????
- Melt the Chocolate: Return the pan to the oven for about 3 minutes, just until the chocolate starts to melt and glisten. Take it out and let the residual heat soften the chocolate further. This makes it easier to spread, if needed. ⏲️????
Add the Marshmallow Layer
- Top with Marshmallows: Scatter the mini marshmallows evenly over the melted chocolate, pressing them gently into place. Make sure the entire surface is covered for that signature s’mores look. ☁️➡️????
- Toast the Marshmallows: Switch your oven to the broil setting. Place the pan on the middle rack and broil for 1–2 minutes, watching closely. The marshmallows will puff up and turn a gorgeous golden brown. Be careful—they can burn in seconds! ????????
Cool and Serve
- Cool Completely: Remove the pan from the oven and allow the bars to cool completely. For cleaner cuts, place the pan in the refrigerator for 15–20 minutes to firm up the layers. ❄️⏲️
- Cut and Serve: Once cooled, use a sharp knife to slice the bars into squares or rectangles. Serve immediately and enjoy the gooey goodness! ????????☁️
Tips for Success
- Pack the Crust Tightly: A well-packed crust prevents crumbling and ensures a firm base for the chocolate and marshmallows.
- Watch the Broiling Step Closely: Marshmallows toast quickly, so keep a close eye on them to avoid burning.
- Chill for Clean Cuts: Cooling the bars in the fridge before slicing makes for neater, more professional-looking pieces.
- Use High-Quality Chocolate: Hershey’s is a classic, but feel free to use your favorite brand for a more gourmet twist.
- Get Creative with Layers: Add peanut butter, caramel, or even Nutella between the chocolate and marshmallows for an extra layer of flavor.
Variations
- Gluten-Free: Swap regular graham crackers for a gluten-free version.
- Nutty Twist: Sprinkle chopped nuts like almonds or pecans on top of the chocolate layer before adding marshmallows.
- Spicy Kick: Add a pinch of cayenne pepper or cinnamon to the crust mixture for a surprising twist.
- Vegan Option: Use vegan graham crackers, dairy-free chocolate, and vegan marshmallows to make these bars plant-based.
How to Serve
- Classic Style: Serve the bars on their own for a no-fuss treat.
- A La Mode: Top with a scoop of vanilla ice cream for a decadent dessert.
- Party Platter: Arrange the bars on a tray alongside other bite-sized treats for a crowd-pleasing dessert spread.
Storing and Freezing of Gooey S’mores Bars
- Storing: Keep leftover bars in an airtight container at room temperature for up to 3 days or in the refrigerator for up to a week.
- Freezing: To freeze, wrap each bar individually in plastic wrap and place them in a freezer-safe container. They’ll keep for up to 3 months. Simply thaw at room temperature before serving.
FAQ
Can I use regular-sized marshmallows instead of mini ones?
Yes, but you’ll need to cut them into smaller pieces for even coverage.
What if I don’t have powdered sugar?
Granulated sugar works as a substitute, though the texture may differ slightly.
Can I make these ahead of time?
Absolutely! Prepare the bars a day in advance and store them in the refrigerator until ready to serve.
Conclusion
These Gooey S’mores Bars are everything you love about campfire s’mores, conveniently baked into a shareable dessert. They’re simple, satisfying, and guaranteed to bring smiles to any table. Whether you’re making them for a cozy family night or as the star of a dessert table, these bars are sure to become a go-to favorite.
I’d love to hear how your s’mores bars turn out! Share your photos or any creative twists you’ve added, and don’t forget to tag me. Let’s keep the s’mores magic alive—no campfire required!
Print
Gooey S’mores Bars: Your New Favorite Dessert
Description
These Gooey S’mores Bars are an easy, no-fuss way to enjoy the nostalgic flavors of s’mores without a campfire. Featuring a buttery graham cracker crust, creamy melted chocolate, and golden-toasted marshmallows, they’re perfect for any occasion.
Ingredients
- Crust: 2 cups graham cracker crumbs, 8–12 tbsp unsalted butter (melted), ½ cup powdered sugar
- Filling: 4 extra-large Hershey’s chocolate bars, 1 package mini marshmallows
Instructions
- Preheat the oven to 350°F (175°C). Prepare the crust by combining graham cracker crumbs, powdered sugar, and butter. Press into a 9×13-inch pan and bake for 5–8 minutes.
- Layer chocolate pieces over the crust and melt them in the oven for 3 minutes.
- Top with marshmallows and broil for 1–2 minutes until golden brown.
- Cool, slice, and serve!
Notes
- For cleaner cuts, refrigerate for 15–20 minutes before slicing.
- Customize with peanut butter or caramel layers.