
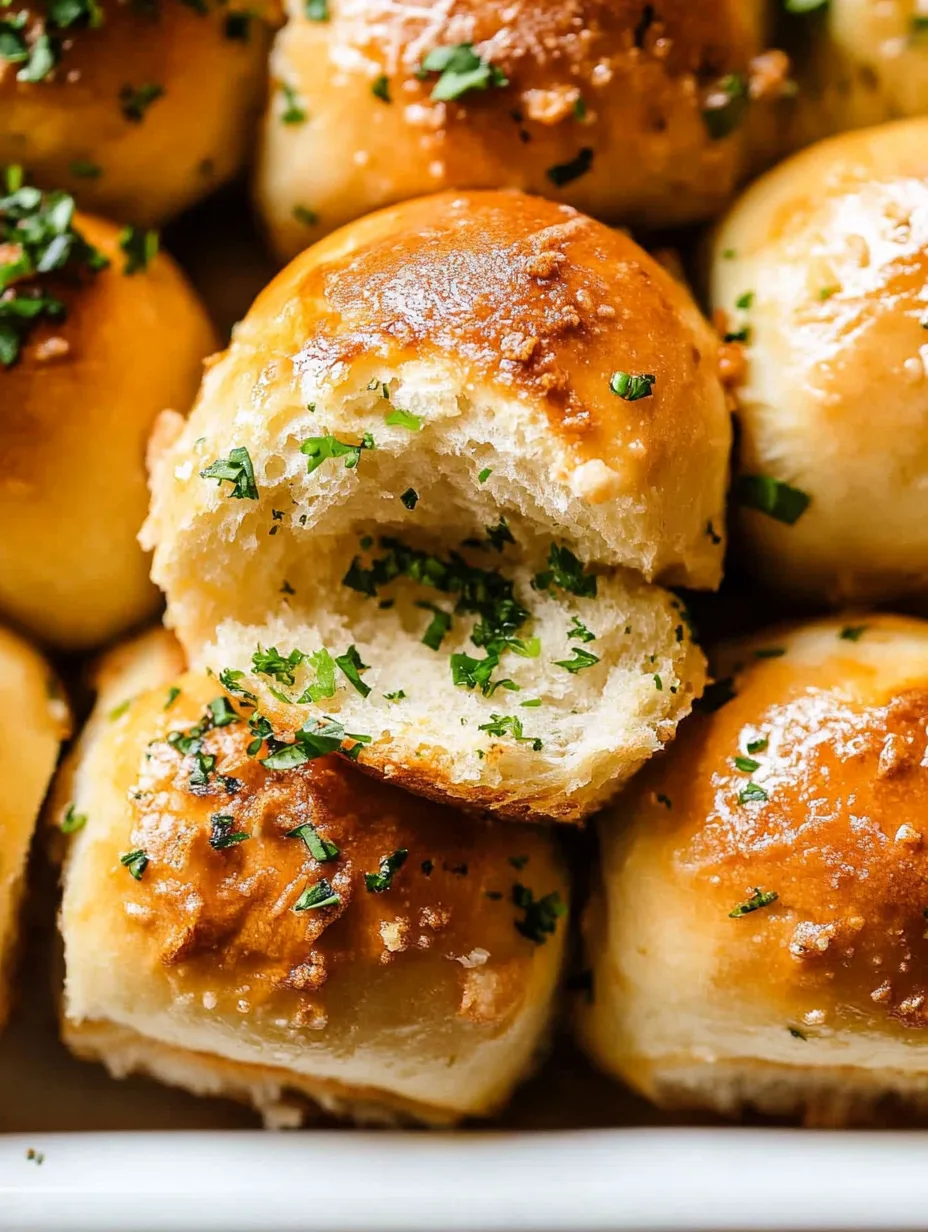
Garlic bread rolls are a delightful addition to any meal, combining the warm, soft texture of freshly baked rolls with the aromatic flavor of garlic and herbs. When indulging in these exquisite rolls, you’re in for a wonderful treat that will not only complement your main dishes but also stand alone as a delicious snack. Imagine tearing into a golden-brown roll, the robust scent of garlic wafting through the air, and a buttery, savory flavor dancing on your taste buds. These rolls are perfect for family dinners, festive gatherings, and even casual get-togethers with friends.
The love for garlic bread rolls spans cultures and cuisines, showing up in various forms around the world. Whether you’re serving them alongside a hearty pasta dish, a fresh salad, or enjoying them solo with a drizzle of olive oil, garlic bread rolls are bound to impress everyone at the table.
This guide will walk you through every detail you need to know to make your very own garlic bread rolls. From preparation time to the specific ingredients that create flavor-packed rolls, you’ll find everything you need to embark on this delicious culinary journey. Get ready to turn your kitchen into a haven of delightful aromas and mouthwatering tastes!
Why You’ll Love This Recipe
Garlic bread rolls are not just any side dish; they are a standout addition to your dining experience. Here are some compelling reasons why you’ll love making these rolls:
1. Simple Ingredients: Most ingredients required to make garlic bread rolls can easily be found in your pantry.
2. Versatile Flavor: You can adjust the garlic content and herb choices to suit your personal taste.
3. Perfect for Any Occasion: Whether you’re hosting a holiday dinner or enjoying a cozy night in, these rolls fit every scenario.
4. Impressive Texture: The fluffy centers and crispy exteriors create a delightful contrast that is both satisfying and delicious.
5. Easy Recipe to Follow: The step-by-step instructions make it accessible for cooks of all skill levels.
6. A Crowd-Pleaser: Everyone loves garlic bread rolls, making them a surefire hit at any gathering.
With these enticing factors, garlic bread rolls are sure to become a beloved recipe that will have your guests clamoring for seconds!
Preparation and Cooking Time
Making garlic bread rolls requires a bit of patience, but the results are absolutely worth it. Here’s a breakdown of the time you’ll need:
– Preparation Time: 15-20 minutes
– Rising Time: 1 hour 30 minutes (this can vary depending on the temperature of your kitchen)
– Cooking Time: 15-20 minutes
– Total Time: Approximately 2 hours
These estimates provide a good framework, although your experience and kitchen environment may affect the times slightly.
Ingredients
– 4 cups all-purpose flour
– 2 ¼ teaspoons instant yeast (1 packet)
– 1 tablespoon granulated sugar
– 1 teaspoon salt
– 1 ½ cups warm water (about 110°F or 43°C)
– ½ cup unsalted butter, softened
– 4-5 cloves garlic, minced (adjust to taste)
– ¼ cup fresh parsley, chopped (or 2 tablespoons dried)
– Optional: Parmesan cheese, grated for topping
Step-by-Step Instructions
Creating these garlic bread rolls can be a straightforward process if you follow these steps:
1. Mix Dry Ingredients: In a large bowl, combine the flour, yeast, sugar, and salt.
2. Add Warm Water: Gradually pour in the warm water, stirring until a dough forms.
3. Knead the Dough: Turn the dough onto a floured surface. Knead for about 8-10 minutes until smooth and elastic.
4. First Rise: Place the dough in a greased bowl, cover it with a clean cloth, and let it rise in a warm area for 1 hour or until doubled in size.
5. Prepare Garlic Butter: While the dough rises, mix the softened butter, minced garlic, and chopped parsley in a small bowl.
6. Shape the Rolls: Punch down the risen dough and turn it onto a lightly floured surface. Divide it into 12 equal pieces, rolling each piece into a ball.
7. Fill with Garlic Butter: Flatten each ball slightly, place about 1 teaspoon of the garlic butter mixture in the center, and then fold the dough over to seal it. Roll it back into a ball.
8. Second Rise: Place the filled rolls seam-side down on a greased baking sheet. Cover and let rise for an additional 30-45 minutes.
9. Preheat Oven: During the second rise, preheat your oven to 375°F (190°C).
10. Bake Rolls: Once risen, bake the rolls in the preheated oven for 15-20 minutes or until golden brown.
11. Brush with Remaining Garlic Butter: After removing the rolls from the oven, brush them with any remaining garlic butter mixture and sprinkle with grated Parmesan cheese if desired.
12. Cool Slightly Before Serving: Allow the rolls to cool on a wire rack for a few minutes before serving. Enjoy them warm!
How to Serve
Serving garlic bread rolls can enhance the dining experience. Here are some thoughtful tips to make them shine:
1. Presentation: Arrange the rolls in a basket lined with a cloth or in a beautiful serving dish. A simple presentation can elevate their appeal.
2. Accompaniments: Pair these rolls with marinara sauce, olive oil for dipping, or even a sprinkle of extra herbs for a burst of flavor.
3. Choosing the Right Size: While generous portions are tempting, consider serving smaller ones to encourage guests to enjoy more than one.
4. Pairing with Main Dishes: Garlic bread rolls pair excellently with pasta, soups, or grilled meats, making them a versatile addition to your menu.
5. Beverage Options: Consider serving drinks like red wine or sparkling water to complement the savory flavors of your garlic bread rolls.
By keeping these serving suggestions in mind, you can create a deliciously satisfying experience for your guests that they’ll remember long after the meal is over.
Garlic bread rolls are not just a side – they are an amazing highlight that will make any meal unforgettable. Try this incredible ultimate recipe, and you might just find yourself baking them again and again!
Additional Tips
– Use Fresh Garlic: Freshly minced garlic brings an authentic flavor that powdered garlic simply can’t replicate. It creates that aromatic punch in every roll.
– Experiment with Herbs: While parsley is an excellent choice, consider adding fresh basil, oregano, or even thyme for an aromatic twist.
– Let Them Cool: Allowing the rolls to cool slightly before serving helps maintain their structure, making them easier to handle while still warm.
Recipe Variation
Feel free to customize your garlic bread rolls based on your preferences! Here are some variations to inspire you:
1. Cheese-Stuffed Rolls: Before sealing each roll, add a cube of mozzarella or cheddar cheese for a gooey surprise inside.
2. Garlic Herb Rolls: Incorporate different herbs like rosemary or chives into the garlic butter for a unique flavor profile.
3. Sweet Garlic Rolls: Drizzle a little honey over the garlic butter for a slightly sweet and savory fusion.
Freezing and Storage
– Storage: Keep the rolls in an airtight container at room temperature for up to 3 days. If they start to become stale, consider toasting them slightly to refresh their texture.
– Freezing: You can freeze the uncooked rolls after the second rise. Place them on a baking sheet until frozen solid, then transfer to a freezer-safe bag. They can be baked directly from frozen—just add a few extra minutes to the baking time.
Special Equipment
To successfully make garlic bread rolls, consider having the following equipment on hand:
– Large mixing bowl for dough preparation
– Wooden spoon or dough hook for mixing
– Baking sheet for the rolls
– Clean kitchen cloth for covering the dough during rising
– Rolling pin for flattening the dough (if desired)
Frequently Asked Questions
Can I use whole wheat flour instead of all-purpose flour?
Yes, whole wheat flour can be used, though it may alter the texture slightly. You may want to combine it with all-purpose flour for the best results.
What if I don’t have instant yeast?
You can substitute active dry yeast, but the rising time will be longer. You’ll also have to activate it in warm water with sugar before using.
Can I make garlic bread rolls without gluten?
Absolutely! You can substitute a gluten-free flour blend in place of all-purpose flour. Just ensure that it contains a binding agent like xanthan gum.
How should I reheat the rolls?
To reheat, wrap the rolls in aluminum foil and place them in a preheated oven at 350°F (175°C) for about 10-15 minutes until warm.
Can I add additional toppings?
Yes! Feel free to add herbs, cheese, or even crushed red pepper flakes on top of the garlic butter before baking for added flavor.
Conclusion
Garlic bread rolls are an easy yet impressive recipe that combines rich flavors and a satisfying texture. With just a few basic ingredients and a step-by-step approach, you can create this irresistible side dish. Whether you’re hosting a family dinner or simply treating yourself to a delicious snack, these garlic bread rolls are sure to delight your taste buds. Bake a batch today and enjoy the tantalizing aroma filling your kitchen!
Garlic Bread Rolls: An Incredible Ultimate Recipe
- Total Time: 35 minutes
Ingredients
– 4 cups all-purpose flour
– 2 ¼ teaspoons instant yeast (1 packet)
– 1 tablespoon granulated sugar
– 1 teaspoon salt
– 1 ½ cups warm water (about 110°F or 43°C)
– ½ cup unsalted butter, softened
– 4-5 cloves garlic, minced (adjust to taste)
– ¼ cup fresh parsley, chopped (or 2 tablespoons dried)
– Optional: Parmesan cheese, grated for topping
Instructions
Creating these garlic bread rolls can be a straightforward process if you follow these steps:
1. Mix Dry Ingredients: In a large bowl, combine the flour, yeast, sugar, and salt.
2. Add Warm Water: Gradually pour in the warm water, stirring until a dough forms.
3. Knead the Dough: Turn the dough onto a floured surface. Knead for about 8-10 minutes until smooth and elastic.
4. First Rise: Place the dough in a greased bowl, cover it with a clean cloth, and let it rise in a warm area for 1 hour or until doubled in size.
5. Prepare Garlic Butter: While the dough rises, mix the softened butter, minced garlic, and chopped parsley in a small bowl.
6. Shape the Rolls: Punch down the risen dough and turn it onto a lightly floured surface. Divide it into 12 equal pieces, rolling each piece into a ball.
7. Fill with Garlic Butter: Flatten each ball slightly, place about 1 teaspoon of the garlic butter mixture in the center, and then fold the dough over to seal it. Roll it back into a ball.
8. Second Rise: Place the filled rolls seam-side down on a greased baking sheet. Cover and let rise for an additional 30-45 minutes.
9. Preheat Oven: During the second rise, preheat your oven to 375°F (190°C).
10. Bake Rolls: Once risen, bake the rolls in the preheated oven for 15-20 minutes or until golden brown.
11. Brush with Remaining Garlic Butter: After removing the rolls from the oven, brush them with any remaining garlic butter mixture and sprinkle with grated Parmesan cheese if desired.
12. Cool Slightly Before Serving: Allow the rolls to cool on a wire rack for a few minutes before serving. Enjoy them warm!
- Prep Time: 15 minutes
- Cook Time: 20 minutes
Nutrition
- Serving Size: 12 rolls
- Calories: 210 kcal per roll
- Fat: 9g
- Protein: 4g