
There’s something about a Funfetti Cheesecake Cake that just screams celebration. Whether it’s the vibrant rainbow sprinkles, the soft and buttery cake layers, or the creamy cheesecake center, this dessert is pure happiness on a plate. It’s the kind of cake that turns any day into a party, whether you’re celebrating a birthday, a special milestone, or just treating yourself to something sweet.
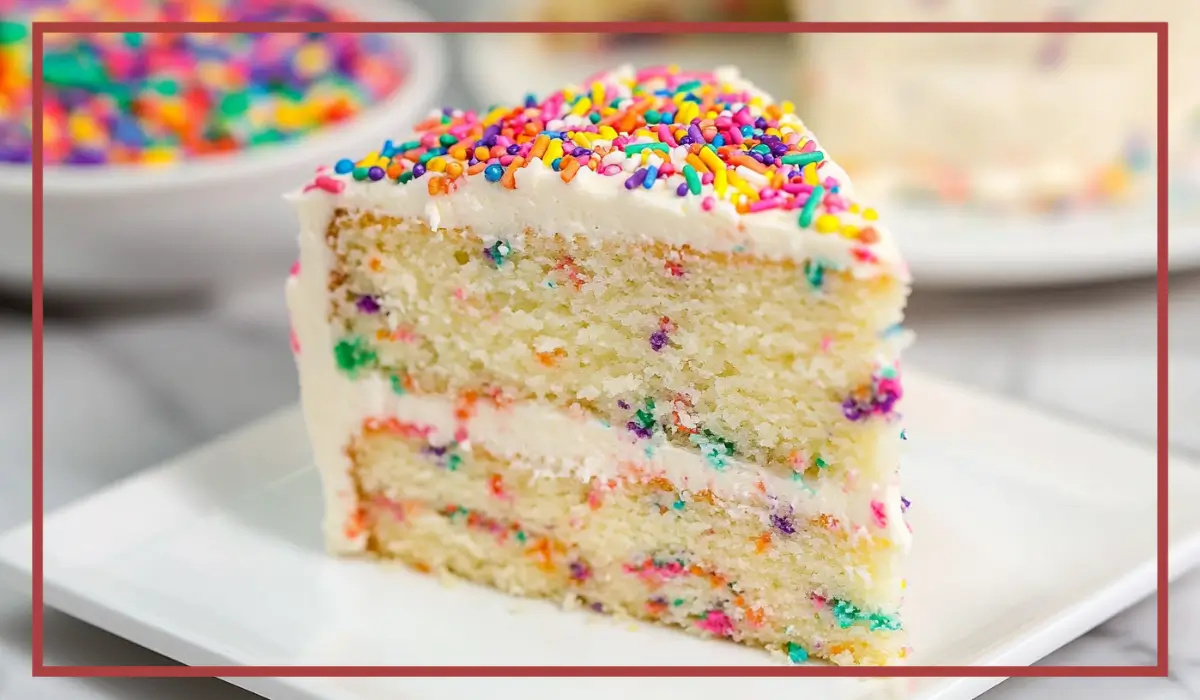
This cake brings together the best of both worlds—light, fluffy Funfetti cake bursting with colorful sprinkles and a rich, velvety cheesecake layer right in the middle. The combination is nothing short of magical. Then, to take it over the top, it’s all wrapped in a smooth, creamy buttercream frosting and more sprinkles for that extra touch of fun.
I remember the first time I made this cake for a friend’s birthday, and the reaction was priceless. Eyes lit up, kids and adults alike rushed to grab a slice, and within minutes, there was nothing left but crumbs on the plate. It’s a showstopper, and the best part? It’s surprisingly easy to make. You don’t have to be a professional baker to pull this off. If you can mix, pour, and layer, you’ve got this!
Whether you’re new to baking or looking for a crowd-pleasing dessert, this Funfetti Cheesecake Cake is a must-try. It’s fun, nostalgic, and utterly delicious. So, let’s dive into what makes this cake so special and why you need to bake it ASAP.
Why You’ll Love This Recipe
There are so many reasons to fall in love with this Funfetti Cheesecake Cake. First, it combines two incredible desserts into one. You get the light, fluffy, and sprinkle-filled goodness of a Funfetti cake, plus the rich, creamy texture of cheesecake. Together, they create the ultimate indulgence.
Another reason to love this cake is its versatility. It’s perfect for birthdays, anniversaries, or even casual get-togethers. No one can resist its cheerful, colorful look, and once they take a bite, they’ll be hooked.
The texture contrast is what truly sets this cake apart. The Funfetti cake layers are light and moist, while the cheesecake provides a dense, creamy contrast that balances everything perfectly. And let’s not forget the buttercream frosting—smooth, sweet, and the perfect finishing touch.
This cake is also a great make-ahead dessert. The cheesecake layer can be made in advance and stored in the freezer, making the assembly process even easier. Plus, if you want to save time, you can use a boxed Funfetti cake mix without compromising on flavor.
Lastly, this recipe is simple enough for beginners but impressive enough for experienced bakers. It’s a foolproof way to wow your guests without spending hours in the kitchen. So, if you’re looking for a fun, festive, and downright delicious cake, this is the one for you.
Health Benefits
While this cake is definitely a treat, there are still some surprising benefits hidden within the indulgence. Let’s take a closer look at how some of the key ingredients can provide a little nutritional value alongside all the deliciousness.
First, let’s talk about dairy. The cream cheese and sour cream in the cheesecake layer provide a good source of calcium and protein. Calcium is essential for strong bones and teeth, while protein helps build and repair tissues. While the sugar content in the cheesecake is high, the dairy base does offer some nutritional perks.
Eggs, which are used in both the cake and cheesecake layers, are another nutritious ingredient. They are packed with high-quality protein and contain essential vitamins like B12 and choline, which support brain function.
Butter, although often seen as an indulgence, contains essential fatty acids and fat-soluble vitamins like A, D, and E. While moderation is key, small amounts of butter can be a part of a balanced diet.
Even the rainbow sprinkles bring a bit of fun to the mix. While they don’t add much in terms of nutrition, they do contribute to the joyful experience of eating this cake. Sometimes, food is about more than just nutrients—it’s about the happiness it brings.
At the end of the day, this cake is meant to be enjoyed as a special treat. Pair it with a balanced meal and savor every bite without guilt. After all, life is all about balance, and a slice of Funfetti Cheesecake Cake is definitely worth it.
Preparation Time, Servings, and Nutritional Information
To help you plan ahead, here’s a quick breakdown of the time commitment for this cake:
- Prep Time: 30 minutes
- Bake Time: 60 minutes (combined)
- Chill Time: 2+ hours
- Total Time: Approximately 3+ hours
- Servings: 12 slices
Nutritional Information (Per Slice):
- Calories: 550
- Protein: 7g
- Carbohydrates: 65g
- Fats: 28g
- Sugar: 45g
While this cake is definitely indulgent, you can always modify ingredients to make it slightly lighter if desired. For example, using reduced-fat cream cheese or a lighter buttercream can help cut down on the calorie count.
Ingredients List
For the Funfetti Cake:
- 2 ½ cups all-purpose flour
- 2 ½ teaspoons baking powder
- ½ teaspoon salt
- 1 cup unsalted butter, softened
- 1 ¾ cups granulated sugar
- 4 large eggs
- 1 cup buttermilk
- 1 tablespoon vanilla extract
- ½ cup rainbow sprinkles
For the Cheesecake Layer:
- 16 ounces cream cheese, softened
- ½ cup granulated sugar
- 2 large eggs
- ½ cup sour cream
- 1 teaspoon vanilla extract
For the Buttercream Frosting:
- 1 cup unsalted butter, softened
- 4 cups powdered sugar
- ¼ cup heavy cream
- 1 teaspoon vanilla extract
- Extra sprinkles for decoration
Step-By-Step Cooking Instructions
Step 1: Prepare the Cheesecake Layer
- Preheat the oven to 325°F (160°C).
- In a mixing bowl, beat the softened cream cheese and sugar until smooth and creamy.
- Add in the eggs, one at a time, mixing after each addition.
- Stir in the sour cream and vanilla extract until well combined.
- Grease an 8-inch springform pan and pour in the cheesecake batter.
- Bake for 35-40 minutes, or until the center is set and slightly jiggly.
- Let the cheesecake cool completely, then transfer it to the freezer for at least 2 hours.
Step 2: Bake the Funfetti Cake Layers
- Preheat the oven to 350°F (175°C).
- Grease and flour two 8-inch round cake pans.
- In a bowl, whisk together the flour, baking powder, and salt.
- In a separate large bowl, beat the butter and sugar until light and fluffy.
- Add in the eggs one at a time, mixing well after each addition.
- Stir in the vanilla extract.
- Gradually add the dry ingredients, alternating with the buttermilk.
- Gently fold in the sprinkles, being careful not to overmix.
- Divide the batter evenly between the two cake pans.
- Bake for 25-30 minutes, or until a toothpick inserted in the center comes out clean.
- Let the cakes cool completely.
Step 3: Make the Buttercream Frosting
- In a large bowl, beat the butter until creamy.
- Gradually add the powdered sugar, mixing well after each addition.
- Pour in the heavy cream and vanilla extract, and beat until light and fluffy.
Step 4: Assemble the Cake
- Place one Funfetti cake layer on a serving plate.
- Carefully place the frozen cheesecake layer on top.
- Add the second Funfetti cake layer.
- Frost the entire cake with the buttercream.
- Decorate with extra sprinkles.
Step 5: Slice and Enjoy!
- Use a sharp knife to cut clean slices.
- Serve and enjoy this colorful, delicious cake.

How to Serve
Now that your Funfetti Cheesecake Cake is fully assembled and looking absolutely gorgeous, it’s time to serve it up! The beauty of this cake is that it’s perfect for almost any occasion. Whether you’re celebrating a birthday, a holiday, or just a random Tuesday, this cake brings joy with every slice.
To get the cleanest slices, use a sharp knife dipped in warm water. Wipe the blade between each cut to keep the layers neat and intact. The contrast between the creamy cheesecake and the soft Funfetti cake layers makes each slice a work of art.
For an extra festive touch, you can serve each slice with a dollop of whipped cream or a scoop of vanilla ice cream. The cool, creamy texture of the ice cream pairs beautifully with the rich, buttery cake and frosting.
If you want to add a little more fun to your presentation, drizzle a bit of melted white chocolate or caramel over the top. This not only enhances the flavor but also gives your cake a bakery-style finish.
For a fun and interactive dessert table, serve the cake with small bowls of extra sprinkles, crushed cookies, or fruit toppings so guests can customize their slice. Kids especially love adding their own extra sprinkle magic!
If you’re making this for a special occasion, consider using a cake topper or birthday candles to make it even more festive. The bright, colorful appearance of this cake means it doesn’t need much decoration, but a few extra touches can make it even more special.
This cake is best served chilled or at room temperature. If you’ve stored it in the fridge, let it sit out for about 20 minutes before serving to allow the flavors to fully develop.
Pairing Suggestions
A cake as special as this deserves the perfect drink or side pairing to make the experience even better. Whether you’re enjoying it as a dessert after a meal or serving it at a party, here are some great pairing options to consider.
Beverage Pairings:
- Milk: A classic choice, especially for kids. The cold, creamy texture of milk balances out the sweetness of the cake.
- Coffee: A hot cup of coffee, whether black or with a splash of cream, provides a delightful contrast to the rich and sweet flavors of the cake.
- Hot Chocolate: For an extra indulgent treat, serve this cake with a mug of thick, creamy hot chocolate. Top it with whipped cream and sprinkles for a fun touch.
- Tea: A lightly sweet or floral tea, like chamomile or vanilla rooibos, complements the buttery richness of the cake without overpowering it.
- Fresh Fruit Juice: If you’re looking for something refreshing, try pairing this cake with freshly squeezed orange juice or a fruity mocktail. The citrus helps balance the sweetness.
Dessert Pairings:
- Ice Cream: A scoop of vanilla, birthday cake, or even cookies and cream ice cream pairs wonderfully with this cake. The cold, creamy texture makes each bite even more indulgent.
- Chocolate Sauce: Drizzling some warm chocolate sauce over a slice of this cake adds an extra level of decadence.
- Fresh Berries: Strawberries, raspberries, or blueberries offer a refreshing, slightly tart contrast to the cake’s sweetness.
Savory Pairings:
If you’re serving this cake after a meal, consider pairing it with lighter, fresh dishes so the dessert can truly shine. A crisp salad with a lemon vinaigrette, a simple grilled chicken dish, or a plate of roasted vegetables can balance out the richness of the cake.
Storage, Freezing & Reheating Instructions
If you have leftovers (which is rare with this cake!), storing it properly will ensure that it stays fresh and delicious for days.
How to Store in the Fridge:
- Place the cake in an airtight container or cover it with plastic wrap to prevent it from drying out.
- Store in the refrigerator for up to 4-5 days.
- If the frosting starts to harden in the fridge, let the cake sit at room temperature for about 20 minutes before serving.
How to Freeze the Cake:
- This cake freezes beautifully, especially if you want to make it in advance.
- To freeze the entire cake, wrap it tightly in plastic wrap, then place it in a freezer-safe container.
- If you want to freeze individual slices, wrap each slice in plastic wrap and place them in a freezer bag.
- The cake can be frozen for up to 2 months.
How to Thaw and Reheat:
- To thaw, transfer the cake from the freezer to the refrigerator and let it thaw overnight.
- If you’re in a hurry, you can let it sit at room temperature for about 30-45 minutes.
- This cake is best enjoyed cold or at room temperature, so reheating is usually unnecessary. However, if you prefer a slightly warm slice, microwave it for 10-15 seconds to soften the cake layers slightly.
Common Mistakes to Avoid
Even though this cake is easy to make, there are a few common mistakes that could affect the final result. Here’s how to avoid them.
- Not Freezing the Cheesecake Layer: The cheesecake needs to be frozen before assembling the cake. If it’s too soft, it will be difficult to stack, and the layers may become unstable.
- Overmixing the Cake Batter: Stirring the batter too much can result in a dense, tough cake instead of a light and fluffy texture. Mix just until the ingredients are combined.
- Adding Too Many Sprinkles: While it’s tempting to go all out with sprinkles, too many can bleed into the batter and create streaks of color instead of evenly dispersed specks. Stick to the recommended amount.
- Skipping the Cake Cooling Process: If you try to frost the cake while it’s still warm, the buttercream will melt and slide off. Be patient and let the cake cool completely.
- Using the Wrong Type of Cream Cheese: Always use full-fat block-style cream cheese for the cheesecake layer. Softened cream cheese from a tub has a different texture and won’t set properly.
Pro Tips
Want to make this cake even better? Here are some expert tips to take it to the next level.
- For Extra Moist Cake: Brush the cake layers with a simple syrup (equal parts sugar and water, heated until dissolved) before assembling. This keeps the cake moist and adds a slight sweetness.
- Use Gel Food Coloring for Customization: If you want to match the cake to a theme, try using gel food coloring in the cake batter or frosting. This works well for baby showers, weddings, or holiday celebrations.
- Make it a Funfetti Explosion: For an extra pop of color, mix sprinkles into the frosting as well. This creates a fun confetti effect both inside and outside the cake.
- For a Bakery-Style Finish: Use a cake turntable when frosting to get smooth, even layers. An offset spatula also helps spread the buttercream effortlessly.
- Chill the Cake Before Slicing: Letting the assembled cake chill in the fridge for 30-60 minutes before slicing helps keep the layers intact and prevents crumbs from getting into the frosting.
Frequently Asked Questions (FAQs)
Can I use a boxed Funfetti cake mix instead of making it from scratch?
Yes! If you’re short on time, a boxed Funfetti cake mix works just fine. Just follow the instructions on the box and bake in two 8-inch cake pans.
Can I make this cake ahead of time?
Absolutely! The cheesecake layer can be made 2-3 days in advance and stored in the freezer. The entire cake can also be assembled the day before and kept in the fridge until serving.
What if I don’t have buttermilk?
You can make a quick substitute by mixing 1 cup of milk with 1 tablespoon of lemon juice or vinegar. Let it sit for 5 minutes before using.
Can I use different frosting instead of buttercream?
Yes! Cream cheese frosting, whipped cream frosting, or white chocolate ganache would all taste amazing with this cake.
Conclusion & Call to Action
This Funfetti Cheesecake Cake is the perfect combination of nostalgia, celebration, and indulgence. The fluffy cake, creamy cheesecake, and rich buttercream make every bite an experience worth savoring.
I’d love to see your creations! If you try this recipe, share your results and tag me on social media. Let me know in the comments how it turned out and if you made any fun variations. Happy baking!
Print
Funfetti Cheesecake Cake – The Best Birthday Cake Recipe Ever
- Total Time: 3+ hours (including chill time)
- Yield: 12 servings 1x
- Diet: Vegetarian
Description
This Funfetti Cheesecake Cake is a fun and festive dessert, featuring layers of moist Funfetti cake, a creamy cheesecake center, and a smooth buttercream frosting. Perfect for birthdays, celebrations, or just because!
Ingredients
For the Funfetti Cake:
- 2 ½ cups all-purpose flour
- 2 ½ teaspoons baking powder
- ½ teaspoon salt
- 1 cup unsalted butter, softened
- 1 ¾ cups granulated sugar
- 4 large eggs
- 1 cup buttermilk
- 1 tablespoon vanilla extract
- ½ cup rainbow sprinkles
For the Cheesecake Layer:
- 16 ounces cream cheese, softened
- ½ cup granulated sugar
- 2 large eggs
- ½ cup sour cream
- 1 teaspoon vanilla extract
For the Buttercream Frosting:
- 1 cup unsalted butter, softened
- 4 cups powdered sugar
- ¼ cup heavy cream
- 1 teaspoon vanilla extract
- Extra sprinkles for decoration
Instructions
- Make the Cheesecake Layer: Preheat oven to 325°F (160°C). Beat cream cheese and sugar until smooth. Add eggs, sour cream, and vanilla. Pour into a greased 8-inch springform pan. Bake for 35-40 minutes. Let cool completely, then freeze.
- Bake the Funfetti Cakes: Preheat oven to 350°F (175°C). Whisk flour, baking powder, and salt. Cream butter and sugar, then add eggs, buttermilk, and vanilla. Fold in sprinkles. Divide batter between two 8-inch cake pans. Bake for 25-30 minutes. Let cool completely.
- Prepare the Buttercream Frosting: Beat butter until creamy. Gradually mix in powdered sugar, then add heavy cream and vanilla extract. Beat until fluffy.
- Assemble the Cake: Place one Funfetti cake layer on a plate. Add the cheesecake layer, then top with the second Funfetti cake. Frost with buttercream and decorate with sprinkles.
- Serve and Enjoy! Slice and serve at room temperature or chilled.
Notes
- Freeze the cheesecake layer for easier stacking.
- Use gel food coloring for themed cake variations.
- Store leftovers in an airtight container in the fridge for up to 5 days.
- Prep Time: 30 minutes
- Cook Time: 60 minutes
- Category: Dessert
- Method: Baking
- Cuisine: American