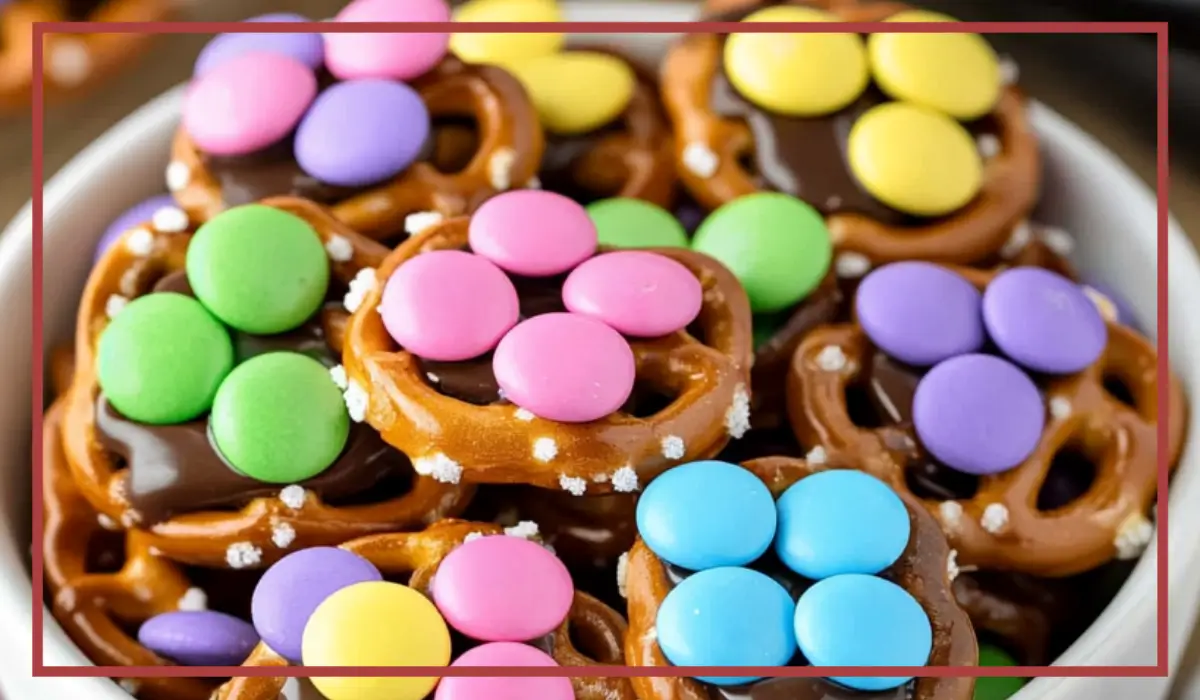
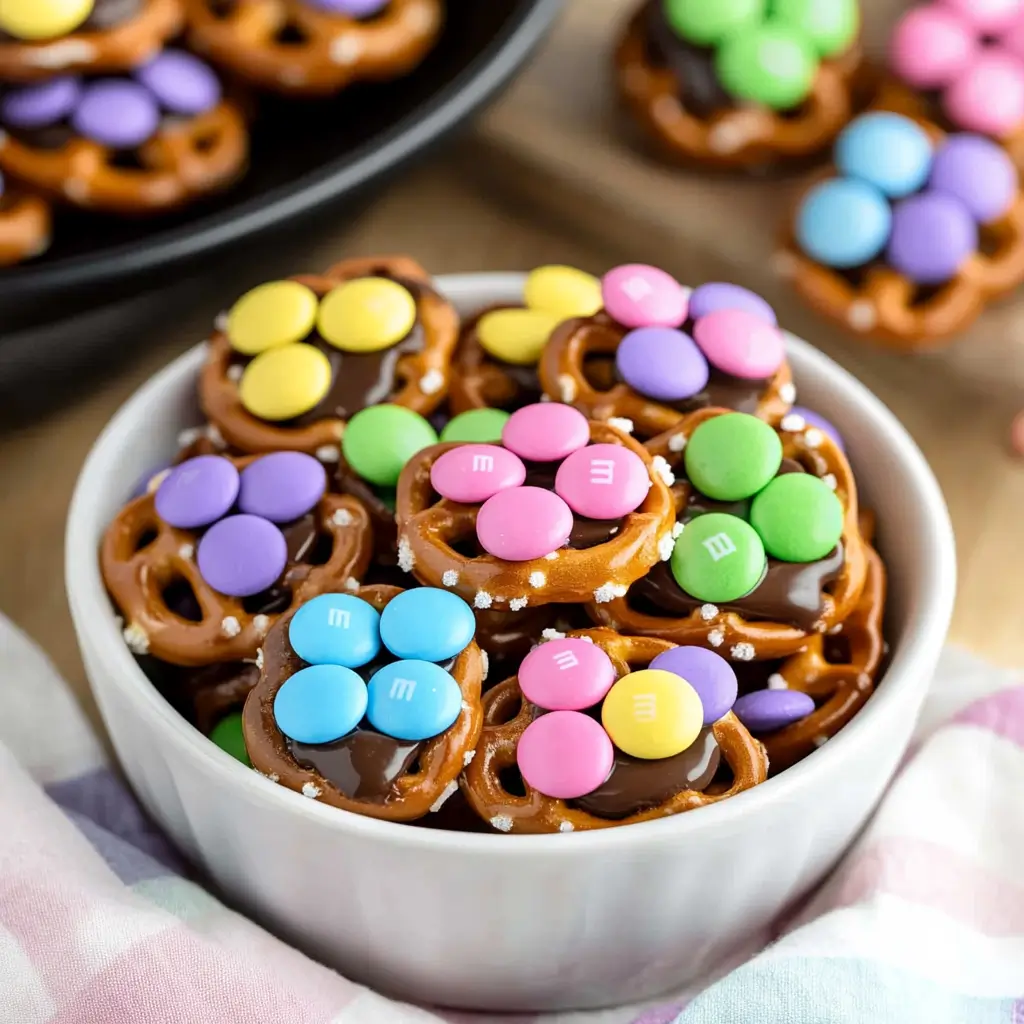
Flower Candy Recipe is a delightful and visually appealing treat that is perfect for all occasions. Whether you are looking for a fun weekend activity, a creative party snack, or a festive homemade gift, these colorful candies are sure to impress. Made with simple ingredients such as candy melts, mini round candies, and pretzel sticks, this recipe requires no baking and minimal effort, making it an ideal choice for both beginners and seasoned dessert lovers.
One of the best things about flower candy is that it allows for creativity. You can mix and match colors, experiment with different shapes, and even involve kids in the process, turning it into a fun family activity. The bright, cheerful appearance of these candies makes them a great addition to celebrations such as spring gatherings, baby showers, and birthday parties. They can also be used to decorate cakes and cupcakes or packaged into small gift bags for loved ones.
Another appealing aspect of this recipe is its simplicity. You do not need any advanced culinary skills to make these adorable candies. By following a few easy steps, you can create a batch of vibrant flower candies that look as good as they taste. Whether you choose to make them with classic candy melts or experiment with white chocolate, the result is always a deliciously sweet treat that is almost too pretty to eat.
For those who enjoy experimenting in the kitchen, this recipe offers endless possibilities. You can customize the size of the flowers, add edible glitter for an extra sparkle, or even use flavored candy melts to enhance the taste. With just a few ingredients and some creativity, you can turn a simple dessert into a stunning edible masterpiece.
Why You’ll Love This Recipe
If you are looking for a treat that is not only delicious but also visually appealing and easy to make, flower candy is the perfect choice. One of the biggest reasons to love this recipe is its simplicity. You do not need any special equipment, complicated techniques, or baking skills to create these beautiful candies. With just a few ingredients and a little patience, you can make a batch of homemade sweets that look as if they came straight from a professional bakery.
Another reason this recipe is a favorite is that it is incredibly versatile. Whether you are making these candies for a themed party, a seasonal celebration, or simply as a fun snack, you can customize them to suit any occasion. By choosing different colors of candy melts and experimenting with decorative elements, you can create endless variations of flower candy that match your personal style.
This recipe is also a great way to engage with kids. Because there are no sharp tools or complicated steps involved, children can participate in shaping the flowers, placing the candy centers, and even drizzling extra melted chocolate for a creative touch. It is a fun, hands-on experience that encourages creativity and teamwork while making something delicious.
Additionally, flower candy is an excellent choice for gifting. Packaged in clear cellophane bags or decorative boxes, these colorful treats make charming homemade presents for friends and family. They can also be used as party favors, adding a personalized touch to any event. Whether you enjoy making sweets for others or simply want to treat yourself, this recipe is guaranteed to bring joy.
Health Benefits
While flower candy is primarily a fun and decorative treat, there are some surprising benefits to making it at home. One of the biggest advantages is that you have full control over the ingredients. Many store-bought candies contain artificial preservatives, excess sugar, and unnecessary additives. By making your own candy, you can ensure that you are using high-quality ingredients and controlling the sweetness level to your preference.
Another benefit of homemade candy is portion control. Because these candies are small and individually crafted, it is easier to enjoy them in moderation. Instead of consuming large quantities of processed sweets, you can indulge in a few homemade flower candies without overloading on sugar.
For those who are mindful of allergens, making candy at home is a safer alternative to store-bought options. Many commercial candies contain traces of nuts, gluten, or dairy, which can be problematic for individuals with dietary restrictions. By selecting allergen-free candy melts and carefully choosing your ingredients, you can create a treat that is safe for everyone to enjoy.
Preparation Time, Servings, and Nutritional Information
This recipe is designed to be quick and convenient, making it perfect for busy schedules. The total preparation time is approximately 25 minutes, including melting the candy, shaping the flowers, and allowing them to set.
Preparation Time:
- 10 minutes to melt and shape the candies
- 15 minutes to allow the candies to cool and harden
Servings:
- The number of candies you can make depends on how many flower shapes you create. Typically, one batch yields 20-30 flower candies, depending on the size of each piece.
Nutritional Information (per candy):
- Calories: Approximately 60-80
- Carbohydrates: 8g
- Sugar: 6g
- Fat: 3g
- Protein: 0g
Ingredients List
To make these delightful flower candies, you will need the following ingredients:
- Candy melts (in various colors such as pink, yellow, purple, and white)
- Mini round candies or M&Ms (for the center of the flowers)
- Pretzel sticks or licorice strings (for the stems, optional)
- Parchment paper or a silicone baking mat
Optional ingredients for customization:
- Edible glitter or sprinkles for decoration
- White chocolate chips as an alternative to candy melts
- Flavored extracts (such as vanilla or peppermint) for a unique taste
Step-By-Step Cooking Instructions
- Prepare Your Work Surface
- Line a baking sheet with parchment paper or a silicone baking mat to prevent the candy from sticking.
- Melt the Candy
- Place each color of candy melts in separate microwave-safe bowls.
- Microwave in 30-second intervals, stirring after each round, until smooth and fully melted.
- Shape the Flowers
- Use a spoon or a piping bag to create five small petal shapes in a circular pattern on the parchment paper.
- While the candy is still soft, place a mini round candy or M&M in the center to complete the flower shape.
- Let Them Set
- Allow the candies to cool at room temperature for about 15 minutes, or place them in the fridge to speed up the process.
- Attach Stems (Optional)
- Dip the end of a pretzel stick or licorice string into melted candy and press it onto the back of the flower. Let it set until firm.
- Decorate (Optional)
- Sprinkle edible glitter or drizzle additional melted candy for a decorative touch.
- Enjoy!
- Once the candies are fully set, they are ready to eat or package for gifts.
How to Serve this Flower Candy Recipe
Flower Candy Recipe is not just a delicious treat; they are also a feast for the eyes. Their vibrant colors and charming shapes make them perfect for various occasions. One of the best ways to serve theis Flower Candy Recipe is as a centerpiece for dessert tables at parties and celebrations. Arrange them on a decorative platter or cake stand to create an eye-catching display that guests will love.
Another great serving idea is to use them as edible cake or cupcake toppers. Placing these candies on frosted cupcakes instantly elevates their appearance, adding a fun and festive touch. If you are decorating a larger cake, you can cluster the flower candies together to create a beautiful floral arrangement that enhances the theme of your celebration.
For a more interactive experience, consider setting up a DIY candy station where guests can decorate their own flower candies. Provide different colors of candy melts, various toppings such as sprinkles and edible glitter, and let everyone create their personalized treats. This idea works particularly well for kids’ parties, bridal showers, and family gatherings.
If you are gifting these candies, consider packaging them in clear cellophane bags tied with a ribbon. You can also place them in small decorative boxes or mason jars for an elegant presentation. Adding a personalized note or a custom label makes the gift even more special.
For those who enjoy pairing sweets with beverages, flower candies go wonderfully with tea, hot chocolate, or fruit-infused water. Their sweetness complements herbal and floral teas, making them an excellent choice for afternoon tea parties. Whether you are serving them at a gathering or enjoying them as a personal treat, these candies bring joy and a touch of creativity to any occasion.
Pairing Suggestions
Flower Candy Recipe can be paired with various foods and beverages to enhance their flavor and presentation. One of the best pairings is with different types of tea. Herbal teas such as chamomile, lavender, and hibiscus complement the floral theme of the candies and balance their sweetness with soothing, earthy notes. Green tea and jasmine tea also work well, as their light, refreshing flavors contrast beautifully with the rich candy melts.
Hot chocolate is another great pairing option. The creamy texture and deep cocoa flavor of hot chocolate provide a wonderful contrast to the crisp and sugary flower candies. If you enjoy experimenting with flavors, you can add a touch of mint or vanilla to your hot chocolate to create a unique and indulgent experience.
For those who prefer a fruity pairing, fresh berries such as strawberries, raspberries, and blueberries are a perfect match. Their natural tartness helps balance the sweetness of the candies, creating a delicious contrast of flavors. Serving flower candies alongside a fruit platter can make for a visually appealing and well-balanced dessert option.
If you are planning a dessert spread, consider serving flower candies with pastries such as shortbread cookies, vanilla cupcakes, or lemon bars. These baked goods have subtle flavors that complement the candies without overpowering them. Additionally, yogurt parfaits layered with fruit and granola can be enhanced with flower candies as a fun and edible garnish.
For a festive pairing, serve flower candies with sparkling beverages such as lemonade, fruit punch, or even a light, floral-inspired cocktail. The bright colors and delicate shapes of the candies add a whimsical touch to drinks, making them perfect for special occasions like weddings, baby showers, and garden parties.
Storage, Freezing & Reheating Instructions
Proper storage is key to maintaining the freshness and quality of Flower Candy Recipe. If stored correctly, these candies can last for several weeks without losing their texture or flavor. The best way to store them is in an airtight container at room temperature. Place parchment paper between layers of candies to prevent them from sticking together. Keep the container in a cool, dry place away from direct sunlight or heat sources, as excessive warmth can cause the candy melts to soften or melt.
If you need to store flower candies for an extended period, you can keep them in the refrigerator. However, be sure to place them in an airtight container to prevent moisture from affecting their texture. Before serving, allow the candies to come to room temperature to ensure they maintain their original consistency.
Freezing flower candies is not recommended, as the moisture from the freezer can cause the candies to become sticky and lose their shape. If you must freeze them, wrap each candy individually in parchment paper and store them in a freezer-safe bag. When ready to use, let them thaw at room temperature without unwrapping them immediately to prevent condensation from forming.
Reheating is generally unnecessary since flower candies do not require warming before serving. However, if any candies become slightly soft due to warm temperatures, you can place them in the refrigerator for a few minutes to help them firm up again.
Common Mistakes to Avoid
Even though this Flower Candy Recipe is simple, there are a few common mistakes that can affect the outcome of your flower candies. One of the biggest mistakes is overheating the candy melts. If the candy is microwaved for too long or at too high a temperature, it can become thick, lumpy, and difficult to work with. To prevent this, always melt the candy in short 30-second intervals, stirring in between to ensure even heating.
Another mistake is not allowing the candies enough time to set. If you try to move or package them before they are fully hardened, they may lose their shape or break apart. To avoid this, let them cool at room temperature for at least 15 minutes or place them in the refrigerator to speed up the process.
Using too much candy melt for each petal can also lead to uneven flowers. Instead of large dollops, use a small spoon or piping bag to create delicate, uniform petals. This will help your flowers look more realistic and professional.
Skipping parchment paper or a silicone baking mat is another common error. Without a non-stick surface, the melted candy can become difficult to remove, leading to misshapen or broken flowers. Always use a lined baking sheet to ensure easy removal.
Lastly, forgetting to customize the candies can make them look less exciting. While the basic recipe is beautiful on its own, adding extra decorative touches such as sprinkles, edible glitter, or drizzled chocolate can take them to the next level.
Pro Tips
For the best results, consider using a piping bag for precise flower shapes. This allows you to control the flow of the melted candy and create uniform designs. If you do not have a piping bag, a small zip-top bag with the corner cut off can work just as well.
Experimenting with colors can make your flower candies more visually appealing. Try using pastel shades for spring-themed candies or bold, vibrant colors for a fun and playful look. Mixing two colors together can create a marbled effect, adding an extra layer of beauty to your treats.
To ensure the candy melts smoothly, consider adding a small amount of vegetable oil or coconut oil. This helps create a glossy finish and makes the melted candy easier to work with.
For added flavor, use flavored candy melts or add a drop of vanilla or almond extract to the melted candy. This enhances the taste and makes the candies even more enjoyable.
Frequently Asked Questions (FAQs)
Can I use regular chocolate instead of candy melts?
Yes, but you may need to temper the chocolate to ensure it sets properly. Candy melts are designed to harden quickly without tempering, making them the best choice for this recipe.
How long do these candies last?
When stored in an airtight container at room temperature, they can last up to two weeks. Refrigeration can extend their shelf life slightly, but freezing is not recommended.
Can I make these candies without a microwave?
Yes, you can melt the candy melts using a double boiler on the stovetop. Place a heatproof bowl over a pot of simmering water and stir until melted.
What if my candy melts become too thick?
If the melted candy is too thick to pipe or spread easily, add a teaspoon of vegetable oil or coconut oil to thin it out.
Conclusion & Call to Action
Flower Candy Recipe is a fun, creative, and delicious treat that can brighten up any occasion. Whether you are making them for a party, a gift, or just as a fun kitchen project, these colorful sweets are guaranteed to bring smiles. With easy-to-find ingredients, simple steps, and endless customization options, this recipe is perfect for all skill levels.
Now that you have learned how to make these delightful candies, it is time to try them yourself. Gather your ingredients, unleash your creativity, and start making a batch today. Share your creations with friends and family, and do not forget to take pictures of your beautiful flower candies. If you loved this recipe, be sure to pass it along to others and keep experimenting with new colors and designs. Happy candy-making!
Print
Flower Candy Recipe – Easy No-Bake Treat for All Ages
- Total Time: 25 minutes
- Yield: 20–30 candies
- Diet: Vegetarian
Description
A fun and colorful no-bake treat made with candy melts and mini round candies. Perfect for parties, gifting, and decorating cakes or cupcakes.
Ingredients
- Candy melts (various colors)
- Mini round candies or M&Ms (for flower centers)
- Pretzel sticks or licorice strings (optional stems)
- Parchment paper or silicone baking mat
- Optional: sprinkles, edible glitter, white chocolate chips
Instructions
- Line a baking sheet with parchment paper.
- Melt candy melts in separate bowls using 30-second microwave intervals, stirring after each.
- Spoon or pipe 5 small petal shapes in a circular pattern on the parchment paper.
- Place a mini round candy in the center while the petals are still soft.
- Let them set at room temperature or in the fridge for 10–15 minutes.
- (Optional) Attach pretzel sticks or licorice strings as stems using melted candy.
- Once hardened, serve, gift, or use as decorations.
Notes
- Avoid overheating candy melts to prevent thickening.
- Get creative with different colors and shapes.
- Store in an airtight container to maintain freshness.
- Prep Time: 10 minutes
- Cook Time: 0 minutes (no-bake)
- Category: Dessert, Snack
- Method: No-Bake
- Cuisine: American


