
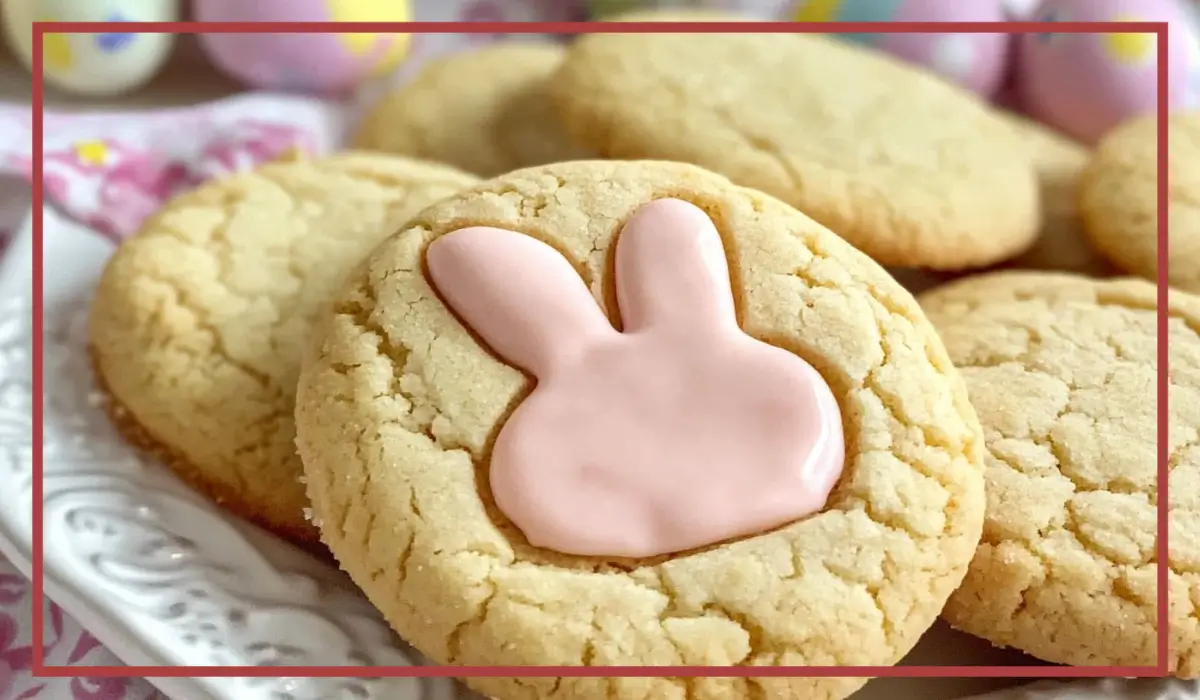
Easter is a time for celebration, family gatherings, and, of course, delicious treats. One of the best ways to bring some festive cheer to the holiday is by baking a batch of adorable Easter Bunny Cut-Out Cookies. These cookies are not just a dessert but also a fun activity that brings people together. Whether you are baking with kids, hosting an Easter brunch, or simply looking for a creative way to enjoy the holiday, these cookies will be a perfect addition to your celebration.
What makes these cookies so special is their simplicity. Unlike traditional sugar cookies that require multiple ingredients and careful mixing, this recipe uses a cake mix as the base. This shortcut not only saves time but also ensures that the cookies turn out soft, chewy, and packed with flavor. The frosting, made with powdered sugar, butter, vanilla, and a touch of pink food coloring, adds a delightful sweetness and a festive touch to the final presentation.
Another great feature of these cookies is their versatility. You can decorate them in endless ways, from pastel-colored frosting to adding sprinkles, coconut flakes, or even chocolate drizzle. Plus, they are perfect for Easter baskets, party favors, or a sweet treat to enjoy with a cup of tea or coffee.
If you are looking for a fun, easy, and delicious Easter baking project, these Easter Bunny Cut-Out Cookies are just what you need. Not only will they brighten up your Easter table, but they will also create lasting memories with your loved ones. Let’s dive into why you will love this recipe and how to make the perfect batch of these delightful cookies.
Why You’ll Love This Easter Bunny Cookies Recipe
There are countless reasons why this recipe will become a favorite in your household. First, it requires only a few ingredients, making it accessible for both beginner and experienced bakers. With just a box of cake mix, eggs, vegetable oil, and a little flour, you can create a batch of cookies that taste like they came from a professional bakery.
Another reason to love this recipe is its ease of preparation. Traditional sugar cookies often require chilling the dough and rolling it out carefully to avoid cracks. This recipe eliminates those extra steps, allowing you to enjoy baking without the hassle. Simply mix, roll, and bake—no need for extensive preparation.
These cookies are also a fantastic activity for kids. The process of cutting out bunny shapes, decorating with frosting, and adding colorful sprinkles makes it a fun-filled experience that little ones will love. Plus, since the cookies are made with a soft and chewy texture, they are easier to bite into than traditional crunchy sugar cookies.
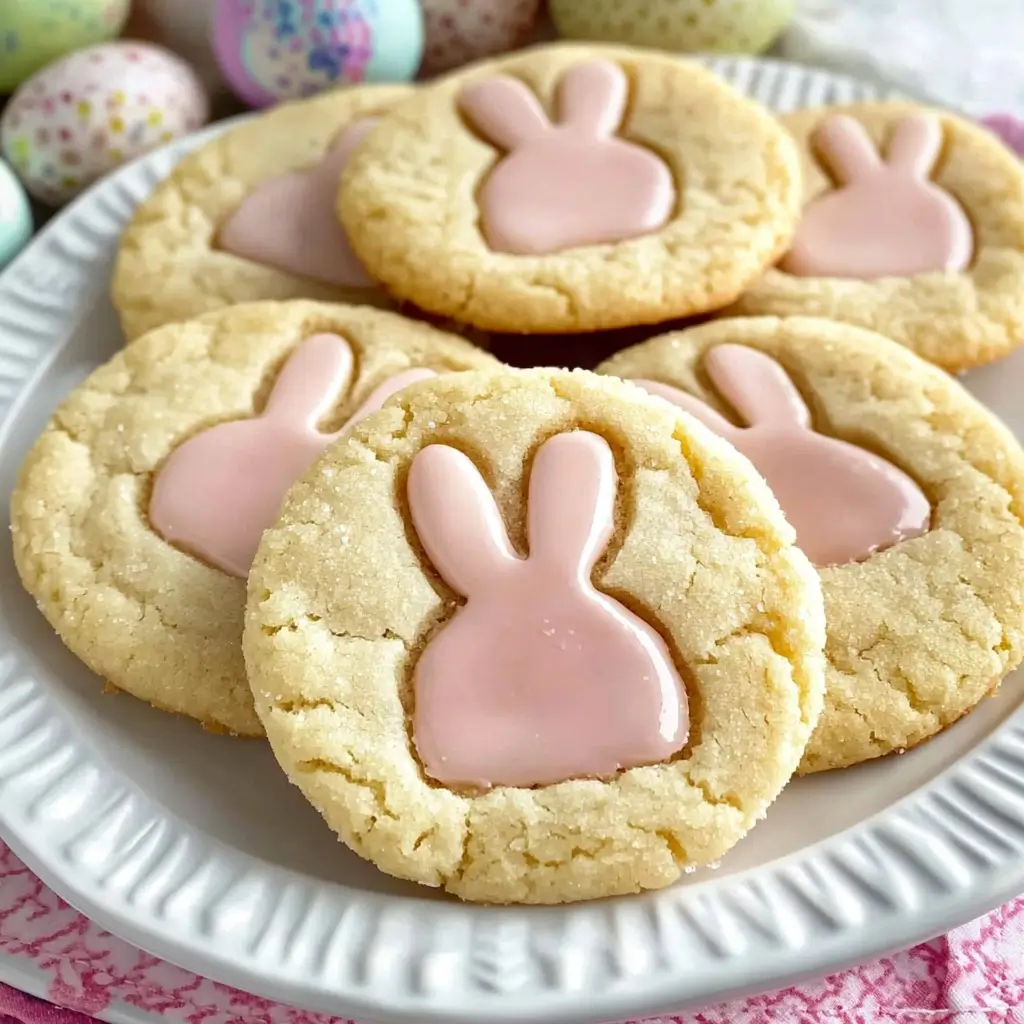
Moreover, these cookies are perfect for sharing. Whether you want to bring them to an Easter gathering, package them as gifts, or serve them at a festive brunch, they are guaranteed to be a hit. Their bright and playful appearance adds a cheerful touch to any table setting, making them a visually appealing treat as well.
Lastly, if you love experimenting with flavors, this recipe allows for endless variations. You can use different cake mix flavors like lemon, strawberry, or chocolate, and you can swap out the pink frosting for other pastel shades to create a colorful assortment of cookies.
Health Benefits
Although these cookies are a sweet indulgence, they still have some benefits when enjoyed in moderation. Unlike store-bought cookies that often contain preservatives and artificial flavors, making your own treats allows you to control the ingredients and ensure they are made with quality products.
One of the main benefits of these cookies is that they are lower in fat compared to some traditional buttery sugar cookies. By using vegetable oil instead of butter in the dough, the fat content is slightly reduced while still maintaining a soft texture. Additionally, since this recipe requires only a handful of ingredients, you can easily make adjustments to fit your dietary preferences.
If you want to make a healthier version, consider using a cake mix with reduced sugar or a gluten-free alternative. You can also replace some of the sugar in the frosting with a sugar-free substitute like stevia or monk fruit sweetener.
Another great way to add nutritional value is by incorporating natural food coloring instead of artificial dyes. Using beet juice or raspberry puree for pink, turmeric for yellow, or spinach juice for green can create beautiful colors while keeping the recipe free from artificial additives.
Additionally, baking at home gives you full control over portion sizes. By making smaller cookies or limiting the amount of frosting used, you can enjoy a festive treat without overindulging.
Preparation Time, Servings, and Nutritional Information
Preparation Time:
- Prep Time: 30 minutes
- Cook Time: 9 minutes
- Total Time: 39 minutes
Servings:
- Yields: Approximately 12 cookies
Nutritional Information (Per Cookie):
- Calories: 180-220 (varies based on ingredients used)
- Carbohydrates: 28g
- Fat: 8g
- Protein: 2g
- Sugar: 15g
Ingredients List
For the Cookies:
- 1 box white cake mix
- ½ cup vegetable oil
- 2 large eggs
- 2 tbsp flour
For the Frosting:
- 3 cups powdered sugar
- ⅓ cup butter, melted
- 2 tsp vanilla extract
- 2-3 tbsp milk
- Pink food coloring
Additional Tools:
- Bunny-shaped cookie cutter
- Mixing bowls
- Baking sheet
- Rolling pin
Step-By-Step Cooking Instructions
Step 1: Prepare the Dough
In a large mixing bowl, combine the cake mix, flour, vegetable oil, and eggs. Stir until a soft dough forms. If the dough feels too sticky, add a little more flour to make it easier to handle.
Step 2: Roll Out the Dough
Lightly flour a clean surface and roll out the dough to about ¼-inch thickness. This will ensure that the cookies are not too thin or too thick, giving them the perfect soft and chewy texture.
Step 3: Cut Out the Bunny Shapes
Use a bunny-shaped cookie cutter to cut out shapes from the dough. Carefully transfer each cut-out to a lined baking sheet, making sure to leave space between each cookie.
Step 4: Bake the Cookies
Preheat your oven to 350°F (175°C) and bake the cookies for about 8-9 minutes, or until they are set but not browned. Remove them from the oven and allow them to cool completely before decorating.
Step 5: Prepare the Frosting
In a bowl, whisk together powdered sugar, melted butter, vanilla extract, and milk. Add pink food coloring and mix until smooth. Adjust the consistency by adding more milk if needed.
Step 6: Decorate the Cookies
Spread a thin layer of frosting on whole cookies. Then, place a bunny-shaped cut-out cookie on top, creating a layered effect. Let the frosting set before serving.
How to Serve
Easter Bunny Cut-Out Cookies are not just a delicious treat; they also add a festive touch to any Easter celebration. Serving them in a creative way enhances the experience, making them even more enjoyable.
One of the best ways to serve these cookies is on a beautifully arranged dessert platter. Place them alongside other Easter-themed treats such as chocolate eggs, pastel-colored macarons, and fruit tarts. The bright and playful colors of the cookies will make the platter look stunning, perfect for an Easter brunch or family gathering.
For a more personalized presentation, consider placing individual cookies in decorative treat bags or small boxes. Tying them with pastel-colored ribbons makes them an excellent gift for guests, friends, or family members. You can even attach a small handwritten note with an Easter greeting to make it extra special.
If you are hosting an Easter tea party, these cookies pair wonderfully with a warm cup of tea, hot chocolate, or flavored coffee. The soft and chewy texture of the cookies balances well with a hot beverage, making them a comforting and delightful treat.
For a fun and interactive serving idea, create a DIY cookie decorating station. Set out extra cookies along with bowls of colored frosting, sprinkles, coconut shavings, and chocolate chips. Kids and adults alike will enjoy customizing their own cookies, making it a memorable Easter activity.
These cookies are also perfect for adding to Easter baskets. Simply wrap a few in clear plastic wrap and tuck them among colorful eggs, small toys, and other holiday treats. Whether served as a centerpiece dessert or as part of an Easter gift, these cookies are sure to be a hit.
Pairing Suggestions
Pairing your Easter Bunny Cut-Out Cookies with the right drinks and desserts can elevate the experience. Here are some fantastic pairing options:
Beverage Pairings:
- Hot Beverages: These cookies taste amazing with a warm drink. Try pairing them with vanilla-flavored tea, chamomile tea, or a cinnamon latte for a cozy combination.
- Cold Beverages: A tall glass of milk is a classic choice, but for something more festive, serve the cookies with strawberry milk or a fruity smoothie. Lemonade or iced tea with a hint of mint also provides a refreshing contrast to the sweetness of the cookies.
- Dessert Wines: If you’re serving these cookies at an adult gathering, a sweet dessert wine like Moscato or Riesling can enhance their flavors.
Dessert Pairings:
- Chocolate Treats: Chocolate-covered strawberries, truffles, or brownies complement the vanilla flavor of these cookies beautifully.
- Fresh Fruit: The light sweetness of the cookies pairs well with fresh berries, such as strawberries, blueberries, and raspberries. The slight tartness balances the sugary frosting.
- Cheesecake: A small slice of creamy cheesecake alongside a decorated bunny cookie creates a perfect balance of textures and flavors.
Pairing these cookies with the right accompaniments ensures a well-rounded and delightful Easter dessert experience.
Storage, Freezing & Reheating Instructions
Proper storage is essential to maintain the freshness and texture of these cookies. If stored correctly, they will stay soft and delicious for several days.
Storing at Room Temperature:
- Once the cookies have completely cooled, store them in an airtight container at room temperature.
- To prevent sticking, place a sheet of parchment paper between layers.
- These cookies will stay fresh for about 4 to 5 days when stored properly.
Refrigerating the Cookies:
- If you live in a warm climate or want to extend their shelf life, you can refrigerate them.
- Store them in an airtight container in the fridge for up to a week.
- Allow them to come to room temperature before serving to bring back their soft texture.
Freezing Instructions:
- These cookies freeze well, making them a great make-ahead treat.
- Place them in a single layer on a baking sheet and freeze until solid.
- Once frozen, transfer them to a freezer-safe bag or container, separating layers with parchment paper.
- They can be stored in the freezer for up to 3 months.
Reheating and Thawing:
- To enjoy frozen cookies, simply let them thaw at room temperature for about 20-30 minutes before serving.
- If you want to slightly warm them, pop them in the oven at 300°F (150°C) for 3-4 minutes or microwave them for 5-10 seconds.
With proper storage, you can enjoy these cookies beyond Easter, making them a convenient and delicious treat for any occasion.
Common Mistakes to Avoid
Even simple recipes can go wrong if common mistakes are made. Here are some potential pitfalls and how to avoid them:
- Overbaking: These cookies should be soft and chewy, so remove them from the oven as soon as they are set. If they start turning golden brown, they may be too dry.
- Skipping the Flour: While cake mix is the base, adding a little flour helps with consistency. Skipping this step may result in cookies that spread too much.
- Rolling the Dough Too Thin or Too Thick: If the dough is too thin, the cookies may become too crispy. If too thick, they may not bake evenly. Aim for ¼-inch thickness for the best results.
- Not Letting the Cookies Cool Completely Before Frosting: Frosting warm cookies can cause it to melt and become runny. Always allow them to cool completely.
- Using Too Much Frosting: A thin layer is enough to enhance the flavor without overwhelming the cookie.
- Not Mixing the Frosting Properly: If the frosting is too thick, add a little more milk. If it’s too runny, add more powdered sugar to achieve the right consistency.
Avoiding these mistakes ensures that your cookies turn out soft, flavorful, and beautifully decorated every time.
Pro Tips
To make the best Easter Bunny Cut-Out Cookies, follow these expert tips:
- Use Parchment Paper: This prevents the cookies from sticking and makes cleanup easier.
- Chill the Dough Before Rolling: If the dough feels too soft, refrigerate it for 10-15 minutes to make cutting out shapes easier.
- Experiment with Flavors: Add a teaspoon of almond extract, lemon zest, or cinnamon to the dough for a unique twist.
- Decorate with Sprinkles or Coconut Flakes: After frosting, sprinkle the cookies with pastel-colored decorations for a festive touch.
- Use a Piping Bag for Detailed Designs: If you want intricate designs, use a piping bag with a fine tip to create outlines, dots, or patterns on the cookies.
- Make Mini Versions: Instead of full-sized cookies, make bite-sized bunny cookies for a cute and snackable option.
- Double the Batch: These cookies are so delicious that they disappear quickly. Consider making a double batch if serving at a party or gathering.
Following these pro tips will ensure that your Easter Bunny Cut-Out Cookies are not only delicious but also visually stunning.
Frequently Asked Questions (FAQs)
1. Can I use a different cake mix flavor?
Yes! You can experiment with chocolate, lemon, or strawberry cake mix for different flavors while keeping the same soft texture.
2. How do I make these cookies gluten-free?
Simply use a gluten-free cake mix and follow the same steps. Check that all additional ingredients are gluten-free as well.
3. Can I make these cookies without a bunny cutter?
Yes! You can use any Easter-themed cookie cutter or cut the dough into simple circles if you don’t have a bunny-shaped one.
4. Can I prepare the dough in advance?
Absolutely! You can make the dough up to 2 days in advance and store it in the refrigerator. Let it sit at room temperature for a few minutes before rolling and cutting.
5. Can I use butter instead of vegetable oil?
Yes, but it will slightly change the texture. Butter will make the cookies richer and slightly crispier, while oil keeps them soft.
Conclusion & Call to Action
Now that you have all the details, it’s time to start baking! These Easter Bunny Cut-Out Cookies are not only fun to make but also a delightful way to celebrate the holiday. Whether you are baking with family, gifting them to loved ones, or enjoying them yourself, they are sure to bring joy to any Easter gathering.
Give this recipe a try and share your creations! Tag your friends and family, post your decorated cookies on social media, and spread the Easter cheer. Happy baking!
Print
Easter Bunny Cut-Out Cookies – Easy & Fun Easter Cookie Recipe
- Total Time: 39 minutes
- Yield: 12 cookies 1x
- Diet: Vegetarian
Description
These Easter Bunny Cut-Out Cookies are soft, chewy, and fun to decorate! Made with cake mix, they’re easy to prepare and perfect for Easter celebrations.
Ingredients
- 1 box white cake mix
- ½ cup vegetable oil
- 2 large eggs
- 2 tbsp flour
- 3 cups powdered sugar
- ⅓ cup butter, melted
- 2 tsp vanilla extract
- 2–3 tbsp milk
- Pink food coloring
Instructions
- Preheat oven to 350°F (175°C). Line a baking sheet with parchment paper.
- In a bowl, mix cake mix, flour, oil, and eggs until dough forms.
- Roll out dough to ¼-inch thickness and cut out bunny shapes.
- Place cookies on a baking sheet and bake for 8-9 minutes. Let cool.
- Mix powdered sugar, butter, vanilla, and milk to make frosting. Add pink food coloring.
- Frost cookies and decorate as desired.
Notes
- Use different food coloring for a variety of pastel shades.
- Chill dough for 10 minutes if it’s too sticky.
- Store in an airtight container for up to 5 days.
- Prep Time: 30 minutes
- Cook Time: 9 minutes
- Category: Dessert
- Method: Baking
- Cuisine: American