
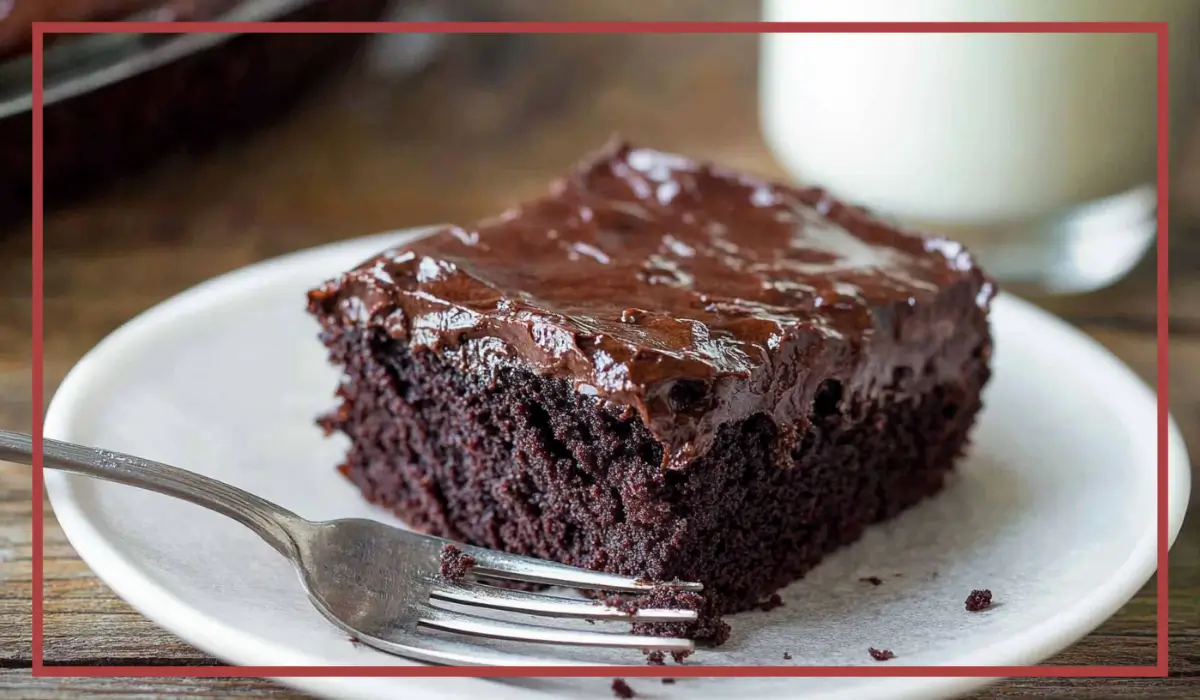
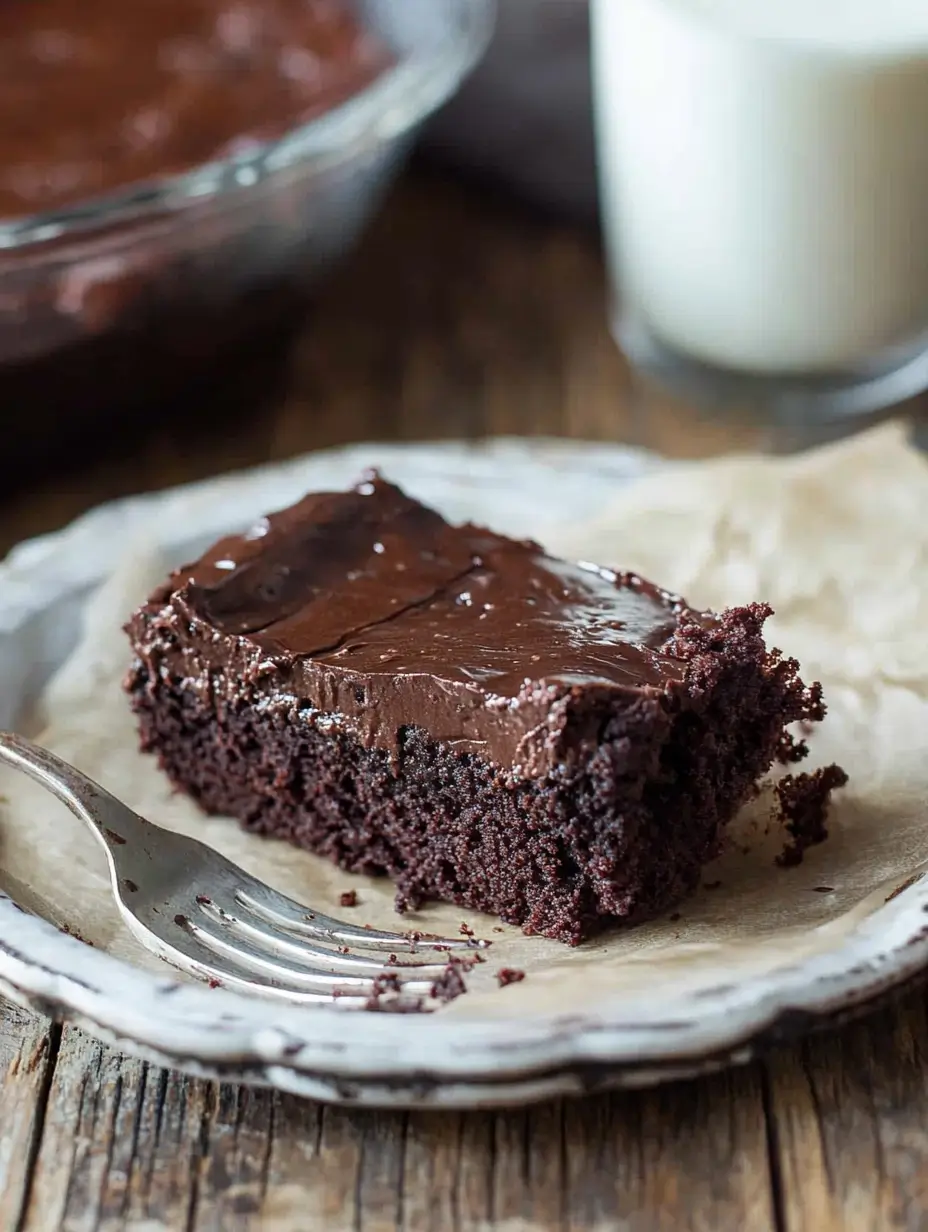
If you’re looking for a simple, delicious, and incredibly moist chocolate cake that’s also budget-friendly and allergy-friendly, then this Chocolate Wacky Cake is exactly what you need. This cake has been around for decades and is sometimes called Depression Cake because it became popular during the Great Depression when eggs, butter, and milk were expensive or hard to find. Instead of these traditional ingredients, this cake relies on pantry staples like flour, sugar, cocoa powder, baking soda, vinegar, and oil to create a soft and fluffy texture without any dairy or eggs.
One of the best parts about this cake is that you can mix everything directly in the baking pan, meaning no extra bowls and minimal cleanup. It’s a great option for those who love baking but don’t want to deal with a sink full of dishes afterward.
This cake is not only vegan-friendly but also incredibly rich and chocolaty, making it perfect for birthdays, casual desserts, or even when you’re just craving something sweet. It’s also a great option for people with food allergies since it doesn’t contain common allergens like eggs or dairy.
If you’re new to baking or just want a foolproof chocolate cake that comes together quickly, this is the recipe for you. Whether you frost it, dust it with powdered sugar, or enjoy it plain, every bite is incredibly delicious and satisfying.
Why You’ll Love This Chocolate Wacky Cake Recipe
This cake has so many things going for it! Here’s why it should be at the top of your must-bake list:
- Dairy-Free & Egg-Free – Perfect for those with food allergies or dietary restrictions.
- One-Pan & No-Mixer Needed – You can mix everything right in the baking dish, so there are fewer dishes to wash.
- Moist & Fudgy Texture – The vinegar and baking soda create a chemical reaction that gives the cake an amazing light yet rich texture.
- Simple Pantry Ingredients – No need for fancy ingredients; you likely already have everything in your kitchen.
- Customizable – Add nuts, chocolate chips, or even a vegan frosting to make it extra special.
- Great for Last-Minute Baking – If you need a quick and easy dessert, this cake comes together in minutes.
- Naturally Vegan – No need for substitutions; this cake is naturally free from animal products.
- Budget-Friendly – Since it uses simple, affordable ingredients, it’s a great option for feeding a crowd without spending a lot of money.
Health Benefits of the Chocolate Wacky Cake
Even though this is a dessert, it has some surprising benefits, especially compared to traditional chocolate cakes. Here’s why you can feel good about enjoying a slice:
- No Dairy or Eggs – This means the cake is cholesterol-free and lower in saturated fat than traditional cakes.
- Less Processed Ingredients – You can use organic or unrefined sugar for a more natural sweetness.
- Rich in Antioxidants – Cocoa powder is packed with antioxidants that help fight inflammation and support heart health.
- Lower in Calories – Since there’s no butter or cream, this cake is lighter than most chocolate cakes, making it a great option for those who want a treat without feeling too heavy.
- Can Be Made with Whole Wheat Flour – If you want to add a bit more fiber and nutrients, you can swap in some whole wheat flour for a healthier twist.
- Vegan-Friendly – Perfect for those following a plant-based diet or trying to eat more dairy-free foods.
Preparation Time, Servings, and Nutritional Information
This cake is perfect for when you need a quick and easy dessert. Here’s what to expect:
- Total Time: 40 minutes (10 minutes prep + 30 minutes baking)
- Servings: Makes one 8×8-inch cake (about 9 squares)
- Calories per Serving: 180
- Carbohydrates: 32g
- Fat: 7g
- Protein: 2g
- Fiber: 2g
- Sugar: 18g
Ingredients List of this Chocolate Wacky Cake
To make this simple yet delicious cake, you’ll need the following ingredients:
- 1 ½ cups all-purpose flour
- ¼ cup unsweetened cocoa powder
- 1 cup granulated sugar (or coconut sugar for a less refined option)
- 1 teaspoon baking soda
- ½ teaspoon salt
- 6 tablespoons vegetable oil (can use melted coconut oil or another neutral oil)
- 1 tablespoon distilled white vinegar (helps activate the baking soda for a fluffy texture)
- 1 teaspoon vanilla extract
- 1 cup hot water or brewed coffee (coffee enhances the chocolate flavor)
Step-By-Step Cooking Instructions
1. Preheat the Oven and Prepare the Pan
Start by preheating your oven to 350°F (175°C). Grab an 8×8-inch baking pan and lightly grease it with oil or non-stick spray. This prevents the cake from sticking to the pan.
2. Combine Dry Ingredients
In the baking pan itself, add the flour, cocoa powder, sugar, baking soda, and salt. Use a fork or whisk to mix everything evenly.
3. Make Three Wells
Using a spoon, create three small wells in the dry mixture. These wells will help distribute the wet ingredients evenly.
4. Add the Wet Ingredients
In the first well, pour in the vanilla extract. Second well, add the vinegar. In the third well, pour in the vegetable oil.
5. Pour in Hot Water or Coffee
Now, pour 1 cup of hot water or brewed coffee over everything. The heat helps dissolve the cocoa powder and intensifies the chocolate flavor.
6. Mix Everything Together
Using a fork or whisk, gently mix everything until just combined. Make sure there are no dry patches, but don’t overmix. The batter will be thin, but that’s normal.
7. Bake the Cake
Place the pan in the preheated oven and bake for 30-40 minutes. The cake is done when a toothpick inserted in the center comes out clean.
8. Let the Cake Cool
Once baked, remove the cake from the oven and let it cool in the pan for about 15 minutes before slicing or adding frosting.
How to Serve the Chocolate Wacky Cake
This cake is delicious on its own, but here are some fun ways to serve it:
- With Chocolate Frosting – A rich, dairy-free frosting makes it even more indulgent.
- With Powdered Sugar – A simple dusting of powdered sugar adds elegance.
- With Fresh Berries – Serve with raspberries, strawberries, or blueberries.
- With Dairy-Free Ice Cream – A scoop of vanilla or chocolate plant-based ice cream pairs beautifully.
Pairing Suggestions
- With Coffee or Tea – The rich chocolate pairs well with a hot drink.
- With Almond or Oat Milk – A glass of dairy-free milk is always a good choice.
- With a Fruit Compote – A homemade raspberry or cherry sauce takes it to the next level.
Storage, Freezing & Reheating Instructions
- Storage: Keep in an airtight container at room temperature for up to 3 days or refrigerate for up to 5 days.
- Freezing: Slice the cake and wrap individual pieces in plastic wrap. Store in an airtight container and freeze for up to 2 months.
- Reheating: Microwave for 10-15 seconds to bring back the fresh-from-the-oven taste.
Common Mistakes to Avoid
- Skipping the Vinegar – This ingredient is essential for the cake’s texture.
- Overmixing the Batter – Stir just until combined to keep the cake light and fluffy.
- Not Letting the Cake Cool – The cake will be too soft to cut if you slice it too soon.
Creative Variations to Try
One of the best things about this Chocolate Wacky Cake is how versatile it is. You can easily customize it to match different flavors, dietary preferences, or occasions. Here are a few fun ways to switch things up:
- Spiced Chocolate Cake – Add ½ teaspoon of cinnamon and a pinch of cayenne pepper for a subtle warmth that enhances the chocolate flavor.
- Nutty Delight – Stir in ½ cup of chopped walnuts, pecans, or almonds for a crunchy texture. You can also top the cake with toasted coconut flakes for extra depth.
- Double Chocolate Dream – Mix in ½ cup of dairy-free chocolate chips before baking for melty chocolate pockets in every bite.
- Mocha Magic – Replace the hot water with strong brewed espresso to intensify the chocolate and give a bold coffee kick.
- Coconut Lover’s Version – Swap the vegetable oil for melted coconut oil and use coconut milk instead of water for a subtle tropical twist.
By experimenting with different add-ins and flavors, you can make this cake feel brand new every time!
The Best Frosting Options
Even though this cake is delicious on its own, a good frosting can take it to the next level. Here are some dairy-free and vegan-friendly options:
- Classic Chocolate Frosting – A simple mix of powdered sugar, cocoa powder, dairy-free butter, and plant-based milk creates a rich and creamy spread.
- Peanut Butter Frosting – Combine powdered sugar, peanut butter, and a splash of almond milk for a salty-sweet twist.
- Coconut Whipped Cream – Use chilled coconut cream whipped with vanilla and a little sugar for a light, airy topping.
- Date Caramel Drizzle – Blend pitted dates, a splash of almond milk, and a touch of sea salt for a natural caramel sauce.
- Simple Ganache – Heat dairy-free chocolate with coconut milk until smooth and pourable, then drizzle over the cake.
Each frosting choice adds a unique twist, making the cake even more special!
How to Make This Cake Gluten-Free
If you’re looking for a gluten-free version of this cake, don’t worry—it’s easy to adapt! Since the structure of this cake relies on simple chemical reactions rather than gluten, a few simple swaps will give you a perfect result.
- Use a Gluten-Free Flour Blend – A 1:1 all-purpose gluten-free flour (like Bob’s Red Mill or King Arthur) works best. Avoid single flours like almond or coconut flour, as they absorb moisture differently.
- Check Your Cocoa Powder – Most cocoa powders are gluten-free, but always read the label to be sure.
- Increase Binding Power – Since gluten-free flours can be a bit crumbly, add ½ teaspoon of xanthan gum if your flour blend doesn’t already contain it.
- Be Gentle When Mixing – Overmixing can make the batter too dense, so stir until just combined.
- Bake Time May Vary – Gluten-free cakes sometimes need an extra 5 minutes in the oven, so check for doneness with a toothpick.
With these adjustments, you’ll get a moist, chocolatey, and completely gluten-free cake that’s just as delicious as the original!
How to Make This Cake a Layered Dessert
Want to turn this simple cake into a stunning layered dessert? With just a few extra steps, you can transform it into a showstopper for special occasions.
- Double the Recipe – Bake two cakes in separate pans, or bake one and slice it in half horizontally once cooled.
- Level the Cake – If the cake has a dome, use a serrated knife to trim the top so your layers stack evenly.
- Add a Filling – Spread chocolate ganache, peanut butter frosting, or raspberry jam between the layers for extra flavor.
- Frost the Outside – Use a smooth buttercream or whipped coconut cream to coat the cake for a polished look.
- Decorate – Top with chocolate shavings, crushed nuts, or fresh fruit for a bakery-worthy finish.
Turning this cake into a layered masterpiece makes it perfect for birthdays, holidays, and celebrations while keeping it easy and budget-friendly!
Conclusion & Call to Action
This Chocolate Wacky Cake is the ultimate easy, dairy-free, and egg-free dessert. Whether you’re making it for a special occasion or just to satisfy a chocolate craving, it’s a foolproof recipe that never disappoints. Give it a try and let me know how it turns out!
Print
Chocolate Wacky Cake (Dairy-Free & Egg-Free)
- Total Time: 40 minutes
- Yield: 9 servings 1x
- Diet: Vegan
Description
A simple, moist, and rich chocolate cake that requires no dairy or eggs! This one-bowl recipe is easy to make and perfect for any occasion.
Ingredients
- 1 ½ cups all-purpose flour
- ¼ cup unsweetened cocoa powder
- 1 cup granulated sugar
- 1 teaspoon baking soda
- ½ teaspoon salt
- 6 tablespoons vegetable oil
- 1 tablespoon white vinegar
- 1 teaspoon vanilla extract
- 1 cup hot water or brewed coffee
Instructions
- Preheat oven to 350°F (175°C) and grease an 8×8-inch baking pan.
- Mix flour, cocoa powder, sugar, baking soda, and salt in the baking pan.
- Create three wells in the dry mixture; add vanilla, vinegar, and oil separately in each well.
- Pour hot water or coffee over everything and stir until combined.
- Bake for 30-40 minutes, or until a toothpick inserted comes out clean.
- Let cool before serving or adding frosting.
Notes
- Coffee enhances the chocolate flavor, but water works just as well.
- This cake stays moist for days and is freezer-friendly!
- Prep Time: 10 minutes
- Cook Time: 30 minutes
- Category: Dessert
- Method: Baking
- Cuisine: American