
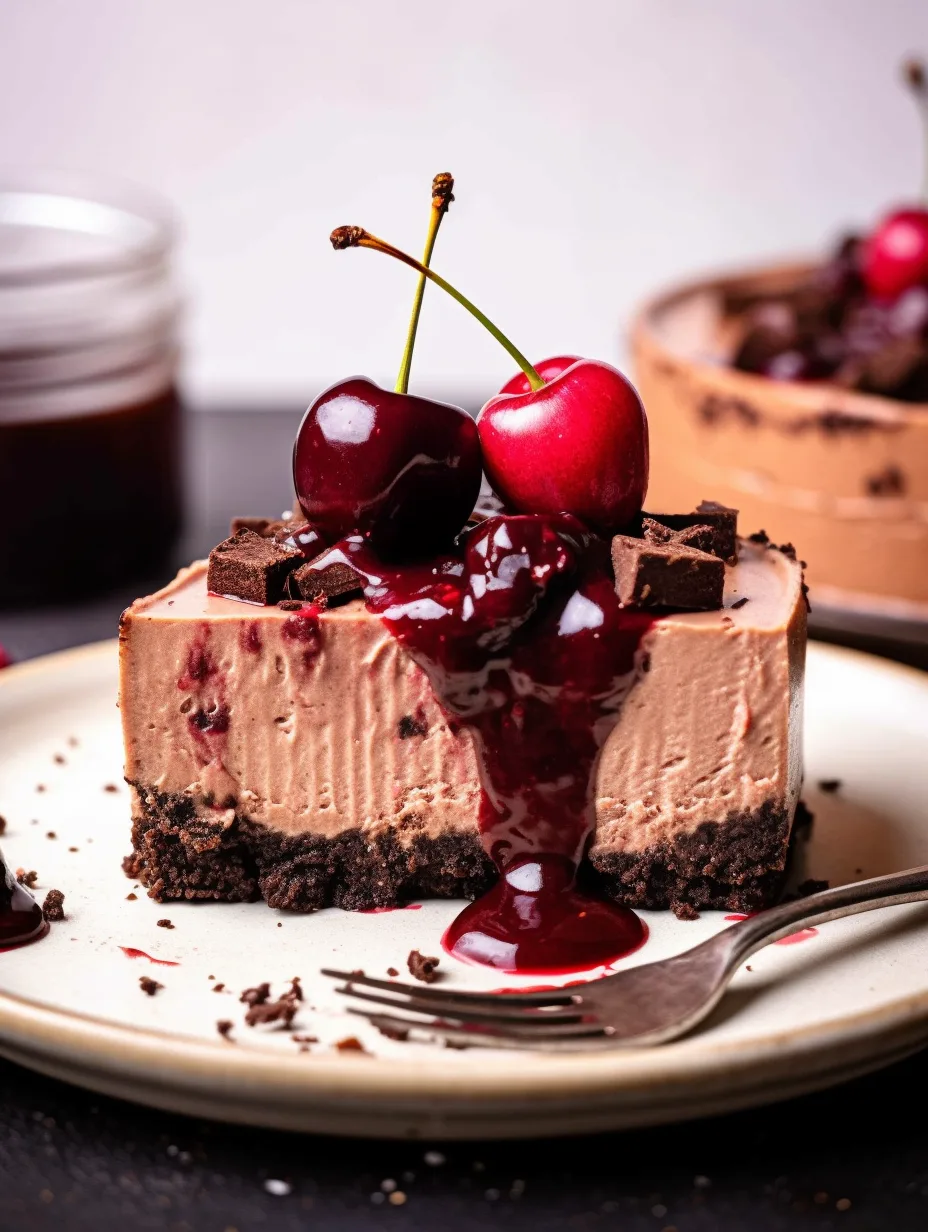
Chocolate Cherry Cheesecake is an amazing dessert that combines the rich flavors of chocolate and cherries in a creamy, delightful cheesecake. This recipe is perfect for any occasion, whether you are celebrating a special milestone, hosting a gathering, or simply indulging your sweet tooth. As soon as you take a bite, the luscious layers will transport you to dessert bliss, making it a true crowd-pleaser. The combination of smooth cream cheese, chocolate, and fresh cherries creates a balance so delicious that you won’t believe how easy it is to make.
Like many unforgettable desserts, this Chocolate Cherry Cheesecake has an intriguing personality. Its velvety texture and rich flavor will draw you in, while the bright cherry topping adds a burst of tanginess that cuts through the creaminess. Every bite is a perfect medley of sweet and tart, making it hard to resist going back for seconds. Even those who claim to be “not a cheesecake person” will be converted after just one taste!
This detailed article will guide you through the recipe and reveal the secrets to making this incredible dish. You’ll find handy tips for preparation, cooking, and of course, serving. Let’s dive into this remarkable Chocolate Cherry Cheesecake recipe and understand what makes it so special!
Why You’ll Love This Recipe
There are numerous reasons to fall in love with this incredible Chocolate Cherry Cheesecake recipe. Here are some standouts:
1. Decadent Flavor: The blend of smooth chocolate and tart cherries creates a delightful harmony that will satisfy any sweet tooth.
2. Easy to Make: This recipe is straightforward, allowing both novice and experienced bakers to create something divine.
3. Showstopper Dessert: The stunning presentation makes it a centerpiece for any gathering, dazzling guests before they even have a taste.
4. Versatile Options: You can customize the cheesecake by using other fruits or even different chocolates, making it suitable for various events.
5. Perfect for Any Occasion: Be it birthdays, holidays, or even just a cozy night in, this cheesecake sets the mood for celebration.
6. Make Ahead: It’s a great option for those busy days when you want to impress. Prepare it the day before to save time.
With these enticing reasons in mind, it’s easy to see why this Chocolate Cherry Cheesecake will become a favorite in your dessert repertoire.
Preparation and Cooking Time
Making this Chocolate Cherry Cheesecake will take a total of approximately 4 hours. Here’s the breakdown of time required:
– Preparation Time: 30 minutes
– Cooking Time: 1 hour
– Cooling Time: 2 hours
– Chilling Time: 1 hour
These times may vary slightly based on your kitchen experience and equipment, but following this framework will help ensure success!
Ingredients
– 1 ½ cups chocolate cookie crumbs
– ½ cup unsalted butter, melted
– 24 oz cream cheese, softened
– 1 cup granulated sugar
– 1 teaspoon vanilla extract
– 3 large eggs
– 8 oz semi-sweet chocolate, melted
– 1 cup fresh cherries, pitted and halved (or jars of preserved cherries)
– 1 tablespoon cornstarch
– ¼ teaspoon salt
– Whipped cream for topping (optional)
– Chocolate shavings for garnish (optional)
Step-by-Step Instructions
Creating the perfect Chocolate Cherry Cheesecake can be simple when you follow these clear steps:
1. Preheat the Oven: Preheat your oven to 325°F (160°C). Grease a 9-inch springform pan.
2. Make the Crust: In a bowl, mix the chocolate cookie crumbs with melted butter until combined. Press this mixture into the bottom of the prepared pan to form a crust.
3. Prepare the Cheesecake Filling:
– In a large mixing bowl, beat the softened cream cheese with an electric mixer until smooth.
– Add granulated sugar and continue to mix until well blended.
– Mix in the vanilla extract and salt.
4. Add Eggs: Add eggs one at a time, mixing on low speed after each addition until just combined.
5. Incorporate Chocolate: Blend in the melted semi-sweet chocolate until smooth and uniform in color.
6. Incorporate Cherries: In a small bowl, mix the pitted cherries with cornstarch. Fold the cherry mixture into the cream cheese mixture gently to distribute evenly.
7. Bake: Pour the cheesecake mixture over the prepared crust in the springform pan. Bake in the preheated oven for about 60 minutes or until the center is set but slightly jiggly.
8. Cool Down: Once baked, turn off the oven and leave the cheesecake inside with the door ajar for about 1 hour to cool gradually.
9. Chill: After cooling to room temperature, remove the cheesecake from the oven and refrigerate for at least 2 hours or until fully set.
10. Serve: Before serving, top with whipped cream and chocolate shavings if desired.
Following these clear steps will help you create a Chocolate Cherry Cheesecake that looks and tastes wonderful!
How to Serve
To make the most of your Chocolate Cherry Cheesecake experience, consider the following suggestions when serving:
1. Presentation: Carefully release the cheesecake from the springform pan and place it on a decorative serving plate. A cake stand can add elegance.
2. Accompaniments: Serve with fresh whipped cream or a scoop of vanilla ice cream to complement the flavors.
3. Garnishing: Consider topping with additional fresh cherries or chocolate shavings for a beautiful finish.
4. Slice Size: Cut generous slices to encourage guests to enjoy every bit of this decadent dessert.
5. Beverage Pairing: Pair with coffee or dessert wines for an added layer of indulgence that enhances the flavors.
By thoughtfully considering how you present and serve the Chocolate Cherry Cheesecake, you create a memorable experience for yourself and your guests.
Additional Tips
– Use Quality Ingredients: For the best flavor, opt for premium chocolate and fresh cherries. Fresh ingredients enhance the overall taste and texture of your Chocolate Cherry Cheesecake.
– Don’t Overmix: When adding eggs, mix just until combined. Overmixing can incorporate too much air, causing your cheesecake to crack during baking.
– Allow for Proper Cooling: Cooling the cheesecake slowly in the oven helps prevent cracks on the surface. Remember, patience is key!
– Chill Thoroughly: Chilling the cheesecake long enough in the refrigerator ensures it sets properly and allows the flavors to meld beautifully.
– Experiment with Flavors: Consider adding a hint of almond extract or a splash of cherry liqueur for extra flavor depth.
Recipe Variation
Feel free to switch things up! Here are a few variations to try:
1. Dark Chocolate Cherry Cheesecake: Replace semi-sweet chocolate with dark chocolate for a richer taste that complements the cherries nicely.
2. Marble Cheesecake: Swirl the chocolate filling with some plain cheesecake mixture before baking for an eye-catching marble effect.
3. Chocolate Cherry Swirl: Add a homemade cherry sauce or pie filling on top before baking for a visually stunning dessert.
4. Crust Alternatives: Instead of chocolate cookie crumbs, consider using graham cracker crumbs or even crushed nuts for a different flavor profile.
5. Dairy-Free Version: Substitute cream cheese with a dairy-free alternative and use coconut cream for the whipped topping.
Freezing and Storage
– Storage: Keep your Chocolate Cherry Cheesecake covered in the refrigerator. It will maintain its quality for up to 4-5 days, making it convenient for leftovers.
– Freezing: Slice the cheesecake into portions and wrap them tightly in plastic wrap, then foil. It can be frozen for up to 3 months. Thaw in the refrigerator before serving.
Special Equipment
To create this decadent cheesecake, you’ll need a few essential tools:
– A 9-inch springform pan for easy release.
– Electric mixer for achieving a smooth filling.
– Mixing bowls for combining ingredients.
– Rubber spatula for folding in the cherries.
– A sharp knife for slicing the cheesecake cleanly.
Frequently Asked Questions
How do I know when the cheesecake is done?
The center should be set but still slightly jiggly. It will firm up as it cools.
Can I make this cheesecake ahead of time?
Absolutely! It can be stored in the refrigerator for 2-3 days before serving, allowing the flavors to develop fully.
Is this cheesecake suitable for gluten-free diets?
Yes, simply use gluten-free cookie crumbs for the crust.
Can I substitute fresh cherries with canned ones?
Certainly! Just make sure to drain them well before using to avoid excess moisture.
How can I prevent my cheesecake from cracking?
A few tricks include cooling the cheesecake slowly in the oven and avoiding overmixing the batter.
Conclusion
The Chocolate Cherry Cheesecake is not just a dessert; it’s an experience. The luxurious blend of flavors and textures makes it undeniably delightful. Whether for a special occasion or a simple indulgence at home, this cheesecake will surely impress. With its easy-to-follow recipe and endless variations, you’ll be able to make this exquisite dessert a staple in your culinary repertoire.
Chocolate Cherry Cheesecake: An Incredible Ultimate Recipe
- Total Time: 1 hour 15 minutes
Ingredients
– 1 ½ cups chocolate cookie crumbs
– ½ cup unsalted butter, melted
– 24 oz cream cheese, softened
– 1 cup granulated sugar
– 1 teaspoon vanilla extract
– 3 large eggs
– 8 oz semi-sweet chocolate, melted
– 1 cup fresh cherries, pitted and halved (or jars of preserved cherries)
– 1 tablespoon cornstarch
– ¼ teaspoon salt
– Whipped cream for topping (optional)
– Chocolate shavings for garnish (optional)
Instructions
Creating the perfect Chocolate Cherry Cheesecake can be simple when you follow these clear steps:
1. Preheat the Oven: Preheat your oven to 325°F (160°C). Grease a 9-inch springform pan.
2. Make the Crust: In a bowl, mix the chocolate cookie crumbs with melted butter until combined. Press this mixture into the bottom of the prepared pan to form a crust.
3. Prepare the Cheesecake Filling:
– In a large mixing bowl, beat the softened cream cheese with an electric mixer until smooth.
– Add granulated sugar and continue to mix until well blended.
– Mix in the vanilla extract and salt.
4. Add Eggs: Add eggs one at a time, mixing on low speed after each addition until just combined.
5. Incorporate Chocolate: Blend in the melted semi-sweet chocolate until smooth and uniform in color.
6. Incorporate Cherries: In a small bowl, mix the pitted cherries with cornstarch. Fold the cherry mixture into the cream cheese mixture gently to distribute evenly.
7. Bake: Pour the cheesecake mixture over the prepared crust in the springform pan. Bake in the preheated oven for about 60 minutes or until the center is set but slightly jiggly.
8. Cool Down: Once baked, turn off the oven and leave the cheesecake inside with the door ajar for about 1 hour to cool gradually.
9. Chill: After cooling to room temperature, remove the cheesecake from the oven and refrigerate for at least 2 hours or until fully set.
10. Serve: Before serving, top with whipped cream and chocolate shavings if desired.
Following these clear steps will help you create a Chocolate Cherry Cheesecake that looks and tastes wonderful!
- Prep Time: 15 minutes
- Cook Time: 60 minutes
Nutrition
- Serving Size: 12
- Calories: 400 kcal
- Fat: 28g
- Protein: 6g