
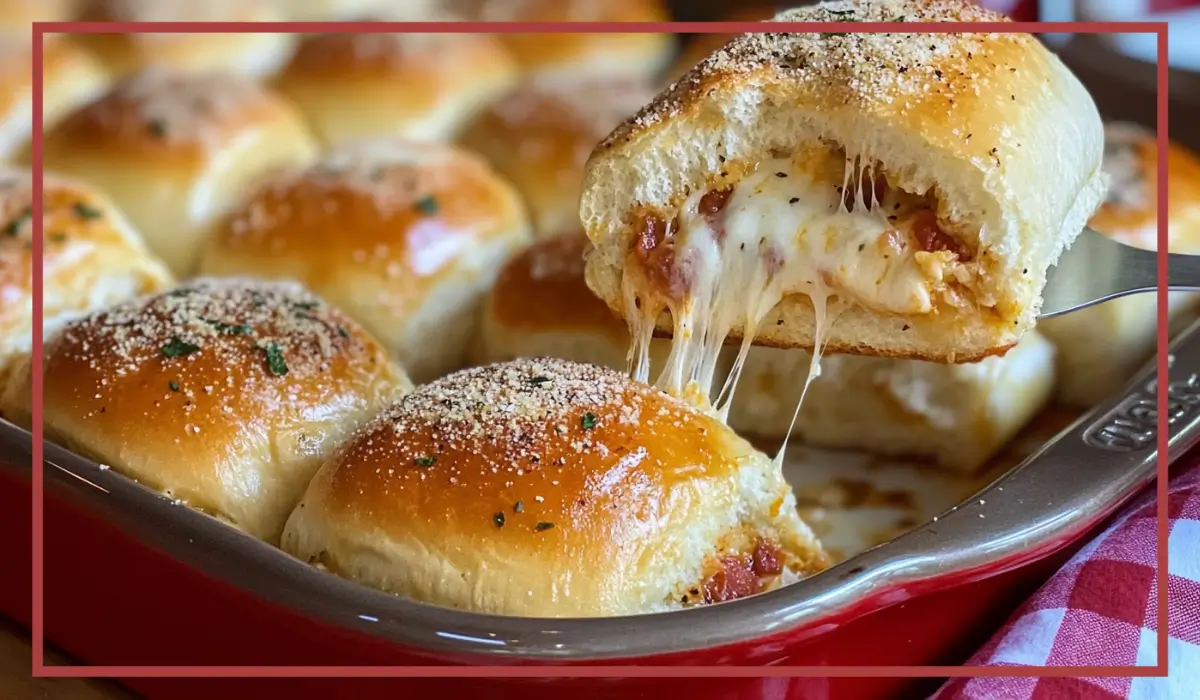
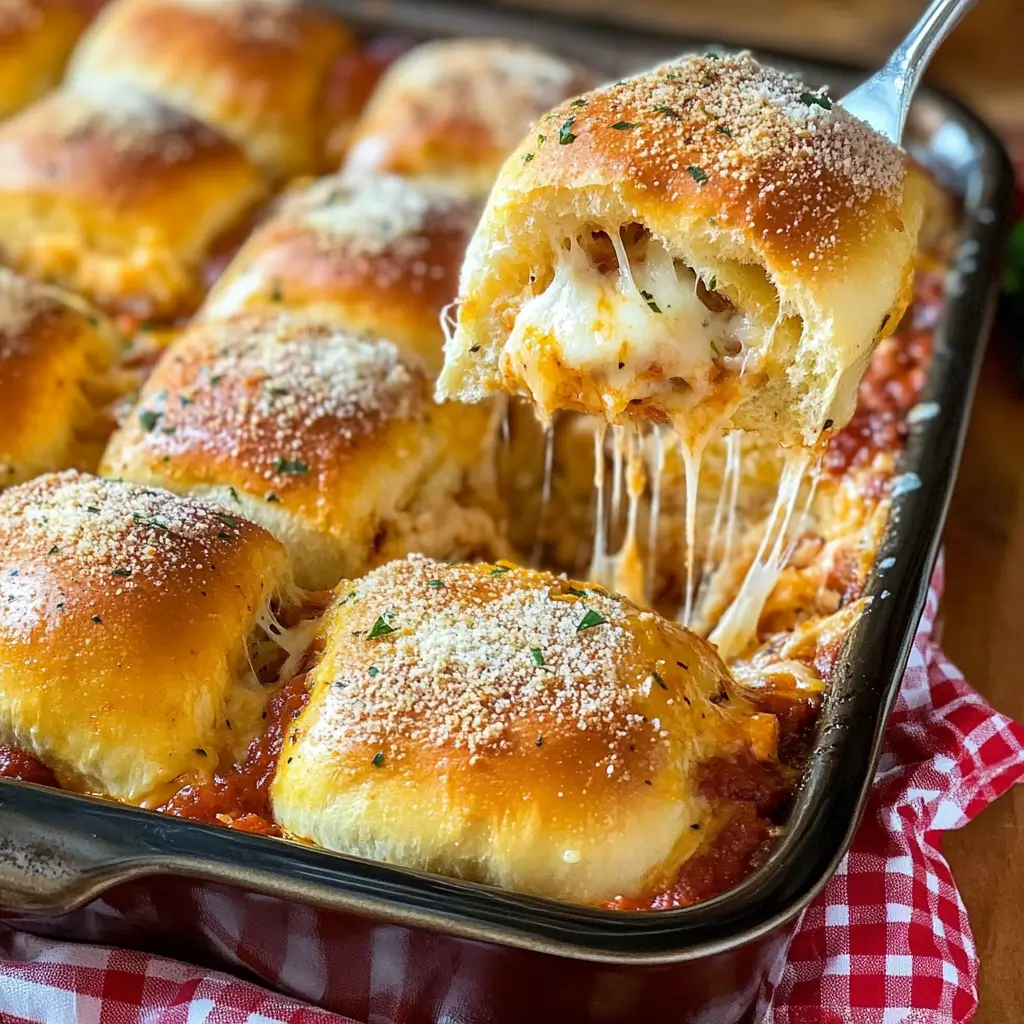
If you’re looking for the perfect game-day snack, quick dinner idea, or party-friendly appetizer that will leave everyone raving, then you’ve just found it. These Chicken Parmesan Sliders are a cheesy, saucy, and delightfully buttery twist on the classic Chicken Parmesan. All the deliciousness of the classic Italian-American dish, but packed into soft, sweet Hawaiian rolls that are baked until perfectly golden and gooey.
Imagine biting into soft, buttery rolls filled with shredded chicken smothered in marinara sauce, melted mozzarella, and Parmesan cheese. The garlicky, herb-infused butter topping brushed over the rolls gives them a luxurious, savory finish that makes these sliders completely irresistible.
I remember the first time I made these Chicken Parmesan Sliders; it was for a casual weekend get-together with friends. I was looking for something easy to whip up, something I could prepare ahead of time and just pop into the oven when everyone arrived. The sliders were a total hit. They were gone within minutes, with everyone asking for the recipe. That’s when I knew I had to make these little beauties a regular part of my entertaining repertoire.
This recipe is not only perfect for parties but also for busy weeknights when you need something comforting and satisfying without spending hours in the kitchen. Plus, it’s a fantastic way to use up leftover rotisserie chicken if you have some sitting in your fridge. Let’s dive right into why you’re going to love these Chicken Parmesan Sliders just as much as I do.
Why You’ll Love This Recipe
First and foremost, these Chicken Parmesan Sliders are ridiculously easy to make. You don’t need any fancy ingredients or complicated techniques. Just some shredded chicken, marinara sauce, cheese, soft dinner rolls, and a few pantry staples to whip up the garlic butter topping.
They’re also the ultimate crowd-pleaser. Whether you’re hosting a big family gathering, a casual game night, or just want to make something comforting for dinner, these sliders fit the bill. Everyone loves them, from picky kids to adults who appreciate a good, cheesy, comforting meal.
The flavor combination is absolutely divine. The sweet, soft Hawaiian rolls pair so well with the savory, cheesy, saucy filling. The melted mozzarella cheese adds that perfect stretchiness, while the Parmesan provides a slightly nutty, salty edge that complements the marinara sauce beautifully.
The garlic butter topping takes things to the next level. Brushing that buttery, herby goodness over the rolls before baking ensures they come out golden, glistening, and fragrant. It’s the kind of aroma that makes your mouth water the moment you open the oven door.
What’s more, you can easily customize these sliders to suit your taste. Want more heat? Add some red pepper flakes. Prefer a little extra cheese? Go for it! The recipe is incredibly flexible.
Finally, these sliders are wonderfully versatile. They make a fantastic appetizer, snack, lunch, or even dinner when served with a side salad. And if you have any leftovers (which is rare, but it happens), they reheat beautifully.
Health Benefits
While these Chicken Parmesan Sliders are undeniably indulgent, you can still enjoy them as part of a balanced diet. They offer several nutritional benefits that make them a worthwhile addition to your meal rotation.
First, the shredded chicken is an excellent source of lean protein. Protein is essential for muscle growth, tissue repair, and keeping you feeling full and satisfied. Using rotisserie chicken makes the process convenient, but you can also cook your own chicken breast for a lower-fat option.
The marinara sauce contributes to the nutritional value by providing vitamins A and C from the tomatoes. Tomatoes are rich in antioxidants, particularly lycopene, which is known for its anti-inflammatory properties and its ability to promote heart health.
Mozzarella and Parmesan cheese offer a good source of calcium and protein. While cheese is high in fat, opting for part-skim mozzarella can reduce the calorie and fat content without sacrificing flavor.
The garlic used in the garlic butter topping offers its own set of health benefits. Garlic is known to have immune-boosting properties and can help support heart health by improving cholesterol levels and potentially lowering blood pressure.
Additionally, if you choose to top your sliders with fresh basil or parsley, you’re adding a touch of vitamins and minerals, as well as a refreshing burst of flavor.
While these sliders are meant to be a comfort food dish, incorporating nutrient-rich ingredients like chicken, tomato sauce, and fresh herbs ensures you’re getting some beneficial nutrients along with all the cheesy, buttery goodness.
Preparation Time, Servings, and Nutritional Information
This recipe is designed to be quick and convenient, perfect for when you need to throw something together without much hassle.
Preparation Time: 10 minutes
Cooking Time: 22 minutes (15 minutes covered, 7 minutes uncovered)
Total Time: 32 minutes
Servings: 12 sliders
Nutritional Information (per slider):
- Calories: Approximately 245
- Protein: 14g
- Carbohydrates: 18g
- Fat: 12g
- Saturated Fat: 6g
- Cholesterol: 53mg
- Sodium: 450mg
- Fiber: 1g
- Sugars: 5g
Keep in mind that nutritional values will vary based on the specific brands of ingredients you use and any adjustments you make to the recipe.
Ingredients List
To make these incredibly cheesy and delicious Chicken Parmesan Sliders, you will need the following ingredients:
For the Sliders:
- 12 Hawaiian rolls (or any soft dinner rolls) – Their slight sweetness perfectly complements the savory filling.
- 2 cups cooked chicken, shredded (Rotisserie chicken works great!) – Provides lean protein and a satisfying, hearty texture.
- 1 1/2 cups marinara sauce (Store-bought or homemade) – Adds rich tomato flavor and keeps everything moist and flavorful.
- 2 cups shredded mozzarella cheese (Or Italian blend) – Melts beautifully, providing that gooey, stretchy goodness we all love.
- 1/2 cup grated Parmesan cheese – Adds a salty, slightly nutty flavor that enhances the dish.
For the Garlic Butter Topping:
- 4 tablespoons unsalted butter, melted – Makes the rolls irresistibly soft and rich.
- 1 teaspoon garlic powder – Adds a savory, garlicky depth to the topping.
- 1 teaspoon Italian seasoning – Brings all the classic herb flavors together.
- Chopped fresh basil or parsley (Optional, for garnish) – Adds a pop of freshness and color.
Feel free to double the recipe if you’re serving a larger crowd or want to have some extra for the next day.
Now, let’s walk through the steps to create these amazing Chicken Parmesan Sliders. They’re so easy, you’ll wonder why you haven’t been making them all along.
Step-By-Step Cooking Instructions
These Chicken Parmesan Sliders are a breeze to put together. With just a few simple steps, you’ll have a mouthwatering dish that’s ready to impress. Let’s get cooking!
Step 1: Preheat the Oven
- Preheat your oven to 350°F (175°C).
- Grease a 9×13-inch baking dish with nonstick spray or line it with parchment paper. This ensures your sliders won’t stick and makes cleanup so much easier.
Step 2: Prepare the Rolls
- Slice the Hawaiian rolls in half horizontally, keeping them all connected. This makes it easier to assemble the sliders as one whole piece rather than dealing with individual rolls.
- Place the bottom half of the rolls into your prepared baking dish. They should fit snugly.
Step 3: Add the Shredded Chicken
- Spread the shredded chicken evenly over the bottom half of the rolls. If your chicken is cold from the fridge, you can quickly microwave it for 30 seconds to take the chill off before assembling.
- Make sure to distribute the chicken evenly, covering every roll so that each bite is packed with chicken goodness.
Step 4: Pour the Marinara Sauce
- Pour the marinara sauce over the shredded chicken, spreading it evenly with a spoon or spatula.
- Use as much or as little sauce as you like. If you prefer a saucier slider, feel free to add an extra 1/2 cup of marinara.
Step 5: Add the Cheeses
- Sprinkle the shredded mozzarella cheese over the marinara sauce, making sure to cover the entire surface.
- Follow up with the grated Parmesan cheese, which will add a deliciously salty, nutty flavor that complements the mozzarella beautifully.
- If you’re a cheese lover, feel free to add a little more mozzarella or even a sprinkle of provolone for an extra cheesy experience.
Step 6: Top with the Rolls
- Carefully place the top half of the rolls over the cheese layer. Press down gently to ensure everything is snug and well-assembled.
Step 7: Make the Garlic Butter Topping
- In a small bowl, combine the melted butter, garlic powder, and Italian seasoning.
- Mix well until the seasoning is fully incorporated into the butter. This mixture is what’s going to give your sliders that irresistible golden, garlicky finish.
Step 8: Brush the Rolls
- Using a pastry brush, generously brush the garlic butter mixture over the tops of the rolls.
- Make sure to cover every inch of the rolls. The butter mixture will seep into the bread as it bakes, making the rolls perfectly soft and flavorful.
Step 9: Cover and Bake
- Cover the baking dish with aluminum foil. This prevents the rolls from browning too quickly while allowing the cheese to melt and the flavors to meld together.
- Bake the sliders in the preheated oven for 15 minutes.
Step 10: Remove the Foil and Continue Baking
- After 15 minutes, remove the foil and continue baking for an additional 5 to 7 minutes.
- The tops of the rolls should be golden brown, the cheese melted and bubbly, and the smell filling your kitchen with pure comfort.
Step 11: Garnish (Optional)
- Remove the sliders from the oven and let them cool for about 5 minutes before cutting.
- Sprinkle with chopped fresh basil or parsley if desired. This adds a burst of freshness and a little pop of color.
Step 12: Serve and Enjoy
- Slice the sliders into individual pieces using a sharp knife. Serve them hot and enjoy every cheesy, saucy, buttery bite!
These sliders are meant to be shared, but don’t be surprised if you find yourself reaching for seconds—or thirds.
How to Serve
Chicken Parmesan Sliders are incredibly versatile when it comes to serving. Whether you’re making them for a casual dinner or a fancy party, they’re bound to be a hit. Here are some ideas for how to serve them:
- Appetizer Platter: Arrange the sliders on a large serving tray and surround them with fresh veggies, chips, or even some garlic breadsticks for a complete Italian-inspired snack spread.
- Main Dish: Serve the sliders with a simple side salad dressed with balsamic vinaigrette for a balanced, satisfying meal. A classic Caesar salad also pairs beautifully.
- Game Day Feast: Pair them with other crowd-pleasers like mozzarella sticks, loaded potato skins, or spicy chicken wings for a game day spread everyone will love.
- Family Dinner: Serve with roasted vegetables or a bowl of creamy tomato soup for a comforting, hearty meal.
- Lunchbox Hero: Pack leftover sliders in your lunchbox. They’re just as delicious when reheated the next day.
Pairing Suggestions
These cheesy, saucy Chicken Parmesan Sliders are amazing on their own, but pairing them with the right sides and drinks can enhance the overall experience. Here are some pairing suggestions to consider:
- Salads: Fresh, crisp salads are a perfect match for the richness of these sliders. Try an arugula salad with lemon vinaigrette or a classic Caesar salad with crunchy croutons.
- Roasted Vegetables: Serve with roasted broccoli, asparagus, or zucchini for a nutritious, well-rounded meal. The slight bitterness of roasted veggies provides a nice contrast to the cheesy, savory sliders.
- Soups: Tomato basil soup or creamy garlic soup can elevate these sliders into a cozy, comforting dinner.
- Dipping Sauces: Offer extra marinara sauce on the side for dipping, or even a garlic aioli for something a bit more decadent.
- Drinks: For a non-alcoholic option, a sparkling lemon water or iced tea works well. For something a little more indulgent, a creamy milkshake can make for a fun contrast.
Storage, Freezing & Reheating Instructions
If you happen to have leftovers (which is rare because these sliders are so good), here’s how to store them properly:
Storage:
- Allow the sliders to cool completely before storing.
- Place them in an airtight container and refrigerate for up to 3 days.
Freezing:
- If you want to freeze the sliders, wrap them tightly in aluminum foil and place them in a freezer-safe bag or container.
- They can be frozen for up to 2 months.
Reheating:
- To reheat from the fridge, simply place the sliders in a 350°F oven for about 10 minutes or until heated through.
- To reheat from frozen, bake them covered at 350°F for 20 minutes, then uncover and bake for an additional 5 to 7 minutes.
- For a quicker option, you can microwave individual sliders for about 30 seconds, but the oven method keeps them crispier.
Now that you’ve got all the basics covered, let’s dive into some common mistakes to avoid to make sure your Chicken Parmesan Sliders turn out perfectly every time.
Common Mistakes to Avoid
Even though this Chicken Parmesan Sliders recipe is super easy, there are a few common mistakes that can affect the final result. Avoid these pitfalls, and you’ll have perfect, cheesy sliders every single time.
Mistake 1: Not Draining the Chicken Properly
Using rotisserie chicken or pre-cooked shredded chicken is convenient, but if it’s too moist, it can make your sliders soggy. After shredding the chicken, pat it dry with paper towels to remove excess moisture before layering it on the rolls.
Mistake 2: Skipping the Foil Cover While Baking
When baking the sliders, it’s essential to cover them with foil for the first 15 minutes. This allows the cheese to melt evenly and the flavors to blend together without over-browning the tops of the rolls. Skipping this step can result in overly crisped rolls and unmelted cheese.
Mistake 3: Using Cold Chicken
Using cold chicken straight from the fridge can increase the baking time and affect how evenly the sliders cook. If your shredded chicken has been refrigerated, give it a quick zap in the microwave for 30 seconds to take off the chill before assembling.
Mistake 4: Not Brushing the Butter Mixture Evenly
The garlic butter topping is a game-changer for this recipe. If you don’t brush it evenly over the rolls, some parts may come out dry and less flavorful. Take your time to spread it generously and evenly for that perfect, golden finish.
Mistake 5: Overloading the Rolls with Sauce
While marinara sauce is essential for flavor and moisture, using too much can make the sliders overly soggy. Stick with the recommended amount or add just a little extra if you love them extra saucy, but avoid drenching the rolls.
Mistake 6: Cutting the Sliders While They’re Too Hot
It’s tempting to dig right in the moment they come out of the oven, but cutting the sliders too soon can cause the filling to spill out, making them messy to serve. Let them cool for about 5 minutes before slicing to allow the cheese to set a bit.
Mistake 7: Not Using Fresh Mozzarella
While pre-shredded mozzarella works just fine, freshly shredded mozzarella from a block melts better and gives you that gooey, stretchy cheese pull that everyone loves. Plus, it tends to have fewer additives, resulting in a purer flavor.
By avoiding these common mistakes, you’ll ensure that your Chicken Parmesan Sliders come out perfectly delicious every single time. Now, let’s move on to some pro tips to make this recipe even better.
Pro Tips
Want to make your Chicken Parmesan Sliders even more amazing? Here are some expert tips to help you achieve the most delicious results.
Tip 1: Toast the Bottom Rolls for Extra Texture
If you prefer a slightly crisp bottom layer, lightly toast the bottom half of the rolls before assembling. Simply place them on a baking sheet and toast them in the oven for about 5 minutes at 350°F. This will help prevent them from getting too soggy once the marinara and chicken are added.
Tip 2: Add a Crispy Topping for More Texture
For a little extra crunch, sprinkle some toasted breadcrumbs mixed with Parmesan cheese over the mozzarella layer before adding the top half of the rolls. This adds a lovely, crispy texture to complement the gooey cheese and soft bread.
Tip 3: Make It Spicy (If You Like It Hot)
If you enjoy a bit of heat, add a pinch of crushed red pepper flakes to the marinara sauce or even sprinkle some over the chicken before layering. You can also add sliced jalapeños for a bolder kick.
Tip 4: Use Fresh Herbs for Garnish
Chopped fresh basil or parsley adds brightness and freshness that elevates the dish. Sprinkle the herbs on just before serving for the best flavor and visual appeal.
Tip 5: Prepare Ahead for Convenience
You can assemble the sliders a few hours ahead of time and store them covered in the refrigerator. When you’re ready to bake, simply pop them in the oven and follow the baking instructions. This makes them perfect for stress-free entertaining.
Tip 6: Try Different Cheeses
While mozzarella and Parmesan are classic choices, feel free to experiment with other cheeses. Provolone, Fontina, or even a sharp white cheddar can bring a new twist to your sliders.
Tip 7: Use Homemade Marinara (If You Have Time)
A homemade marinara sauce can make these sliders taste even more special. If you have a favorite recipe, go ahead and use it. The freshness and flavor of a homemade sauce can truly enhance the overall taste.
Tip 8: Double the Recipe for Larger Gatherings
If you’re hosting a big party, simply double the recipe and bake the sliders on two baking sheets. You’ll have plenty to go around, and guests will be thrilled!
Now that you’ve got all the pro tips, let’s tackle some frequently asked questions about making Chicken Parmesan Sliders.
Frequently Asked Questions (FAQs)
Q1: Can I use other types of bread instead of Hawaiian rolls?
Absolutely! While Hawaiian rolls offer a slightly sweet, soft texture that pairs beautifully with the savory filling, you can use any soft dinner rolls or even slider buns. Brioche buns work particularly well if you’re looking for a richer flavor.
Q2: Can I make these sliders gluten-free?
Yes, you can! Simply use gluten-free dinner rolls and check that your marinara sauce and seasonings are gluten-free. The rest of the ingredients are naturally gluten-free.
Q3: How do I keep the sliders from getting soggy?
To prevent soggy sliders, make sure to pat the chicken dry before assembling. You can also toast the bottom half of the rolls before layering to create a barrier that helps maintain structure.
Q4: Can I use different meats instead of chicken?
Certainly! While shredded chicken is classic, you can use shredded turkey, ground beef, or even thinly sliced steak. Adjust the cooking time as needed.
Q5: How do I make these sliders ahead of time?
You can assemble the sliders up to 24 hours in advance. Cover them tightly with foil and refrigerate until you’re ready to bake. Bake as directed, adding a few extra minutes if needed.
Q6: Can I reheat these sliders in the microwave?
Yes, but the texture will be softer than if you reheat them in the oven. For best results, microwave individual sliders for about 30 seconds or until heated through.
Q7: Can I use pre-shredded mozzarella cheese?
Yes, you can, but freshly shredded mozzarella melts better and has a superior flavor. If convenience is your priority, pre-shredded cheese will still be delicious.
Q8: What can I serve with these sliders?
They pair wonderfully with salads, roasted vegetables, soups, and even dipping sauces like extra marinara or garlic aioli.
Q9: Can I freeze leftover sliders?
Yes! Wrap them tightly in foil and store them in a freezer-safe bag. They’ll keep well for up to 2 months. Reheat in the oven for best results.
Q10: Can I make these sliders vegetarian?
Yes, you can! Replace the shredded chicken with a meat substitute like shredded jackfruit, sautéed mushrooms, or a blend of roasted veggies.
Ready for the final part? Let’s wrap this all up and get you excited to make these delicious Chicken Parmesan Sliders.
Conclusion & Call to Action
These Chicken Parmesan Sliders are everything you could possibly want in a comfort-food recipe. They’re cheesy, saucy, buttery, and packed with all the satisfying flavors of classic Chicken Parmesan, but in a fun, handheld form. The combination of soft, sweet Hawaiian rolls, flavorful marinara, melty mozzarella, and rich Parmesan cheese makes these sliders irresistible. And let’s not forget the finishing touch of garlicky, herby butter that ties everything together so beautifully.
What makes this recipe even more amazing is how simple it is to prepare. In just about 30 minutes, you can have a batch of these cheesy sliders ready to serve. They’re perfect for busy weeknights when you need a comforting meal fast, for game days when you’re hosting friends, or even for holiday gatherings where you need a crowd-pleasing appetizer. The flexibility of this recipe also makes it a go-to option for customizing to your heart’s content. Whether you’re adding extra spices, experimenting with different cheeses, or throwing in some extra veggies, these sliders will always turn out delicious.
The best part? These sliders are basically foolproof. Whether you’re a seasoned cook or a beginner just starting to experiment in the kitchen, you can absolutely nail this recipe. And if you happen to have any leftovers, they reheat like a dream.
I can’t stress enough how much everyone is going to love these Chicken Parmesan Sliders. They’re comforting, hearty, and just plain delicious. Whether you’re enjoying them fresh out of the oven or reheating a few the next day, you’ll be hooked.
Now it’s your turn to give this recipe a try. Trust me, once you make these sliders, they’ll become a regular part of your cooking rotation. And don’t forget to share the love! If you make this recipe, I’d love to hear about your experience.
Leave a comment below to let me know how your Chicken Parmesan Sliders turned out. Did you make any creative tweaks? What did you pair them with? And of course, if you’re on social media, tag me in your photos—I can’t wait to see your delicious creations!
Happy cooking, and enjoy every cheesy, saucy, buttery bite of these amazing sliders!
Print
Chicken Parmesan Sliders – Easy & Cheesy Party Favorite
- Total Time: 32 minutes
- Yield: 12 sliders 1x
- Diet: Halal
Description
These Chicken Parmesan Sliders are the ultimate comfort food packed into soft Hawaiian rolls. With shredded chicken, marinara sauce, gooey mozzarella, and rich Parmesan cheese all baked under a golden garlic butter topping, they are perfect for parties, game days, or quick family dinners. Ready in just 30 minutes, they’re sure to become a household favorite!
Ingredients
For the Sliders:
-
12 Hawaiian rolls (or any soft dinner rolls)
-
2 cups cooked chicken, shredded (Rotisserie chicken works great!)
-
1 1/2 cups marinara sauce (Store-bought or homemade)
-
2 cups shredded mozzarella cheese (Or Italian blend)
-
1/2 cup grated Parmesan cheese
For the Garlic Butter Topping:
-
4 tbsp unsalted butter, melted
-
1 tsp garlic powder
-
1 tsp Italian seasoning
-
Chopped fresh basil or parsley (Optional, for garnish)
Instructions
-
Preheat Oven: Preheat oven to 350°F (175°C). Grease a 9×13-inch baking dish or line it with parchment paper.
-
Prepare the Rolls: Slice Hawaiian rolls in half horizontally (keeping them connected) and place the bottom half in the prepared baking dish.
-
Add Chicken: Spread shredded chicken evenly over the bottom rolls.
-
Add Sauce & Cheese: Pour marinara sauce over the chicken. Sprinkle mozzarella and Parmesan cheese over the sauce.
-
Top with Rolls: Place the top half of the rolls over the cheese layer.
-
Make Garlic Butter: In a small bowl, mix melted butter, garlic powder, and Italian seasoning. Brush this mixture over the rolls.
-
Bake: Cover the dish with foil and bake for 15 minutes. Remove foil and bake for another 5–7 minutes until cheese is melted and tops are golden.
-
Garnish & Serve: Let the sliders cool for 5 minutes, sprinkle with fresh basil or parsley, and slice to serve.
Notes
-
For extra crispiness, toast the bottom rolls before assembling.
-
Feel free to add red pepper flakes or provolone cheese for a different flavor profile.
-
To make it gluten-free, use gluten-free dinner rolls.
- Prep Time: 10 minutes
- Cook Time: 22 minutes (15 minutes covered, 7 minutes uncovered)
- Category: Appetizer, Main Dish
- Method: Baking
- Cuisine: Italian-American