
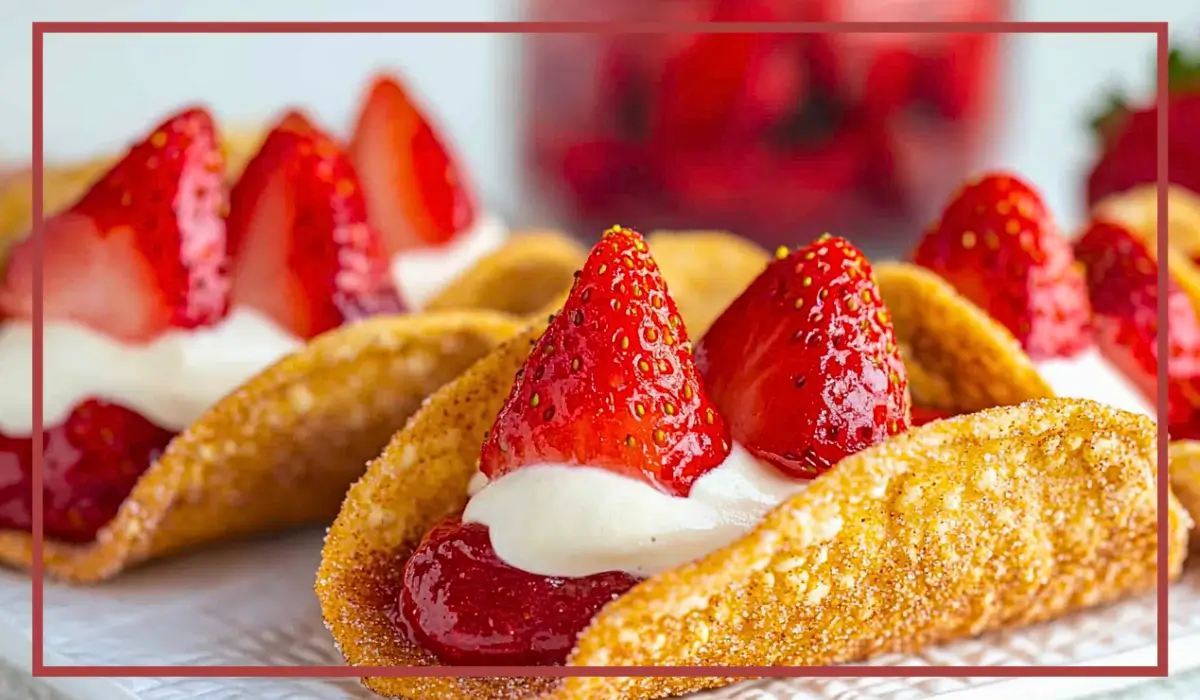
Cheesecake tacos are the ultimate dessert mashup that combines the best of two worlds: the crispy, golden crunch of a taco shell and the rich, creamy indulgence of a classic cheesecake filling. These sweet treats are perfect for any occasion, whether you’re hosting a party, celebrating a birthday, or simply craving a fun and delicious dessert to brighten your day.
What makes these cheesecake tacos so special is the contrast in textures. The taco shells are baked to crispy perfection and coated in a fragrant cinnamon-sugar mixture, making them irresistibly crunchy. Inside, the smooth and luscious cheesecake filling is light and airy, perfectly balancing out the crispiness of the shell. To take things up a notch, these tacos are topped with fresh, juicy berries and a drizzle of chocolate, caramel, or even a sprinkle of crushed graham crackers for an extra burst of flavor.
This recipe is incredibly easy to make, requiring just a handful of ingredients and minimal prep time. Plus, it’s fully customizable—you can experiment with different toppings, flavors, and fillings to make it your own. Whether you’re making them for kids, guests, or just for yourself (no judgment here), these cheesecake tacos are guaranteed to be a hit.
If you’re looking for a dessert that’s simple, fun, and absolutely delicious, then you’ve come to the right place. Let’s dive into why you’ll love this recipe and how you can make these delightful treats at home.
Why You’ll Love This Recipe
There are so many reasons to fall in love with these cheesecake tacos. First and foremost, they are incredibly easy to make. You don’t need any fancy kitchen equipment or advanced baking skills—just a few simple ingredients and a little bit of creativity.
Another reason to love this recipe is its versatility. You can fill your taco shells with classic vanilla cheesecake, add a fruity twist with fresh berries, or go all out with chocolate chips, crushed cookies, or even caramelized bananas. The possibilities are endless!
These tacos are also great for entertaining. They make a stunning dessert for parties, potlucks, or family gatherings. Since they’re individually portioned, they’re easy to serve and eat—no need for slicing or plates. Just pick one up and enjoy.
On top of that, they have the perfect balance of textures. The crispiness of the shell complements the smooth and creamy filling, creating a delightful contrast that makes every bite satisfying. And if you’re someone who loves a bit of crunch in your dessert, you can sprinkle crushed nuts, graham crackers, or even mini chocolate chips on top.
Finally, they’re a great make-ahead dessert. You can prepare the shells and filling ahead of time and assemble them just before serving, making them a stress-free option for busy days.
Health Benefits
While these cheesecake tacos are definitely a treat, there are some ways to make them a bit healthier without sacrificing flavor. For starters, the recipe includes fresh fruit toppings, which add natural sweetness, fiber, and essential vitamins. Strawberries and blueberries, for example, are packed with antioxidants and vitamin C, which help support your immune system.
Another health benefit comes from portion control. Since these tacos are individually sized, they naturally help you manage your serving size, making it easier to enjoy a dessert without overindulging.
If you’re looking for a lighter version, you can make a few simple swaps. Using low-fat cream cheese or Greek yogurt in the filling can reduce the amount of fat while still keeping the texture creamy and delicious. You can also opt for whole wheat tortillas instead of regular flour tortillas to add extra fiber.
For those watching their sugar intake, consider using a sugar substitute like stevia or monk fruit sweetener in place of traditional sugar. This will help reduce the overall sugar content while keeping the sweetness intact.
Finally, baking the taco shells instead of frying them is another great way to keep things lighter. By using the oven, you get that crispy texture without the extra oil and calories that come with deep frying.
Preparation Time, Servings, and Nutritional Information
- Prep Time: 15 minutes
- Cook Time: 10 minutes
- Chill Time: 30 minutes
- Total Time: 55 minutes
- Servings: 6 cheesecake tacos
Estimated Nutrition Per Serving:
- Calories: 250-300
- Protein: 4g
- Carbohydrates: 35g
- Fat: 12g
- Sugar: 20g
- Fiber: 2g
Ingredients List
The Taco Shells:
- 6 small flour tortillas
- 3 tablespoons melted butter
- ½ cup granulated sugar
- 1 teaspoon ground cinnamon
The Cheesecake Filling:
- 8 ounces cream cheese, softened
- ½ cup powdered sugar
- 1 teaspoon vanilla extract
- 1 cup whipped topping (such as Cool Whip)
The Toppings:
- ½ cup diced strawberries
- ½ cup blueberries
- ¼ cup chocolate drizzle (optional)
- ¼ cup crushed graham crackers (optional)
Step-By-Step Cooking Instructions
1: Prepare the Taco Shells
Preheat your oven to 375°F (190°C). In a small bowl, mix together the granulated sugar and cinnamon.
Using a pastry brush, coat both sides of each tortilla with melted butter. Sprinkle the cinnamon-sugar mixture generously over both sides of each tortilla, ensuring they’re well coated.
To shape the tacos, drape each tortilla over two bars of an upside-down muffin tin, allowing them to form a taco shape. If you don’t have a muffin tin, you can also drape them over the bars of an oven rack.
Bake the tortillas for 8-10 minutes or until they turn golden brown and crispy. Once they’re done, remove them from the oven and let them cool completely before filling.
2: Prepare the Cheesecake Filling
In a mixing bowl, beat the softened cream cheese, powdered sugar, and vanilla extract until smooth and creamy. Make sure to scrape down the sides of the bowl to ensure everything is well combined.
Gently fold in the whipped topping using a spatula. This will make the cheesecake filling light and airy. Once combined, place the filling in the refrigerator for about 30 minutes to allow it to firm up slightly.
3: Assemble the Tacos
Once the taco shells have cooled, spoon or pipe the cheesecake filling into each shell. A piping bag makes this process easier and ensures an even distribution of filling.
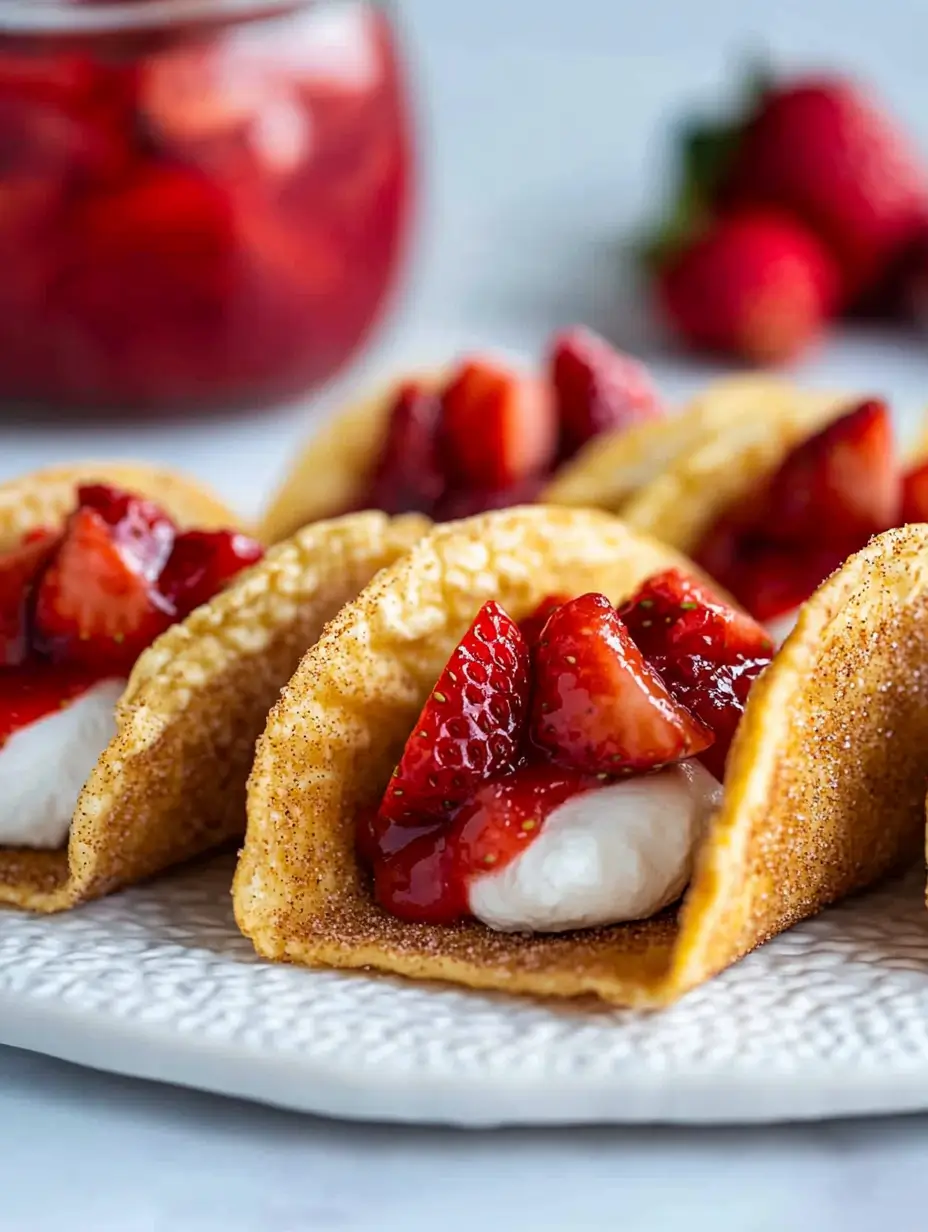
Top each taco with fresh diced strawberries, blueberries, and a drizzle of chocolate or caramel. For extra crunch, sprinkle crushed graham crackers on top.
4: Serve and Enjoy
Place the assembled cheesecake tacos on a serving platter and refrigerate for at least 30 minutes before serving. This allows the filling to set and makes them even more delicious.
How to Serve
- Serve these tacos chilled for the best texture and flavor.
- Garnish with a dusting of powdered sugar for a beautiful finishing touch.
- Add a scoop of vanilla ice cream on the side for an extra indulgent treat.
Pairing Suggestions
- A hot cup of coffee or chai tea complements the creamy texture of the cheesecake filling.
- A refreshing fruit smoothie or fresh lemonade pairs well with the fruity toppings.
- If you prefer a richer experience, serve with a drizzle of warm chocolate sauce on the side.
Storage, Freezing & Reheating Instructions
- Storage: Store assembled cheesecake tacos in an airtight container in the fridge for up to 3 days.
- Freezing: The shells can be stored separately in an airtight container for up to 2 months. The cheesecake filling can also be frozen, but it’s best to whip it again before using.
Common Mistakes to Avoid
- Overbaking the taco shells can make them too hard. Watch closely after 8 minutes.
- Not letting the filling chill long enough can make the tacos messy.
Creative Variations to Try
Cheesecake tacos are incredibly versatile, allowing you to experiment with different flavors and textures. For a chocolate lovers’ version, mix cocoa powder into the cheesecake filling and top with chocolate shavings. If you’re a fan of tropical flavors, add shredded coconut and pineapple chunks. For a cookie-inspired twist, blend crushed Oreos into the filling and top with a drizzle of white chocolate. Those who love a nutty crunch can sprinkle chopped almonds, pecans, or crushed peanuts over the tacos. There’s truly no limit to how you can customize this recipe to suit your cravings.
How to Make This Recipe Ahead of Time
If you’re planning to serve cheesecake tacos for a party or event, you can easily prep them in advance. Bake and store the taco shells in an airtight container at room temperature for up to three days to keep them crisp. The cheesecake filling can be prepared two days in advance and stored in the refrigerator in an airtight container. When it’s time to serve, simply fill the taco shells, top with fruit, and enjoy. To prevent sogginess, assemble the tacos just before serving for the best texture.
Kid-Friendly Cheesecake Tacos
Kids will love these fun, handheld treats! To make them even more appealing, let children decorate their own tacos with toppings like mini chocolate chips, rainbow sprinkles, or crushed cereal. You can also swap the cinnamon-sugar coating for graham cracker crumbs to create a softer shell. If you’re looking for a lower-sugar version, use Greek yogurt in place of some of the cream cheese and reduce the amount of added sugar. These tacos are a great way to get kids involved in the kitchen while keeping dessert fun and interactive.
Turning This Recipe into a Party Dessert Bar
Hosting a gathering? Turn your cheesecake tacos into a DIY dessert bar where guests can build their own creations. Set up a table with pre-made taco shells and bowls of cheesecake filling, fresh fruit, chocolate chips, caramel sauce, and nuts. Provide piping bags for the filling to make it easier for guests to fill their tacos. This setup makes dessert interactive and fun, ensuring that everyone gets to customize their treat exactly how they like it.
Conclusion & Call to Action
These cheesecake tacos are the perfect dessert for any occasion. They are fun, easy to make, and incredibly delicious. If you try this recipe, share your experience and let me know how it turns out. Happy baking!
Print
Cheesecake Tacos – Crispy Cinnamon Shells with Creamy Filling
- Total Time: 55 minutes (including chilling)
- Yield: 6 cheesecake tacos 1x
- Diet: Vegetarian
Description
These cheesecake tacos combine crispy, cinnamon-sugar-coated shells with a luscious, creamy cheesecake filling. Topped with fresh fruit and a drizzle of chocolate, this easy dessert is perfect for parties, birthdays, or any sweet craving.
Ingredients
For the Taco Shells:
- 6 small flour tortillas
- 3 tbsp melted butter
- ½ cup granulated sugar
- 1 tsp cinnamon
For the Cheesecake Filling:
- 8 oz cream cheese (softened)
- ½ cup powdered sugar
- 1 tsp vanilla extract
- 1 cup whipped topping
For the Toppings:
- ½ cup diced strawberries
- ½ cup blueberries
- ¼ cup chocolate drizzle (optional)
Instructions
- Prepare the Taco Shells:
- Preheat oven to 375°F (190°C).
- Brush tortillas with melted butter and coat with cinnamon sugar.
- Drape tortillas over an upside-down muffin tin to shape them.
- Bake for 8-10 minutes until golden and crispy. Let cool.
- Make the Cheesecake Filling:
- Beat cream cheese, powdered sugar, and vanilla until smooth.
- Fold in whipped topping and chill for 30 minutes.
- Assemble the Tacos:
- Fill each taco shell with cheesecake filling.
- Top with fresh fruit and drizzle with chocolate.
- Chill & Serve:
- Refrigerate for at least 30 minutes before serving.
Notes
- Use a piping bag for a neater presentation.
- Swap berries for caramelized bananas or crushed Oreos for a twist.
- Serve immediately for the best texture.
- Prep Time: 15 minutes
- Cook Time: 10 minutes
- Category: Dessert
- Method: Baking
- Cuisine: American, Fusion