
If you’re a fan of comfort food with a twist, you’re in for a treat. Cheeseburger spring rolls are everything you love about a juicy cheeseburger, all wrapped up in a crispy, golden shell. Imagine biting into one and experiencing the perfect combination of seasoned beef, melty cheddar cheese, tangy pickles, and the bold flavors of ketchup and mustard, all in one satisfying crunch. Whether you’re hosting a game-day gathering, planning a fun party appetizer, or just looking to shake up your dinner routine, these cheeseburger spring rolls are guaranteed to be a hit.
The first time I made these, I was skeptical about how well “burger flavors” could translate into a spring roll wrapper. But let me tell you, it’s pure magic. The way the crispy wrapper contrasts with the gooey, savory filling is nothing short of addictive. My family, who are burger purists at heart, were won over instantly. It’s also a great way to turn familiar ingredients into something exciting and new.
Now, what really makes these spring rolls special is their versatility. You can customize them with your favorite burger toppings, serve them with a variety of dipping sauces, or even make a spicy version with jalapeños. Plus, they’re easier to make than you might think. If you’re nervous about wrapping spring rolls, don’t be—I’ve got some foolproof tips to help you along the way. So, let’s dive in and create some crispy, cheesy goodness together!
Why You’ll Love These Cheeseburger Spring Rolls
There are so many reasons these cheeseburger spring rolls should make it to your recipe repertoire. First, they’re super easy to prepare. The filling comes together in just a few minutes, and wrapping the rolls is surprisingly simple, even for beginners. Once you get the hang of it, you’ll be rolling like a pro.
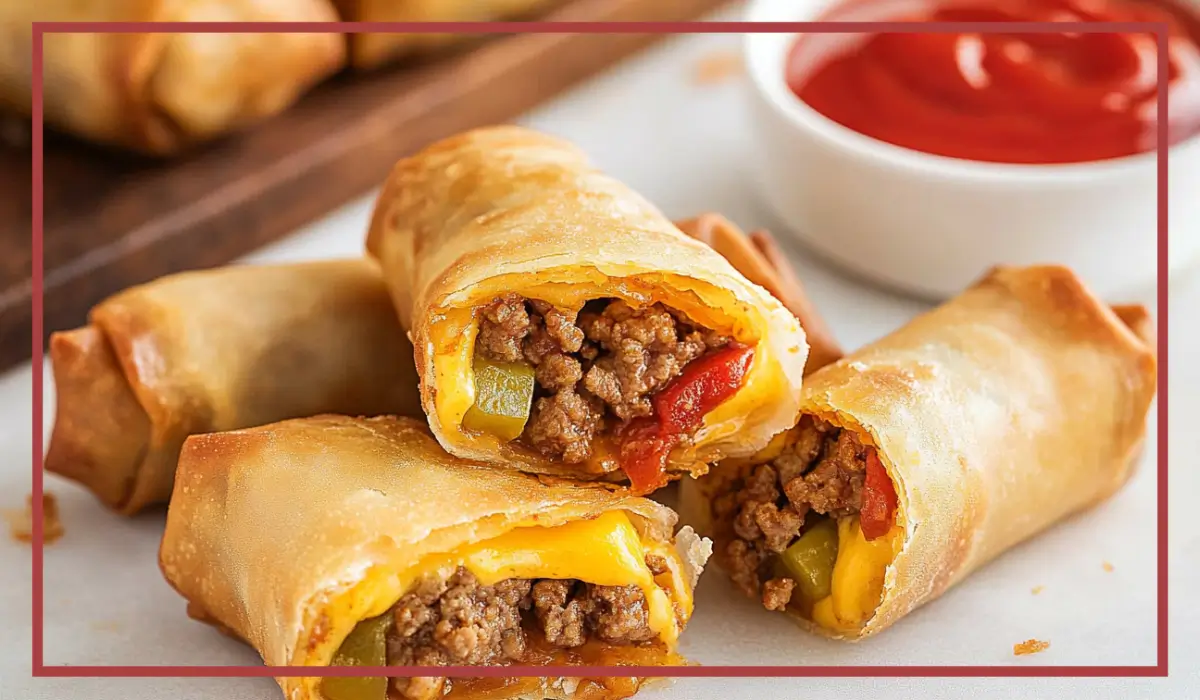
Next, the flavor is out of this world. The filling captures all the classic cheeseburger elements we know and love—seasoned beef, creamy cheese, tangy pickles, and a touch of sweetness and acidity from ketchup and mustard. Then, wrapping it all up in a crispy shell adds that extra layer of texture that takes it to the next level.
These spring rolls are also incredibly versatile. You can serve them as an appetizer, snack, or even a fun main dish. They’re a hit with kids and adults alike, making them perfect for family meals or parties. Plus, they freeze beautifully, so you can make a batch ahead of time and fry them up whenever the craving strikes.
And finally, they’re customizable. Love bacon cheeseburgers? Add some crumbled turkey or beef bacon. Want a spicy kick? Toss in some diced jalapeños or a dash of hot sauce. These rolls are your blank canvas for creativity.
Preparation Time and Servings
Total Time: 30 minutes
Servings: Makes 12 spring rolls (serves 4 as an appetizer or snack)
Calories per serving: Approximately 150 per spring roll
Ingredients
The Filling:
- ½ lb ground beef (or chicken for a lighter version)
- ¼ cup diced onion
- ½ cup shredded cheddar cheese
- ¼ cup chopped pickles
- 2 tablespoons ketchup
- 1 teaspoon yellow mustard
The Wrapper:
- 12 spring roll wrappers (6-inch size)
- Small bowl of water (for sealing the wrappers)
Frying:
- ¼ inch vegetable oil or canola oil for frying
Optional Dipping Sauces:
- Ketchup
- Mustard
- Spicy mayo
Step-by-Step Instructions
Step 1: Prepare the Filling
Start by heating a medium skillet over medium heat. Add the ground beef and diced onion, breaking up the beef as it cooks. Stir occasionally for about 5–7 minutes until the beef is browned and fully cooked, and the onions are soft and fragrant. Remove from heat and let the mixture cool for a few minutes.
Once the beef mixture has cooled slightly, transfer it to a mixing bowl. Add the shredded cheddar cheese, chopped pickles, ketchup, and mustard. Stir everything together until well combined. The cheese should start to melt slightly, binding the mixture together. Taste the filling and adjust the seasoning if needed.
Step 2: Assemble the Spring Rolls
Place a spring roll wrapper on a clean surface in a diamond orientation, with one point facing you. Spoon about 2 tablespoons of the filling near the bottom corner of the wrapper. Be careful not to overfill, as this can make rolling more difficult.
Fold the bottom corner of the wrapper tightly over the filling, then fold in the side corners like an envelope. Continue rolling the wrapper upward, keeping the roll tight but not so tight that the wrapper tears. Dip your fingers in water and lightly wet the top corner of the wrapper, pressing it down to seal the roll. Repeat this process with the remaining filling and wrappers.
Step 3: Fry the Spring Rolls
Heat about ¼ inch of vegetable oil in a large skillet over medium heat. To test if the oil is hot enough, drop in a small piece of wrapper—it should sizzle immediately. Carefully place the spring rolls in the skillet, seam side down, making sure not to overcrowd the pan.
Fry the spring rolls for about 1 minute per side, turning them gently with tongs or a spatula, until they’re golden brown and crispy all over. Once done, transfer the rolls to a plate lined with paper towels to drain excess oil.
Step 4: Serve
Serve the spring rolls hot with your choice of dipping sauces. Ketchup and mustard are classic, but spicy mayo, ranch, or even a smoky barbecue sauce would be fantastic options.
Tips for Success
- Choose the Right Wrappers: Look for spring roll wrappers made from flour and water, as they’re sturdier and fry up beautifully. Avoid rice paper wrappers for this recipe—they don’t hold up well to frying.
- Don’t Overfill: It’s tempting to stuff the rolls generously, but less is more here. Overfilled rolls are harder to seal and can burst while frying.
- Keep the Rolls Tight: Make sure to roll the wrappers snugly around the filling to prevent oil from seeping in during frying.
- Test the Oil: Make sure your oil is hot enough before frying, but not smoking. If the rolls fry too slowly, they’ll absorb excess oil and become greasy.
- Freeze for Later: Uncooked spring rolls can be frozen for up to 3 months. Freeze them in a single layer on a baking sheet first, then transfer to an airtight container. Fry directly from frozen, adding an extra minute or two to the cooking time.
Recipe Variations
- Bacon Cheeseburger Spring Rolls: Add crumbled turkey or beef bacon to the filling for a smoky twist.
- Spicy Version: Incorporate diced jalapeños, hot sauce, or a pinch of chili flakes into the filling.
- Vegetarian Option: Swap out the beef for a plant-based meat alternative or sautéed mushrooms.
- Gluten-Free Option: Use gluten-free wrappers, and ensure all sauces and seasonings are gluten-free as well.
- Cheeseburger Sliders Twist: Serve the rolls sliced in halves on a platter with tiny slider buns for a fun presentation.

How to Serve
Cheeseburger spring rolls are incredibly versatile when it comes to serving. You can enjoy them as a snack, appetizer, or part of a casual dinner. Here are some ideas to pair them with:
- Serve with a side of crisp, tangy coleslaw for a refreshing contrast.
- Pair with a hearty soup, like tomato basil, for a comforting meal.
- Offer a dipping sauce bar with ketchup, mustard, ranch, and barbecue sauce for variety.
Storing and Reheating
If you have leftovers (unlikely, but it happens!), store them in an airtight container in the refrigerator for up to 3 days. To reheat, place the rolls on a baking sheet and warm them in a 350°F oven for about 10 minutes. This helps retain their crispy texture.
For longer storage, freeze uncooked spring rolls and fry them straight from frozen as described earlier.
Special Equipment
- Skillet: A medium skillet works perfectly for both cooking the filling and frying the rolls.
- Tongs or Spatula: Essential for turning the rolls gently while frying.
- Paper Towels: For draining excess oil.
FAQ
Can I bake these instead of frying?
Yes! Brush the rolls lightly with oil and bake them on a parchment-lined baking sheet at 400°F for 15–20 minutes, flipping halfway through.
What if I don’t have pickles?
You can use relish or even finely diced cucumbers as a substitute.
Can I make these ahead of time?
Absolutely! Assemble the rolls and store them in the fridge for up to 24 hours before frying.
What dipping sauces work best?
Ketchup and mustard are classics, but try ranch, spicy mayo, or even a garlic aioli for a twist.
Conclusion
Cheeseburger spring rolls are everything you didn’t know you needed in a snack: crispy, cheesy, and bursting with flavor. They’re easy to make, endlessly customizable, and a guaranteed crowd-pleaser. Whether you’re hosting friends or looking for a family-friendly meal, these rolls will steal the show. So grab your wrappers and start rolling—you’ve got some delicious bites to create! Don’t forget to share your creations and let me know how they turned out.
Print
Cheeseburger Spring Rolls Recipe – Crispy and Delicious
- Total Time: 30 minutes
- Yield: 12 spring rolls 1x
- Diet: Halal
Description
Cheeseburger spring rolls are a fun, crispy snack loaded with all the flavors of a classic cheeseburger. Perfect for appetizers, parties, or game day, these rolls feature seasoned ground beef, cheddar cheese, pickles, and tangy ketchup-mustard filling, all wrapped in a crunchy shell.
Ingredients
- Filling:
- ½ lb ground beef
- ¼ cup diced onion
- ½ cup shredded cheddar cheese
- ¼ cup chopped pickles
- 2 tbsp ketchup
- 1 tsp yellow mustard
- Wrapper:
- 12 spring roll wrappers
- Water for sealing
- Frying:
- ¼ inch vegetable oil
Instructions
- Heat a skillet and cook ground beef with onions until browned. Cool.
- Mix beef with cheese, pickles, ketchup, and mustard.
- Place filling on wrappers, fold, and roll tightly. Seal with water.
- Fry in hot oil for 1 minute per side until crispy and golden. Drain on paper towels.
- Serve hot with dipping sauces like ketchup, mustard, or spicy mayo.
Notes
- Don’t overfill the rolls to avoid tearing.
- Freeze uncooked rolls for up to 3 months.
- For a healthier option, bake instead of frying.
- Prep Time: 10 minutes
- Cook Time: 20 minutes
- Category: Appetizer, Snack
- Method: Frying
- Cuisine: American