
There is something truly magical about the combination of caramel and apples. The rich, buttery sweetness of caramel mixed with the crisp, tartness of apples creates a flavor combination that is both comforting and indulgent. Whether it’s a crisp autumn day or you’re just craving something cozy, caramel apple desserts are a timeless favorite. However, the classic caramel apple—while delicious—can be a bit messy and tricky to eat. That’s where Caramel Apple Dessert Cups come in.
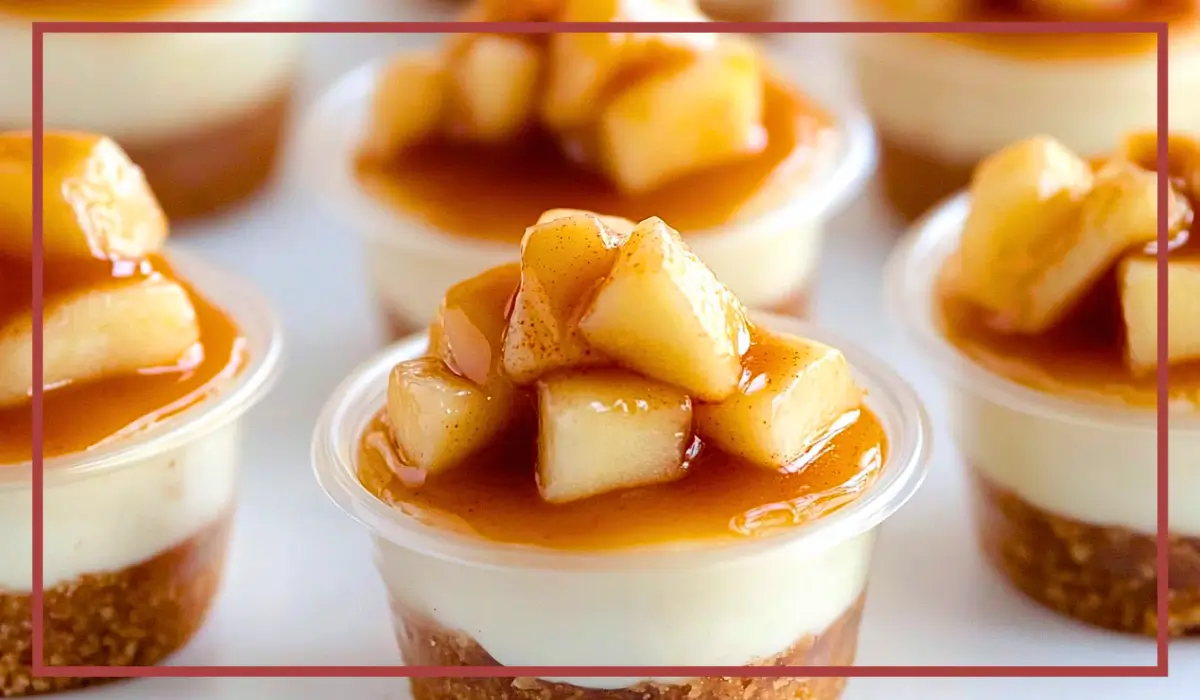
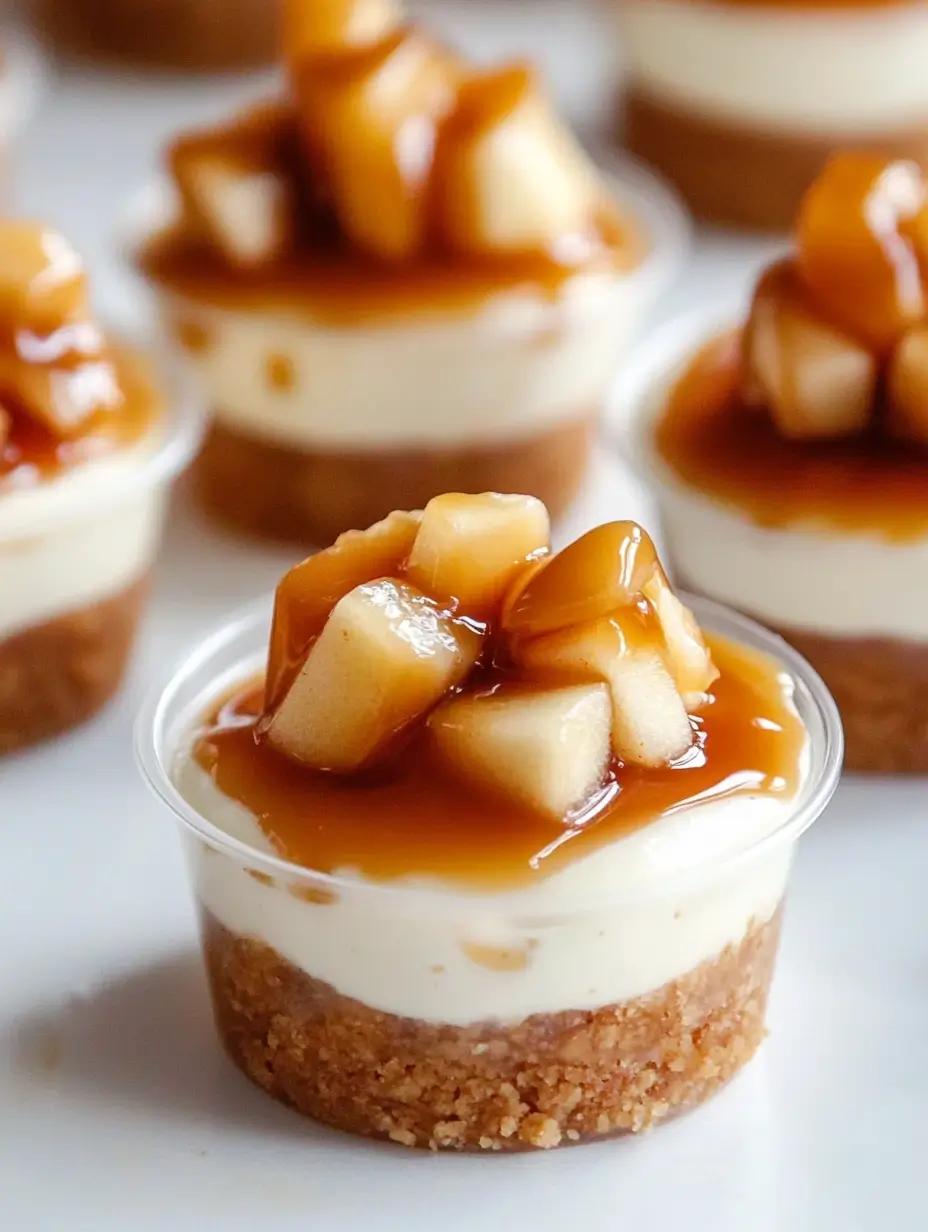
These little cups take all the best elements of a caramel apple and turn them into a convenient, no-mess treat. Imagine a buttery graham cracker crust, a creamy cheesecake-style filling, and warm cinnamon-spiced apples, all topped with a luscious drizzle of caramel. Each bite is filled with rich flavors, smooth textures, and a delightful crunch.
One of the things I love most about this recipe is its versatility. Whether you’re making it for a fall gathering, a holiday party, or just because you’re in the mood for something sweet, these mini desserts are always a hit. Plus, they’re no-bake—which means less time in the kitchen and more time enjoying the season.
I first made these for a Thanksgiving get-together when I wanted something easier to serve than a traditional pie. To my surprise, they were gone in minutes! Guests loved how easy they were to grab and enjoy, and the balance of flavors made them completely irresistible. Since then, they’ve become a staple dessert in my home, and I’m excited to share this recipe with you.
If you’re looking for a dessert that is easy, delicious, and impressive, these Caramel Apple Dessert Cups are the answer. Keep reading for everything you need to know to make them perfect every single time.
Why You’ll Love This Recipe
There are so many reasons to love these Caramel Apple Dessert Cups, but let’s start with the most obvious one: they taste amazing. The combination of creamy, crunchy, sweet, and spiced flavors is nothing short of heavenly. The graham cracker crust provides the perfect buttery base, the cheesecake layer adds a smooth richness, and the caramel-drizzled apples bring the perfect touch of fall flavor.
Beyond taste, this recipe is also incredibly easy to make. Since it’s a no-bake dessert, there’s no need to worry about oven temperatures or baking times. That means less stress in the kitchen, especially if you’re making these for a holiday gathering or party.
These dessert cups are also perfectly portioned. Instead of slicing into a whole cheesecake or dealing with sticky caramel apples, you can serve these in individual cups for easy grab-and-go enjoyment. This makes them ideal for parties, potlucks, or any event where guests might want to mingle while enjoying their dessert.
Another reason to love this recipe is how customizable it is. You can swap out the graham cracker crust for a different base, adjust the sweetness, or even add a bit of crunch with nuts or toffee bits. No matter how you tweak them, they always turn out delicious.
And let’s not forget the best part—they look beautiful. Mini desserts always have a way of impressing guests, and these little cups are no exception. Whether you’re serving them at a dinner party or just enjoying them with family, they’ll always be a crowd-pleaser.
Health Benefits
While these Caramel Apple Dessert Cups are definitely a treat, they do have some redeeming nutritional qualities, thanks to their fresh ingredients. Apples, for instance, are packed with fiber, antioxidants, and essential vitamins like Vitamin C. They help support digestion and overall gut health while also providing a natural sweetness.
Cinnamon, another key ingredient, is known for its anti-inflammatory properties and can help regulate blood sugar levels. This makes it a great addition to desserts, as it can balance out the sweetness and prevent sugar spikes.
If you’re looking for a healthier version, there are plenty of simple swaps you can make. Using Greek yogurt instead of cream cheese in the filling will lighten up the dessert while still keeping it creamy. Opting for a sugar-free caramel sauce can also help reduce the overall sugar content. And if you want a gluten-free option, simply use gluten-free graham crackers for the crust.
Additionally, since these are served in small portions, they’re a great way to satisfy a sweet craving without overindulging. They’re also a better alternative to traditional caramel apples, which can be loaded with extra sugar and artificial additives.
Preparation Time, Servings, and Nutritional Information
- Prep Time: 15 minutes
- Cook Time: 5-7 minutes (for the apple topping)
- Chill Time: 1 hour
- Total Time: ~1 hour 20 minutes
- Servings: 12 mini dessert cups
- Calories per serving: ~180
- Carbohydrates: 22g
- Fat: 8g
- Protein: 2g
Ingredients List
For the Crust
- 1 ½ cups graham cracker crumbs
- ¼ cup butter, melted
- 2 tablespoons sugar
For the Cheesecake Filling
- 8 oz cream cheese, softened
- ½ cup powdered sugar
- 1 teaspoon vanilla extract
- 1 cup whipped topping (like Cool Whip)
For the Apple Topping
- 2 medium apples (peeled and diced, Granny Smith works best)
- 2 tablespoons sugar
- 1 teaspoon cinnamon
- 1 tablespoon butter
For the Caramel Drizzle
- ½ cup caramel sauce
Step-By-Step Cooking Instructions
Step 1: Prepare the Crust
- In a mixing bowl, combine graham cracker crumbs, melted butter, and sugar. Stir until the mixture resembles wet sand.
- Divide the mixture evenly into 12 cupcake liners or small dessert cups. Press down firmly with the back of a spoon to create a solid crust.
- Place the cups in the refrigerator while you prepare the filling.
Step 2: Make the Cheesecake Filling
- In a large bowl, beat the softened cream cheese, powdered sugar, and vanilla extract until smooth and creamy.
- Gently fold in the whipped topping, making sure not to deflate the mixture.
- Spoon or pipe the cheesecake filling over the prepared crusts, smoothing the tops with a spoon.
Step 3: Prepare the Apple Topping
- In a skillet over medium heat, melt the butter. Add the diced apples, sugar, and cinnamon.
- Stir and cook for 5-7 minutes until the apples are soft and slightly caramelized.
- Remove from heat and let the apples cool slightly before adding them to the dessert cups.
Step 4: Assemble the Dessert Cups
- Spoon the cooked apple topping over the cheesecake layer in each cup.
- Drizzle with caramel sauce for the final touch.
Step 5: Chill and Serve
- Refrigerate the dessert cups for at least 1 hour to allow the flavors to set.
- Serve chilled and enjoy!
How to Serve
Caramel Apple Dessert Cups are best served chilled, allowing the flavors to meld together and the texture to be just right. These mini desserts are perfect for casual gatherings, elegant dinner parties, or even just as a sweet snack after a long day. To elevate their presentation, serve them in small glass cups or mini mason jars instead of cupcake liners. This makes them look even more impressive and allows guests to see the beautiful layers of crust, creamy filling, and spiced apples.
For an extra touch of indulgence, top each cup with a little something extra. A sprinkle of crushed pecans or walnuts will add crunch, while a light dusting of cinnamon gives them a warm, cozy aroma. If you want to go all out, you can add a dollop of whipped cream right before serving and drizzle on a bit more caramel for that bakery-style finish.
These dessert cups are incredibly easy to serve because they’re already portioned out, making them ideal for events where people might be mingling. Unlike traditional caramel apples or full-sized cheesecakes, there’s no cutting or slicing involved—just grab a spoon and enjoy. If you’re hosting a buffet-style gathering, consider placing them on a serving tray with small spoons next to each one for convenience.
If you want to get creative, you can even turn these into a fun DIY dessert bar. Set out the crust, cheesecake filling, apple topping, and caramel sauce separately and let guests assemble their own mini treats. This works especially well for kids, as they love adding their favorite toppings.
Pairing Suggestions
Caramel Apple Dessert Cups are a rich and flavorful treat, so they pair well with beverages and side dishes that complement their sweetness. One of the best pairings is a warm cup of coffee or tea, as the slight bitterness helps balance out the caramel’s sweetness. A cinnamon-spiced latte or chai tea is a particularly great choice, as it enhances the warm spices in the apple topping.
If you prefer something cold, consider serving these dessert cups with a glass of milk or a vanilla milkshake. The creamy, smooth texture of milk or a milkshake works well with the rich cheesecake filling and the buttery graham cracker crust.
For a more decadent pairing, you can serve these alongside vanilla bean ice cream or cinnamon ice cream. The contrast between the cold ice cream and the warm apple topping creates a delightful mix of textures and temperatures. If you really want to impress, serve each dessert cup with a small scoop of ice cream on the side and an extra drizzle of caramel.
Another great pairing is a fruit platter with grapes, berries, and sliced pears. The fresh fruit provides a light and refreshing contrast to the richness of the dessert, making it a well-balanced option if you’re serving these at a party.
For those who enjoy a little extra crunch, serve these dessert cups with butter pecan cookies or shortbread biscuits on the side. The crisp texture of the cookies pairs beautifully with the creamy cheesecake filling, making for a satisfying combination.
Storage, Freezing & Reheating Instructions
These dessert cups are perfect for making ahead, as they store well in the refrigerator for several days. If you plan to store leftovers, place them in an airtight container and keep them refrigerated for up to 3 days. The flavors will continue to meld together, making them even more delicious over time.
If you’re making these ahead for an event, it’s best to add the caramel drizzle just before serving to keep the topping fresh and visually appealing. You can also store the crust, cheesecake filling, and apple topping separately in the fridge and assemble them right before serving.
While these dessert cups don’t freeze well as a whole, you can freeze individual components. The graham cracker crust can be made ahead and frozen in an airtight container for up to 1 month. The apple topping can also be frozen separately—just thaw it in the fridge and reheat it slightly before using. However, the cheesecake filling doesn’t freeze well, as it can become grainy once thawed.
If you need to reheat the apple topping after storing, simply warm it up in a skillet over low heat for a couple of minutes until it’s soft again. You can also microwave it for 10-15 seconds, but be careful not to overheat it, as it may become mushy.
Common Mistakes to Avoid
One of the most common mistakes when making these dessert cups is not pressing the crust firmly enough. If the crust is too loose, it will crumble when you try to eat the dessert. To prevent this, use the back of a spoon or a small measuring cup to firmly press the crumbs into the cups.
Another mistake is overmixing the cheesecake filling. If you beat the cream cheese too much, it can become overly dense instead of light and fluffy. To avoid this, mix just until the ingredients are combined and smooth.
Many people also make the mistake of adding warm apple topping directly onto the cheesecake layer. This can cause the filling to soften too much or even melt slightly. Instead, let the apples cool for a few minutes before layering them on top.
If you want to achieve a perfectly smooth caramel drizzle, avoid using thick caramel sauce straight from the fridge. Cold caramel doesn’t drizzle well and can create clumps. Instead, warm it slightly in the microwave or on the stovetop until it’s just runny enough to drizzle easily.
Pro Tips
For the best crust texture, toast the graham cracker crumbs in a dry pan over low heat for a couple of minutes before mixing them with butter. This enhances their flavor and makes the crust even more delicious.
If you want to make these extra special, consider using homemade caramel sauce instead of store-bought. A simple homemade caramel made with sugar, butter, and cream adds a richer flavor and a more luxurious texture.
To save time, you can use store-bought apple pie filling instead of making your own apple topping. Just make sure to cut the apples into smaller pieces so they fit well in the cups.
If you love a crunchy texture, add toasted pecans or crushed toffee bits on top before serving. These little additions add a fun contrast to the creamy filling and soft apples.
For a more elegant presentation, use clear dessert cups or mini trifle glasses instead of cupcake liners. This allows the beautiful layers to be visible, making them look even more impressive when served.
Frequently Asked Questions (FAQs)
Can I use a different type of fruit instead of apples? Yes! While apples are the classic choice, you can use pears, peaches, or even a mix of berries for a unique twist.
Can I make these ahead of time? Absolutely! You can prepare them up to 24 hours in advance, but wait until just before serving to add the caramel drizzle.
How can I make this dessert gluten-free? Simply use gluten-free graham crackers for the crust, or replace them with crushed nuts for a grain-free version.
Can I use whipped cream instead of whipped topping? Yes, but keep in mind that homemade whipped cream is not as stable as whipped topping, so the filling may be softer.
What kind of caramel sauce should I use? You can use store-bought caramel sauce or make your own at home. If using store-bought, opt for a high-quality brand for the best flavor.
Conclusion & Call to Action
These Caramel Apple Dessert Cups are the perfect blend of creamy, crunchy, sweet, and spiced flavors, making them a must-try fall dessert. Whether you’re serving them at a family gathering, bringing them to a potluck, or simply indulging in a sweet treat at home, they’re guaranteed to be a hit.
Now that you have all the details to make these perfectly every time, it’s time to give them a try! If you make these, I’d love to hear how they turned out—drop a comment below and let me know your thoughts. If you take pictures, be sure to share them on social media and tag me! Enjoy your delicious homemade caramel apple dessert cups.
Print
Caramel Apple Dessert Cups – Easy No-Bake Fall Treat
- Total Time: 1 hour 20 minutes (includes chilling)
- Yield: 12 mini dessert cups
- Diet: Vegetarian
Description
These Caramel Apple Dessert Cups are a delicious, no-bake fall dessert featuring a crunchy graham cracker crust, creamy cheesecake filling, and warm cinnamon-spiced apples, all topped with a rich caramel drizzle. Perfect for holiday gatherings, parties, or a cozy night in!
Ingredients
- For the Crust: 1 ½ cups graham cracker crumbs, ¼ cup melted butter, 2 tbsp sugar
- For the Cheesecake Filling: 8 oz cream cheese (softened), ½ cup powdered sugar, 1 tsp vanilla extract, 1 cup whipped topping
- For the Apple Topping: 2 medium apples (peeled & diced), 2 tbsp sugar, 1 tsp cinnamon, 1 tbsp butter
- For the Caramel Drizzle: ½ cup caramel sauce
Instructions
- Make the Crust: Mix graham cracker crumbs, melted butter, and sugar. Press into dessert cups and refrigerate.
- Prepare the Cheesecake Filling: Beat cream cheese, powdered sugar, and vanilla until smooth. Fold in whipped topping and spoon over the crust.
- Cook the Apple Topping: Sauté diced apples, sugar, cinnamon, and butter until soft. Let cool slightly.
- Assemble: Add the apple topping over the cheesecake layer and drizzle with caramel sauce.
- Chill & Serve: Refrigerate for at least 1 hour before serving.
Notes
- Use Granny Smith apples for a tart contrast to the sweet caramel.
- For extra crunch, top with crushed nuts or toffee bits.
- Serve in mini mason jars for a beautiful presentation.
- Prep Time: 15 minutes
- Cook Time: 5 minutes
- Category: Dessert
- Method: No-Bake
- Cuisine: American