
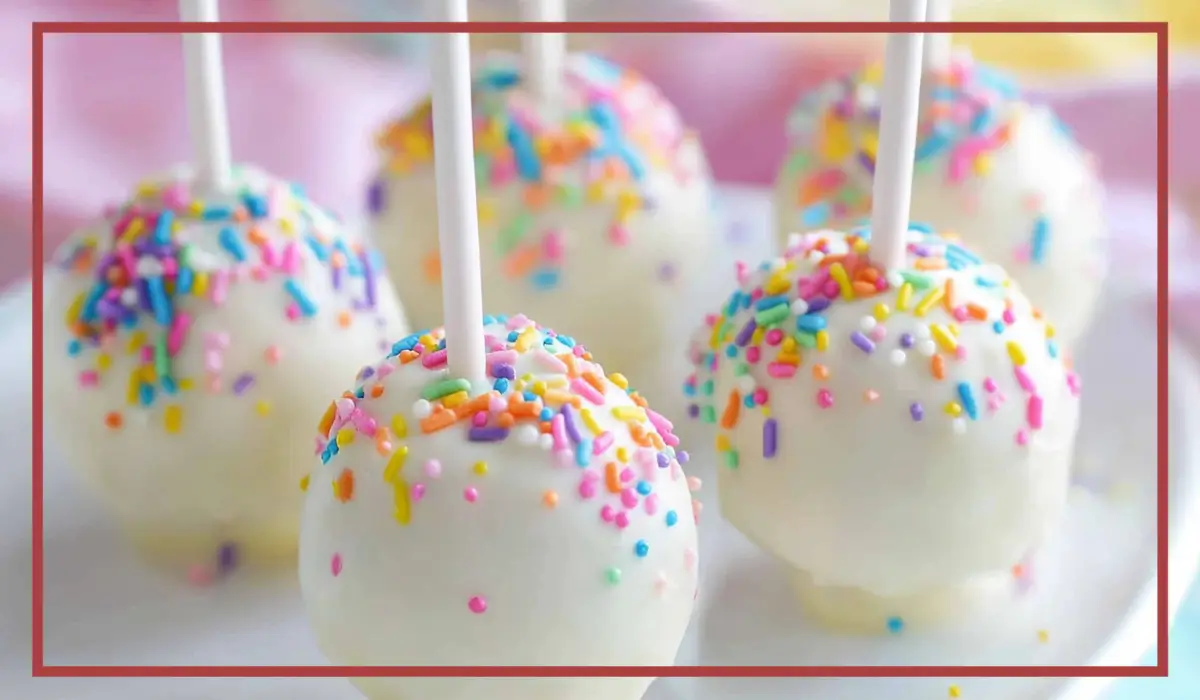
Cake Pop Recipe is like tiny bites of joy wrapped up on a stick. They’re the perfect blend of cake and frosting, dipped in a candy coating, and decorated with colorful sprinkles. Whether you’re making them for a birthday party, holiday celebration, or just because you need a sweet treat to brighten your day, cake pops are the answer.
The first time I made cake pops, I was hooked. It was for a friend’s baby shower, and I wanted to make something that looked adorable but also tasted amazing. I went with pastel-colored sprinkles to match the theme, and honestly, they were a hit. Everyone couldn’t stop raving about how cute and delicious they were. And here’s the thing: even if you’re a complete beginner, making cake pops is totally doable.
What makes this Cake Pop Recipe extra special is the combination of rich, moist cake mixed with creamy frosting, all encased in a smooth, candy-coated shell. The texture is like a dream—soft and sweet inside with a delightful crunch on the outside. Plus, decorating them is half the fun. From classic sprinkles to themed designs, there’s no limit to what you can create.
So, if you’re ready to master the art of Cake Pop Recipe, this guide will walk you through every step. From baking the cake to decorating like a pro, I’ve got you covered. Let’s get started, and trust me, once you’ve made these cake pops, you’ll be looking for excuses to whip up another batch.
Why You’ll Love This Cake Pop Recipe
1. Easy and Foolproof
This cake pop recipe is incredibly easy to follow. You start with a simple yellow cake mix, so there’s no need to worry about baking from scratch unless you want to. Everything else comes together with just a little mixing, shaping, and decorating.
2. Customizable to Your Liking
One of the best things about cake pops is their versatility. Want chocolate cake pops instead of vanilla? Go for it. Prefer a fruity twist? Add some strawberry extract. You can also switch up the sprinkles and decorations to match any theme or holiday.
3. Perfect Texture
The combination of crumbled cake and creamy frosting creates a smooth, truffle-like consistency that’s rich and satisfying. When dipped in the candy coating, you get the perfect balance of creamy and crunchy.
4. Great for Sharing
Cake pops are the ideal party treat. They’re portion-controlled, easy to serve, and everyone loves them. Plus, you can make them ahead of time and store them in the fridge or freezer.
5. Fun to Decorate
Decorating cake pops is an art of its own. You can make them as simple or extravagant as you like. Pastel-colored sprinkles are a classic choice, but feel free to get creative with your decorations.
Health Benefits
1. Portion Control
Unlike giant slices of cake or oversized cupcakes, cake pops are perfectly portioned. They’re small enough to enjoy as a treat without feeling overindulgent, which makes them great for those who are trying to watch their sugar intake.
2. Customizable Ingredients
Making your own cake pops allows you to control what goes into them. You can choose low-sugar or gluten-free cake mixes, opt for reduced-fat frostings, or even try using natural food colorings and organic ingredients if you prefer.
3. Stress-Relieving Activity
Baking and decorating cake pops can be a relaxing, therapeutic activity. The process of rolling the cake balls, dipping them in candy coating, and adding decorations is enjoyable and allows you to be creative.
4. Encourages Mindful Eating
Because cake pops are individually sized, it’s easier to enjoy them mindfully. You get to savor a sweet treat without going overboard.
5. Dietary Flexibility
With so many alternative ingredients available, you can easily modify this recipe to suit your dietary needs. Whether you want to make them gluten-free, dairy-free, or even vegan, there’s a way to do it.
Preparation Time, Servings, and Nutritional Information
Preparation and Cooking Times
- Total Time: About 2.5 hours (including freezing time)
- Preparation Time: 1 hour
- Freezing Time: 1 hour
- Decorating Time: 30 minutes
Servings
This recipe makes approximately 30 cake pops, making it perfect for sharing at parties, celebrations, or simply enjoying over a few days.
Nutritional Information (Per Cake Pop)
- Calories: 190
- Protein: 2g
- Carbohydrates: 30g
- Fat: 7g
- Sugar: 24g
These nutritional values are estimates and may vary slightly depending on the specific brands and types of ingredients you use.
Ingredients List
For the Cake Pops
- 1 box yellow cake mix (baked according to package instructions)
- 1 cup creamy white frosting (store-bought or homemade)
- 1 tsp pure vanilla extract (for enhanced flavor)
- 3/4 tsp Kosher salt (balances sweetness)
- 3/4 cup pastel-colored sprinkles (Jimmies) (for that festive look)
- 3 tbsp white nonpareils (adds texture and extra color)
For Decoration
- 36 oz white Ghirardelli melting candy wafers (smooth, perfect coating)
- 30 lollipop sticks (for making them easy to hold and eat)
Step-By-Step Cooking Instructions
1: Bake the Cake
-
Prepare the Cake Mix:
-
Preheat your oven according to the cake mix package instructions. Most yellow cake mixes call for 350°F (175°C).
-
Grease and flour your baking dish or line it with parchment paper to prevent sticking.
-
-
Mix and Bake:
-
Follow the instructions on the cake mix box. Typically, this involves combining the mix with eggs, water, and oil.
-
Mix until smooth and well-combined. Avoid overmixing, as this can make the cake dense.
-
-
Bake the Cake:
-
Pour the batter into the prepared baking dish and spread it evenly.
-
Bake according to package instructions, usually around 25–30 minutes, or until a toothpick inserted into the center comes out clean.
-
-
Cool Completely:
-
Remove the cake from the oven and let it cool in the pan for about 10 minutes.
-
Carefully transfer the cake to a wire rack to cool completely. This is crucial because a warm cake will not mix well with frosting.
-
2: Mix the Icing
-
Crumble the Cake:
-
Once the cake has completely cooled, break it into large chunks and place them in a large mixing bowl.
-
Using your hands or a fork, crumble the cake into fine crumbs. The texture should resemble coarse sand.
-
-
Add Frosting and Flavoring:
-
Add 1 cup of creamy white frosting to the crumbled cake.
-
Pour in 1 tsp of pure vanilla extract and 3/4 tsp of kosher salt. The salt helps balance the sweetness and enhance the overall flavor.
-
-
Add Sprinkles (Optional but Fun!):
-
To make these cake pops festive, add 3/4 cup of pastel-colored sprinkles (Jimmies) to the mixture.
-
Mix well until the frosting is evenly distributed and the mixture forms a sticky, cohesive dough.
-
If the mixture feels too dry, add more frosting a tablespoon at a time until you reach the desired consistency.
-
-
Check the Consistency:
-
The mixture should be sticky enough to hold together when pressed but not overly wet.
-
3: Shape and Freeze
-
Form the Cake Balls:
-
Using a cookie scoop or your hands, scoop about 2 tablespoons of the mixture and roll it into a ball.
-
Gently shape the ball into an egg shape if you’re going for a fun, seasonal design.
-
-
Place on Baking Sheet:
-
Arrange the shaped cake balls on a lined baking sheet (use parchment paper or a silicone mat to prevent sticking).
-
Make sure the balls are spaced apart so they don’t touch.
-
-
Freeze the Cake Balls:
-
Place the baking sheet in the freezer for 1 hour. Freezing helps the cake balls firm up, making them easier to handle during the dipping process.
-
Don’t rush this step! If the cake balls aren’t firm enough, they’ll fall apart when dipped.
-
4: Prepare Decorations
-
Prepare the Sprinkle Mixture:
-
In a small bowl, combine 3/4 cup of pastel-colored sprinkles (Jimmies) and 3 tbsp of white nonpareils.
-
Set aside until ready to decorate.
-
-
Melt the Candy Wafers:
-
Place 36 oz of white Ghirardelli melting candy wafers in a microwave-safe bowl.
-
Heat in the microwave at 50% power for 30-second intervals, stirring well between each interval.
-
Continue heating and stirring until the wafers are completely melted and smooth.
-
If the candy coating is too thick, add a tiny bit of vegetable oil or coconut oil (about 1/2 teaspoon at a time) and mix well.
-
Keep the melted coating warm and smooth for easy dipping.
-
5: Stick and Dip
-
Attach the Sticks:
-
Remove the cake balls from the freezer.
-
Dip the end of a lollipop stick into the melted candy coating (about 1/2 inch deep).
-
Immediately insert the coated end of the stick about halfway into each cake ball.
-
This step helps the stick adhere to the cake pop, ensuring it stays in place during dipping.
-
Allow the candy-coated sticks to set for about 5 minutes before proceeding.
-
-
Dip the Cake Pops:
-
Working with one cake pop at a time, hold the stick and submerge the entire cake ball into the melted candy coating.
-
Gently swirl the cake pop to coat it completely.
-
Lift the cake pop out of the coating and carefully tap off excess coating by gently tapping the stick against the edge of the bowl.
-
Rotate the stick while tapping to ensure a smooth, even coating.
-
6: Decorate
-
Add Sprinkles:
-
While the coating is still wet, sprinkle the cake pop with your prepared Jimmies and nonpareils mixture.
-
You can also use other decorations like crushed candies, edible glitter, or drizzle with colored candy melts for extra flair.
-
-
Allow to Set:
-
Place the dipped and decorated cake pop upright in a foam block or cake pop stand to dry completely.
-
Let the coating harden for about 25–30 minutes.
-
7: Serve and Enjoy!
-
Presentation:
-
Arrange your finished cake pops on a pretty tray, place them in decorative jars, or individually wrap them as gifts.
-
Serve them at parties, holidays, or simply enjoy them as a special treat.
-
-
Enjoy Your Homemade Cake Pops:
-
Bite into the creamy, smooth, and delightfully sweet cake pops you just created.
-

How to Serve this Cake Pop Recipe
Simple Serving Ideas
- Display on a Styrofoam Block or Cake Pop Stand: For a charming presentation, stick the cake pops into a foam block or cake pop stand so they stand upright. This is especially great for parties or dessert tables.
- Serve in Decorative Jars or Glasses: If you prefer a more rustic or playful presentation, you can place the cake pops in jars filled with candy or colorful sprinkles to hold them upright.
- Wrap Them Individually: For party favors or gifts, wrap each cake pop in a small plastic bag tied with ribbon. This keeps them fresh and makes them look professionally made.
Themed Serving Ideas
- Holiday-Themed Cake Pops: Decorate with red and green sprinkles for Christmas, pastel colors for Easter, or orange and black for Halloween.
- Special Occasions: Use gold and silver sprinkles for New Year’s Eve parties or birthday-themed decorations for kids’ celebrations.
- Personalized Touch: Write initials or small designs using edible markers or contrasting colored candy melts.
Pairing Suggestions
Cake pops are delightful on their own, but pairing them with other treats can elevate your dessert experience. Here are some fun ideas:
Beverage Pairings
- Coffee or Espresso: The rich, creamy flavor of cake pops pairs wonderfully with a hot cup of coffee or espresso.
- Hot Chocolate: For a cozy treat, serve cake pops with a steaming mug of hot chocolate topped with whipped cream.
- Milkshakes: Create a fun dessert spread by serving cake pops alongside creamy milkshakes for a double dose of sweetness.
Dessert Pairings
- Ice Cream Sundaes: Serve cake pops as part of a dessert bar with ice cream, hot fudge, and other toppings.
- Cupcakes: For a dessert platter that looks and tastes incredible, add cake pops to a tray of frosted cupcakes.
- Cookies: Pairing cake pops with a variety of cookies can make for a charming and crowd-pleasing dessert table.
Party Table Ideas
- Themed Dessert Tables: Coordinate your cake pop decorations to match other treats on the table, such as cupcakes, candies, and macarons.
- Candy Buffets: Incorporate cake pops into a colorful candy buffet where guests can choose their favorite sweets.
- Kids’ Parties: Serve cake pops with a selection of fruit juices or fun mocktails for a delightful and kid-friendly pairing.
Storage, Freezing & Reheating Instructions
Storage
- Room Temperature: If you plan to eat them within 24 hours, you can store cake pops at room temperature. Keep them in an airtight container to maintain freshness.
- Refrigerator: For longer storage, place the cake pops in an airtight container and store them in the refrigerator for up to 5 days. This helps keep them fresh without compromising the texture.
Freezing
- Before Dipping: If you want to prepare the cake pops ahead of time, freeze the shaped cake balls (without sticks) on a lined baking sheet. Once frozen, transfer them to a freezer-safe bag or container for up to 3 months.
- After Dipping: You can also freeze fully decorated cake pops. Simply place them in an airtight container with parchment paper between layers to prevent sticking. They can be stored in the freezer for up to 3 months.
Reheating (If Needed)
- Thawing: If you’ve frozen your cake pops, allow them to thaw in the refrigerator for a few hours before serving.
- Room Temperature: Once thawed, leave them at room temperature for about 30 minutes to ensure they’re perfectly creamy and delicious before serving.
Common Mistakes to Avoid
1. Not Letting the Cake Cool Completely
Trying to mix the frosting with a warm cake will result in a gooey mess. Make sure your cake is completely cool before crumbling it.
2. Using Too Much Frosting
Adding too much frosting to the crumbled cake can make your mixture overly soft and hard to shape. Start with a little frosting, mix well, and only add more if necessary.
3. Overheating the Candy Coating
If you overheat the candy wafers, they can become clumpy and hard to work with. Heat them slowly in the microwave or use a double boiler to maintain a smooth, creamy consistency.
4. Rushing the Freezing Process
Skipping the freezing step can cause your cake pops to fall apart when you try to dip them. Be patient and give them enough time to firm up properly.
5. Not Tapping Off Excess Coating
After dipping your Cake Pop Recipe, gently tap off the excess coating. This helps create a smooth, even layer that looks polished and professional.
Pro Tips
1. Use a Cookie Scoop for Even Sizing
If you want all your Cake Pop Recipe to be the same size, use a cookie scoop to portion out the mixture before rolling them into balls.
2. Chill Your Sticks Before Dipping
To help the sticks stay securely in the cake pops, chill them briefly before dipping them into the candy coating.
3. Experiment with Flavors
Don’t be afraid to get creative. Try using different cake and frosting flavors or even adding a touch of extract, like almond or peppermint, to customize your cake pops.
4. Decorate Quickly
The candy coating hardens fast, so make sure you add your sprinkles or decorations immediately after dipping each cake pop.
5. Double Dip for Extra Smoothness
If you want your Cake Pop Recipe to have a perfectly smooth finish, dip them twice in the melted candy wafers. Let the first layer set completely before dipping them again.
Frequently Asked Questions (FAQs)
Can I Make These Cake Pops Ahead of Time?
Yes! You can prepare the cake balls and freeze them before dipping for up to 3 months. Once dipped and decorated, they can be stored in the fridge for up to 5 days or frozen for up to 3 months.
Can I Use Homemade Frosting Instead of Store-Bought?
Absolutely. Homemade frosting works beautifully and adds a special touch. Just make sure it’s thick and creamy, not too runny.
What If My Cake Pops Keep Falling Off the Stick?
This usually happens if the cake mixture is too soft. Make sure to freeze the cake balls properly before dipping and try dipping the sticks in melted candy coating before inserting them.
Can I Use Other Types of Candy Melts?
Yes, you can use any brand of candy melts or even white chocolate. However, Ghirardelli melting wafers tend to work best for a smooth finish.
How Do I Color My Candy Coating?
Use oil-based food coloring to tint the candy coating. Water-based coloring can cause the coating to seize.
Can I Make These Gluten-Free?
Yes! Simply use a gluten-free cake mix and make sure all other ingredients are gluten-free as well.
Can I Make Vegan Cake Pops?
Absolutely! Use a vegan cake mix, dairy-free frosting, and vegan-friendly candy melts.
How Can I Prevent Cracks in the Coating?
Let the cake pops come to room temperature for a few minutes before dipping if they’ve been frozen. This prevents the coating from cracking.
What’s the Best Way to Store Leftovers?
Keep leftovers in an airtight container in the fridge or freezer. Refer to the storage section above for more details.
Can I Decorate the Cake Pops After They’ve Set?
Yes, you can use edible markers, drizzle with melted chocolate, or even paint with edible glitter once the coating has hardened.
Conclusion & Call to Action
Congratulations! You’ve just unlocked the secrets to making the most delightful and charming Cake Pop Recipe. Whether you’re making them for a special celebration, gifting them to friends, or simply treating yourself to something sweet, this recipe is guaranteed to impress.
What makes these cake pops so special is their versatility. You can follow the classic yellow cake and white frosting combo or get creative with different flavors and decorations. The process is so much fun that it’s almost therapeutic, and the results are nothing short of amazing.
The best part? This recipe is beginner-friendly, and even if you make a few mistakes along the way, you’ll still end up with delicious, adorable cake pops that everyone will love. From rolling the cake balls to dipping them in creamy candy coating and adding colorful sprinkles, the whole experience is a joyful adventure.
Now that you’ve got all the tips, tricks, and guidance you need, it’s time to head to your kitchen and start making these delightful treats. I can’t wait to see what you come up with!
If you try this recipe, I’d love to hear how it turns out for you. Feel free to leave a comment sharing your experience, and if you’re feeling extra generous, tag me on social media with photos of your gorgeous cake pops. Your creativity and enthusiasm always brighten my day.
So go ahead, grab your ingredients, and get baking. Once you see how easy and fun it is to make these cake pops, you’ll be looking for any excuse to whip up another batch. Happy baking!
Print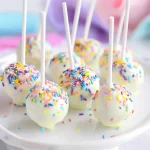
Cake Pop Recipe – Easy and Delicious Homemade Cake Pops
- Total Time: 2.5 hours
- Yield: 30 Cake Pops 1x
- Diet: Vegetarian
Description
This easy cake pop recipe shows you how to make perfect, moist, and creamy cake pops with a smooth candy coating. They’re customizable, fun to decorate, and perfect for parties, holidays, or sweet treats anytime.
Ingredients
For the Cake Pops:
-
1 box yellow cake mix (baked according to package instructions)
-
1 cup creamy white frosting (store-bought or homemade)
-
1 tsp pure vanilla extract
-
3/4 tsp Kosher salt
-
3/4 cup pastel-colored sprinkles (Jimmies)
-
3 tbsp white nonpareils
For Decoration:
-
36 oz white Ghirardelli melting candy wafers
-
30 lollipop sticks
Instructions
-
Bake the Cake: Prepare the yellow cake mix as per package instructions. Let it cool completely and crumble into fine pieces in a large mixing bowl.
-
Mix the Icing: Add frosting, vanilla extract, salt, and sprinkles to the crumbled cake. Mix until a sticky dough forms.
-
Shape and Freeze: Roll the mixture into 2-tbsp-sized balls, shape them into egg shapes if desired, place on a lined baking sheet, and freeze for 1 hour.
-
Prepare Decorations: Combine Jimmies and nonpareils in a bowl. Melt the candy wafers according to package instructions until smooth.
-
Stick and Dip: Dip the end of each lollipop stick in melted candy coating and insert it halfway into each cake ball. Dip the entire cake pop into the melted coating, allowing excess to drip off.
-
Decorate: Immediately add sprinkles before the coating hardens.
-
Set and Serve: Let the coating harden completely for about 25–30 minutes. Serve and enjoy!
Notes
-
Use a cookie scoop for even-sized cake pops.
-
Chill sticks briefly before dipping for better adhesion.
-
Store in the fridge for up to 5 days or freeze for up to 3 months.
- Prep Time: 1 hour
- Cook Time: 30 minutes
- Category: Dessert
- Method: Mixing, Freezing, Dipping
- Cuisine: American