
There’s something undeniably comforting about ice cream. Whether it’s a hot summer day, a cozy weekend indoors, or just one of those “I need a treat” moments, ice cream always seems to hit the spot. And if you’ve never made it yourself, let me tell you—homemade ice cream is a game-changer.
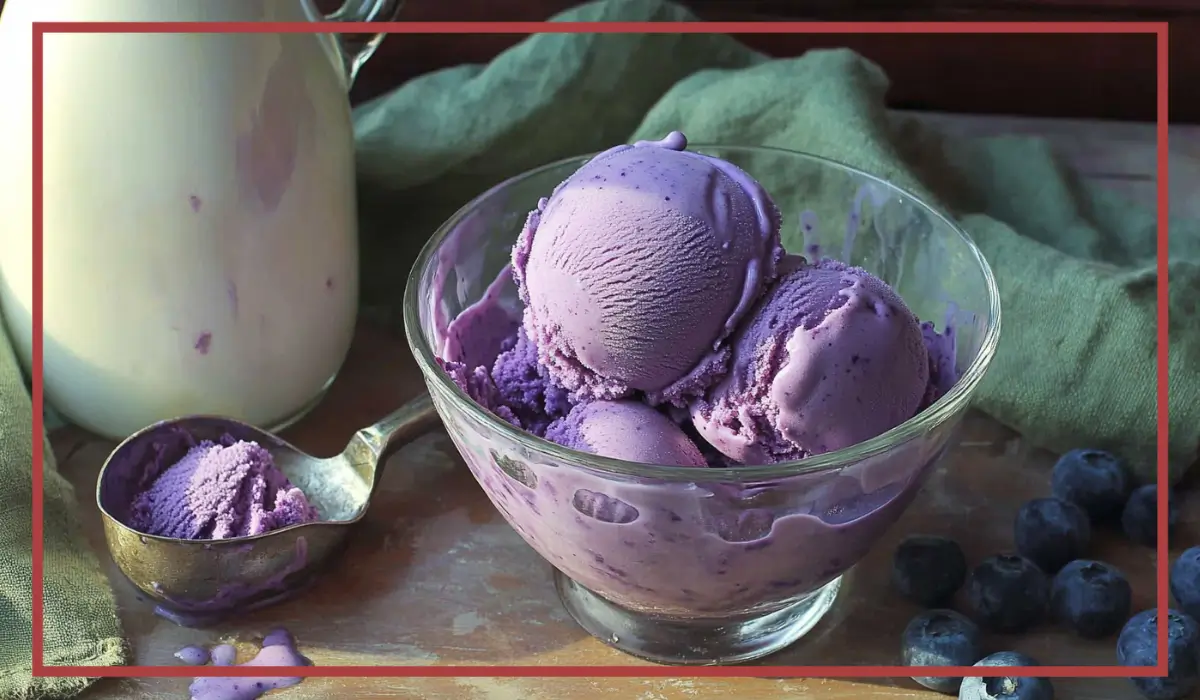
I still remember the first time I made this blueberry ice cream. It was one of those spontaneous kitchen experiments. I had fresh blueberries on the counter, cream in the fridge, and a craving that wasn’t going to be satisfied by a store-bought tub. What I ended up with was something far more delicious than I had expected: a smooth, rich, and creamy ice cream with swirls of sweet-tart blueberry throughout. It quickly became a favorite in our home and something I now make on repeat during blueberry season.
What makes this ice cream so special isn’t just its incredible flavor—it’s the ease. You don’t need fancy culinary skills or rare ingredients. In fact, the entire recipe uses only six ingredients that you probably already have in your kitchen: blueberries, sugar, lemon juice, whole milk, heavy cream, and a bit of patience while it freezes.
The beauty of this blueberry ice cream lies in its simplicity. The blueberries are gently simmered into a jammy, flavorful base, then blended smooth before being mixed with a rich dairy combination. After a quick churn in the ice cream maker, the result is a luscious dessert that’s bursting with natural fruit flavor. There’s no need for artificial coloring or flavoring here—just pure, fresh ingredients.
Whether you’re making this for a weekend treat, a dinner party dessert, or just because you want to try something new, this recipe is a fantastic way to dive into the world of homemade ice cream. Let’s talk about why you’re going to love it.
Why You’ll Love This Recipe
First of all, this recipe is incredibly approachable. Even if you’ve never made ice cream before, you’ll find this one totally manageable. The steps are straightforward, and the ingredients are as basic as they come. Plus, if you’ve got an ice cream maker, you’re already halfway there.
One of the biggest reasons people love this blueberry ice cream is the flavor. It strikes that perfect balance between sweet and tart, thanks to the natural brightness of the blueberries and the subtle acidity from the lemon juice. When paired with the creamy, rich base made from whole milk and heavy whipping cream, it creates a dessert that’s both refreshing and indulgent. It’s light enough to enjoy on a warm day but rich enough to feel like a real treat.
Another reason to fall in love with this recipe is its versatility. You can make it with fresh blueberries during the summer or with frozen ones during the off-season. The flavor remains just as vibrant either way. It’s also an excellent recipe to personalize—add a swirl of blueberry compote, sprinkle in crushed cookies or granola, or top it off with a drizzle of honey or a spoonful of whipped cream. There’s plenty of room to make it your own.
For families, this is a fantastic activity to do together. Kids will enjoy seeing how the berries transform on the stove and how the liquid mixture magically churns into ice cream. It’s an educational and delicious way to spend time in the kitchen together.
Finally, there’s something deeply satisfying about knowing exactly what goes into your dessert. No preservatives, no artificial flavors—just honest, wholesome ingredients that you’ve picked out and cooked yourself. And let’s be honest: homemade always tastes better.
Health Benefits
While ice cream may not be the first thing that comes to mind when you think of healthy eating, this blueberry version has some noteworthy nutritional benefits, thanks in large part to the star ingredient—blueberries. Known as one of nature’s most powerful superfoods, blueberries bring a lot to the table.
First, blueberries are packed with antioxidants, particularly a type called anthocyanins, which give them their deep blue color. These antioxidants are known to help fight inflammation and oxidative stress, which are linked to chronic diseases like heart disease and diabetes. Adding blueberries to your dessert means you’re sneaking in a solid dose of these beneficial compounds without even trying.
Secondly, blueberries are rich in vitamin C, which supports the immune system, and vitamin K, which plays a role in bone health. They also provide a good amount of dietary fiber, which helps with digestion and keeps you feeling fuller longer. In this recipe, you’re using two full cups of blueberries, meaning each scoop delivers a little nutritional bonus.
When it comes to the dairy ingredients, yes—they are rich. But they also offer important nutrients like calcium, vitamin D, and protein. These are essential for strong bones, muscle function, and overall cellular health. While heavy cream and whole milk are more calorie-dense, they also help keep the texture of your ice cream smooth and luxurious without needing any thickeners or stabilizers.
Another positive aspect of this recipe is that it contains no artificial colors or flavors. Many store-bought fruit-flavored ice creams rely heavily on artificial additives to mimic real fruit. In this homemade version, everything is natural—from the bright purple hue to the fresh berry taste.
So while it’s still a dessert and should be enjoyed in moderation, this blueberry ice cream offers more than just sweetness. It brings in real, whole ingredients that provide flavor, satisfaction, and a small but meaningful boost of nutrition.
Preparation Time, Servings, and Nutritional Information
Before diving into the kitchen, let’s break down what you can expect in terms of prep time, serving size, and nutrition. One of the great things about this recipe is that it’s not very time-consuming when you consider the hands-on time involved. Most of the time is passive—waiting for the mixture to chill, churn, and freeze.
Total Preparation Time:
- Cooking the blueberry base: 15 minutes
- Cooling and blending: 20 minutes
- Chilling time (before churning): 1 hour
- Churning: 30–35 minutes
- Freezing until firm: At least 3 hours
Total Time (including passive chilling and freezing): Approximately 5 hours
Active Time (hands-on): Around 30–40 minutes
Servings:
This recipe makes about 1.5 quarts of ice cream, which is approximately 6 to 8 servings, depending on portion size.
Nutritional Information (per serving):
- Calories: Approximately 280
- Protein: 2g
- Fat: 20g
- Saturated Fat: 12g
- Carbohydrates: 24g
- Sugars: 21g
- Fiber: 1g
- Calcium: 10% of the daily recommended intake
- Vitamin C: 15% of the daily recommended intake
Of course, these numbers may vary slightly depending on the exact ingredients you use. If you’re looking for a lighter version, you can substitute some of the heavy cream for additional whole milk or even try using a light cream option. However, keep in mind that changing the cream-to-milk ratio will affect the final texture and creaminess.
Whether you’re making this for your family or hosting friends, the servings are generous and satisfying. Plus, because it freezes well, you can always make a batch and enjoy it over several days without losing flavor or texture.
Ingredients List
Let’s take a look at the ingredients you’ll need for this ice cream. There are just six, and they all play a key role in creating the creamy, fruity magic of this dessert.
Blueberries – 2 cups (fresh or frozen):
This is the heart of your ice cream. Blueberries offer a naturally sweet and tart flavor, along with that gorgeous deep purple color. If you’re using frozen blueberries, you can use them straight from the freezer—no need to thaw.
Lemon Juice – 2 tablespoons:
Fresh lemon juice brightens up the blueberries and adds a subtle citrusy note that makes the berry flavor pop. It also helps balance the sweetness and enhances the overall freshness of the dessert.
Granulated Sugar – 1 cup:
Sugar not only sweetens the ice cream but also helps with texture. It keeps the mixture from becoming too icy by lowering the freezing point, resulting in a softer, scoopable consistency.
Heavy Whipping Cream – 2 cups:
This is what gives your ice cream that signature creamy, luxurious mouthfeel. The high fat content is essential for a rich, velvety texture.
Whole Milk – 1½ cups:
Whole milk adds volume and lightens the richness of the heavy cream just enough. Using whole milk ensures you still get a creamy texture without it being overwhelmingly rich.
Each of these ingredients is easy to find in any grocery store, and there’s no need for stabilizers, eggs, or corn syrup. This simplicity is what makes the recipe so appealing. You get clean, natural flavors with minimal effort.
Now that you’ve got everything ready, let’s walk through each step of making this blueberry ice cream from start to finish.
Step-By-Step Cooking Instructions
Now it’s time to bring everything together. The process is straightforward, and with a little patience, you’ll end up with a batch of creamy, fruity blueberry ice cream that tastes like summer in a bowl. Even if this is your first time making ice cream, you’ll find these steps easy to follow. I’ve broken everything down and included plenty of helpful tips along the way.
Step 1: Cook the Blueberry Base
Start by preparing your fruit base. This step is important because it intensifies the blueberry flavor and helps create that beautiful natural color.
In a medium saucepan, combine:
- 2 cups of blueberries (fresh or frozen)
- 2 tablespoons of lemon juice
- 1 cup of granulated sugar
Place the saucepan over medium heat. Stir the mixture frequently as it begins to warm. The sugar will dissolve, and the blueberries will start to release their juices. After about 5 to 7 minutes, you should see a light bubbling as it comes to a gentle boil.
At this point, reduce the heat to low and allow the mixture to simmer. Continue stirring occasionally to prevent sticking. Let it simmer for about 10 minutes, or until the blueberries have softened and the mixture has thickened slightly. You’re aiming for a loose jam consistency here—something that coats the back of a spoon but still pours easily.
Once the mixture is ready, remove it from the heat and let it cool completely. This cooling process is crucial. If the mixture is still warm when you add the dairy, it could curdle or melt the fats in the cream too quickly, leading to a grainy texture.
Step 2: Blend Until Smooth
Once your blueberry mixture has cooled to room temperature (you can speed this up by placing the saucepan in an ice bath or transferring the mixture to a shallow dish and refrigerating it), it’s time to blend.
Using a blender, food processor, or immersion blender, blend the mixture until mostly smooth. You can blend it until completely smooth if you prefer a silky texture, or leave it slightly chunky for little bursts of berry in every bite. I personally like it somewhere in between—mostly smooth with a few pieces of berry for added texture.
If you’d like an ultra-smooth ice cream, you can strain the mixture through a fine mesh sieve after blending to remove the skins and seeds. This step is optional, but it will result in a smoother finish.
Step 3: Combine with Cream and Milk
Pour the blended blueberry mixture into a large mixing bowl. Add:
- 2 cups of heavy whipping cream
- 1½ cups of whole milk
Stir everything together gently until well combined. Be careful not to whisk too vigorously, as you don’t want to incorporate too much air at this stage.
Now, check the temperature of your mixture. If it still feels warm from the blending, place it in the fridge for at least 30 minutes to an hour. It should be nice and cold before you transfer it to the ice cream maker—cold mixtures churn better and create a creamier texture.
Step 4: Churn in the Ice Cream Maker
When your mixture is thoroughly chilled, it’s time to churn. Set up your ice cream maker according to the manufacturer’s instructions.
Pour the blueberry and cream mixture into the machine. Churn for 30 to 35 minutes, or until it reaches a soft-serve consistency. This time may vary slightly depending on your specific ice cream maker, so keep an eye on the texture. It should look thick, creamy, and scoopable.
During this stage, the magic happens. The churning incorporates air while freezing the mixture evenly, which gives your ice cream that signature smooth, scoopable texture.
If you want to add extras like crushed graham crackers, white chocolate chips, or more blueberry compote, now’s the time to do it—about five minutes before the end of churning. Just toss them in gently and let the machine mix them through.
Step 5: Freeze Until Firm
Once the ice cream has reached the desired consistency, transfer it to a freezer-safe container. I recommend using a container with a tight-fitting lid to prevent ice crystals from forming. A loaf pan covered tightly with plastic wrap or beeswax wrap works well too.
Smooth the top of the ice cream with a spatula, then press a piece of parchment paper or wax paper directly onto the surface before sealing the lid. This helps prevent freezer burn.
Place the container in the freezer for at least 3 hours to firm up completely. Overnight is even better if you have the patience. When ready to serve, let it sit at room temperature for 5–10 minutes to soften slightly for easier scooping.
And there you have it—homemade blueberry ice cream, ready to impress everyone who tries it.
How to Serve
Now that your ice cream is ready, let’s talk about how to serve it in ways that really showcase its beautiful color and flavor. While a simple scoop in a bowl or cone is always a winning choice, there are so many fun and delicious ways to enjoy this treat.
Serve it in classic waffle cones for a nostalgic experience. The crispy texture of the cone pairs perfectly with the smooth creaminess of the ice cream. You can even dip the tops of your cones in melted chocolate and sprinkles for extra flair.
Another great option is to scoop it into small dessert bowls and top with a few fresh blueberries and a mint leaf. It makes a lovely presentation, especially when entertaining guests. For an added touch, drizzle a little honey or a spoonful of blueberry compote over the top.
If you’re in the mood for something a bit more decadent, try serving your blueberry ice cream with a slice of pound cake or a warm fruit crumble. The contrast between warm and cold is incredibly satisfying.
For a kid-friendly option, make ice cream sandwiches using soft sugar cookies or graham crackers. Just scoop a small amount between two cookies, wrap in plastic, and freeze again for 30 minutes. These are great for parties and summer barbecues.
You can also serve it alongside other flavors, like lemon sorbet, vanilla bean, or honey ice cream, to create a beautiful trio of colors and complementary tastes. Blueberry ice cream also makes a great base for ice cream sundaes—top with whipped cream, crushed nuts, and a drizzle of blueberry syrup or dark chocolate sauce.
Whether it’s a casual dessert after dinner or the centerpiece of a celebration, this ice cream is as versatile as it is delicious.
Pairing Suggestions
Pairing your homemade blueberry ice cream with the right flavors and textures can elevate it from a simple dessert to a gourmet experience. Because this ice cream has a fruity, creamy base with just a hint of tartness, it pairs beautifully with a variety of dishes, drinks, and accompaniments.
First, let’s talk baked goods. Blueberry ice cream served with a warm slice of lemon pound cake is an absolute dream. The citrus notes enhance the tanginess of the lemon juice in the ice cream, while the moist cake balances out the cold creaminess. Similarly, a buttery shortbread cookie or a slice of vanilla sponge cake makes for an excellent partner.
If you prefer something more casual, scoop it onto warm waffles or pancakes for a delicious brunch treat. The heat from the waffles gently melts the ice cream, creating a rich, berry-infused sauce that soaks into every crevice.
For a refreshing pairing, consider serving it with fresh fruit. A bowl of sliced peaches, strawberries, or even a mix of melon and mint works beautifully. You can also create a fruit parfait by layering blueberry ice cream with granola and Greek yogurt in a tall glass.
On the drink side, blueberry ice cream makes an excellent base for milkshakes. Blend a few scoops with a splash of milk for a thick, creamy shake. Or for something different, create an ice cream float with lemon soda or a berry-flavored sparkling water. The fizziness adds a playful twist.
If you’re serving adults and want to keep it halal, pair it with herbal teas like mint, hibiscus, or chamomile. The floral and earthy notes in the tea contrast nicely with the sweet richness of the ice cream.
No matter how you pair it, this blueberry ice cream holds its own and shines in both simple and elegant presentations. In the next section, we’ll walk through how to store and reheat—yes, reheat—this frozen treat properly.
Storage, Freezing & Reheating Instructions
When it comes to homemade ice cream, proper storage is key to maintaining its texture and flavor. Unlike store-bought versions that often contain stabilizers and preservatives, homemade ice cream is more sensitive to temperature fluctuations and can develop ice crystals if not stored correctly. But don’t worry—keeping it fresh is simple if you follow a few best practices.
Let’s start with freezing. Once your blueberry ice cream is churned and ready, you should immediately transfer it into an airtight, freezer-safe container. A shallow, rectangular container works best because it allows the ice cream to freeze more evenly and is easier to scoop from later. Press a piece of parchment paper or wax paper directly onto the surface of the ice cream before sealing the lid. This extra step helps prevent freezer burn and keeps the top layer from developing a hard, icy crust.
Place the container in the back of your freezer, where the temperature is most consistent. Avoid storing it near the door, as this area is more prone to temperature changes each time you open and close the freezer. Allow it to freeze for at least three hours before serving if you want a firmer texture.
Now, let’s talk about leftovers. If you’re storing leftovers, always return the container to the freezer as quickly as possible after serving. The less time it spends at room temperature, the better the texture will remain. Homemade ice cream is best enjoyed within one to two weeks for optimal flavor and consistency, although it can be stored for up to a month.
As for reheating—yes, there is such a thing in the ice cream world, but it’s really more about softening. If your ice cream has become too hard, simply remove it from the freezer and let it sit at room temperature for 5 to 10 minutes before scooping. Avoid microwaving it, as this can create uneven melting and negatively affect the texture.
If you’ve made a big batch and want to store portions separately, you can divide the ice cream into smaller containers. This is especially helpful if you’re serving guests or planning ahead for events. Smaller portions also thaw more quickly and evenly.
By following these simple storage and softening tips, you’ll keep your blueberry ice cream tasting just as delicious on day five as it did on day one.
Common Mistakes to Avoid
Making ice cream at home is surprisingly simple, but like any recipe, there are a few pitfalls to avoid if you want the best results. Let’s go through some of the most common mistakes and how to steer clear of them.
Using warm ingredients:
This is one of the most frequent missteps. If your blueberry mixture is still warm when you add the cream and milk, you risk altering the fat structure, which can lead to a grainy or icy texture. Always let the fruit mixture cool completely before blending it with the dairy.
Skipping the chill step before churning:
Your mixture needs to be cold before it goes into the ice cream maker. If it’s too warm, it won’t churn properly, and the texture will suffer. Make sure your final mixture is thoroughly chilled—ideally for at least an hour in the fridge—before pouring it into the machine.
Over- or under-churning the ice cream:
It’s tempting to walk away while the machine does its job, but keep an eye on it. If you stop churning too early, the ice cream won’t have enough structure and will freeze rock solid. If you over-churn, the fat can start to clump, leading to a buttery texture. Most machines take about 30–35 minutes, but always watch for that soft-serve consistency as your cue.
Using low-fat dairy alternatives without adjusting the recipe:
Substituting heavy cream with milk or other lower-fat options without adjusting the ratios can lead to icy, watery results. Fat is what gives ice cream its creamy, smooth texture. If you’re looking to make a lighter version, it’s best to follow a recipe specifically developed for that.
Not storing it properly:
Leaving your container uncovered or placing it near the freezer door can expose your ice cream to temperature swings and air, leading to freezer burn. Always store it in an airtight container with parchment or wax paper pressed directly on top, and place it deep inside the freezer.
Over-sweetening the fruit base:
Blueberries naturally vary in sweetness. If your berries are very sweet, consider using a little less sugar in the base. Too much sugar can throw off the balance and result in an overly sweet ice cream that masks the berry flavor.
By avoiding these common mistakes, you’re setting yourself up for success. The difference between okay ice cream and amazing ice cream often comes down to small, simple details.
Pro Tips
If you really want to take your blueberry ice cream to the next level, these pro tips will help you get the most out of your ingredients, tools, and time. Whether you’re new to making ice cream or already love experimenting in the kitchen, these tips will guide you toward consistently perfect results.
1. Use ripe, flavorful blueberries
The quality of your blueberries matters. Fresh, ripe berries have the richest flavor and natural sweetness. If you’re using frozen blueberries, look for high-quality brands with no added sugar or preservatives. Taste a few before cooking—if they’re a bit tart, you might want to add an extra tablespoon of sugar.
2. Don’t skip the lemon juice
It may seem like a small addition, but lemon juice does more than brighten the flavor—it enhances the natural berry notes and balances the sweetness. Even just two tablespoons can transform the whole batch.
3. Chill your ice cream base overnight
If you have time, chill your blueberry-dairy mixture overnight before churning. This gives the flavors more time to meld and helps the mixture churn into a smoother, creamier consistency.
4. Pre-freeze your ice cream maker bowl
If you’re using an ice cream maker that requires freezing the bowl, make sure it’s been in the freezer for at least 24 hours. A fully frozen bowl is crucial for the mixture to churn and freeze properly.
5. Add a touch of vanilla extract for warmth
Though not required, adding half a teaspoon of pure vanilla extract can add a warm, round note that complements the blueberries beautifully. It softens the tartness and deepens the overall flavor.
6. Let it soften before serving
Homemade ice cream tends to freeze harder than store-bought. Letting it sit at room temperature for just a few minutes before scooping will give you that perfect, creamy texture without any struggle.
7. Keep mix-ins small and cold
If you’re adding extra ingredients like chopped nuts, cookies, or fruit, make sure they’re cold and finely chopped. Large or warm additions can disrupt the freezing process and create icy patches.
With these tips in your back pocket, you’re well-equipped to create a batch of blueberry ice cream that not only tastes amazing but also has a gorgeous texture and presentation.
Frequently Asked Questions (FAQs) (Minimum 300 words)
Even though this blueberry ice cream recipe is beginner-friendly, it’s natural to have a few questions pop up as you go. Below are some of the most common questions readers have—and the answers to help you feel confident every step of the way.
Can I use frozen blueberries instead of fresh?
Absolutely. Frozen blueberries work just as well as fresh in this recipe. There’s no need to thaw them before cooking—just toss them in the saucepan as directed. They’ll release their juices as they heat and blend beautifully with the other ingredients.
Do I need an ice cream maker?
While an ice cream maker gives you the creamiest texture with minimal effort, you can still make this recipe without one. After blending and chilling the mixture, pour it into a freezer-safe container. Stir it every 30 minutes for the first 3 hours to break up ice crystals and improve the texture. It won’t be quite as creamy as churned ice cream, but it will still be delicious.
How long does homemade ice cream last in the freezer?
For the best flavor and texture, enjoy your blueberry ice cream within 1 to 2 weeks. It can technically last up to a month if stored properly, but after that, it may start to develop ice crystals and lose some of its fresh flavor.
Can I make this recipe dairy-free?
Yes, but it will require a few modifications. Replace the heavy cream and milk with full-fat coconut milk or a combination of almond milk and coconut cream. Keep in mind that the flavor will change slightly, and the texture might be a bit less creamy. You’ll also need to churn or stir frequently if you’re skipping an ice cream maker.
What can I use instead of granulated sugar?
You can use honey, maple syrup, or coconut sugar instead of granulated sugar, though the sweetness level and flavor will vary. Start with slightly less than 1 cup and adjust to taste after the blueberry base cooks down.
Is it normal for the ice cream to harden a lot after freezing?
Yes, homemade ice cream tends to freeze harder than store-bought because it doesn’t contain commercial softeners or stabilizers. Just let it sit at room temperature for 5 to 10 minutes before scooping. This short wait makes it much easier to serve.
Can I add other fruits to this recipe?
Definitely. You can mix blueberries with raspberries, blackberries, or strawberries to create a mixed-berry ice cream. Just keep the total amount of fruit to about 2 cups to maintain the right consistency.
Can I reduce the sugar for a less sweet version?
Yes, though keep in mind that sugar not only sweetens the ice cream but also affects its texture. If you reduce the sugar too much, the ice cream may freeze harder and become icy. Try cutting back to ¾ cup and see how you like it.
Is this recipe halal?
Yes, this recipe is naturally halal. It contains no alcohol, gelatin, or pork-derived ingredients. All components are simple and clean, making it perfect for anyone observing halal dietary guidelines.
What’s the best way to serve it at a party?
Scoop the ice cream into small bowls ahead of time and keep them in the freezer until serving. This makes it easy to serve a crowd quickly without the ice cream melting. Add a fresh blueberry or mint leaf to each bowl for an elegant touch.
Conclusion & Call to Action
There’s just something about homemade ice cream that feels special. It takes a little bit of time and care, but the result is something so fresh, flavorful, and rewarding. This blueberry ice cream, with its creamy base and bright berry flavor, is one of those recipes that delivers joy in every single bite. It’s easy enough for a beginner to make, yet delicious enough to impress guests or satisfy even the pickiest dessert lovers.
I hope this recipe becomes a staple in your home, just like it has in mine. Whether you’re using freshly picked berries from the farmers’ market or pulling a bag from the freezer in the middle of winter, this ice cream brings the taste of summer to your spoon all year long. It’s the kind of dessert that makes you slow down, savor, and maybe even go back for seconds.
What I love most about this recipe is how customizable it is. You can add mix-ins, play with fruit combinations, or tweak the sweetness to your taste. Once you’ve mastered the basics, the possibilities are endless. And perhaps best of all, it brings people together—whether you’re scooping cones for kids in the backyard, serving sundaes at a dinner party, or just treating yourself after a long day.
If you give this recipe a try, I’d love to hear how it turned out for you. Was it your first time making homemade ice cream? Did you try any fun variations? Don’t be shy—share your experience in the comments, or tag your creations on social media. Seeing your versions of this blueberry ice cream is the best part of sharing these recipes.
So grab your ingredients, fire up your ice cream maker, and treat yourself to a dessert that’s as wholesome and delicious as it is easy to make. I can’t wait to hear what you think.
Print
Blueberry Ice Cream – Creamy, Homemade and Easy to Make
- Total Time: 5 hours (including chilling and freezing)
- Yield: 6-8 servings 1x
- Diet: Vegetarian
Description
This easy homemade blueberry ice cream is rich, creamy, and bursting with fresh berry flavor. With just 6 simple ingredients, it’s a perfect treat for any occasion.
Ingredients
-
2 cups blueberries (fresh or frozen)
-
2 tablespoons lemon juice
-
1 cup granulated sugar
-
2 cups heavy whipping cream
-
1½ cups whole milk
Instructions
-
In a saucepan, combine blueberries, lemon juice, and sugar. Cook over medium heat until sugar dissolves and the mixture simmers. Simmer for 10 minutes, then let cool.
-
Blend the cooled blueberry mixture until mostly smooth.
-
Stir in heavy cream and whole milk. Chill the mixture if still warm.
-
Pour into an ice cream maker and churn for 30–35 minutes until soft-serve consistency.
-
Transfer to a container, freeze for at least 3 hours, then serve.
Notes
-
Use frozen blueberries if fresh aren’t available—no need to thaw.
-
For smoother texture, strain blended berries before mixing with cream.
-
Let the ice cream sit for 5–10 minutes before scooping after freezing.
- Prep Time: 20 minutes
- Cook Time: 15 minutes
- Category: Dessert
- Method: Churned Ice Cream
- Cuisine: American