
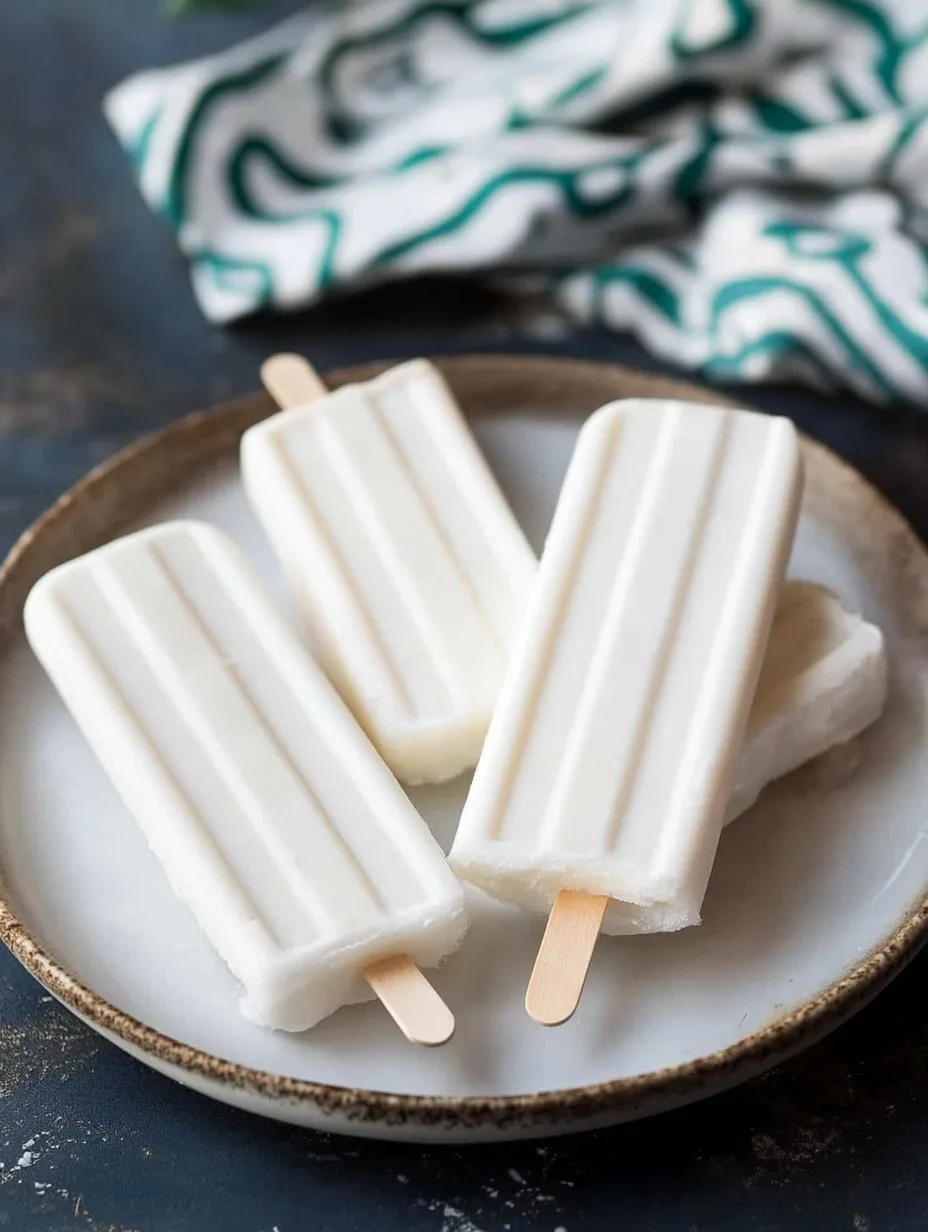
Blender Creamy Coconut Milk Popsicles are the perfect treat for those warm days when you need a refreshing dessert. These popsicles deliver an amazing burst of tropical flavor that will whisk you away to a sun-soaked beach. The rich, creamy texture of coconut milk combined with the sweetness of your favorite fruits creates a delightful experience for your taste buds. Whether you prefer them as a snack, a dessert, or a cool refreshment, these popsicles are sure to please everyone in your family.
The preparation is incredibly simple, requiring only a blender and ice pops molds. This no-fuss recipe is not only easy to make but is also a healthy alternative to store-bought popsicles, which often contain artificial flavors and excessive sugars. By making your own, you have full control over the ingredients, ensuring a delightful treat that’s as wholesome as it is delicious.
If you’re looking for a delightful way to enjoy summer or fancy a nutritious dessert, Blender Creamy Coconut Milk Popsicles should be at the top of your list. With the combination of coconut milk, fresh fruits, and some sweetness, these popsicles are bound to be a hit among kids and adults alike. Plus, they’re incredibly versatile; you can experiment with various flavors, adding in extras like honey, vanilla, or even a dash of lime juice for added zing!
Let’s dive into why this recipe is a must-try for anyone wanting to bring a taste of the tropics to their kitchen.
Why You’ll Love This Recipe
Blender Creamy Coconut Milk Popsicles come with numerous benefits that make them an indispensable addition to your seasonal treat repertoire. Here are some reasons why you’ll adore this recipe:
1. Easy to Make: The steps are straightforward and take only moments to prepare.
2. Healthier Alternative: These popsicles are a great way to enjoy a sweet treat without the guilt of consuming artificial ingredients.
3. Customizable Flavors: You can personalize your popsicles by using whatever fruits are in season or to your liking.
4. Kid-Friendly: Making these popsicles a fun activity allows kids to pick fruits and even help blend.
5. Makes a Large Batch: This recipe yields a generous number of popsicles, perfect for sharing at parties or keeping stocked in your freezer.
6. Tropical Ingredient: Coconut milk not only adds creaminess but also infuses the popsicles with a delightful tropical twist.
With these compelling reasons, it’s easy to see why Blender Creamy Coconut Milk Popsicles are a fantastic option for those looking to enjoy something sweet and refreshing.
Preparation and Cooking Time
Preparing these popsicles is a breeze! Below is a breakdown of the time you’ll need to allocate for making Blender Creamy Coconut Milk Popsicles:
– Preparation Time: 10 minutes
– Freezing Time: 4-6 hours or overnight
– Total Time: Approximately 4-6 hours and 10 minutes (mostly hands-off due to freezing)
The freezing time can vary based on your freezer’s temperature, but traditionally, allowing them to freeze overnight yields the best results.
Ingredients
– 1 can (13.5 ounces) coconut milk
– 1 cup fresh fruit (e.g., mango, berries, or coconut)
– 2 tablespoons honey or maple syrup (optional)
– 1 teaspoon vanilla extract
– A pinch of salt
– Additional fruit for layering (optional)
Step-by-Step Instructions
Creating your own Blender Creamy Coconut Milk Popsicles is simple and fun. Follow these easy steps:
1. Gather Ingredients: Assemble all the ingredients and your blender.
2. Blend Coconut Milk: Pour the coconut milk into the blender.
3. Add Fruits: Add your choice of fresh fruit to the blender. If you’re using hard fruits like mango, cut them into smaller pieces for easier blending.
4. Sweeten: If you’d like some added sweetness, include honey or maple syrup. This step is optional, as the fruit will contribute natural sweetness.
5. Add Vanilla: Pour in the vanilla extract and a pinch of salt to enhance the flavors.
6. Blend Smoothly: Blend everything until you achieve a smooth consistency.
7. Taste Test: Sample the mixture and adjust sweetness if needed; blend again if you add anything.
8. Prep Popsicle Molds: Pour the blended mixture into popsicle molds, filling them about 3/4 full. Leave a little space to allow expansion when freezing.
9. Add Layers (Optional): For added texture, you can include chunks of fruits between layers if desired.
10. Insert Sticks: Place the sticks into the molds, ensuring they are centered.
11. Freeze: Put the molds in the freezer and allow them to freeze for at least 4-6 hours or overnight until solid.
12. Unmold: To remove the popsicles, run warm water over the outside of the molds for a few seconds, then gently pull them out.
Your Blender Creamy Coconut Milk Popsicles are ready to enjoy!
How to Serve
These luscious popsicles are not only great straight from the freezer but can also be served in fun and creative ways to impress your family and friends. Here are some ideas on how to serve them:
1. Presentation: Arrange the popsicles on a platter and garnish with slices of fresh fruit or mint leaves for a beautiful presentation.
2. Accompaniments: Serve with a side of yogurt for a creamy dip, or offer a drizzle of chocolate sauce for added indulgence.
3. Party Style: Set these popsicles out in an ice bucket at gatherings or parties for guests to serve themselves, making them an instant crowd-pleaser.
4. Pair with Drinks: Consider serving these popsicles alongside tropical juices or smoothies to elevate the experience and create a refreshing beverage-popsicle combo.
By serving Blender Creamy Coconut Milk Popsicles in thoughtful ways, you’ll not only enhance their appeal but also create memorable moments around a delightful treat.
Enjoy your delicious homemade popsicles that are bursting with flavor and nutrition!
Additional Tips
– Use Ripe Fruits: For the best flavor, choose ripe fruits that are naturally sweet. This enhances the taste of the popsicles.
– Experiment with Coconut Milk: You can try using light coconut milk for a lower-calorie option or full-fat for a richer texture.
– Blend Thoroughly: Ensure all ingredients are blended smoothly. This creates a creamy texture and prevents any chunky bits in your popsicles.
– Chill the Molds: Before pouring in the mixture, chill your popsicle molds in the freezer for a bit to help the popsicles freeze faster.
Recipe Variation
Feel free to customize your Blender Creamy Coconut Milk Popsicles! Here are some delicious variations to consider:
1. Tropical Twist: Add pineapple or passionfruit for a more tropical flavor.
2. Green Smoothie Pops: Include spinach or kale along with fruits for a healthier, nutrient-dense treat.
3. Chocolate Swirl: Mix in some unsweetened cocoa powder or melted dark chocolate for a chocolatey version.
4. Nut Butter Addition: Swirl in a tablespoon of almond or peanut butter for added creaminess and flavor.
Freezing and Storage
– Storage: Keep your homemade popsicles in an airtight container in the freezer. They should last about 2-3 months without losing flavor.
– Easy Release: If you have trouble getting the popsicles out, run warm water over the outside of the molds for a few seconds before pulling them out.
Special Equipment
To make Blender Creamy Coconut Milk Popsicles, you’ll need a few essential items:
– High-Powered Blender: A good blender ensures that your ingredients mix smoothly.
– Ice Pops Molds: Choose molds in various shapes and sizes to add fun to your popsicles.
– Popsicle Sticks: Most molds come with sticks, but ensure you have some extra in case you misplace them.
Frequently Asked Questions
Can I use frozen fruit?
Yes, frozen fruit works well! Just keep in mind that it may make the mixture thicker.
How long do the popsicles take to freeze?
Allow them to freeze for at least 4-6 hours, or overnight for the best results.
Can I sweeten the popsicles with alternative sweeteners?
Absolutely! You can use agave syrup or stevia instead of honey or maple syrup if you prefer.
What should I do if the mixture is too thick?
Add a splash of coconut milk or water to thin it out to your desired consistency before pouring it into the molds.
Are these popsicles vegan?
Yes, as long as you use maple syrup or agave for sweetness, this recipe is completely vegan.
Conclusion
Blender Creamy Coconut Milk Popsicles are not only a delicious and refreshing treat but also a simple way to enjoy nutritious ingredients. They provide a perfect balance of sweetness and creaminess while being delightfully versatile. With endless possibilities for flavor combinations, these popsicles are sure to make your summer days even sweeter. Whether you’re hosting a backyard barbecue, enjoying a family gathering, or simply savoring a quiet afternoon, these delightful treats will elevate your moments of indulgence. Get blending and enjoy the refreshing taste of the tropics right at home!
Blender Creamy Coconut Milk Popsicles: An Incredible Ultimate Recipe
- Total Time: 28 minute
Ingredients
– 1 can (13.5 ounces) coconut milk
– 1 cup fresh fruit (e.g., mango, berries, or coconut)
– 2 tablespoons honey or maple syrup (optional)
– 1 teaspoon vanilla extract
– A pinch of salt
– Additional fruit for layering (optional)
Instructions
Creating your own Blender Creamy Coconut Milk Popsicles is simple and fun. Follow these easy steps:
1. Gather Ingredients: Assemble all the ingredients and your blender.
2. Blend Coconut Milk: Pour the coconut milk into the blender.
3. Add Fruits: Add your choice of fresh fruit to the blender. If you’re using hard fruits like mango, cut them into smaller pieces for easier blending.
4. Sweeten: If you’d like some added sweetness, include honey or maple syrup. This step is optional, as the fruit will contribute natural sweetness.
5. Add Vanilla: Pour in the vanilla extract and a pinch of salt to enhance the flavors.
6. Blend Smoothly: Blend everything until you achieve a smooth consistency.
7. Taste Test: Sample the mixture and adjust sweetness if needed; blend again if you add anything.
8. Prep Popsicle Molds: Pour the blended mixture into popsicle molds, filling them about 3/4 full. Leave a little space to allow expansion when freezing.
9. Add Layers (Optional): For added texture, you can include chunks of fruits between layers if desired.
10. Insert Sticks: Place the sticks into the molds, ensuring they are centered.
11. Freeze: Put the molds in the freezer and allow them to freeze for at least 4-6 hours or overnight until solid.
12. Unmold: To remove the popsicles, run warm water over the outside of the molds for a few seconds, then gently pull them out.
Your Blender Creamy Coconut Milk Popsicles are ready to enjoy!
- Prep Time: 15 minutes
- Cook Time: –
Nutrition
- Serving Size: 6-8 popsicles
- Calories: 145 kcal
- Fat: 8g
- Protein: 1g