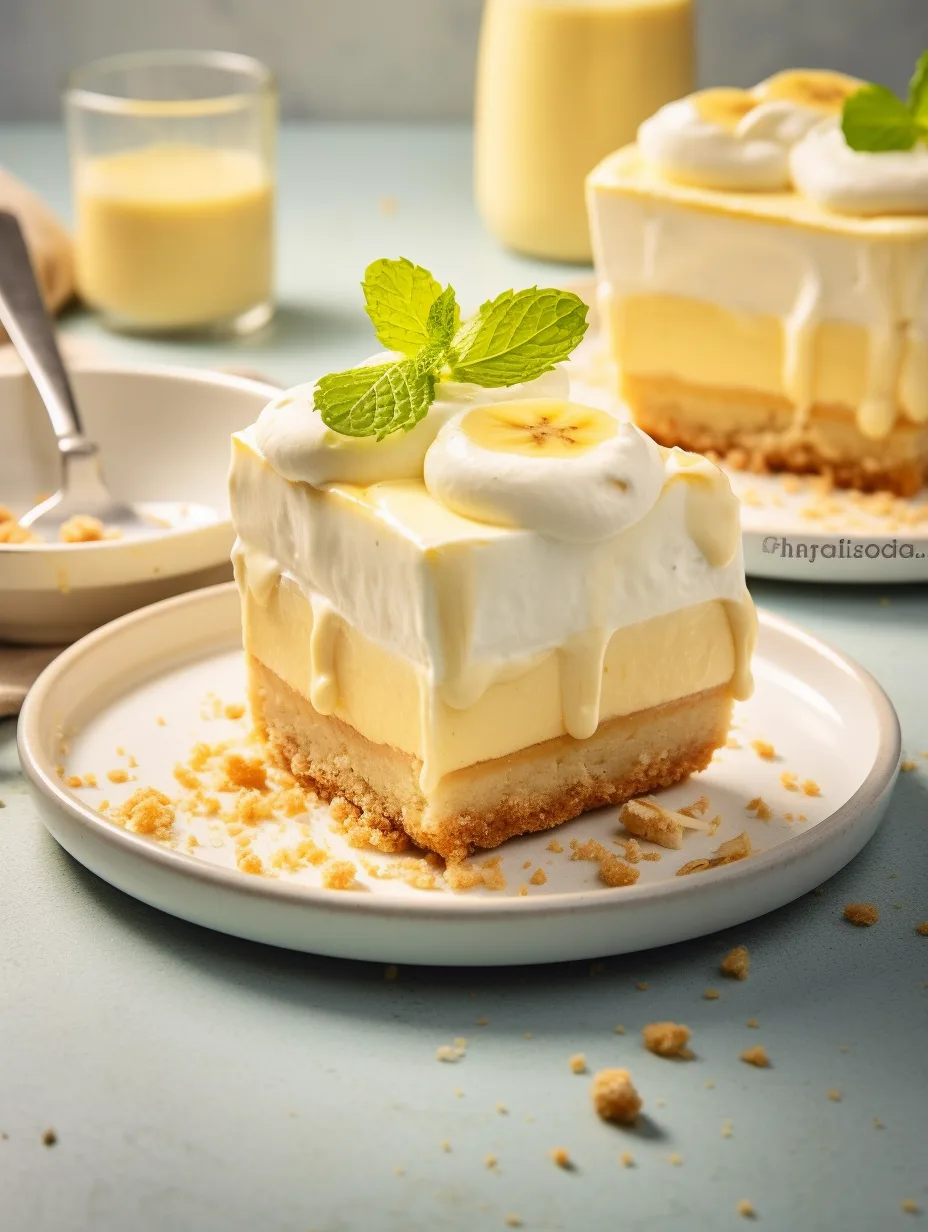
Banana Pudding Bars are a delightful dessert that brings joy and nostalgia with every bite. This incredible treat combines the creamy, sweet flavors of banana pudding with a fun, portable bar form. It’s the perfect dessert for gatherings, picnics, or simply indulging on your own after a long day. If you love the taste of banana pudding, you are in for a delightful surprise with these bars. Not only do they capture the essence of the classic dessert, but they also offer a modern twist that’s ideal for sharing or enjoying at home.
Imagine taking a bite and being enveloped in that smooth, creamy texture combined with the crunch of graham cracker crust. The blend of tastes and textures in Banana Pudding Bars creates an uplifting experience that is both satisfying and heartwarming. This recipe shines in its simplicity, yet delivers an amazing flavor profile that will leave your guests asking for seconds. Prepare to impress your family and friends with this ultimate guide to Banana Pudding Bars!
In this article, you will discover the reasons you’ll love this recipe, how to prepare it, the ingredients needed, step-by-step instructions to achieve the perfect bars, and finally, tips on how to serve them flawlessly. No matter your level of baking expertise, you will find the directions easy to follow, allowing even novice bakers to create these delightful treats. Let’s dive into what makes Banana Pudding Bars a must-try dessert!
Why You’ll Love This Recipe
Banana Pudding Bars offer a range of features that make them irresistible. Here are some reasons why you’ll love this recipe:
1. Easy to Prepare: This recipe is straightforward, with no complicated techniques involved.
2. No Oven Required: Perfect for warm days, as you can make these bars without turning on the oven.
3. Versatile: Feel free to adjust the recipe by adding your favorite toppings or garnishes.
4. Perfectly Portable: Great for picnics, potlucks, or parties.
5. A Nostalgic Classic: Captures the flavor of childhood favorite banana pudding in a new form.
6. Crowd-Pleasing: Guaranteed to be a hit with kids and adults alike.
These features ensure that Banana Pudding Bars aren’t just delicious; they are a practical and fun dessert option that will add excitement to any occasion.
Preparation and Cooking Time
Making Banana Pudding Bars is a quick endeavor, including preparation and chilling time. Here’s a breakdown of the estimated time needed:
– Preparation Time: 20 minutes
– Chilling Time: 2 hours
– Total Time: Approximately 2 hours and 20 minutes
This means you can have these delightful bars ready to impress your guests in just a little time!
Ingredients
– 1 package (8 oz) cream cheese, softened
– 1 cup powdered sugar
– 2 cups whipped topping (e.g., Cool Whip)
– 2 cups banana pudding (prepared, not instant)
– 1 ½ cups graham cracker crumbs
– ½ cup unsalted butter, melted
– 2 ripe bananas, sliced
– 1 tablespoon lemon juice (to coat banana slices)
– Extra whipped topping, for garnish (optional)
– Nilla wafers, for garnish (optional)
Step-by-Step Instructions
Creating luscious Banana Pudding Bars can be straightforward with these step-by-step instructions:
1. Prep the Pan: Line a 9×9 inch baking pan with parchment paper, allowing some overhang for easy removal later.
2. Make the Crust: In a bowl, combine graham cracker crumbs and melted butter. Mix until fully combined. Press the mixture firmly into the bottom of the prepared pan to form an even layer.
3. Cream Cheese Mixture: In a separate mixing bowl, beat the softened cream cheese and powdered sugar together until smooth and creamy.
4. Fold in Whipped Topping: Gently fold in the whipped topping until fully incorporated, creating a light and fluffy blend.
5. Mix with Pudding: Add the prepared banana pudding to the cream cheese mixture. Stir gently until well mixed.
6. Layering: Spread half of the banana pudding mixture evenly over the graham cracker crust.
7. Add Bananas: Place sliced bananas evenly over the pudding layer. Drizzle lemon juice over the bananas to prevent browning.
8. Finish Layer: Pour the remaining pudding mixture on top of the banana slices, spreading it evenly.
9. Chill: Cover the pan with plastic wrap and refrigerate for at least 2 hours, allowing the bars to set.
10. Serve: Once set, lift the bars out of the pan using the overhanging parchment paper. Cut into squares and serve.
Following these steps ensures that your Banana Pudding Bars will come out beautifully every time. They are designed to be easy yet delightfully satisfying, making them a favorite for anyone who loves the taste of banana pudding.
How to Serve
Serving Banana Pudding Bars is just as delightful as making them. Here are some tips to make the presentation special:
1. Presentation: Use a cake stand or a decorative plate for an appealing display. A touch of mint leaves could add a pop of color.
2. Accompaniments: Offer extra whipped topping, chocolate shavings, or even a drizzle of caramel sauce on the side for guests to customize.
3. Nilla Wafers: Present Nilla wafers alongside the bars for that classic banana pudding experience.
4. Slice Size: Cut the bars into bite-sized portions to encourage guests to try multiple servings without feeling overwhelmed.
5. Chill Before Serving: Make sure the bars stay cool until serving time for optimum freshness.
By putting thought into how you serve your Banana Pudding Bars, you’ll make the whole experience memorable and enjoyable for everyone! Whether it’s a gathering or a cozy night in, these bars are guaranteed to be a hit.
Now that you have the ultimate guide to making Banana Pudding Bars, it’s time to roll up your sleeves and start creating this amazing treat. Enjoy the deliciousness and watch as smiles spread all around!
Additional Tips
– Use Ripe Bananas: The sweeter and more flavorful your bananas, the better your bars will taste. Look for bananas with a few brown spots for the ideal sweetness.
– Chill Thoroughly: For best results, allow the bars to chill for a full 2 hours. This helps them set properly and makes cutting easier.
– Tweak the Sweetness: If you prefer a less sweet treat, consider reducing the powdered sugar in the cream cheese layer to adjust to your taste.
– Experiment with Flavors: Add a splash of vanilla or almond extract for an extra layer of flavor in the pudding mixture.
– Keep Bananas Fresh: To maintain the freshness of bananas layered in your bars, coat the slices in lemon juice to prevent browning and ensure they look great when serving.
Recipe Variation
Don’t hesitate to mix things up! Here are a few fun variations of Banana Pudding Bars to explore:
1. Chocolate Banana Pudding Bars: Use chocolate pudding instead of vanilla for a rich twist and add mini chocolate chips to the filling.
2. Peanut Butter Twist: Swirl in some creamy or crunchy peanut butter into the cream cheese layer for a delightful flavor combination.
3. Coconut Delight: Incorporate shredded coconut into the crust or topping for added texture and flavor.
4. Layered Fruit Bars: Add thin layers of strawberries or blueberries between the banana layers for a fruity burst with each bite.
Freezing and Storage
– Storage: Keep the bars in an airtight container in the fridge for up to 3-5 days. Follow these tips to maintain their freshness.
– Freezing: Wrap the bars tightly in plastic wrap or place them in a freezer-safe container. They can last up to 3 months in the freezer. Thaw them in the fridge overnight before serving.
Special Equipment
To successfully prepare Banana Pudding Bars, gather the following essential tools:
– Mixing bowls
– 9×9 inch baking pan lined with parchment paper
– Electric mixer or hand whisk for beating the cream cheese mixture
– Measuring cups and spoons for accurate ingredient sizing
– Plastic wrap to cover during the chilling process
Frequently Asked Questions
Can I use instant pudding instead of prepared pudding?
While you can use instant pudding, the texture and flavor will differ. It’s best to use prepared banana pudding for an authentic taste.
How should I store leftover bars?
Store them in the refrigerator in an airtight container. They will stay fresh for a few days.
Can I make these bars gluten-free?
Yes! Substitute graham cracker crumbs with gluten-free options, like crushed gluten-free cookies or oats, to make a gluten-free version.
How long do these bars last in the fridge?
These bars are best enjoyed within 3 to 5 days when stored in the refrigerator.
Can I prepare the layers ahead of time?
Absolutely! You can prepare the crust and cream cheese mixture in advance, then assemble and chill the day you plan to serve them.
Conclusion
Banana Pudding Bars are a versatile, crowd-pleasing dessert that encapsulates the beloved flavors of traditional banana pudding in a fun, portable form. Simple to prepare and packed with nostalgic taste, these bars deserve a spot at any gathering. Whether serving them at a picnic or enjoying them with family, their charm and deliciousness will certainly win everyone over. So gather your ingredients, follow the straightforward steps, and treat yourself to a delightful experience with these Banana Pudding Bars. You won’t regret it!

Banana Pudding Bars: An Amazing Ultimate Recipe You Need to Try
- Total Time: 15 minutes
Ingredients
– 1 package (8 oz) cream cheese, softened
– 1 cup powdered sugar
– 2 cups whipped topping (e.g., Cool Whip)
– 2 cups banana pudding (prepared, not instant)
– 1 ½ cups graham cracker crumbs
– ½ cup unsalted butter, melted
– 2 ripe bananas, sliced
– 1 tablespoon lemon juice (to coat banana slices)
– Extra whipped topping, for garnish (optional)
– Nilla wafers, for garnish (optional)
Instructions
Creating luscious Banana Pudding Bars can be straightforward with these step-by-step instructions:
1. Prep the Pan: Line a 9×9 inch baking pan with parchment paper, allowing some overhang for easy removal later.
2. Make the Crust: In a bowl, combine graham cracker crumbs and melted butter. Mix until fully combined. Press the mixture firmly into the bottom of the prepared pan to form an even layer.
3. Cream Cheese Mixture: In a separate mixing bowl, beat the softened cream cheese and powdered sugar together until smooth and creamy.
4. Fold in Whipped Topping: Gently fold in the whipped topping until fully incorporated, creating a light and fluffy blend.
5. Mix with Pudding: Add the prepared banana pudding to the cream cheese mixture. Stir gently until well mixed.
6. Layering: Spread half of the banana pudding mixture evenly over the graham cracker crust.
7. Add Bananas: Place sliced bananas evenly over the pudding layer. Drizzle lemon juice over the bananas to prevent browning.
8. Finish Layer: Pour the remaining pudding mixture on top of the banana slices, spreading it evenly.
9. Chill: Cover the pan with plastic wrap and refrigerate for at least 2 hours, allowing the bars to set.
10. Serve: Once set, lift the bars out of the pan using the overhanging parchment paper. Cut into squares and serve.
Following these steps ensures that your Banana Pudding Bars will come out beautifully every time. They are designed to be easy yet delightfully satisfying, making them a favorite for anyone who loves the taste of banana pudding.
- Prep Time: 15 minutes
- Cook Time: 0 minutes
Nutrition
- Serving Size: 9 squares
- Calories: 250 kcal
- Fat: 11g
- Protein: 3g

