
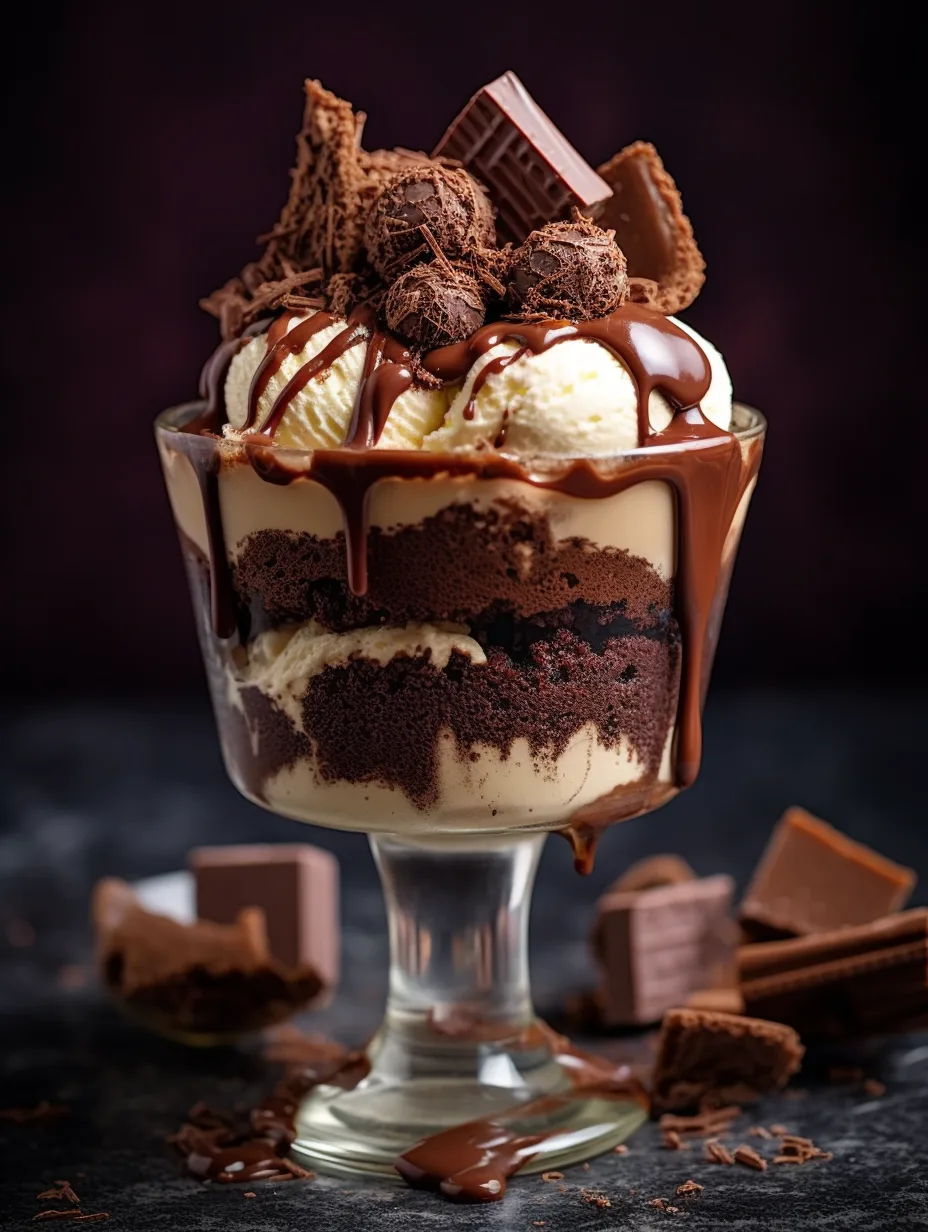
Heavenly Chocolate Cheesecake is a dessert that transforms any occasion into a celebration. Its rich, velvety texture combined with the enchanting flavors of chocolate creates a mouthwatering experience that is hard to resist. Imagine slicing into a perfect cheesecake, its glossy top glistening with chocolate ganache while a burst of chocolate flavor tantalizes your taste buds. This dessert stands out not only for its taste but also for its stunning presentation that is sure to impress family and friends alike.
If you’ve ever craved a slice of decadent cheesecake, this Heavenly Chocolate Cheesecake is the answer. Every bite is a delightful blend of creamy filling and a buttery, crunchy crust that makes your senses ignite with joy. From birthdays to dinner parties, this cheesecake is a versatile treat that elevates any gathering. Throughout this article, you’ll discover the charm of baking your own cheesecake, learn about its preparation, and find tips for serving it like a pro.
The incredible recipe below will guide you through making this cheesecake from scratch. Whether you’re an experienced baker or just starting, this Heavenly Chocolate Cheesecake comes with simple steps that ensure success and satisfaction. So, are you ready to indulge in this chocolate heaven? Let’s dive into why you’ll absolutely love this recipe and how to prepare it!
Why You’ll Love This Recipe
This Heavenly Chocolate Cheesecake is not just another dessert; it’s an experience. Here are several compelling reasons why this recipe will become a favorite in your kitchen:
1. Decadent Flavor Profile: Each layer harmonizes chocolate, cream, and sweetness, creating a mouthwatering delight.
2. Visual Appeal: The elegant layers of chocolate and cheese create an impressive dessert that looks as fantastic as it tastes.
3. Versatile Occasions: Perfect for birthdays, anniversaries, or any gathering where chocolate lovers unite.
4. Simple Ingredients: Many ingredients are kitchen staples, making it accessible for anyone to create.
5. Impressive Presentation: The rich appearance of this cheesecake will wow your guests and make for stunning photography.
6. Customizable: Add your favorite toppings or flavors to make it uniquely yours!
This method guarantees a successful bake and offers room for creativity in the kitchen. Don’t be surprised if this Heavenly Chocolate Cheesecake becomes your go-to dessert recipe!
Preparation and Cooking Time
Creating this Heavenly Chocolate Cheesecake involves a bit of time but is absolutely worth it. Here’s a basic breakdown of the time required:
– Preparation Time: 20 minutes
– Cooking Time: 60 minutes
– Cooling Time: 4 hours (or overnight for best results)
Overall, you should budget at least 5 hours for this recipe, including cooling time. Remember, patience is key when it comes to cheesecakes, as giving it ample time to set is crucial for the best results.
Ingredients
– For the crust:
– 1 ½ cups graham cracker crumbs
– ½ cup unsalted butter, melted
– ¼ cup granulated sugar
– For the cheesecake filling:
– 24 oz cream cheese, softened
– 1 cup granulated sugar
– 1 tsp vanilla extract
– 3 large eggs
– 8 oz sour cream
– 8 oz semi-sweet chocolate, melted
– For the chocolate ganache topping:
– 1 cup semi-sweet chocolate chips
– ½ cup heavy cream
– For decoration (optional):
– Whipped cream
– Chocolate shavings
– Fresh berries
Step-by-Step Instructions
Creating the Heavenly Chocolate Cheesecake requires a few straightforward steps:
1. Preheat the Oven: Begin by preheating your oven to 325°F (160°C).
2. Make the Crust: In a mixing bowl, combine graham cracker crumbs, melted butter, and granulated sugar. Stir until well mixed.
3. Press the Crust: Firmly press the mixture into the bottom of a 9-inch springform pan to form an even layer. Bake for 10 minutes, then remove and set aside to cool.
4. Prepare the Filling: In a large mixing bowl, beat together softened cream cheese and sugar until smooth. Add the vanilla extract and mix well.
5. Add Eggs: Gradually add eggs one at a time, mixing on low speed after each addition until barely combined. Do not overmix to ensure a smooth texture.
6. Incorporate Sour Cream: Gently fold in sour cream and melted chocolate until no streaks remain.
7. Pour the Filling: Pour the cheesecake filling over the cooled crust, spreading it evenly.
8. Bake the Cheesecake: Place the pan in the preheated oven and bake for 60 minutes, or until the edges are set, but the center is still slightly jiggly.
9. Cool the Cheesecake: Turn off the oven, crack the oven door, and allow the cheesecake to cool completely in the oven for about 1 hour. Afterward, chill the cheesecake in the refrigerator for at least 4 hours or overnight.
10. Make Ganache: In a small saucepan, heat heavy cream until just simmering. Remove from heat and add chocolate chips. Stir until smooth and glossy.
11. Top with Ganache: Pour the ganache over the cooled cheesecake, spreading it evenly. Let it set in the fridge for about 30 minutes.
12. Decorate: Top with whipped cream, chocolate shavings, or fresh berries if desired before slicing.
These steps ensure a rich, creamy cheesecake that you and your guests will love. With a bit of patience, you’ll be rewarded with a dessert worthy of any celebration!
How to Serve
Serving the Heavenly Chocolate Cheesecake can enhance the experience. Here are some tips to impress your guests:
1. Slice Carefully: Use a hot, clean knife to cut slices. Wipe between cuts for clean edges.
2. Garnish: Add a dollop of whipped cream on each slice, topped with chocolate shavings or fresh berries for a pop of color.
3. Served Chilled: Ensure the cheesecake is well-chilled for the best texture and flavor.
4. Plate Presentation: Consider using a dessert plate and serve with a light drizzle of chocolate sauce alongside each slice.
5. Pair with Beverages: This cheesecake pairs beautifully with rich coffee or port wine, enhancing the chocolate experience.
By applying these serving suggestions, you can create a memorable experience around your Heavenly Chocolate Cheesecake that will delight every guest at the table.
Additional Tips
– Use Quality Ingredients: For the best flavor in your Heavenly Chocolate Cheesecake, opt for high-quality cream cheese and chocolate. This will enhance the taste and texture significantly.
– Allow Ingredients to Soften: Make sure your cream cheese is at room temperature before mixing. This helps create a smooth filling without lumps.
– Precise Measurements: Accurately measuring your ingredients, especially the chocolate and cream cheese, is crucial to achieve the perfect cheesecake texture.
– Mind the Oven Temperature: Ensure that your oven is properly calibrated. An accurate temperature helps your cheesecake bake evenly.
– Avoid Overmixing: Overmixing can introduce too much air, leading to cracks in your cheesecake. Mix until just combined for a smooth surface.
– Use a Water Bath: For an ultra-creamy texture, consider baking your cheesecake in a water bath. Place your springform pan inside a larger pan filled with water to create humidity while baking.
– Let It Set: This cheesecake improves in flavor over time. Allow it to chill overnight for the best taste and texture.
Recipe Variations
Feel free to switch things up! Here are a few variations to try:
1. Different Chocolate Varieties: Experiment with different types of chocolate, such as white chocolate or dark chocolate, to create unique flavor profiles.
2. Add a Crunch: Mix crushed cookies or nuts into the crust for an added texture. Alternatively, sprinkle some on top for a delightful crunch.
3. Flavored Cream Cheese: Use flavored cream cheeses, like raspberry or espresso, to introduce new tastes to your cheesecake.
4. Layered Cheesecake: Create a layered cheesecake by adding a layer of fruit or caramel in between. This not only enhances flavor but also visuals.
Freezing and Storage
– Storage: To keep your Heavenly Chocolate Cheesecake fresh, cover it tightly with plastic wrap and store it in the refrigerator. It will stay fresh for about 5 days.
– Freezing: You can freeze individual slices of cheesecake for up to 3 months. Wrap each slice in plastic wrap, then place them in a resealable freezer bag to prevent freezer burn.
– Thawing: When ready to enjoy, remove the cheesecake from the freezer and let it thaw in the refrigerator overnight. This will retain moisture and flavor.
Special Equipment
To create your Heavenly Chocolate Cheesecake, you will need a few essential tools:
– Mixing Bowls: A large mixing bowl for combining ingredients is essential.
– Electric Mixer: A hand or stand mixer makes it easier to achieve a smooth filling.
– Springform Pan: Use a 9-inch springform pan for easy removal and serving.
– Rubber Spatula: This is great for folding in ingredients without deflating the batter.
– Food Processor: Optional but helpful for making crusts with a finer texture.
Frequently Asked Questions
How do I know when the cheesecake is done baking?
The edges should be set, and the center should slightly jiggle when you gently shake the pan. It will firm up as it cools.
Can I make this cheesecake ahead of time?
Absolutely! This cheesecake is best made a day ahead, as it allows the flavors to meld beautifully and ensures a perfect texture.
Is this cheesecake suitable for dietary restrictions?
You can adapt the recipe by using gluten-free graham crackers for a gluten-free option. Additionally, try substituting vegan cream cheese for a dairy-free treat.
Can I eliminate the ganache topping?
Yes! You can serve the cheesecake plain or with a simple dusting of cocoa powder or powdered sugar for a more classic presentation.
What do I do if my cheesecake cracks?
If cracks appear, don’t worry! You can cover them with ganache or whipped cream to hide imperfections while adding delicious flavor.
Conclusion
Making a Heavenly Chocolate Cheesecake is a delightful journey that results in an indulgent, rich dessert. Its layers of chocolatey goodness and creamy filling provide a perfect balance, making it irresistible for any occasion. As you master this recipe, don’t hesitate to experiment with flavors and toppings to create your signature version. Whether served at a celebration or as a treat for yourself, this cheesecake is sure to impress.
Heavenly Chocolate Cheesecake: An Incredible 5-Layer Recipe
- Total Time: 1 hour 15 minutes
Ingredients
– For the crust:
– 1 ½ cups graham cracker crumbs
– ½ cup unsalted butter, melted
– ¼ cup granulated sugar
– For the cheesecake filling:
– 24 oz cream cheese, softened
– 1 cup granulated sugar
– 1 tsp vanilla extract
– 3 large eggs
– 8 oz sour cream
– 8 oz semi-sweet chocolate, melted
– For the chocolate ganache topping:
– 1 cup semi-sweet chocolate chips
– ½ cup heavy cream
– For decoration (optional):
– Whipped cream
– Chocolate shavings
– Fresh berries
Instructions
Creating the Heavenly Chocolate Cheesecake requires a few straightforward steps:
1. Preheat the Oven: Begin by preheating your oven to 325°F (160°C).
2. Make the Crust: In a mixing bowl, combine graham cracker crumbs, melted butter, and granulated sugar. Stir until well mixed.
3. Press the Crust: Firmly press the mixture into the bottom of a 9-inch springform pan to form an even layer. Bake for 10 minutes, then remove and set aside to cool.
4. Prepare the Filling: In a large mixing bowl, beat together softened cream cheese and sugar until smooth. Add the vanilla extract and mix well.
5. Add Eggs: Gradually add eggs one at a time, mixing on low speed after each addition until barely combined. Do not overmix to ensure a smooth texture.
6. Incorporate Sour Cream: Gently fold in sour cream and melted chocolate until no streaks remain.
7. Pour the Filling: Pour the cheesecake filling over the cooled crust, spreading it evenly.
8. Bake the Cheesecake: Place the pan in the preheated oven and bake for 60 minutes, or until the edges are set, but the center is still slightly jiggly.
9. Cool the Cheesecake: Turn off the oven, crack the oven door, and allow the cheesecake to cool completely in the oven for about 1 hour. Afterward, chill the cheesecake in the refrigerator for at least 4 hours or overnight.
10. Make Ganache: In a small saucepan, heat heavy cream until just simmering. Remove from heat and add chocolate chips. Stir until smooth and glossy.
11. Top with Ganache: Pour the ganache over the cooled cheesecake, spreading it evenly. Let it set in the fridge for about 30 minutes.
12. Decorate: Top with whipped cream, chocolate shavings, or fresh berries if desired before slicing.
These steps ensure a rich, creamy cheesecake that you and your guests will love. With a bit of patience, you’ll be rewarded with a dessert worthy of any celebration!
- Prep Time: 15 minutes
- Cook Time: 60 minutes
Nutrition
- Serving Size: 12 slices
- Calories: 450 kcal
- Fat: 30g
- Protein: 6g