
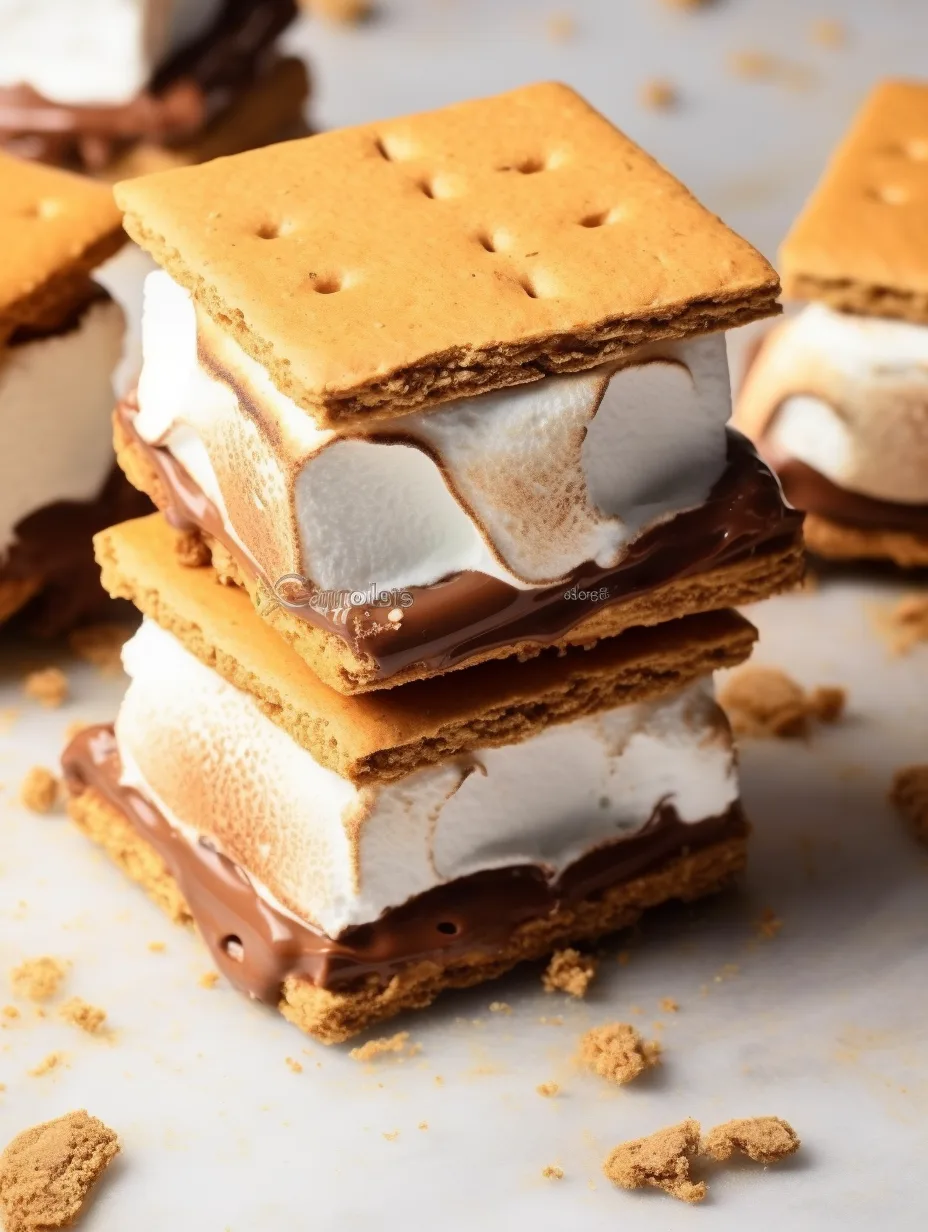
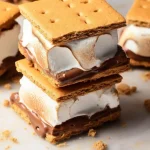
Frozen S’mores are a delightful twist on the classic dessert that many of us cherish. This amazing treat captures all the beloved flavors of traditional s’mores, with the added bonus of being a refreshing, cool dessert for hot summer days. Imagine biting into layers of creamy chocolate, gooey marshmallow, and crunchy graham crackers that melt in your mouth—all while being blissfully chilled! These Frozen S’mores are perfect for a fun summer gathering or simply a cozy night at home with family.
If you’ve ever had the pleasure of enjoying a classic s’more, you will find that this frozen version takes the experience to a whole new level. The sweet and rich flavors mingle beautifully, creating a wonderful treat that boasts both nostalgia and innovation. In this article, you will discover why Frozen S’mores are so irresistible, how to prepare them in your own kitchen, and tips for serving them perfectly to your guests. Get ready to learn the ins and outs of this incredible frozen dessert that can easily become a favorite!
Why You’ll Love This Recipe
Frozen S’mores bring together an amazing combination of flavors and textures that are sure to leave you craving more. Here are some reasons why this recipe should be on your must-try list:
1. Easy to Make – With minimal preparation and cooking required, this recipe is perfect for anyone.
2. No-Bake Delight – Beat the heat without turning on the oven, making it ideal for summer days.
3. Fun for All Ages – Kids and adults alike will love crafting their own frozen s’mores.
4. Customizable Options – Switch up the ingredients to include your favorite chocolate or toppings.
5. Make Ahead – This dessert can be prepared in advance, allowing you to enjoy it whenever you desire.
6. Impressive Presentation – Layered beautifully in a dish or individually wrapped, they look as good as they taste!
With all these enticing reasons in mind, it’s easy to see why Frozen S’mores are an amazing addition to your dessert repertoire. Each bite combines the familiar taste of traditional s’mores with an icy twist—perfectly balancing sweet and creamy.
Preparation and Cooking Time
Creating your own Frozen S’mores doesn’t take much time at all. Here’s a breakdown of the time you’ll need:
– Preparation Time: 15 minutes
– Freezing Time: 4-6 hours (or overnight for best results)
– Total Time: About 4-6 hours and 15 minutes
Although the freezing time may seem lengthy, the active prep time is quite short, giving you plenty of time to relax while they set!
Ingredients
– 1 box of graham cracker crumbs
– ½ cup unsalted butter, melted
– ¼ cup granulated sugar
– 2 cups mini marshmallows
– 2 cups chocolate chips (milk or dark)
– 1 ½ cups whipped cream or Cool Whip
– ½ teaspoon vanilla extract
– Additional graham crackers for layering (optional)
– Extra mini marshmallows for topping (optional)
Step-by-Step Instructions
Making Frozen S’mores is incredibly simple. Follow these steps to create your own delicious treat:
1. Prepare the Crust: In a bowl, combine graham cracker crumbs, melted butter, and sugar. Mix until well combined.
2. Press Into Pan: Press the mixture firmly into the bottom of a 9×9-inch baking dish or a freezer-safe container to form the crust.
3. Make the Filling: In a separate bowl, melt the chocolate chips in the microwave or over a double boiler, stirring until smooth.
4. Fold in Whipped Cream: Allow the chocolate to cool slightly, then fold in whipped cream and vanilla extract until fully integrated.
5. Layer the Mixture: Spread half of the chocolate-whipped cream mixture over the graham cracker crust evenly.
6. Add Marshmallows: Sprinkle the mini marshmallows over the chocolate layer.
7. Top with Remaining Mixture: Spread the remaining chocolate-whipped cream mixture over the marshmallows.
8. Create the Final Layer: Crush additional graham crackers, if desired, and sprinkle them on top for decoration.
9. Freeze: Cover the dish with plastic wrap and place it into the freezer. Freeze for at least 4-6 hours or until solid.
10. Slice and Serve: Once set, remove from the freezer and let it sit for a few minutes before slicing into squares.
How to Serve
Serving Frozen S’mores can be as enjoyable as making them! Here are some tips to present this delightful treat beautifully:
1. Presentation: Cut the Frozen S’mores into neat squares or bars for easy serving. Arrange them on a serving platter for an appealing display.
2. Garnish: Consider adding some extra mini marshmallows or a drizzle of chocolate syrup on top for an impressive finish.
3. Pair with Beverages: Serve alongside milky cocktails, hot chocolate, or iced coffee for a lovely treat experience.
4. Individual Portions: For gatherings, consider portioning each square into individual wrappers or cups for a fun, customizable dessert.
By applying these serving tips, you will elevate the entire experience of enjoying these Frozen S’mores among friends and family. Each bite is a delightful reminder of childhood summers spent around the campfire—now with a cool twist!
Additional Tips
– Use Quality Ingredients: Select high-quality chocolate chips and marshmallows for maximum flavor impact.
– Layer Generously: Ensure that each layer is even and well-distributed for the best texture in every bite.
– Add Texture: Incorporate crushed nuts or candies between layers for an extra crunch if desired.
Recipe Variation
Feel free to experiment with these variations to personalize your Frozen S’mores:
1. Peanut Butter Twist: Add a layer of creamy peanut butter between the chocolate and marshmallow layers for a nutty burst.
2. Cookie Crust: Substitute graham cracker crumbs with crushed Oreo cookies for a deliciously different crust.
3. Fruity Freeze: Layer in slices of banana or strawberries for a refreshing fruit flavor alongside the classic s’mores taste.
Freezing and Storage
– Storage: Keep your Frozen S’mores in an airtight container in the freezer. They will stay fresh for up to two weeks.
– Freezing: For longer storage, wrap the individual squares in plastic wrap and then place them in a freezer bag. They can last up to three months.
Special Equipment
To successfully create your Frozen S’mores, gather the following essential tools:
– Mixing bowls for combining ingredients
– A 9×9-inch baking dish or freezer-safe container for layering
– Plastic wrap for covering while freezing
– A spatula for smoothing out layers
Frequently Asked Questions
Can I make Frozen S’mores ahead of time?
Yes, they are perfect for making a day in advance. Just allow enough time for proper freezing.
What should I do if the chocolate mixture is too thick?
Add a touch of warmed cream or milk to thin it out to your desired consistency.
Are frozen s’mores suitable for gluten-free diets?
You can use gluten-free graham cracker crumbs or substitute with crushed nuts to make them gluten-free.
Can I use different toppings?
Absolutely! Feel free to experiment with toppings like chopped nuts, coconut flakes, or even sprinkles for a festive touch.
Conclusion
Frozen S’mores are a fun and easy dessert that captures the essence of summer. With their cool and creamy texture, they tightly embrace the nostalgia of classic s’mores while providing a refreshing twist. Perfect for summer gatherings or simply enjoying at home, they are sure to be a hit with everyone who tries them. Follow the simple recipe, get creative with variations, and delight in the amazing flavors of your very own Frozen S’mores!
Frozen S’mores: The Amazing Ultimate Recipe You Need
- Total Time: 15 minutes
Ingredients
– 1 box of graham cracker crumbs
– ½ cup unsalted butter, melted
– ¼ cup granulated sugar
– 2 cups mini marshmallows
– 2 cups chocolate chips (milk or dark)
– 1 ½ cups whipped cream or Cool Whip
– ½ teaspoon vanilla extract
– Additional graham crackers for layering (optional)
– Extra mini marshmallows for topping (optional)
Instructions
Making Frozen S’mores is incredibly simple. Follow these steps to create your own delicious treat:
1. Prepare the Crust: In a bowl, combine graham cracker crumbs, melted butter, and sugar. Mix until well combined.
2. Press Into Pan: Press the mixture firmly into the bottom of a 9×9-inch baking dish or a freezer-safe container to form the crust.
3. Make the Filling: In a separate bowl, melt the chocolate chips in the microwave or over a double boiler, stirring until smooth.
4. Fold in Whipped Cream: Allow the chocolate to cool slightly, then fold in whipped cream and vanilla extract until fully integrated.
5. Layer the Mixture: Spread half of the chocolate-whipped cream mixture over the graham cracker crust evenly.
6. Add Marshmallows: Sprinkle the mini marshmallows over the chocolate layer.
7. Top with Remaining Mixture: Spread the remaining chocolate-whipped cream mixture over the marshmallows.
8. Create the Final Layer: Crush additional graham crackers, if desired, and sprinkle them on top for decoration.
9. Freeze: Cover the dish with plastic wrap and place it into the freezer. Freeze for at least 4-6 hours or until solid.
10. Slice and Serve: Once set, remove from the freezer and let it sit for a few minutes before slicing into squares.
- Prep Time: 15 minutes
- Cook Time: 0 minutes
Nutrition
- Serving Size: 12 squares
- Calories: 280 kcal
- Fat: 15g
- Protein: 3g