
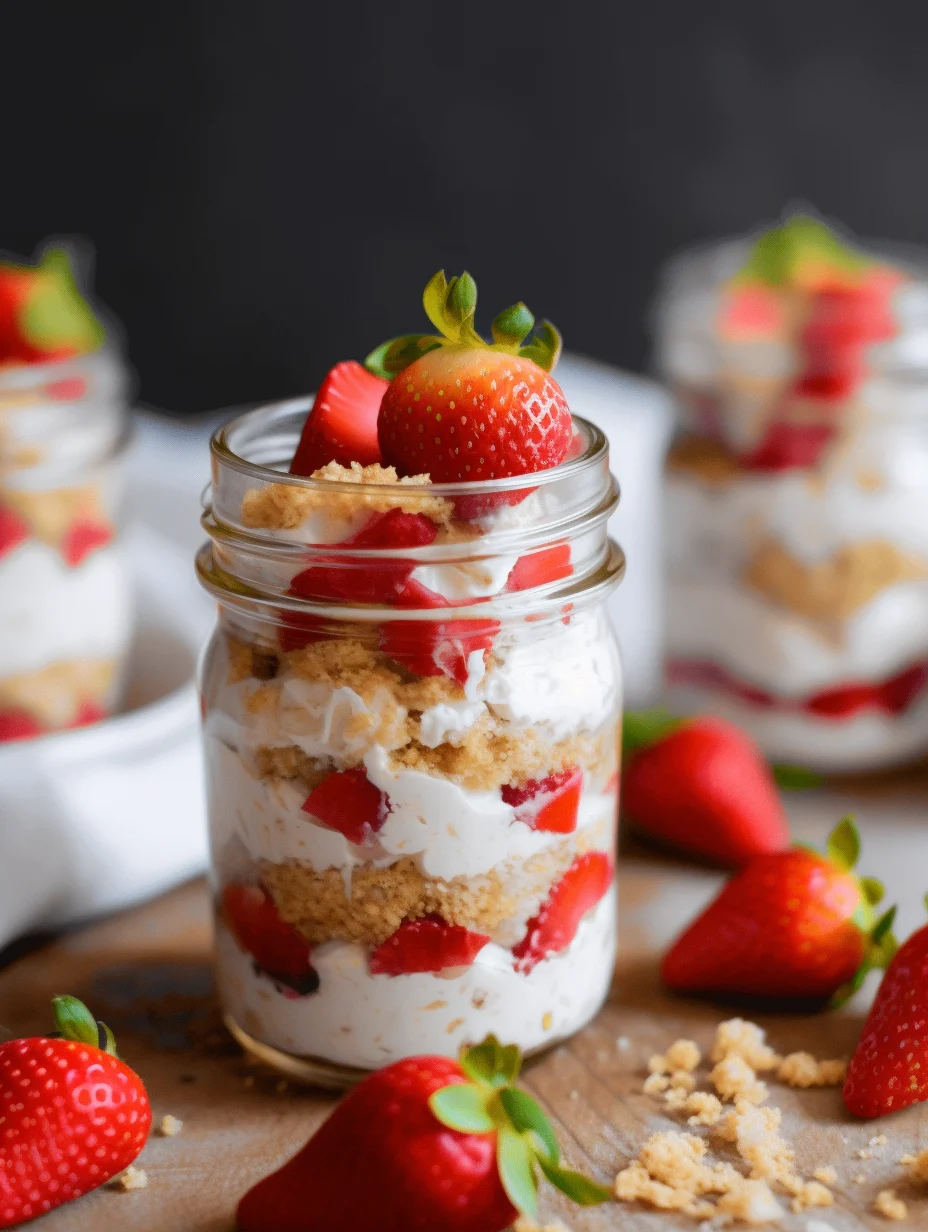
No-Bake Strawberry Cheesecake Jars are an amazing dessert that combines creamy cheesecake filling with the sweet, refreshing taste of strawberries. This delightful treat is perfect for any occasion and elevates the classic cheesecake to a new, accessible level. Whether you’re enjoying a warm summer day or celebrating a special moment with friends and family, these jars provide a quick and easy solution for dessert lovers. They offer not only an indulgent taste but also a beautiful presentation that will impress your guests.
Imagine the luscious layers of smooth cream cheese, whipped cream, and fresh strawberries, all nestled within a charming jar. This dessert speaks to those who appreciate both taste and aesthetics. Moreover, you can tailor the ingredients to accommodate dietary needs or preferences, making them versatile and appealing to everyone. As you dive into the layers of this dessert, each spoonful will leave you craving more.
In this article, you’ll discover why No-Bake Strawberry Cheesecake Jars are a fantastic addition to your dessert repertoire. We will explore the reasons to love this recipe, provide you with straightforward preparation and cooking times, and list all the ingredients you need. Finally, we’ll guide you through step-by-step instructions to create these incredible individual servings. Let’s get started on making this ultimate dessert!
Why You’ll Love This Recipe
No-Bake Strawberry Cheesecake Jars make a delightful treat for many reasons. Here are just a few why this recipe will become a favorite in your kitchen:
1. No Baking Required: Perfect for hot weather or when you want a quick dessert without using your oven.
2. Fresh Ingredients: Using real strawberries adds a fresh burst of flavor that enhances the cheesecake’s richness.
3. Quick Preparation: You can whip up this dessert in no time, making it ideal for last-minute gatherings.
4. Individual Portions: The jars create beautiful, individual servings that are perfect for sharing or enjoying alone.
5. Beautiful Presentation: They look fantastic in serving jars, adding a touch of elegance to any table setting.
6. Customizable: You can easily modify the recipe to include different fruits or flavors according to your preference.
With all these wonderful aspects in mind, it’s easy to see why these No-Bake Strawberry Cheesecake Jars are a must-try!
Preparation and Cooking Time
The total time to prepare No-Bake Strawberry Cheesecake Jars is approximately 45 minutes, which includes preparation and chilling time. Here’s a detailed breakdown of the timings:
– Preparation Time: 20 minutes
– Chilling Time: 25 minutes (or longer if preferred)
These times may vary slightly based on your kitchen setup and experience level. Having the ingredients prepped ahead of time will also speed up the process.
Ingredients
– 8 ounces cream cheese, softened
– 1 cup powdered sugar
– 1 teaspoon vanilla extract
– 1 cup heavy whipping cream
– 12 ounces fresh strawberries, hulled and sliced
– 1 cup graham cracker crumbs
– 4 tablespoons unsalted butter, melted
– 1 tablespoon sugar (optional, for macerating strawberries)
Step-by-Step Instructions
Creating No-Bake Strawberry Cheesecake Jars is straightforward with the following steps:
1. Prepare the Strawberry Mixture: In a bowl, combine the sliced strawberries with a tablespoon of sugar if desired. Let them sit for about 10 minutes to macerate and release their juices.
2. Mix the Cheesecake Filling: In a medium bowl, beat the softened cream cheese and powdered sugar together until smooth. Add the vanilla extract and mix well.
3. Whip the Cream: In a separate bowl, whip the heavy cream until stiff peaks form. Be careful not to over-whip; it should be fluffy and light.
4. Combine Mixtures: Gently fold the whipped cream into the cream cheese mixture until well combined. Be careful not to deflate the whipped cream.
5. Prepare the Crust: In a small bowl, combine the graham cracker crumbs with the melted butter. Mix until the crumbs are evenly coated and resemble wet sand.
6. Layer the Ingredients: Start layering in each jar: add a spoonful of the graham cracker mixture as the base, then a layer of the cheesecake filling, followed by a layer of macerated strawberries. Repeat the layers until the jars are filled to the top.
7. Chill: Place the jars in the refrigerator for at least 25 minutes to allow the layers to set and the flavors to meld.
8. Serve: If desired, top the jars with additional whipped cream or fresh strawberries before serving.
Following these simple steps will help you create beautiful, delicious No-Bake Strawberry Cheesecake Jars effortlessly!
How to Serve
To serve your No-Bake Strawberry Cheesecake Jars perfectly, consider the following tips:
1. Add Decorative Toppings: Top each jar with a dollop of whipped cream and additional strawberry slices for an eye-catching presentation.
2. Use Elegant Jar Options: Mason jars, small glass cups, or dessert dishes elevate the look and feel of your dessert.
3. Garnish with Fresh Mint: A sprig of fresh mint can add a pop of color and a refreshing aroma.
4. Pair with Beverages: These jars pair beautifully with iced tea, sparkling water, or a light dessert wine.
5. Make Ahead: These jars can be prepared a day in advance, allowing the flavors to develop and making it convenient for entertaining.
With these serving tips, your No-Bake Strawberry Cheesecake Jars will not only taste incredible but also impress your guests!
Additional Tips
– Use Fresh Strawberries: For the best flavor and presentation, always opt for ripe, fresh strawberries. They enhance both the taste and visual appeal of your No-Bake Strawberry Cheesecake Jars.
– Experiment with Flavors: Feel free to add a touch of lemon zest or a splash of almond extract to the cheesecake filling for an exciting flavor twist.
– Keep it Chill: Ensure the jars are well-chilled before serving. This enhances the texture of the cheesecake, making it even creamier and more delightful.
– Make the Crust Crunchy: For an extra crunch, toast the graham cracker crumbs lightly in the oven before mixing them with butter.
– Portion Control: While the jars are perfect for individual servings, consider using smaller jars for a delightful tasting experience without overindulging.
Recipe Variation
No-Bake Strawberry Cheesecake Jars can easily be modified to suit your taste. Here are some variations to try out:
1. Chocolate Version: Add cocoa powder to the cheesecake mixture for a delightful chocolate strawberry cheesecake combo.
2. Mixed Berries: Substitute strawberries with a mix of other berries, like blueberries or raspberries, for a mixed berry treat.
3. Nutty Crunch: Incorporate finely chopped nuts, such as almonds or pecans, in the crust for a nutty flavor profile.
4. Vegan Adaptation: Use vegan cream cheese and coconut whipped cream for a delicious plant-based version of this classic dessert.
5. Layer with Other Textures: Include layers of granola or crushed cookies between the cheesecake and strawberries for added crunch.
Freezing and Storage
– Storage: These jars can be kept in the refrigerator for up to 3 days. Cover them tightly with lids or plastic wrap to maintain their freshness.
– Freezing: If you want to prepare them in advance, you can freeze the jars without the fresh strawberries. They will last up to a month in the freezer. When ready to serve, let the jars thaw in the refrigerator and add fresh strawberries.
Special Equipment
To make No-Bake Strawberry Cheesecake Jars, you will need a few essential tools:
– Mixing bowls (various sizes)
– Electric mixer or whisk for cream
– Measuring cups and spoons
– Mason jars or dessert cups for layering
– Rubber spatula for folding ingredients
– Knife and cutting board for preparing strawberries
Frequently Asked Questions
How long can I keep these jars in the refrigerator?
Store them in the fridge for up to 3 days for the best taste and texture.
Can I use frozen strawberries instead?
Yes, but make sure to thaw and drain excess liquid before adding them to prevent a soggy dessert.
What if I don’t have graham crackers?
You can substitute with crushed vanilla wafers, digestive biscuits, or even Oreos for a unique flavor twist.
Can these jars be made ahead of time?
Absolutely! In fact, making them a few hours ahead allows the flavors to meld beautifully.
Is there a gluten-free version of this recipe?
Yes, simply replace graham crackers with gluten-free crumbs or nut-based crusts.
Conclusion
No-Bake Strawberry Cheesecake Jars are not only a beautiful dessert but also a crowd-pleaser for gatherings, family occasions, or just a sweet ending to a meal. This easy-to-make recipe combines freshness, flavor, and an appealing presentation, ensuring it’s a hit every time you serve it. With its adaptable nature and charming look, this dessert is bound to create lasting memories. Enjoy creating your own irresistible version of this classic treat!
No-Bake Strawberry Cheesecake Jars: An Incredible Ultimate Recipe
- Total Time: 15 minutes
Ingredients
– 8 ounces cream cheese, softened
– 1 cup powdered sugar
– 1 teaspoon vanilla extract
– 1 cup heavy whipping cream
– 12 ounces fresh strawberries, hulled and sliced
– 1 cup graham cracker crumbs
– 4 tablespoons unsalted butter, melted
– 1 tablespoon sugar (optional, for macerating strawberries)
Instructions
Creating No-Bake Strawberry Cheesecake Jars is straightforward with the following steps:
1. Prepare the Strawberry Mixture: In a bowl, combine the sliced strawberries with a tablespoon of sugar if desired. Let them sit for about 10 minutes to macerate and release their juices.
2. Mix the Cheesecake Filling: In a medium bowl, beat the softened cream cheese and powdered sugar together until smooth. Add the vanilla extract and mix well.
3. Whip the Cream: In a separate bowl, whip the heavy cream until stiff peaks form. Be careful not to over-whip; it should be fluffy and light.
4. Combine Mixtures: Gently fold the whipped cream into the cream cheese mixture until well combined. Be careful not to deflate the whipped cream.
5. Prepare the Crust: In a small bowl, combine the graham cracker crumbs with the melted butter. Mix until the crumbs are evenly coated and resemble wet sand.
6. Layer the Ingredients: Start layering in each jar: add a spoonful of the graham cracker mixture as the base, then a layer of the cheesecake filling, followed by a layer of macerated strawberries. Repeat the layers until the jars are filled to the top.
7. Chill: Place the jars in the refrigerator for at least 25 minutes to allow the layers to set and the flavors to meld.
8. Serve: If desired, top the jars with additional whipped cream or fresh strawberries before serving.
Following these simple steps will help you create beautiful, delicious No-Bake Strawberry Cheesecake Jars effortlessly!
- Prep Time: 15 minutes
- Cook Time: 0 minutes
Nutrition
- Serving Size: 4 jars
- Calories: 310 kcal
- Fat: 18g
- Protein: 4g