
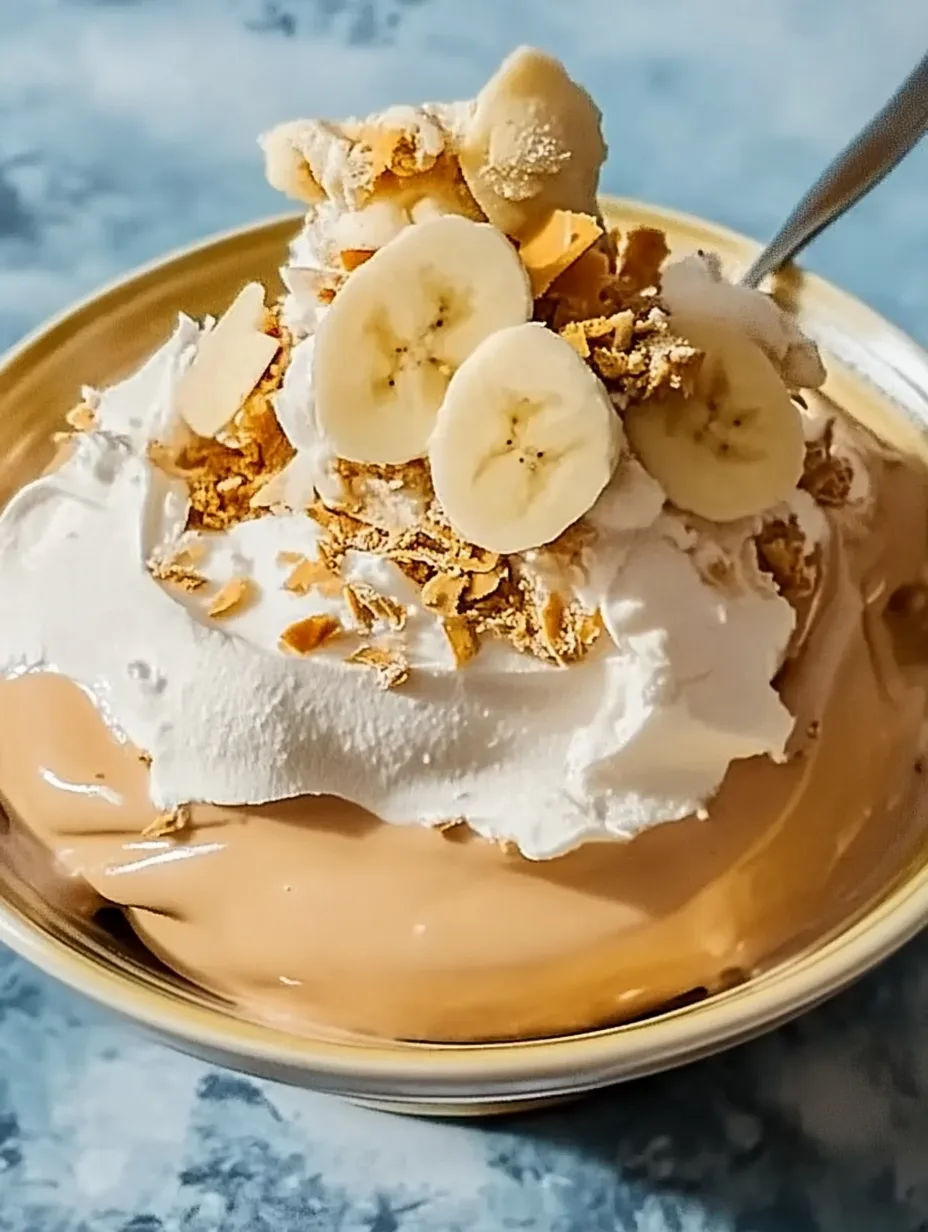
2-Ingredient Peanut Butter Banana Ice Cream is an amazing treat that proves delicious desserts don’t always have to be complicated. This simple frozen dessert combines just two wholesome ingredients, creating a creamy and satisfying ice cream that you’ll love. Whether you’re searching for a quick snack or a healthier dessert option, this recipe will become a staple in your kitchen. It’s perfect for warm summer days, cozy evenings, or whenever that sweet tooth strikes.
If you’re tired of store-bought ice cream loaded with sugar and preservatives, then this peanut butter banana ice cream is the ideal solution. With only two ingredients, you can enjoy an indulgent dessert without any guilt. Just picture this: a rich peanut butter flavor enveloping velvety banana goodness, all blended together into a dreamy ice cream. It’s simple, delightful, and incredibly satisfying. Let’s explore why this 2-Ingredient Peanut Butter Banana Ice Cream deserves a spot in your dessert rotation.
In this guide, we will go through the process step-by-step, sharing useful tips for making it perfectly smooth and creamy. You’ll not only discover how easy this ice cream is to make but also learn about its health benefits and various ways to serve it. This remarkable recipe showcases the versatility of bananas and the irresistibility of peanut butter. By the end, you will understand why so many people rave about this deliciously simple treat!
Why You’ll Love This Recipe
There is so much to appreciate about this 2-Ingredient Peanut Butter Banana Ice Cream. Here are some wonderful reasons to fall in love with it:
1. Quick and Easy – No complicated steps or lengthy preparation is involved; you’ll be enjoying your ice cream in no time.
2. Healthy Ingredients – Both bananas and peanut butter are packed with nutrients, making this a guilt-free indulgence.
3. Customizable – Blend in your favorite mix-ins or toppings for a personalized dessert experience.
4. Kid-Friendly – This recipe is an excellent opportunity to get kids involved in the kitchen, making it a fun family activity.
5. Perfect for Any Occasion – Whether it’s a hot day, a party, or just a craving for something sweet, this ice cream fits right in.
6. No Churn Required – There’s no need for an ice cream maker; a blender or food processor is all you need!
With such fantastic benefits, you’ll soon find yourself making this incredible ice cream again and again. Every scoop delivers a delightful balance between creaminess and flavor that is sure to impress everyone who tries it!
Preparation and Cooking Time
Creating your 2-Ingredient Peanut Butter Banana Ice Cream requires minimal time and effort. Here’s a breakdown of the time involved:
– Preparation Time: 5 minutes
– Freezing Time: 4 hours (or until fully frozen)
This quick overview ensures you can plan appropriately. While the actual hands-on time is short, just remember that the ice cream needs a few hours in the freezer to achieve that perfect scoopable texture.
Ingredients
– 4 ripe bananas
– 1/2 cup creamy peanut butter
Step-by-Step Instructions
Follow these steps to create your delightful 2-Ingredient Peanut Butter Banana Ice Cream:
1. Choose Ripe Bananas: Select 4 ripe bananas, ensuring they have brown spots for optimal sweetness and flavor.
2. Peel the Bananas: Remove the peels and cut the bananas into smaller chunks for easier blending.
3. Blend the Ingredients: In a blender or food processor, combine the banana chunks and creamy peanut butter. Blend on high speed until the mixture is smooth and creamy.
4. Taste and Adjust: Give your mixture a taste. If you desire a sweeter flavor, you can add a drizzle of honey or maple syrup at this point.
5. Transfer to a Container: Pour the blended mixture into an airtight container suitable for freezing.
6. Smooth the Top: Use a spatula to smooth the top for even freezing.
7. Freeze: Place the container in the freezer. Allow it to freeze for at least 4 hours, or until completely set.
8. Scoop and Serve: Once frozen, let it sit at room temperature for a few minutes to soften slightly, making it easier to scoop.
These straightforward steps will ensure you create the perfect batch of ice cream for all to enjoy!
How to Serve
Once you’ve made your incredible 2-Ingredient Peanut Butter Banana Ice Cream, you might be wondering how to serve it for maximum enjoyment. Here are some ideas to elevate your serving experience:
1. Presentation: Serve your ice cream in stylish bowls or waffle cones for a classic touch. A sprinkle of chopped nuts or chocolate chips on top can provide an extra crunch.
2. Toppings Galore: Consider toppings like sliced bananas, a drizzle of chocolate sauce, or shredded coconut to add texture and flavor.
3. Pair with Other Desserts: Use this ice cream to complement other desserts, such as an elegant slice of cake or fresh fruit.
4. Blend It Up: Mix it with smoothies by blending a scoop into your favorite base for an extra creamy treat.
5. Creative Milkshake: For a delightful twist, mix the ice cream with milk to create a luscious peanut butter banana milkshake.
With these serving suggestions, your peanut butter banana ice cream becomes an even more exciting and versatile dessert option to savor!
In conclusion, 2-Ingredient Peanut Butter Banana Ice Cream is a marvelously simple yet delicious recipe that delivers incredible flavor and satisfaction. The ease of preparation combined with the healthful benefits of its ingredients makes it a fantastic choice for any occasion. Don’t hesitate to try this delightful ice cream—you’re in for a treat!
Additional Tips
– Use Ripe Bananas: The sweetness and creaminess of ripe bananas greatly influence the flavor and texture. Look for bananas with brown spots for optimal ripeness.
– Blend Well: Ensure that the banana and peanut butter mixture is blended thoroughly for a smooth, creamy ice cream. Scrape down the sides of the blender or processor to fully incorporate all ingredients.
– Add a Pinch of Salt: For enhanced flavor, consider adding a pinch of salt to the mixture. It will help balance the sweetness and magnify the peanut butter taste.
– Experiment with Sweeteners: If desired, you can substitute honey with maple syrup or agave nectar depending on your sweetness preference or dietary restrictions.
– Serve Immediately: If you prefer a soft-serve texture, enjoy your ice cream straight after blending. Just make sure to consume it promptly, as it will melt quickly.
Recipe Variation
Feel free to explore creativity with these variations for your 2-Ingredient Peanut Butter Banana Ice Cream:
1. Chocolate Lovers: Blend in 2 tablespoons of cocoa powder or a handful of chocolate chips for a chocolatey twist.
2. Nutty Additions: Incorporate chopped nuts such as walnuts or almonds for added crunch and flavor.
3. Fruit Fusion: Try mixing in other fruits like strawberries or blueberries to create a fruity flavor explosion.
4. Dairy-Free Option: Use almond butter or sunflower seed butter instead of peanut butter for a nut-free dessert option.
5. Swirled Fun: Add a swirl of caramel or chocolate fudge sauce before freezing for an extravagant touch.
Freezing and Storage
– Storage: Store your 2-Ingredient Peanut Butter Banana Ice Cream in an airtight container to prevent freezer burn. It can be kept for up to 2 weeks.
– Freezing: If the ice cream becomes too hard after freezing, let it sit at room temperature for about 10 minutes. This will soften it enough to scoop easily.
Special Equipment
While this recipe is simple, having the right tools can make the process easier:
– Blender or Food Processor: A powerful blender or a food processor is essential for creating a smooth ice cream.
– Airtight Container: Opt for a good-quality container to freeze your ice cream properly.
– Spatula: A spatula can help you transfer the mixture into the container and smooth the top, ensuring even freezing.
Frequently Asked Questions
1. Can I use frozen bananas?
Yes, frozen bananas work great! They make the ice cream even creamier. Just let the frozen bananas sit out for a few minutes to soften slightly before blending.
2. How can I tell when my ice cream is ready?
Your ice cream should be firm and scoopable after at least 4 hours in the freezer. If it’s too hard, let it sit out for a bit.
3. Can I double the recipe?
Absolutely! Just double the ingredients and use a larger container to store the ice cream.
4. Is this dessert vegan?
Yes, this 2-Ingredient Peanut Butter Banana Ice Cream is vegan-friendly, as it contains only bananas and peanut butter.
5. What if I don’t like peanut butter?
You can substitute peanut butter with any nut butter or even sunflower seed butter for a delightful alternative.
Conclusion
2-Ingredient Peanut Butter Banana Ice Cream is an incredibly simple yet delicious dessert option that satisfies cravings without the guilt. The delightful combination of peanut butter and ripe bananas makes for a refreshing treat. Easy to prepare and customizable, this ice cream will undoubtedly become a favorite in your home. Whether enjoyed on a hot day or as a late-night snack, every scoop is a celebration of wholesome ingredients and satisfying flavor. Don’t miss out on adding this amazing recipe to your dessert rotation—you’re sure to impress family and friends!
2-Ingredient Peanut Butter Banana Ice Cream: An Incredible Ultimate Recipe
- Total Time: 28 minute
Ingredients
– 4 ripe bananas
– 1/2 cup creamy peanut butter
Instructions
Follow these steps to create your delightful 2-Ingredient Peanut Butter Banana Ice Cream:
1. Choose Ripe Bananas: Select 4 ripe bananas, ensuring they have brown spots for optimal sweetness and flavor.
2. Peel the Bananas: Remove the peels and cut the bananas into smaller chunks for easier blending.
3. Blend the Ingredients: In a blender or food processor, combine the banana chunks and creamy peanut butter. Blend on high speed until the mixture is smooth and creamy.
4. Taste and Adjust: Give your mixture a taste. If you desire a sweeter flavor, you can add a drizzle of honey or maple syrup at this point.
5. Transfer to a Container: Pour the blended mixture into an airtight container suitable for freezing.
6. Smooth the Top: Use a spatula to smooth the top for even freezing.
7. Freeze: Place the container in the freezer. Allow it to freeze for at least 4 hours, or until completely set.
8. Scoop and Serve: Once frozen, let it sit at room temperature for a few minutes to soften slightly, making it easier to scoop.
These straightforward steps will ensure you create the perfect batch of ice cream for all to enjoy!
- Prep Time: 15 minutes
- Cook Time: N/A
Nutrition
- Serving Size: 4
- Calories: 250 kcal
- Fat: 12g
- Protein: 6g