
Easter Dirt Cake Casserole is a fun and festive no-bake delight that will bring smiles to your family and friends during the holiday. This dessert not only looks appealing but also embodies the spirit of Easter with its colorful presentation and delicious flavors. As the sweet, creamy layers blend with the crushed cookies, it creates a delightful treat that children and adults alike will adore. Plus, the best part is that it’s effortless to prepare and doesn’t require any baking, making it an ideal choice for busy celebrations.
The Easter Dirt Cake Casserole makes a memorable centerpiece for your holiday table. Its charming aesthetic, mimicking dirt and grass with vibrant colors, can spark conversations and create joyful moments as everyone digs in. This recipe is perfect for bringing everyone together, celebrating the season in an exciting and creative way.
In this guide, you will discover why this Easter Dirt Cake Casserole stands out among traditional desserts, explore how to prepare it easily, and learn about serving it to elevate your Easter festivities. So, get ready to make an incredible dessert that is sure to impress and delight everyone at your table.
Why You’ll Love This Recipe
There are many reasons why the Easter Dirt Cake Casserole is a must-try for your next celebration. Here are just a few of the reasons you’ll love this delectable dessert:
1. No Baking Required – This casserole is a no-bake dessert, saving you time and effort during your busy holiday preparations.
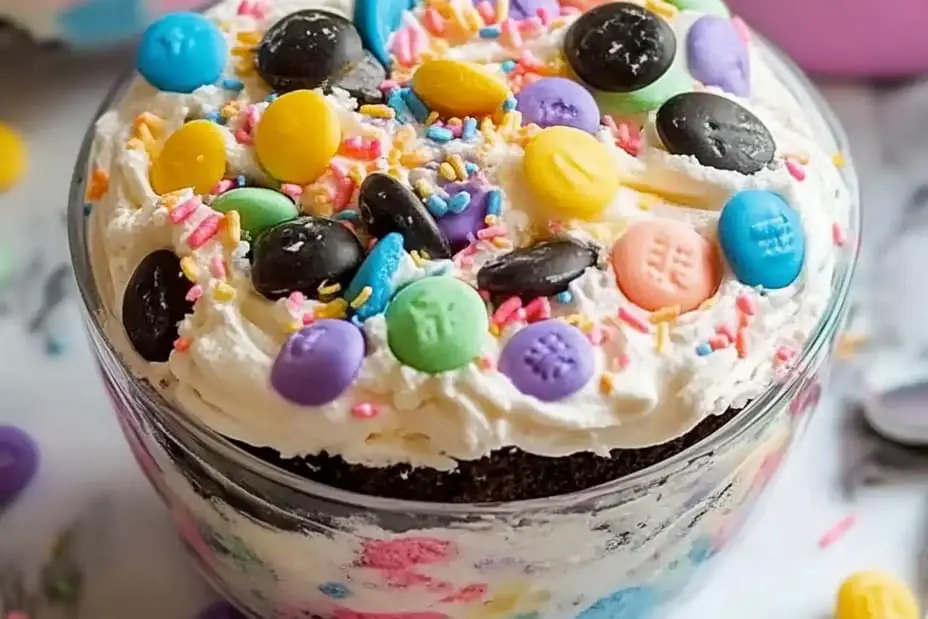
2. Visually Stunning – The layered colors and textures create a visually appealing dessert that mimics a garden, complete with “dirt” and “grass.”
3. Easy to Make – With straightforward steps and common ingredients, anyone can whip up this dessert, regardless of skill level.
4. Kid-Friendly Fun – This fun dessert will engage both kids and adults as they help with mixing, layering, or sprinkling toppings.
5. Flavorful Layers – Each bite combines creamy, sweet layers with a crunchy cookie texture, making it a delightful treat for all ages.
6. Versatile Decoration Options – You can customize the toppings to fit your theme, using different candies or sprinkles to create a unique look for every occasion.
These factors ensure that everyone will rave about your Easter Dirt Cake Casserole, making it a cherished recipe you’ll want to return to every year.
Preparation and Cooking Time
Preparing the Easter Dirt Cake Casserole is both quick and easy. Here’s the time breakdown for this delicious dessert:
– Preparation Time: 25 minutes
– Chilling Time: 3-4 hours (to let the layers set)
– Total Time: Approximately 3 hours and 25 minutes
Most of the time is spent chilling, allowing the flavors to meld together beautifully for delicious results.
Ingredients
– 1 package (8 oz) cream cheese, softened
– 1 cup powdered sugar
– 1 teaspoon vanilla extract
– 2 cups whipped topping (like Cool Whip)
– 2 cups milk
– 1 package (3.9 oz) instant chocolate pudding mix
– 1 package (16 oz) chocolate sandwich cookies (like Oreos)
– 1 cup gummy worms (for decoration)
– Green food coloring (optional for icing)
– 1 small potted plant or Easter-themed decor (for presentation, optional)
Step-by-Step Instructions
Creating the Easter Dirt Cake Casserole is simple if you follow these steps:
1. Crush the Cookies: Place the chocolate sandwich cookies in a food processor and pulse until they are finely crushed. Set aside.
2. Prepare the Cream Cheese Layer: In a large bowl, beat the softened cream cheese with an electric mixer until creamy. Gradually add the powdered sugar and vanilla extract, beating until smooth.
3. Add Whipped Topping: Fold in the whipped topping until combined. Ensure there are no lumps in this layer; it should be smooth and creamy.
4. Mix the Pudding: In another bowl, whisk the milk and instant chocolate pudding mix together until it starts to thicken, about 2 minutes.
5. Combine Layers: Layer half of the cookie crumbs at the bottom of a large serving dish or casserole pan. Spread half of the cream cheese mixture on top of the cookie layer. Then, pour half of the pudding mixture over the cream cheese layer.
6. Repeat Layers: Add another layer of cookie crumbs, followed by the remaining cream cheese mixture. Finish with the remaining pudding mixture on top.
7. Chill: Cover the casserole with plastic wrap and refrigerate for at least three hours or until fully set.
8. Decorate: Once chilled, top the casserole with the remaining crushed cookie crumbs, making it look like dirt. Add gummy worms on top and, if desired, a few drops of green food coloring in the whipped topping to create a grassy effect.
9. Serve: Gently remove the casserole from the fridge. Serve it chilled, inviting your guests to dig in and enjoy!
How to Serve
To impress your guests and elevate the experience of your Easter Dirt Cake Casserole, keep these serving suggestions in mind:
1. Interactive Viewing: Serve the casserole in a clear glass dish to showcase the beautiful layers and colors. This visual appeal will certainly attract attention.
2. Personal Touches: Allow each guest to customize their servings with additional toppings, like extra gummy worms, sprinkles, or edible flowers.
3. Portion Control: Use a large spoon to serve generous portions while still allowing everyone a chance to savor more than one bite.
4. Themed Surroundings: Enhance your table setting with Easter-themed decor, such as bunny figurines or colorful linens, to match the festive spirit of the cake.
5. Pairing Suggestions: Complement this dessert with a refreshing drink, such as lemonade, iced tea, or a bubbly soda to balance the sweetness of the cake.
By considering these serving suggestions, you will not only make the dessert itself appealing but also create a delightful atmosphere for everyone to enjoy. The Easter Dirt Cake Casserole promises to be a fun and festive addition to your holiday celebrations, bringing happiness and sweetness to this special occasion. Enjoy making this unforgettable dessert and watch as it becomes a beloved family favorite for years to come!
Additional Tips
– Use Quality Ingredients: High-quality cream cheese and real vanilla extract will significantly enhance the flavor of your Easter Dirt Cake Casserole.
– Chill Properly: Allow enough time for the casserole to chill. This helps the layers to set firmly and meld the flavors together beautifully.
– Garnish Creatively: Consider adding edible flowers or small chocolate eggs for a more festive touch on top of the dirt layer.
– Taste As You Go: Always taste each layer as you prepare them. This way, you can adjust the sweetness or flavors according to your preference.
Recipe Variation
Feel free to customize your Easter Dirt Cake Casserole with these fun variations:
1. Different Flavor Options: Swap the chocolate pudding for vanilla or butterscotch pudding for a unique twist.
2. Add Fresh Fruit: Layer in some diced strawberries or banana between the layers for a fresh flavor contrast.
3. Cookie Alternatives: Experiment with vanilla sandwich cookies or golden Oreos instead of chocolate for a lighter appearance and taste.
4. Nutty Texture: Add chopped nuts, such as pecans or walnuts, between the layers for added crunch.
Freezing and Storage
– Storage: Keep your Easter Dirt Cake Casserole covered in the refrigerator for up to 4 days to maintain its freshness and texture.
– Freezing: Although this dessert is best enjoyed fresh, you can freeze it for up to 2 months. Be sure to wrap individual portions in plastic wrap and store in an airtight container to prevent freezer burn.
Special Equipment
You will need a few essential tools for a successful Easter Dirt Cake Casserole:
– Mixing Bowls: To prepare the various components of the dessert.
– Electric Mixer: For easy blending of the cream cheese layer.
– Food Processor: To crush the chocolate sandwich cookies effortlessly.
– 9×13 inch Casserole Dish: A large, flat dish for assembling the layers.
– Plastic Wrap: To keep the casserole covered while it chills in the refrigerator.
Frequently Asked Questions
Can I make this dessert ahead of time?
Absolutely! You can prepare the Easter Dirt Cake Casserole a day in advance. Allow it to chill overnight for the best results.
What if I don’t like chocolate?
You can make a vanilla version by using vanilla pudding and vanilla sandwich cookies instead. The creamy layers will still provide a delightful dessert experience.
How can I make it more festive?
Decorate the top with more gummy worms and colorful sprinkles or candies to enhance the Easter theme. You can also use mini chocolate eggs for decoration.
Is this dessert gluten-free?
To make it gluten-free, use gluten-free chocolate sandwich cookies and ensure that all other ingredients are certified gluten-free.
What do I do with leftovers?
Store any leftovers in an airtight container in the refrigerator for up to 4 days. This dessert is delicious even the following day as the flavors continue to meld.
Conclusion
The Easter Dirt Cake Casserole is a delightful and easy-to-make no-bake dessert that is perfect for holiday gatherings. Its whimsical presentation and delicious layers are sure to captivate both kids and adults. The flexibility in customization and quick preparation make it a go-to recipe for your Easter festivities. This cake can bring friends and family together, creating sweet memories that will last for years to come.

Easter Dirt Cake Casserole: An Amazing Ultimate No-Bake Delight
- Total Time: 15 minutes
Ingredients
– 1 package (8 oz) cream cheese, softened
– 1 cup powdered sugar
– 1 teaspoon vanilla extract
– 2 cups whipped topping (like Cool Whip)
– 2 cups milk
– 1 package (3.9 oz) instant chocolate pudding mix
– 1 package (16 oz) chocolate sandwich cookies (like Oreos)
– 1 cup gummy worms (for decoration)
– Green food coloring (optional for icing)
– 1 small potted plant or Easter-themed decor (for presentation, optional)
Instructions
Creating the Easter Dirt Cake Casserole is simple if you follow these steps:
1. Crush the Cookies: Place the chocolate sandwich cookies in a food processor and pulse until they are finely crushed. Set aside.
2. Prepare the Cream Cheese Layer: In a large bowl, beat the softened cream cheese with an electric mixer until creamy. Gradually add the powdered sugar and vanilla extract, beating until smooth.
3. Add Whipped Topping: Fold in the whipped topping until combined. Ensure there are no lumps in this layer; it should be smooth and creamy.
4. Mix the Pudding: In another bowl, whisk the milk and instant chocolate pudding mix together until it starts to thicken, about 2 minutes.
5. Combine Layers: Layer half of the cookie crumbs at the bottom of a large serving dish or casserole pan. Spread half of the cream cheese mixture on top of the cookie layer. Then, pour half of the pudding mixture over the cream cheese layer.
6. Repeat Layers: Add another layer of cookie crumbs, followed by the remaining cream cheese mixture. Finish with the remaining pudding mixture on top.
7. Chill: Cover the casserole with plastic wrap and refrigerate for at least three hours or until fully set.
8. Decorate: Once chilled, top the casserole with the remaining crushed cookie crumbs, making it look like dirt. Add gummy worms on top and, if desired, a few drops of green food coloring in the whipped topping to create a grassy effect.
9. Serve: Gently remove the casserole from the fridge. Serve it chilled, inviting your guests to dig in and enjoy!
- Prep Time: 15 minutes
- Cook Time: 0 minutes
Nutrition
- Serving Size: 12 servings
- Calories: 320 kcal
- Fat: 15g
- Protein: 4g