
There are recipes that feel like they belong in a restaurant, and then there are recipes like this one—simple, cozy, deeply satisfying, and just downright craveable. These Creamy Garlic Chicken Wraps hit that perfect middle ground. They’re easy enough for a weeknight dinner but taste special enough to serve for guests or during family gatherings. And let me tell you, the flavor is something else.
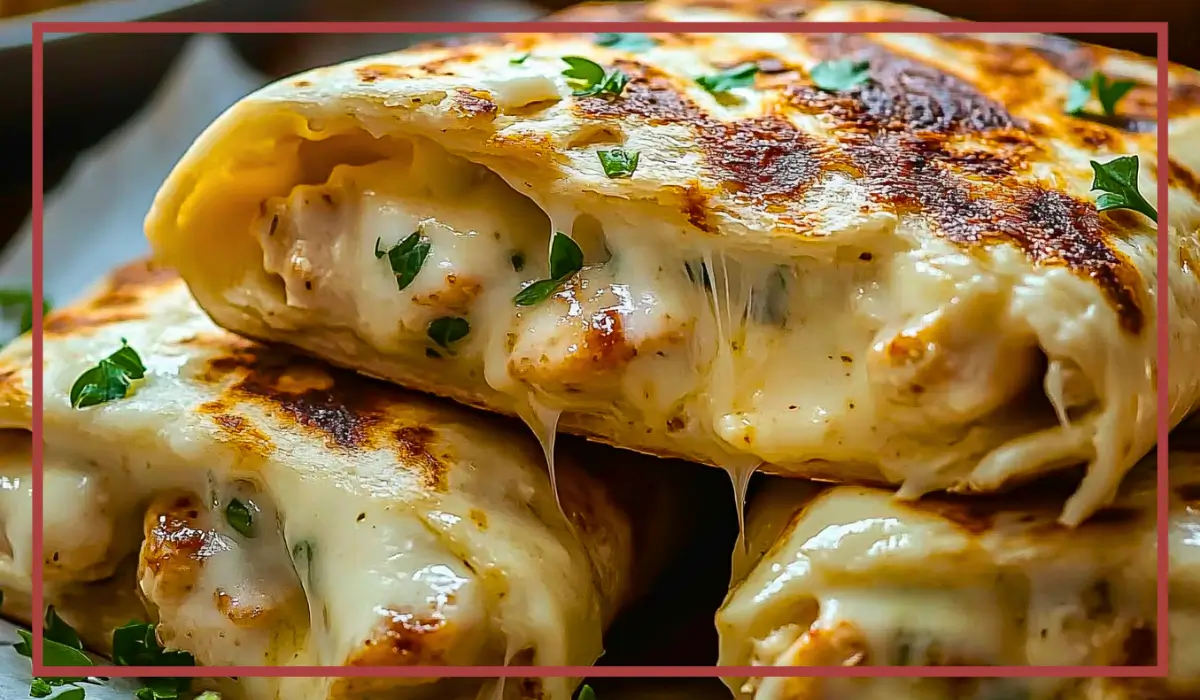
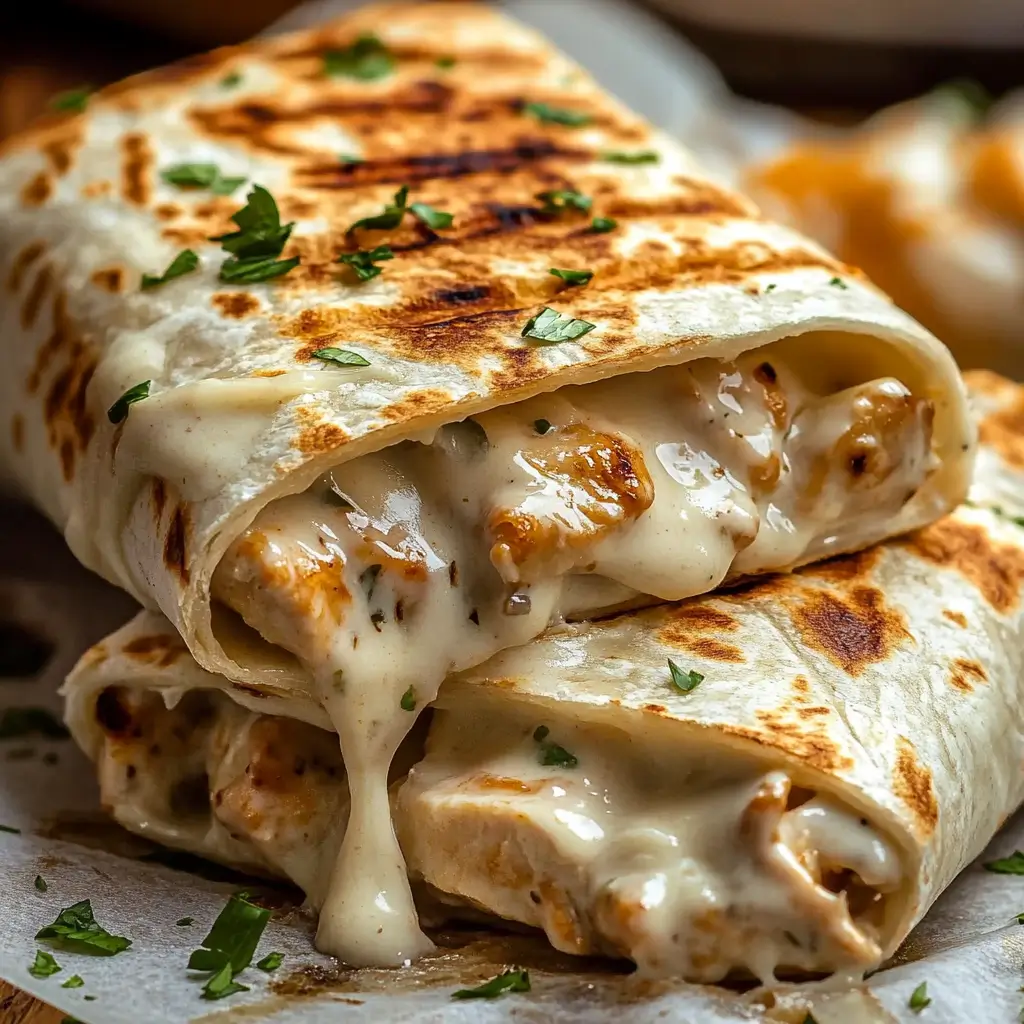
Each bite is loaded with juicy shredded chicken, creamy cheese, and rich garlic flavor, all wrapped in a toasty, golden tortilla. The outside has a little crunch, thanks to a quick pan-sear, while the inside stays melty and warm. It’s the kind of meal that feels like a hug from the inside out. I still remember the first time I whipped these up on a rainy Wednesday night, staring into the fridge and wondering what to do with leftover chicken. A few ingredients later, dinner turned into a surprisingly fancy moment of joy—rich, cheesy, and just garlicky enough to make the kitchen smell like heaven.
Since then, these wraps have become a regular in our household. They’re comforting without being heavy, customizable depending on what cheese or herbs you have on hand, and the kind of thing even picky eaters ask for again. Whether you’re looking to impress with minimal effort, or you just need something that comes together in under 30 minutes and satisfies every craving, this is the recipe you’ll want to keep on repeat.
So if you’re looking for a dish that’s family-friendly, flavor-packed, and easy to make, these creamy garlic chicken wraps are about to become your new favorite go-to.
Why You’ll Love This Creamy Garlic Chicken Wraps Recipe
There are plenty of reasons why these creamy garlic chicken wraps deserve a permanent spot in your meal rotation. First and foremost, let’s talk about the flavor. The combination of garlic-infused chicken, melty mozzarella, tangy sour cream, and a hint of Italian herbs creates a filling that’s rich and indulgent without feeling overwhelming. It’s savory, creamy, slightly zesty, and everything you want wrapped in a warm tortilla.
Then there’s the texture. When you crisp up the wraps in a skillet, they develop this golden, lightly crunchy exterior that contrasts perfectly with the soft, cheesy center. Every bite has that satisfying mix of crispy and gooey, which keeps things interesting from start to finish.
Another huge plus is how easy this recipe is. You don’t need a long list of fancy ingredients. In fact, most of them are pantry or fridge staples—chicken, cheese, tortillas, garlic, and butter. Plus, everything comes together in just a few simple steps. Even if you’re not super confident in the kitchen, this is a great recipe to try because it’s forgiving, quick, and super adaptable.
And speaking of adaptability, let’s not forget how customizable this recipe can be. Want to use rotisserie chicken instead of cooked chicken breast? Go for it. Prefer cheddar over mozzarella? That’s totally fine. Need to skip sour cream? Try Greek yogurt instead. You can add spinach, swap in turkey, or throw in some chili flakes for heat. It’s a choose-your-own-adventure kind of meal.
Finally, this recipe is kid-friendly and crowd-pleasing. It’s one of those dishes that doesn’t need explaining or convincing. Just set out a plate of these wraps and watch them disappear. Whether you’re serving a hungry family, meal-prepping for the week, or just trying to make lunch more exciting, these wraps check all the boxes.
Health Benefits of these Creamy Garlic Chicken Wraps
While this dish is undeniably comforting and cheesy, it still brings several nutritional benefits that make it a well-rounded option for lunch or dinner. Let’s start with the chicken, which is the main source of protein in this dish. Using lean, skinless chicken breast or even leftover shredded chicken provides a solid protein base without adding excessive saturated fat. Protein helps keep you full and supports muscle maintenance, making these wraps more satisfying than your average sandwich or snack.
Next, we’ve got the dairy components—mozzarella or cheddar, cream cheese, and sour cream. While they do add richness, they also contribute calcium, which is essential for bone health. Choosing lower-fat versions of these ingredients can help reduce the overall calorie content while still giving you that delicious creamy texture.
Garlic is more than just a flavor booster. It’s known for its potential immune-supporting properties and is rich in compounds like allicin, which may help reduce inflammation and improve heart health. Cooking it gently in butter enhances its flavor while maintaining some of its beneficial compounds.
The herbs and spices—like Italian seasoning and garlic powder—bring antioxidant benefits and help elevate the dish without relying on excess salt or processed sauces. You also have full control over the sodium content, which is helpful if you’re watching your intake.
If you want to boost the nutrition even further, you can easily sneak in some extras. Add a handful of chopped spinach or kale to the chicken mixture for added fiber, iron, and vitamins. Use whole wheat or high-fiber tortillas for a more nutritious base. You could even add avocado slices for healthy fats, or swap out sour cream for plain Greek yogurt to increase the protein content and cut down on fat.
Overall, while this recipe falls squarely in the “comfort food” category, it doesn’t have to derail your healthy eating goals. With a few smart swaps and additions, these creamy garlic chicken wraps can be as wholesome as they are delicious.
Preparation Time, Servings, and Nutritional Information
One of the many things that make these wraps a go-to favorite in our kitchen is how quickly they come together. You won’t be spending all evening in front of the stove, and that’s a win in my book—especially on busy weeknights when everyone’s hungry and time is short.
Preparation Time:
- Prep time: 10 minutes
- Cook time: 15 minutes
- Total time: 25 minutes
Servings: This recipe makes 4 large wraps, which typically serves 4 people as a full meal. If you’re serving smaller appetites or using them as part of a lunch spread, you could easily slice them in half and serve 6 to 8 people.
Estimated Nutritional Information (Per Wrap):
- Calories: 490
- Protein: 32g
- Carbohydrates: 28g
- Total Fat: 27g
- Saturated Fat: 13g
- Cholesterol: 95mg
- Sodium: 610mg
- Fiber: 2g
- Sugar: 2g
Please note that these numbers can vary depending on the exact brands of ingredients used, the size of the tortillas, and whether you make any substitutions. If you’re looking to lighten it up, using low-fat dairy products and whole grain wraps is a great start.
Ingredients List of these Creamy Garlic Chicken Wraps
Let’s walk through what you’ll need to make these creamy garlic chicken wraps. Don’t worry, there’s nothing fancy here—just good, honest ingredients that you probably already have in your kitchen.
Makes 4 large wraps
- 2 cups cooked chicken, shredded or diced
You can use rotisserie chicken, leftover grilled chicken, or cook up a couple of breasts just for this dish. Chicken adds a hearty, protein-packed base. - 1½ cups shredded mozzarella or cheddar cheese
Mozzarella is super melty and mild, while cheddar adds a little more sharpness. Use whichever you prefer—or mix both for a flavor combo. - ¼ cup cream cheese, softened
This adds a rich, creamy element that makes the filling extra luscious. Let it sit at room temp for a few minutes to soften. - 2 tablespoons butter, melted
Used to sauté the garlic and bring that buttery richness to the flavor base. - 3 cloves garlic, minced
Fresh garlic is key here. It gets lightly sautéed to mellow its sharpness and release all that wonderful aroma. - ¼ cup sour cream
Gives the filling a creamy tang. You can also use plain Greek yogurt if you want a lighter option. - 1 teaspoon garlic powder
Adds an extra layer of garlic flavor that ties everything together. - 1 teaspoon Italian seasoning
A mix of dried herbs that adds warmth and depth. Oregano, basil, and thyme usually shine here. - 4 large tortillas
Flour tortillas work best for wrapping and pan-toasting. Use whole wheat if you prefer a healthier twist. - Salt and pepper, to taste
Don’t forget to season as you go to build flavor throughout. - Fresh parsley (optional, for garnish)
A sprinkle of fresh parsley adds a pop of color and a touch of freshness right before serving.
These ingredients come together to create a filling that’s flavorful, cheesy, and comforting, all tucked inside a perfectly toasted wrap.
Step-by-Step Cooking Instructions
Now that you’ve gathered your ingredients, it’s time to bring it all together. The process is straightforward, but there are a few tricks to ensure your wraps turn out irresistibly delicious every single time. Let’s walk through each step, and I’ll explain not just the how, but the why behind each part.
1. Sauté the Garlic
Step 1: Start by heating a large skillet over medium heat. Add the 2 tablespoons of melted butter and allow it to get warm, but not sizzling.
Step 2: Once the butter is hot but not browned, add the minced garlic. Cook for about 1 to 2 minutes, stirring constantly to prevent burning. The goal here is to soften the garlic and release its oils, creating a flavorful base for the chicken mixture.
Pro tip: Don’t rush this part. Garlic that’s sautéed gently will be sweet and aromatic, but garlic that’s burned will taste bitter and overpower the whole dish. As soon as it’s golden and fragrant, move on to the next step.
2. Warm the Chicken
Step 3: Add your shredded or diced cooked chicken to the skillet with the garlic butter. Stir to coat the chicken evenly with the butter and garlic mixture.
Step 4: Sprinkle in the garlic powder, Italian seasoning, salt, and pepper. Stir everything well to make sure the chicken is evenly seasoned.
Step 5: Let the chicken cook in the garlic and herbs for about 3–4 minutes. This gives the flavors a chance to infuse the meat and reheat it gently if it was stored in the fridge.
3. Make the Cheese Mix
Step 6: While the chicken is warming, grab a medium-sized bowl and add the cream cheese, sour cream, and half of your shredded cheese. Stir everything together until it forms a smooth, creamy mixture.
Why this works: The cream cheese and sour cream act as the glue for your filling. They bring moisture and richness, helping everything bind together and creating that creamy, dreamy texture.
Step 7: Once combined, give the cheese mix a quick taste and adjust with salt or pepper if needed. This is your chance to control the flavor before it’s all mixed up with the chicken.
4. Combine Chicken and Cheese Mixture
Step 8: Remove the skillet from heat and allow the chicken to cool slightly for about 1–2 minutes. You don’t want it piping hot when it hits the cheese mix or the cheeses might separate.
Step 9: Add the garlicky chicken into the cheese bowl and stir to combine. Make sure the chicken is well coated and every bite has a little of everything.
Pro tip: If your mixture feels a little stiff or dry, you can add an extra tablespoon of sour cream to loosen it up. It should be thick and scoopable, not runny.
5. Assemble the Wraps
Step 10: Lay out the four tortillas on a clean surface. Divide the chicken mixture into four equal portions and spoon one portion into the center of each tortilla.
Step 11: Sprinkle the remaining shredded cheese over the top of the chicken mixture on each wrap. This layer of cheese will melt during cooking and act like a gooey glue that holds everything together.
Step 12: Fold the sides of each tortilla inwards, then roll up tightly from the bottom, burrito-style. Make sure they’re snug but not overstuffed—you want them to hold their shape during cooking.
Optional step: You can brush the outside of each wrap lightly with olive oil or melted butter to help them crisp up even more when you sear them.
6. Crisp the Wraps
Step 13: Wipe out the skillet you used earlier (or grab a clean one) and place it over medium heat.
Step 14: Once the skillet is hot, place the wraps seam-side down in the pan. You may need to do this in batches depending on the size of your pan.
Step 15: Cook each wrap for about 2–3 minutes per side, or until golden brown and crispy. Press down lightly with a spatula to ensure even browning and help seal the edges.
Step 16: Once both sides are crisped and the cheese inside is melty, remove the wraps from the skillet and set them on a cutting board or plate.
Step 17: Let the wraps rest for a minute or two before cutting. This helps the filling settle slightly and makes them easier to slice.
7. Serve and Garnish
Step 18: Slice each wrap in half at a diagonal if desired. Sprinkle with chopped fresh parsley for a bit of color and freshness.
Step 19: Serve hot and enjoy immediately for the best flavor and texture. The wraps are best when the cheese is still warm and gooey.
By following these steps, you’ll have a wrap that’s crispy on the outside, gooey and flavorful on the inside, and satisfying in every single bite.
How to Serve
These wraps are incredibly versatile and can be served in so many different ways. Whether you’re prepping a weeknight dinner or putting together a casual brunch or lunch, there are a few fun and creative ways to serve them that make the experience even better.
One of the easiest ways is to slice the wraps in half and serve them alongside a dipping sauce. You could go with classic ranch, a garlic aioli, or even a homemade yogurt-based dressing. These dips add extra flavor and a cooling contrast to the warm wraps.
If you’re serving a family meal, consider placing the wraps on a large platter with a side of fresh veggies or a crunchy salad. A simple cucumber and tomato salad with lemon juice and olive oil pairs beautifully and keeps the meal feeling fresh and balanced.
For a heartier option, you can serve the wraps with a side of roasted potato wedges, sweet potato fries, or even a small bowl of soup like creamy tomato or chicken noodle. This turns it into a complete comfort meal that’s super satisfying.
Hosting a party or casual get-together? Cut the wraps into smaller pinwheel-style pieces and arrange them on a tray for easy finger food. They make excellent party snacks or lunchbox additions for kids and adults alike.
No matter how you serve them, just make sure to offer some napkins—because between the melty cheese and juicy filling, these wraps are as deliciously messy as they are satisfying.
Pairing Suggestions
Pairing your creamy garlic chicken wraps with the right side dish or beverage can take your meal from great to amazing. Whether you’re serving this for lunch, dinner, or a weekend treat, here are some delicious ideas to complete your plate.
Side Dish Pairings
Fresh Salad: A crisp salad is a perfect contrast to the rich, creamy wraps. Try an arugula and lemon vinaigrette mix, a simple cucumber-tomato salad, or a Greek salad with olives and feta.
Roasted Vegetables: Roasted broccoli, carrots, or Brussels sprouts seasoned with olive oil and herbs add flavor and nutrition to your meal. You can also roast sweet potatoes or zucchini for a heartier side.
Rice or Couscous: If you want something more filling, serve your wrap with a side of herbed rice, couscous, or even quinoa. These grains soak up the garlic and herb flavors beautifully.
Soup: Creamy tomato, lentil, or vegetable soup makes a comforting and balanced meal. The soup’s warm, velvety texture pairs well with the crispy exterior of the wrap.
Beverage Pairings
Iced Tea or Lemonade: A glass of lightly sweetened iced tea or zesty lemonade adds brightness and contrast to the savory, cheesy wrap.
Sparkling Water with Citrus: For a refreshing non-alcoholic option, try sparkling water with a splash of lime or orange.
Mint Yogurt Drink: A chilled yogurt drink, such as a homemade mint lassi or laban, balances out the garlic flavor and adds a cooling element.
Smoothies: For a brunch or lunch version, serve the wraps with a fruit smoothie—banana, strawberry, or mango blends work beautifully.
These pairing options elevate your wrap from a quick bite to a well-rounded, satisfying meal.
Storage, Freezing & Reheating Instructions
One of the things I love most about these creamy garlic chicken wraps—besides how delicious they are, of course—is how well they hold up as leftovers. Whether you’re meal prepping for the week or just trying to get ahead on tomorrow’s lunch, this recipe stores beautifully and is easy to reheat without losing that melty, crispy magic.
How to Store Leftover Wraps
If you have wraps left over after your meal, or you’re planning to make them ahead of time, here’s how to store them properly for the best results.
In the Fridge:
Allow the cooked wraps to cool completely before storing. Once they’re at room temperature, wrap each one tightly in foil or plastic wrap to lock in moisture and prevent drying out. Then place them in an airtight container or zip-top bag. Stored this way, the wraps will stay fresh in the refrigerator for up to 3 to 4 days.
If you’ve only prepped the filling but haven’t assembled or cooked the wraps yet, store the chicken and cheese mixture in an airtight container separately. This will keep for up to 4 days in the fridge.
How to Freeze the Wraps
These wraps freeze surprisingly well, which makes them an excellent make-ahead option for busy weeks.
To Freeze Cooked Wraps:
Let the wraps cool completely. Wrap each one individually in foil or parchment paper, then place them in a freezer-safe zip-top bag. Be sure to remove as much air as possible to prevent freezer burn. You can freeze them for up to 3 months.
To Freeze the Filling Only:
If you want to prepare the chicken and cheese filling ahead of time and assemble later, transfer it to a freezer-safe container. It will keep well for up to 2 months. When ready to use, let it thaw in the fridge overnight, then proceed with assembling and cooking as usual.
Reheating Instructions
There are a few ways to reheat your wraps, depending on how much time you have.
In a Skillet (Best Method):
For the crispiest results, unwrap the refrigerated or thawed wrap and heat it in a dry skillet over medium heat. Cook for about 2–3 minutes per side, pressing gently with a spatula to re-crisp the outside and heat the filling through.
In the Oven:
Preheat your oven to 350°F (175°C). Place the wraps on a baking sheet and cover loosely with foil. Bake for 10–12 minutes if thawed, or 20–25 minutes if frozen, until heated through.
In the Microwave:
While this is the quickest option, it can make the tortilla a bit soft. Wrap the wrap in a damp paper towel and microwave on medium heat for about 1–2 minutes, or until hot. You can then pop it in a hot skillet for a minute or two if you want to revive the crispiness.
With these storage and reheating tips, you can make a big batch of wraps and enjoy them throughout the week, knowing they’ll taste just as good the second or even third time around.
Common Mistakes to Avoid
Even a simple recipe like creamy garlic chicken wraps can go a little sideways if you’re not paying attention to the details. To make sure your wraps turn out perfect every time, here are some common pitfalls and how to steer clear of them.
1. Overfilling the Wraps
It’s tempting to load each tortilla with as much of that delicious filling as possible, but resist the urge. Overstuffed wraps are hard to fold, don’t cook evenly, and often burst open in the skillet. Stick to even portions and roll tightly for the best results.
2. Not Softening the Tortillas First
Cold tortillas tend to crack when you try to fold them, especially if they’re straight out of the fridge. To prevent this, warm them up slightly in a skillet or microwave before assembling. This makes them more pliable and less likely to tear.
3. Using Too Much Butter in the Pan
Yes, butter adds flavor, but too much of it in the pan can lead to soggy, greasy wraps. When crisping your wraps, a light brushing on the outside or a dry skillet is usually all you need. The cheese and filling already bring a good amount of fat and richness.
4. Skipping the Rest Time After Cooking
When the wraps come out of the pan, give them a minute to rest before cutting or biting into them. This allows the filling to set slightly, so you’re not dealing with a hot, gooey mess. Plus, the wraps hold together better after resting briefly.
5. Not Tasting and Seasoning the Filling
Even if your chicken is already seasoned, once you add cheese and sour cream, the flavor can get a little muted. Always taste your filling before assembling the wraps and adjust salt and pepper as needed. A sprinkle of extra herbs or a squeeze of lemon juice can also brighten things up.
Avoiding these mistakes will help you make wraps that are not only flavorful and satisfying, but also easy to assemble and beautiful to serve.
Pro Tips
Want to take your wraps to the next level? Here are some of my favorite pro tips that can help you get the best possible results every time you make this recipe.
1. Toast the Inside First
Before adding the filling to your tortillas, you can lightly toast one side of each tortilla in the skillet. Then fill and roll them with the toasted side facing in. This gives an extra layer of flavor and texture inside the wrap, almost like a hidden crunch.
2. Drain Moist Ingredients
If your chicken was stored in broth or your sour cream is extra runny, take a moment to blot or drain them before mixing. Too much moisture can make the wraps soggy and harder to crisp up later.
3. Add a Flavor Twist
To change things up, stir in a spoonful of pesto, chopped sun-dried tomatoes, or sautéed mushrooms into the filling. These ingredients add depth and variation without complicating the recipe too much.
4. Keep the Heat Moderate
When crisping the wraps in a skillet, use medium—not high—heat. This helps them brown evenly without burning. Low and slow ensures the cheese melts fully before the outside gets too dark.
5. Use a Press
If you have a panini press or a sandwich press, you can use it to cook the wraps even more evenly and get a beautiful golden finish. It’s also a great way to cook multiple wraps at once without flipping.
These little adjustments might seem small, but they can make a big difference in how your wraps turn out. Whether you’re trying to impress someone or just make a weeknight meal feel special, these pro tips are here to help.
Frequently Asked Questions (FAQs)
Even though this recipe is super straightforward, you might still have a few questions—especially if it’s your first time making wraps like this. Below are some of the most commonly asked questions, with helpful answers to ensure your cooking experience is as smooth and stress-free as possible.
Can I use store-bought rotisserie chicken?
Absolutely. In fact, rotisserie chicken is one of the best time-saving swaps you can make for this recipe. Just shred it up and make sure to remove the skin if you don’t want extra grease in your filling. It adds great flavor and cuts down your prep time even further.
What type of tortillas should I use?
Flour tortillas work best for this recipe because they’re flexible, soft, and hold up well to cooking. Large burrito-sized tortillas make wrapping easier, especially if you’re adding a generous amount of filling. You can also use whole wheat, spinach, or low-carb wraps depending on your preferences.
Can I make this recipe ahead of time?
Yes, you can. You have a few options here. You can:
- Make the filling ahead of time and store it in the fridge for up to 4 days.
- Assemble the wraps (without cooking them) and refrigerate until ready to cook.
- Cook the wraps fully and reheat them later using the methods described earlier.
All of these options work well for meal prep or entertaining.
How can I make this recipe lighter?
There are several easy ways to make a lighter version of these wraps:
- Use low-fat or reduced-fat cream cheese and cheese.
- Swap sour cream for non-fat plain Greek yogurt.
- Choose whole wheat or high-fiber tortillas.
- Add in some cooked spinach, mushrooms, or bell peppers to bulk up the filling with fewer calories.
With just a few swaps, you can keep all the flavor while lightening things up.
Can I make this recipe halal?
Yes, and it already is! This recipe contains no pork, no alcohol, and uses common halal-friendly ingredients. Just make sure the chicken you’re using is halal-certified, and double-check labels on your dairy products and tortillas to ensure they meet your dietary standards.
What cheeses work best for this recipe?
Mozzarella melts beautifully and gives you that gooey stretch, while cheddar adds a sharper flavor. You can also try Monterey Jack, provolone, or a cheese blend. If you like a little heat, try pepper jack for a spicy twist.
Can I bake these wraps instead of cooking them on the stove?
Yes! If you want to bake them, place the assembled wraps seam-side down on a parchment-lined baking sheet. Brush lightly with oil or melted butter and bake at 375°F (190°C) for about 15–20 minutes, flipping once halfway through, until golden brown and heated through.
How do I prevent the wraps from getting soggy?
There are a few key things to keep your wraps crisp:
- Don’t overfill the wraps.
- Let the chicken mixture cool slightly before assembling.
- Drain any excess moisture from ingredients.
- Cook the wraps over medium heat, not high, so they crisp gradually.
Can I freeze these wraps?
Definitely. These wraps freeze really well. Cool them completely after cooking, wrap tightly in foil or parchment, and freeze in a resealable freezer bag for up to 3 months. Reheat in the oven or skillet for best results.
Are these wraps good for kids?
Yes, these wraps are super kid-friendly. They’re creamy, cheesy, and not spicy, so most kids love them. You can even customize individual wraps to suit picky eaters—leave out the herbs, use just mozzarella, or add in some veggies like finely chopped carrots or peas.
These FAQs should clear up most of the common concerns, but if you ever have a question as you cook, trust your instincts and taste as you go. Cooking is as much about feeling and flavor as it is about measurements.
Conclusion & Call to Action
So there you have it—everything you need to make your own irresistible, cheesy, garlic-packed chicken wraps. This recipe is the kind that quietly becomes a household favorite. It’s comforting without being too heavy, flavorful without being fussy, and easy enough to throw together on a weeknight without breaking a sweat.
What I love most about these wraps is their versatility. You can dress them up with sides and sauces, or keep things simple and cozy. They freeze beautifully, reheat like a dream, and always leave you feeling satisfied. Whether you’re feeding a family, hosting friends, or cooking just for yourself, these creamy garlic chicken wraps are one of those recipes that simply never disappoint.
If you’ve been stuck in a cooking rut or looking for something new to try that’s both approachable and delicious, this is your moment. Don’t be intimidated by the idea of pan-searing wraps or mixing cheeses—it’s much easier than it sounds, and honestly, pretty fun too.
Now it’s your turn. Head into the kitchen, gather those ingredients, and give it a go. I’d love to hear how yours turn out. Did you add a twist of your own? Maybe some spicy jalapeños or a handful of spinach? Whatever you do, share your results!
Leave a comment below and let me know how it went. If you snapped a photo of your masterpiece, even better—tag me on social media so I can see your delicious creation. Let’s keep this cozy kitchen community growing, one cheesy wrap at a time.
Happy cooking, and enjoy every last bite of those creamy garlic chicken wraps. You’ve got this.
Print
Creamy Garlic Chicken Wraps – Easy & Flavor-Packed Meal
- Total Time: 25 minutes
- Yield: 4 wraps 1x
- Diet: Halal
Description
These creamy garlic chicken wraps are quick, cheesy, and packed with flavor. A perfect weeknight dinner made in under 30 minutes with simple ingredients.
Ingredients
-
2 cups cooked chicken, shredded or diced
-
1½ cups shredded mozzarella or cheddar cheese
-
¼ cup cream cheese, softened
-
2 Tbsp butter, melted
-
3 cloves garlic, minced
-
¼ cup sour cream
-
1 tsp garlic powder
-
1 tsp Italian seasoning
-
4 large tortillas
-
Salt and pepper, to taste
-
Fresh parsley (optional, for garnish)
Instructions
-
Melt butter in a skillet and sauté minced garlic for 1–2 minutes.
-
Add shredded chicken, season with garlic powder, Italian seasoning, salt, and pepper. Heat through.
-
In a bowl, mix softened cream cheese, sour cream, and half of the shredded cheese.
-
Stir chicken into the cheese mixture until well combined.
-
Spoon mixture into tortillas, top with remaining cheese.
-
Roll tortillas tightly like burritos.
-
In a clean skillet, cook each wrap seam-side down for 2–3 minutes per side until golden.
-
Garnish with parsley if desired and serve hot.
Notes
-
Use rotisserie chicken for convenience.
-
Substitute Greek yogurt for a lighter version.
-
Add chopped spinach or jalapeños for variety.
- Prep Time: 10 minutes
- Cook Time: 15 minutes
- Category: Main Course
- Method: Stovetop
- Cuisine: American